


This article is a detailed exploration of internal cable routing which is now common on mid-end bikes and standard on high-end bikes.
The questions covered include:
Internal cable routing in bike design locates brake cables and derailleur cables—or cable housing—inside a bike frame.
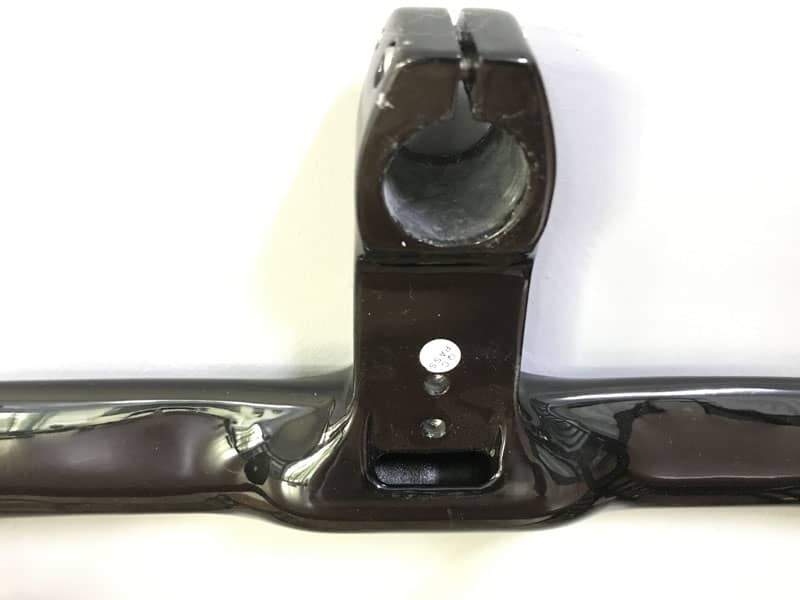
The first sections of derailleur and brake cables to be routed internally were the down tube (derailleur cables) and rear brake cable (top tube).
The crucial component redesign allowing complete internal cable routing is an integrated handlebar and stem working together with an internal cable housing headset; each bar and stem requires a custom headset for an exact fit.
One crucial internal addition also making this type of cable routing possible is the internal guides which channel cables through a frame’s out-of-reach sections.
These tubes make the impossible, possible, although they do not guarantee cables will glide easily from entry through to the exit in the out-of-reach sections of the frame.
Cables often get stuck requiring patient creativity to get them moving in the right direction.
Keep Jagwire’s comprehensive solution in mind—or in your toolbox—should cable installation or replacement go awry.
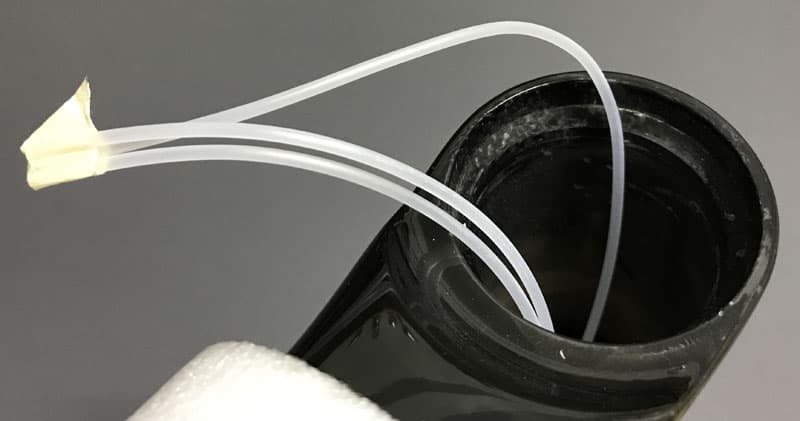
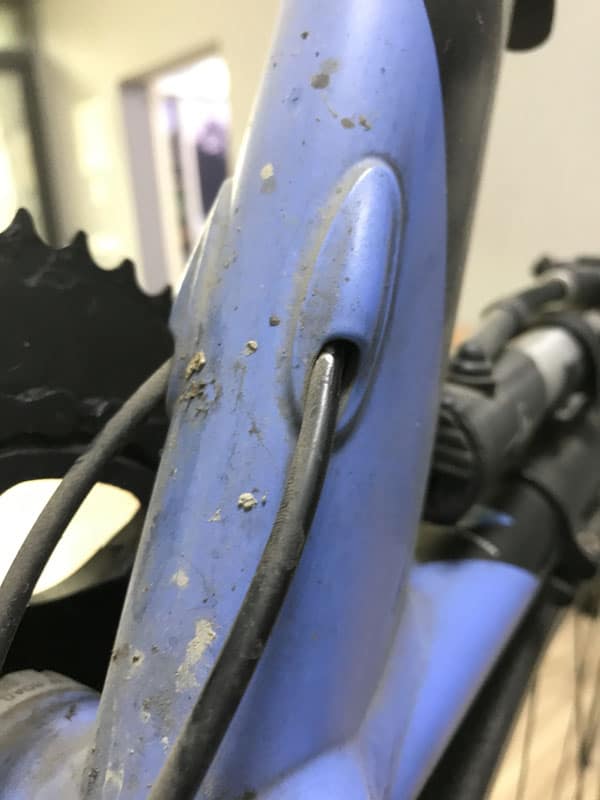
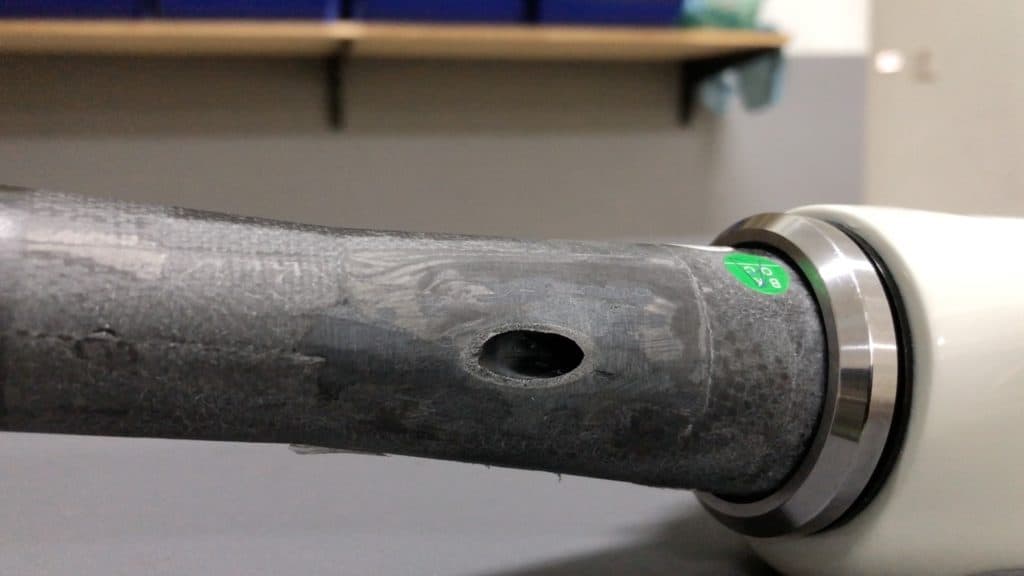
The manufacturer of this carbon frame installs internal plastic tubing for the front and rear derailleur cables and the rear brake cables, secured with masking tape to prevent them retracting into the frame before final assembly.
You thread the cable through the tubing until it emerges from the frame, then draw the tubing back through the frame when you are certain your positioning’s correct.
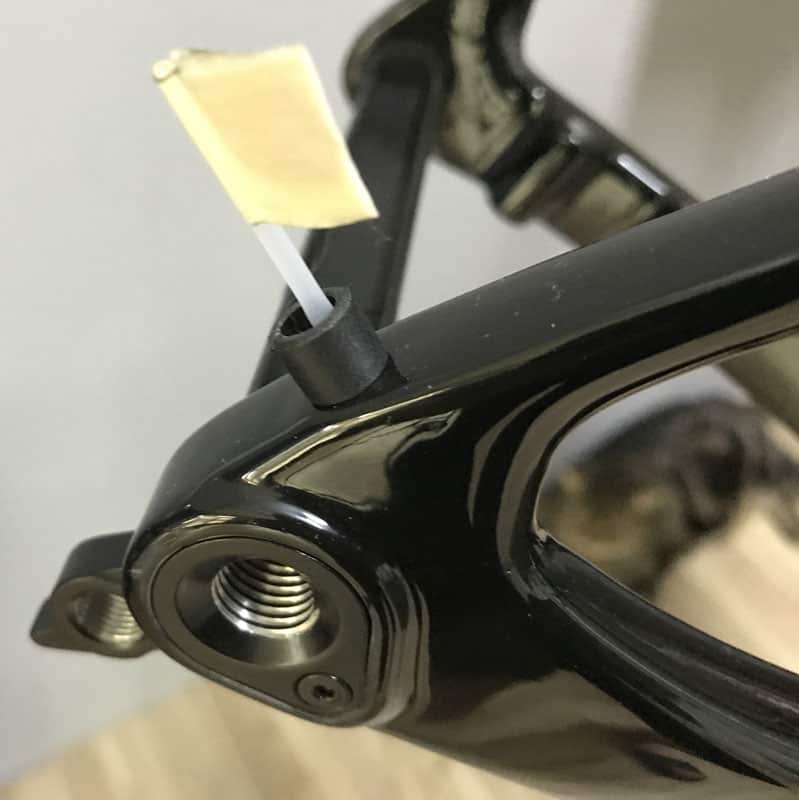
The rear derailleur cable port at the dropout. The cable threads from the head tube down to the BB shell, then along the chain stay. Pull it all the way through, then secure it so it won’t retract into the frame.
Some manufacturers build guides into the frame rather than use disposable plastic tubing which is, actually, not disposable of course—keep the tubing to help you replace or reinstall cables later.
This question joins other recent bike design “innovation” controversies:
One technical advantage of routing cables internally is you can reduce reliance on cable housing, thus reducing weight.
The aesthetic advantage is you can not only remove the unsightly brake and derailleur cable lump restrained beneath the handlebar tape along with the curve of cable housing projecting from the front of your bike, but also the equally unsigtly external routing from the remaining frame tubes.
Allowing exactly the right amount of cable housing at the front is crucial though—bike assemblers must provide enough cable housing to allow free rotation of the fork, whilst keeping the look as neat as possible.
Far better to include more cable than necessary than not enough.
There is also the challenge of finishing the bar tape’s end neatly, wrapping it seamlessly, a skill lacking amongst many assemblers and mechanics.
For professional racers, internal cable routing is default. To the slight aerodynamic advantage of moving cables inside add the possibly more important reason—whatever is defined as the latest and greatest in design must be integral to every professional’s kit.
Internal cable routing is mandatory for anyone riding a high-end brand, or even a lesser-known brand that makes snazzy frames. The look is cooler, and reinforces the quality message the rider wishes to broadcast (whether or not they admit it).
For pure shifting efficiency, however, externally routed cables work perfectly. Provided cables are greased on installation into cable housings, shifting is fluid and immediate. Cable installation and replacement is also quick and easy.
This transitional design from 2013 replaced the formerly exposed cable on the down tube, with cable housing routed internally.
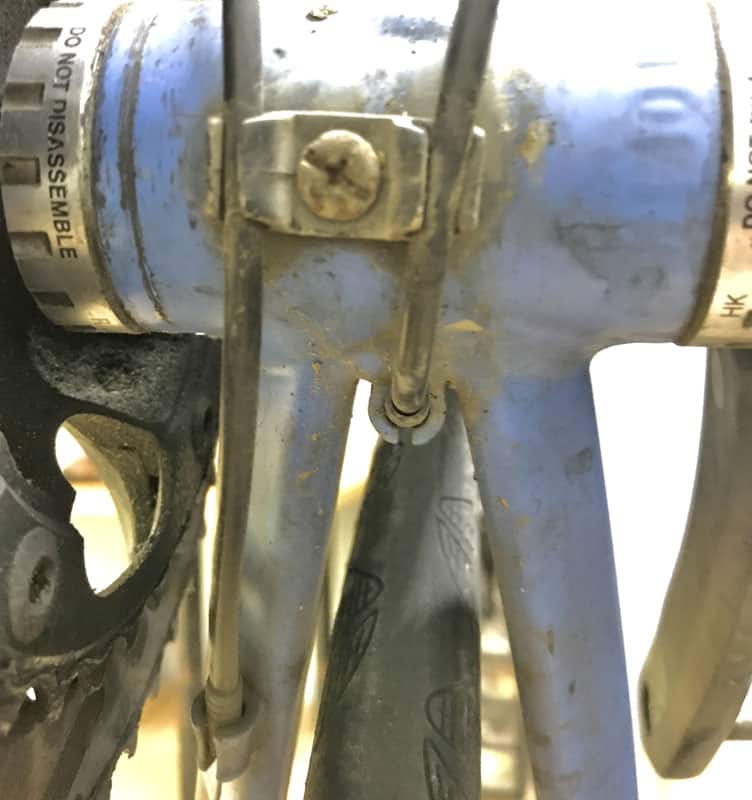
Front and rear derailleur cable housing emerges several inches above the bottom bracket shell, then wraps through the external cable guide bolted to the bottom bracket into cable stoppers.
The cable housing ferrules slot into the stoppers, with the cable continuing on to the front and rear derailleurs respectively.
The front derailleur cable loops up; the rear cable connects to the derailleur cable stop at the dropout, carrying shifter-to-derailleur tension without loss.
A fully internally routed cable without housing is the better way to go when it comes to aesthetics.
Nevertheless, there is no evidence that internal cable routing demonstrably improves shifting or braking performance compared to externally routed cables.
Yes, internally routed cables are protected from excessively dusty or wet conditions. But dust and especially water will find a way into a frame and onto cables no matter what.
In sum, while internal cable routing might be aesthetically superior in delivering an unbeatably streamlined look, in practical terms internal routing amounts to solving a non-problem.
There are two types of handlebars for internal cable routing: integrated and semi-integrated. The difference is whether the stem is integrated into the bar.
Choosing an integrated model means a headset adapted to seamlessly fit the stem and also integrate with the bike frame’s head tube.
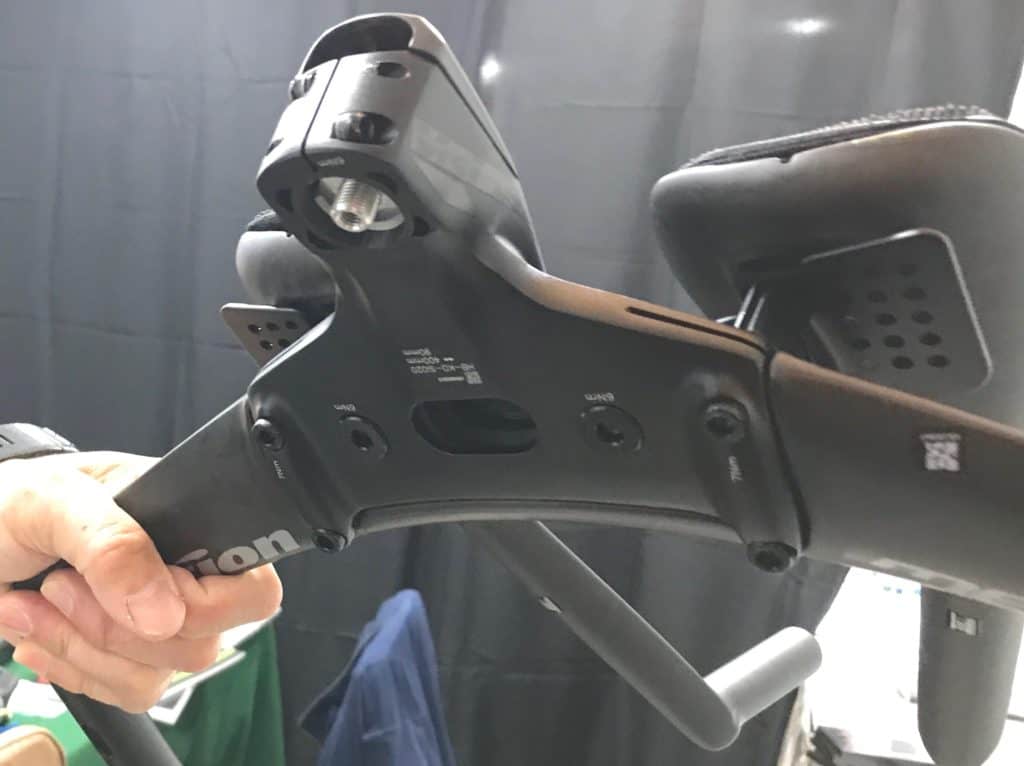
This was Vision Tech’s time trial cockpit on display at the September 2019 edition. The aim was an aero-efficient design that also looked superb.
The headset solution is from FSA, with whom Vision Tech works closely.
A semi-integrated design exits the cable-housing from the handlebar below the stem. This model’s cover is removable to enable simplified cable housing installation during assembly.
Not integrating the stem leaves you free to choose your stem, avoiding restrictive and expensive lock-in to a single brand solution. You can opt to route cables into the frame where stops have been placed on a particular frame design.
An alternative is a headset which allows cable housing to enter at the top, or the dust cap, and then route internally through the head tube, then on to to the derailleur or brake.
A completely cable-free look on a bike requires a one piece handlebar and stem, routing the brake and derailleur (where there’s no electronic shifting) cable housings internally through the stem, into the head tube, and then into the top tube and down tube.
Making room for cable housings within the head tube means enlarging the top and eliminating the taper characteristic of most frames today with oversized head tubes and tapered headsets.
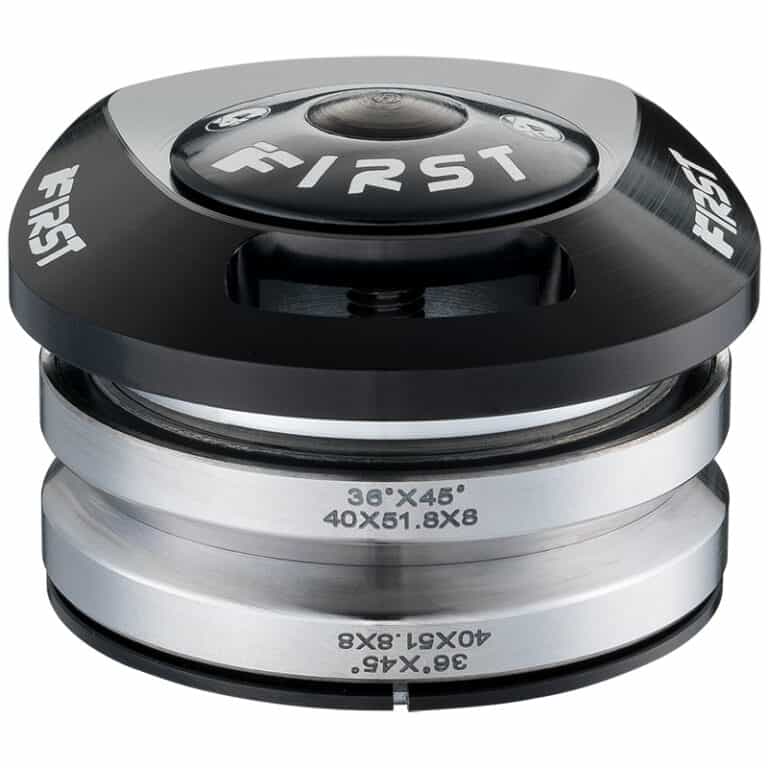
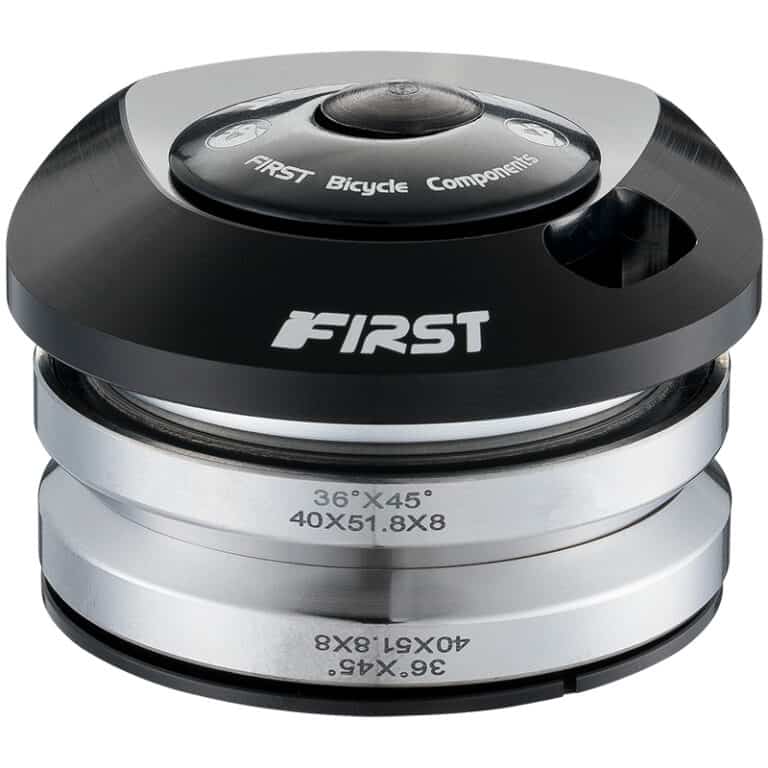
Top and bottom bearing outer diameters have been expanded to 2”; the dust cap integration with the stem is different for each branded design.
For example, FSA is leading in this area (see the example below). To use an integrated cable routing FSA stem/handlebar, you need the headset that goes with it. Ditto for other branded stems/handlebars.
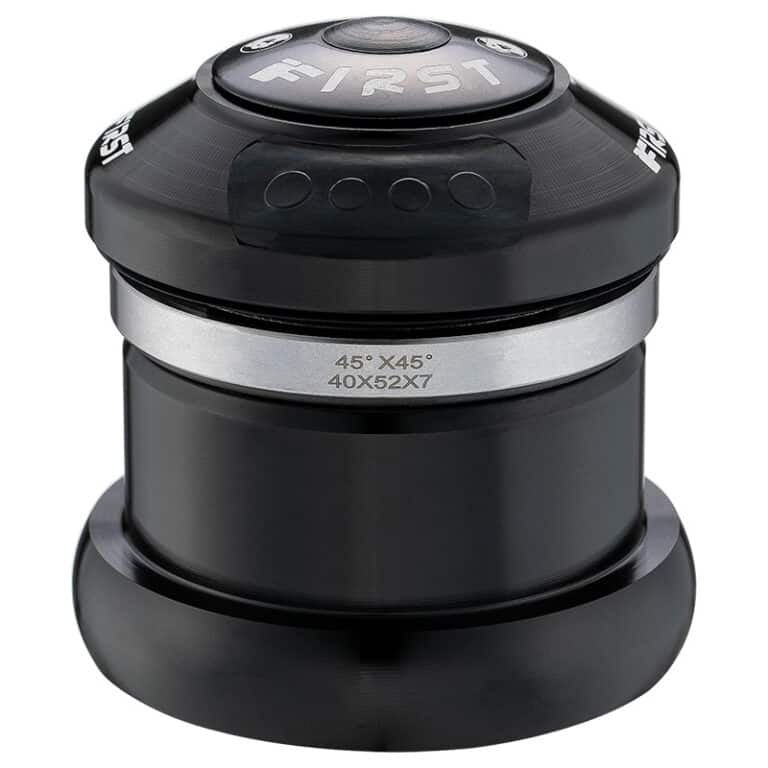
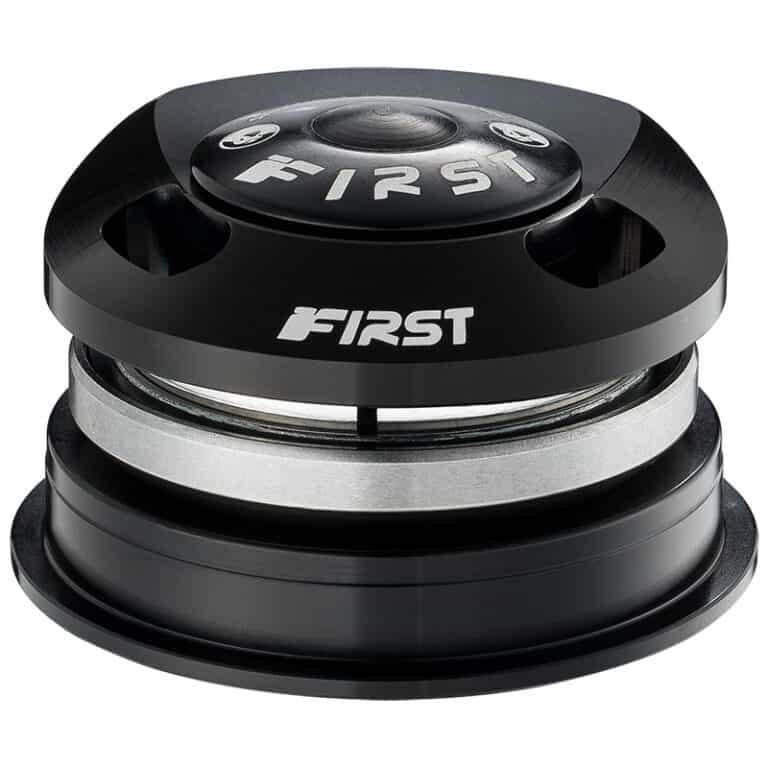
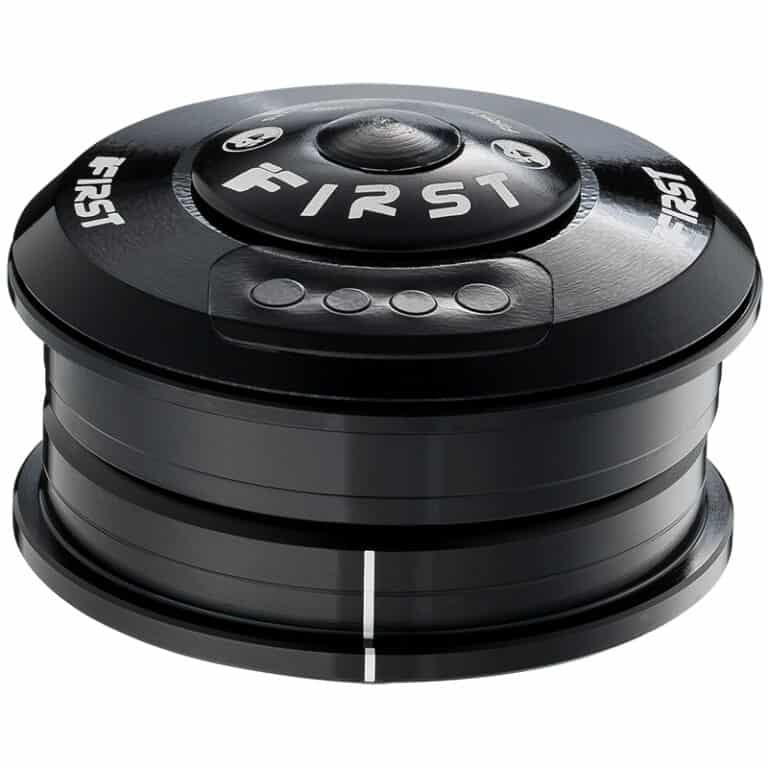
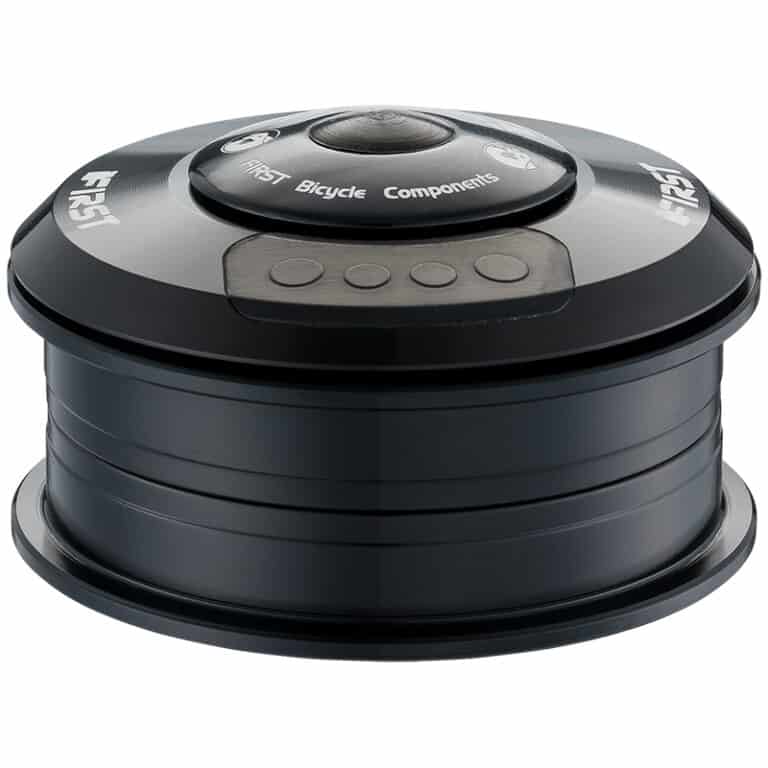
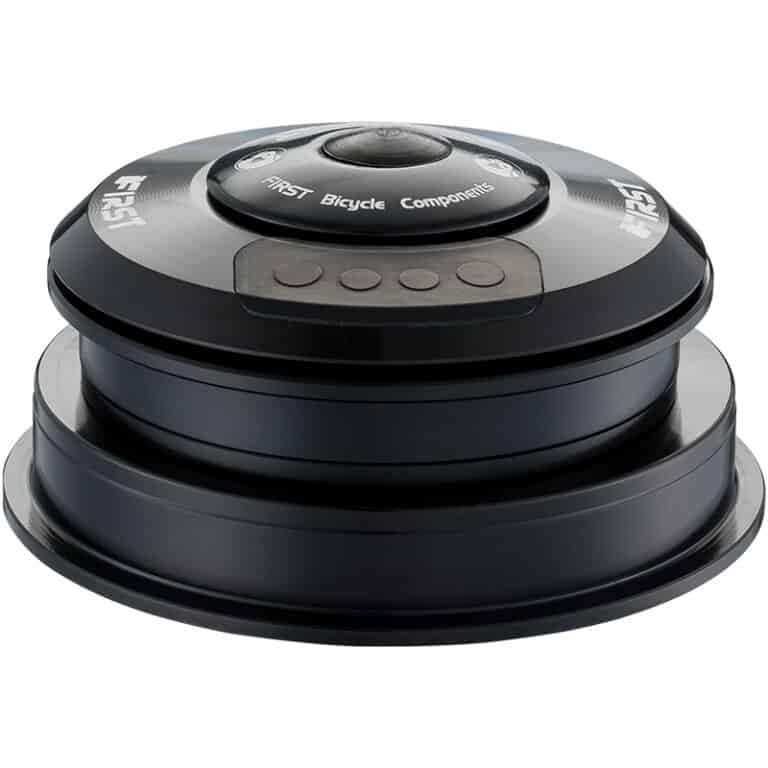
The video demonstrates FIRST’s new internal cable routing headset installation procedure, examining each part along the way.
If you’re not familiar with headsets, the sealed bearing is the key component.
Most high performance bike headsets use sealed bearings since they perform better and last longer than loose ball bearings contained within an inner and outer race.
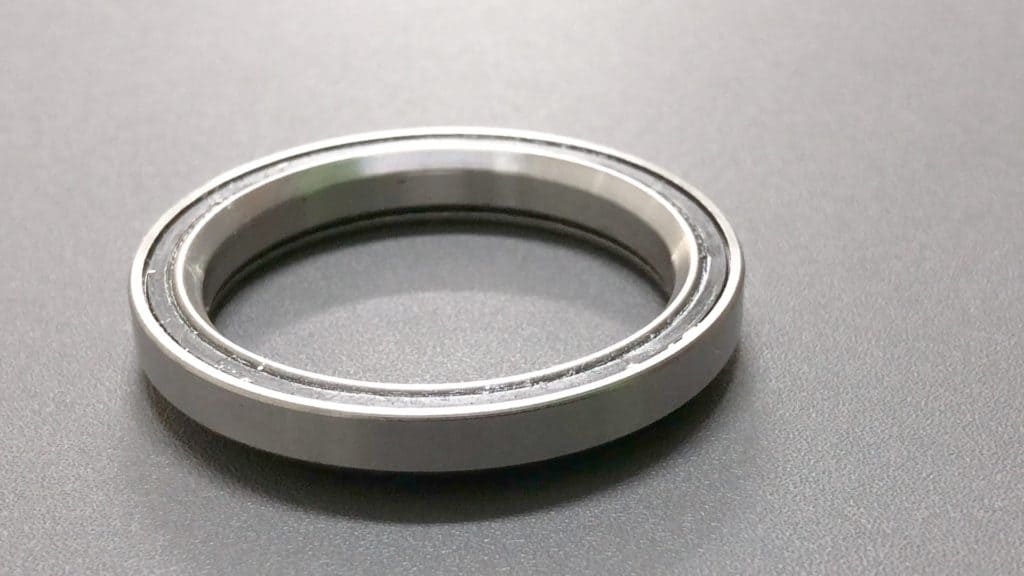
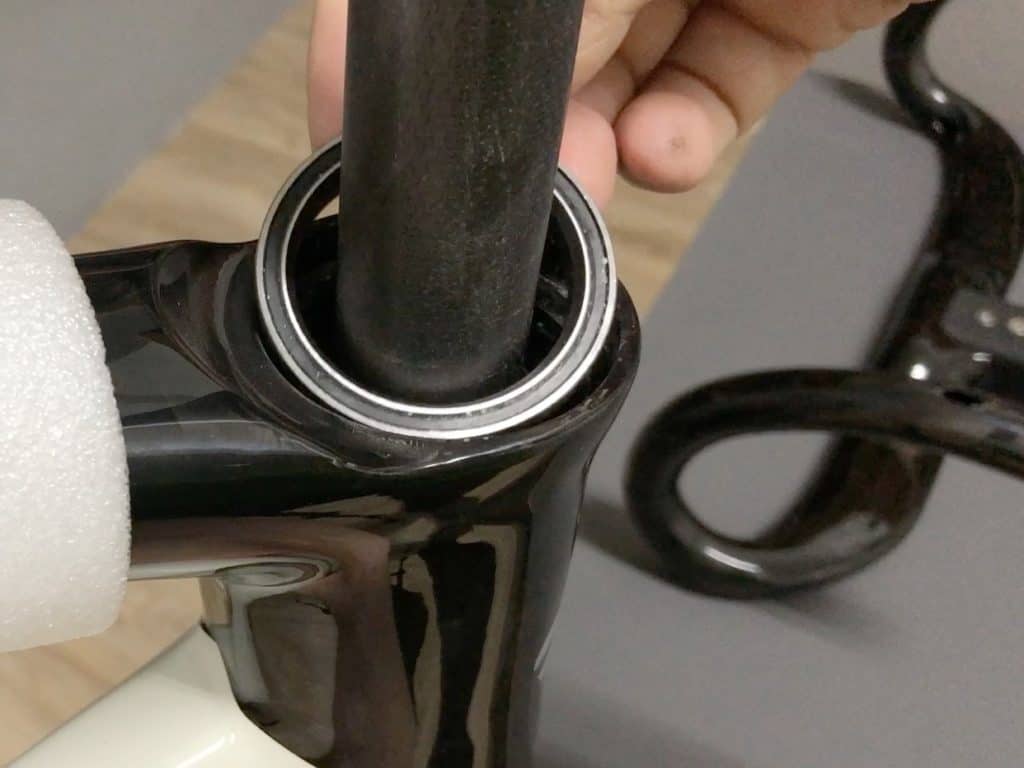
Let’s take the upper bearing as an example. In the image the bearing is sitting as it would if installed just inside the head tube.
The balls are contained within a cage constrained within the inner and outer races. One side has a 45° bevelled outer face which slots into a corresponding angled edge in a bike’s head tube.
The opposite side is sealed with a removable cover which, together with plenty of grease, keeps most moisture and dirt out.
Servicing a sealed bearing is more difficult than loose bearings which can be removed and individually cleaned, then re-greased. Better to simply replace a sealed bearing than attempt a comprehensive service.
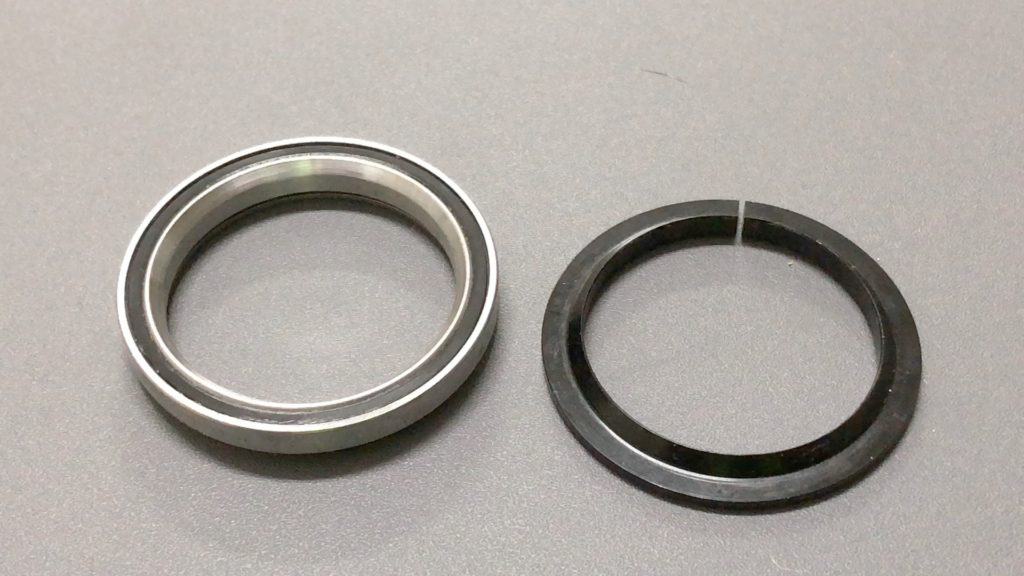
The crown race and bearing are the same as any other headset design. The bearing’s sealed edge slots onto the race; the beveled edge fits into the head tube.
The bearings and crown race are the only elements internal cable routing headsets have in common with non-internal routing cable headsets. We adapt all other components to accommodate the brake and derailleur cable housings.
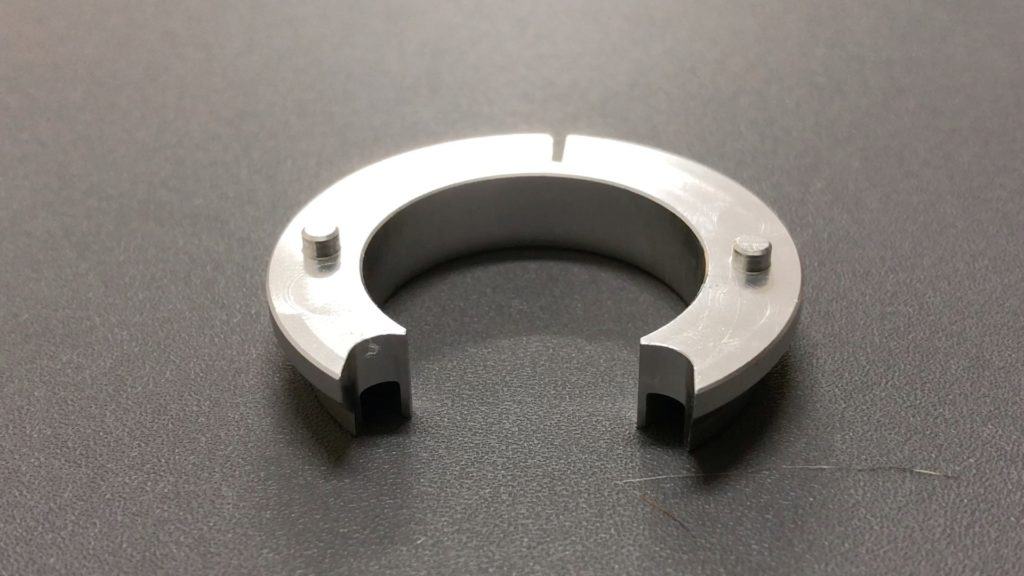
A headset’s washer or compression ring holds a bike’s fork steerer against the sealed bearing’s inner race.

The washer’s lower angled edge wedges into the race encircling the steerer in an exact fit, allowing the steerer to rotate left and right, moving with the inner race.
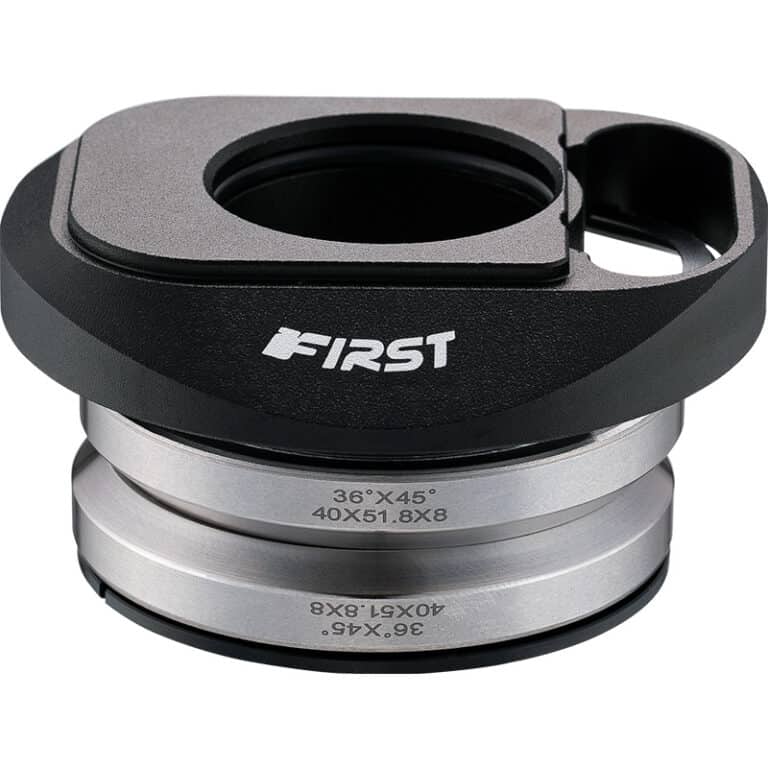
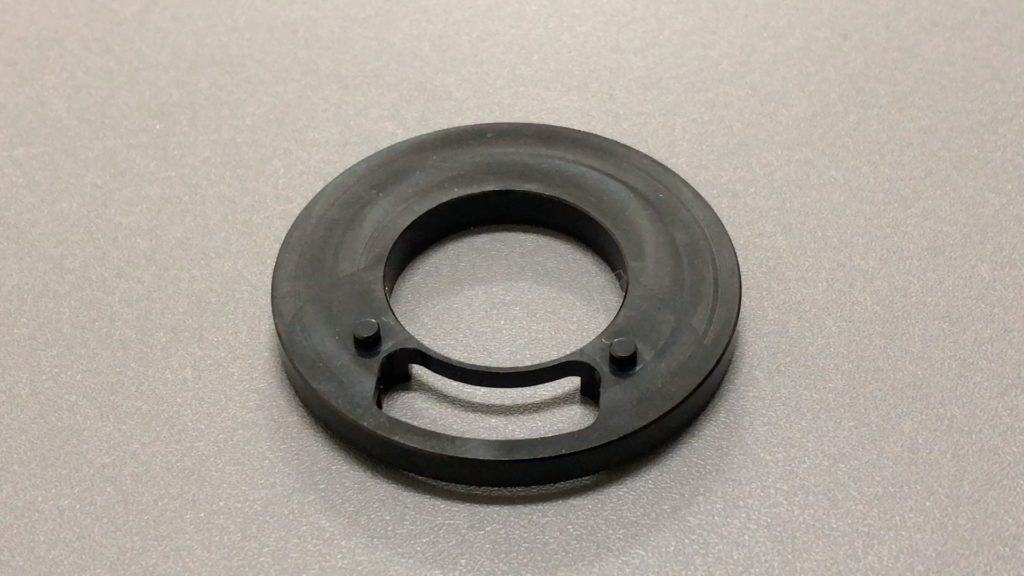
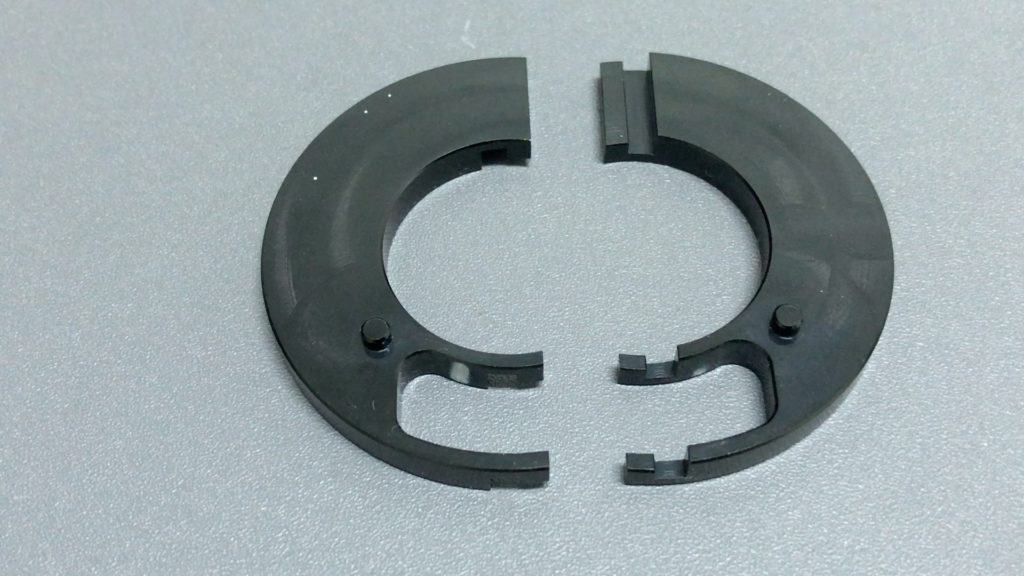
The clear difference with a standard headset is the cutaway section at the front, routing the cable housings through the head tube to the down tube.
The lugs ensure each part lines up exactly on the cutaway preventing the part from sliding off-center to the left or right.
The main spacer encloses the washer, fitting close to the top of the sealed bearing. Every headset has one, along with the option of installing multiple spacers to achieve the desired stack height.
Adding spacers above the dust cap below the stem is not possible with an internal cable routing headset because the dust cap must integrate with the stem for the cables to be channeled into the head tube.
The split design allows easier installation since you don’t have to remove the stem to deploy them. These spacers are also made from machined aluminum, not plastic.
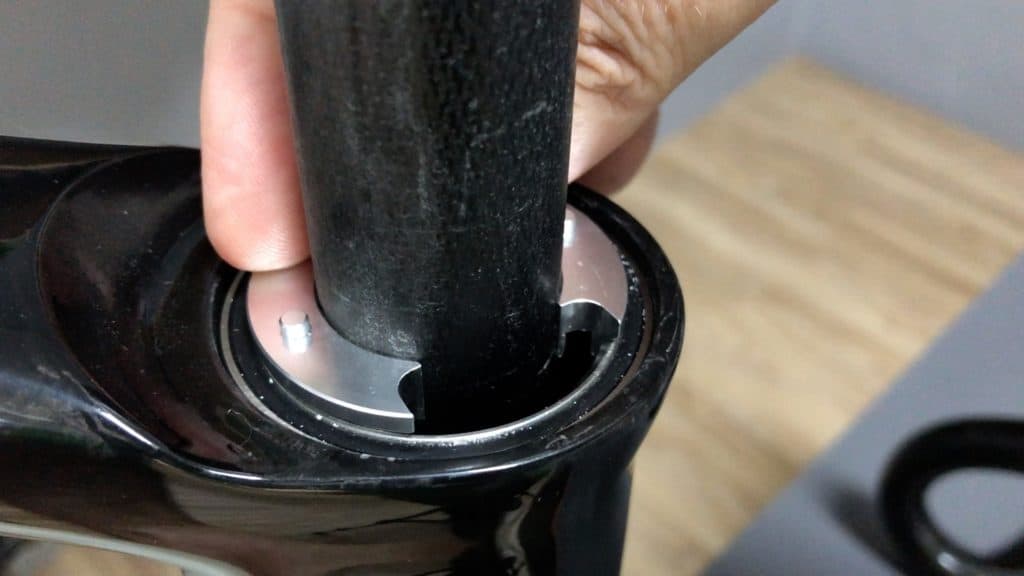
The dust cap is the crucial piece. This one is designed to fit into an FSA stem.
The guiding principle behind FIRST’s internal cable routing headset is a universal design for all frames—we can machine the dust cap to fit any stem.
Installation is similar to integrated headsets, although there are several significant differences to note.
The headset must incorporate up to five cable housings—in the absence of electronic shifting—including an internal disk brake cable/hydraulic hose.
Internally routing a disc brake cable is truly the only option for road bike disc brakes.
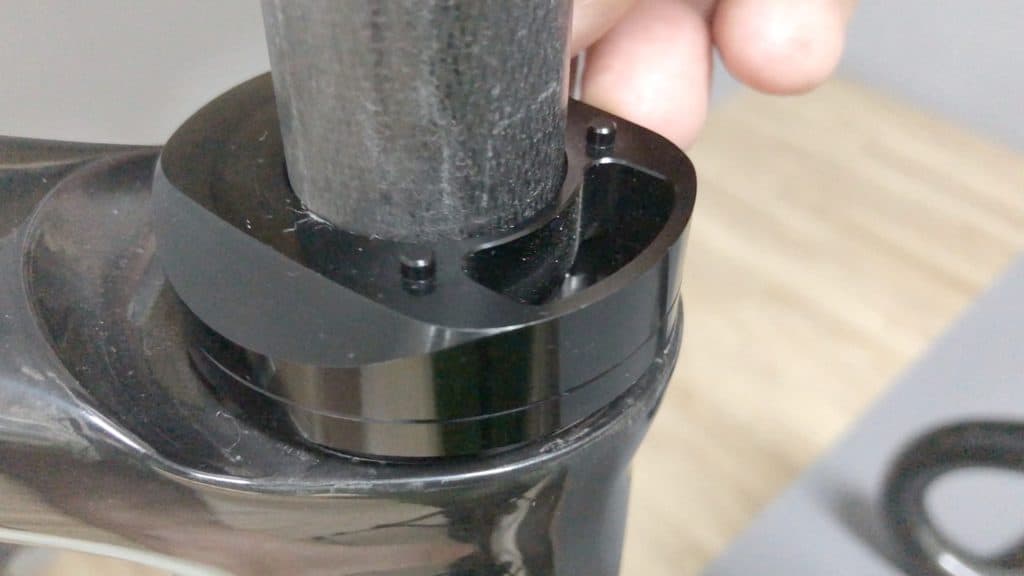
The opening in the steerer allows the brake’s cable housing to exit directly into the head tube, up through the headset cutaway, then through the stem into the handlebar.
There is quite a bit of extra work to efficiently position the cable housing in the headset cutaway section on the lever side of the handlebar.
An assembling mechanic should have a cable housing placement plan worked out in advance to avoid misplacement and time consuming back tracking to optimize cable housing position.
You support the fork with one hand whilst installing each headset component with the other.
A standard integrated headset grips the steerer locking the fork into place once the dust cap is pushed down onto the assemblage: not so with this model.
The top bearing drops into place as with a standard headset.
The washer slots into the sealed bearing’s inner race. A smear of grease across both faces of that connection does not hurt either.
Squaring the fork blades, then aligning the washer and the components that install on top is good practice: the cutaway will be in the optimum position for cable housing placement.
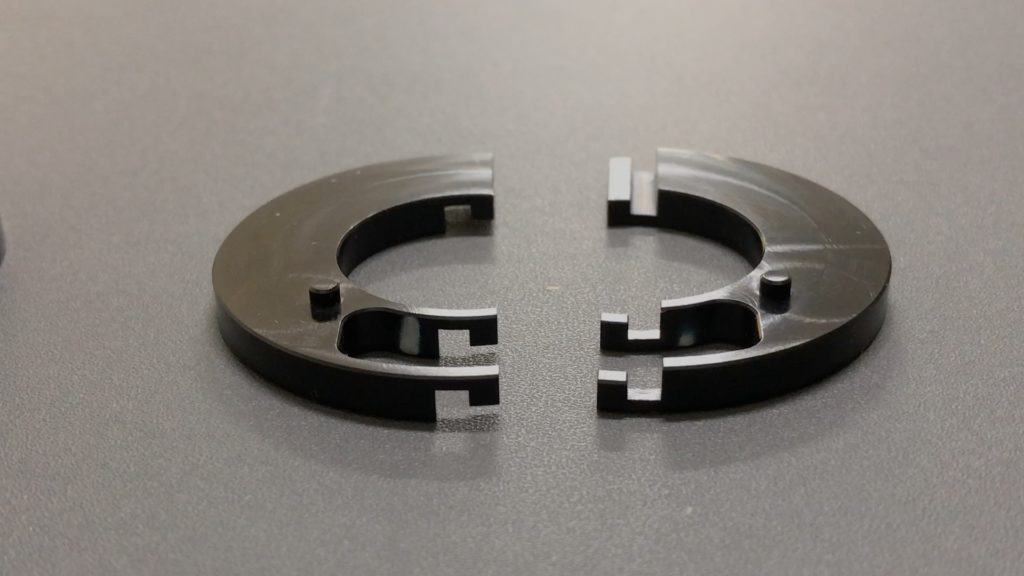
Sliding the spacer into position.
The optional spacers come next. Each half fits snugly around the steerer with the right half slotted in first.
You press the left half onto the steerer slightly above the right since it slots into the right half and does not press directly into it.

The advantage is not clear on initial installation, but when a cyclist wishes to remove or add spacers later on, they loosen then slide the stem and the dust cap up to provide the 7 millimeters or so required for installing or removing a spacer—no need to remove the stem.
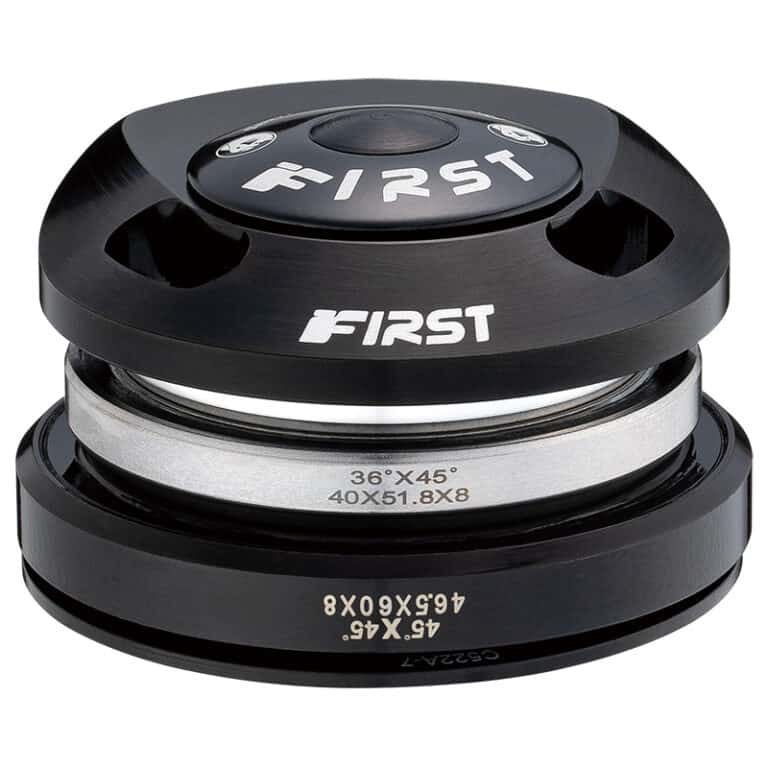
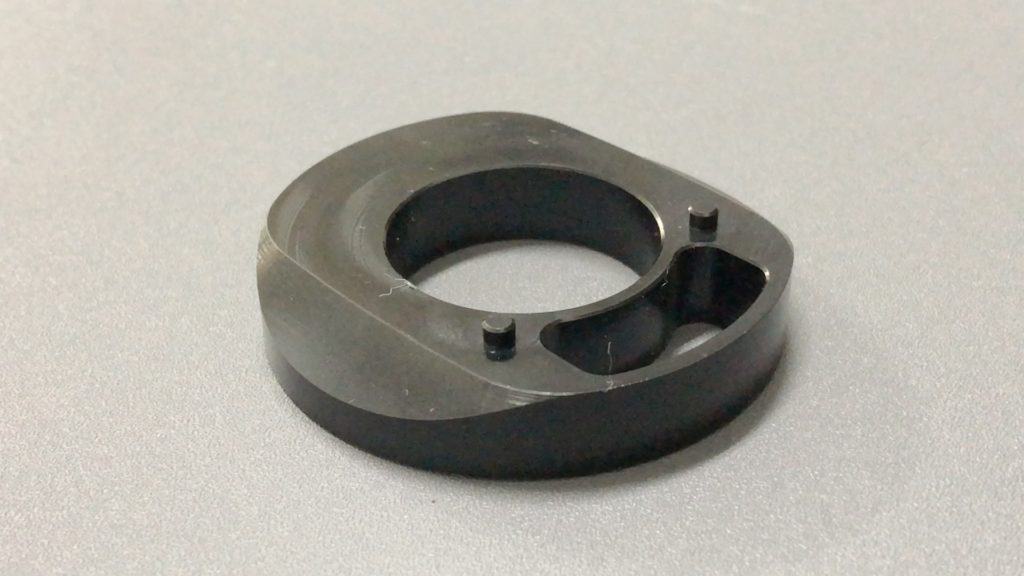
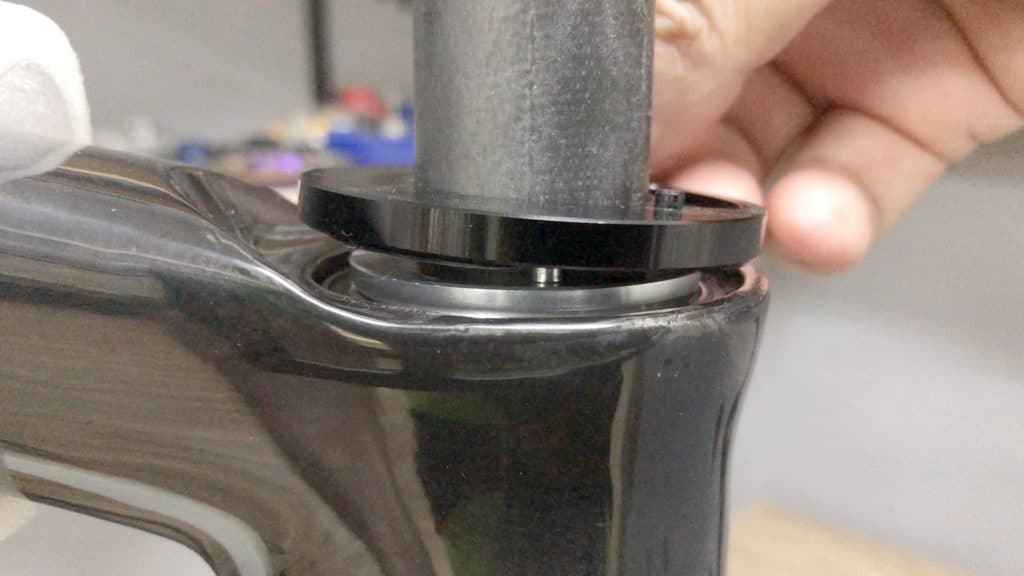
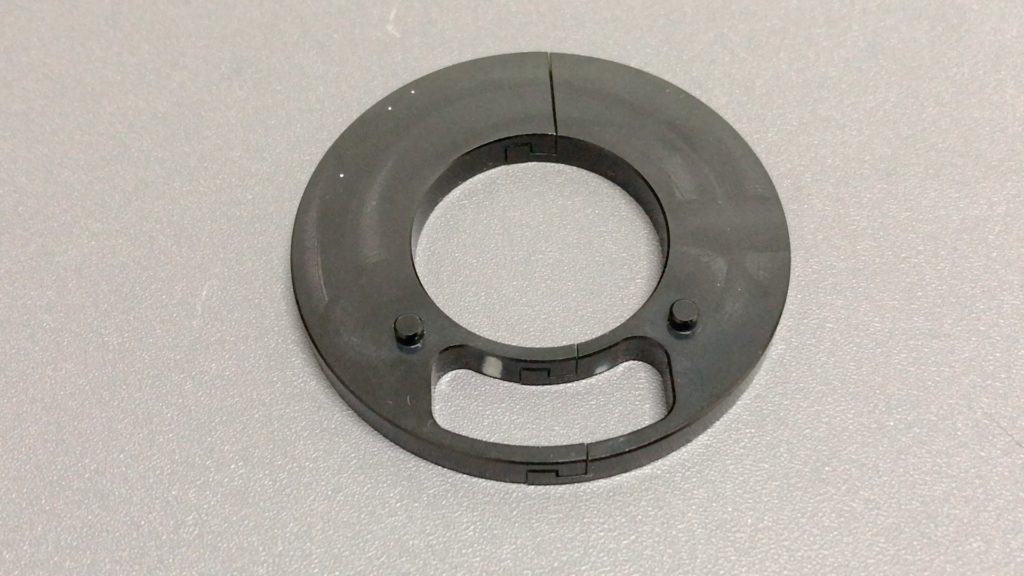
The dust cap is the final piece to slot into position.
The final assembly here highlights the significance of the dust cap’s design.
A FIRST dust cap is designed for a particular stem. CNC machining a solid piece of alloy is easier and much cheaper than opening a mold for a custom integrated stem and handlebar: better to shape the headset to fit the stem rather then vice versa.
The dust cap pictured fits an FSA internal cable routing stem and handlebar, which is why it sits above the dust cap and not flush with it. However the cap can be machined to fit any stem, in this case the unit by EDGE.
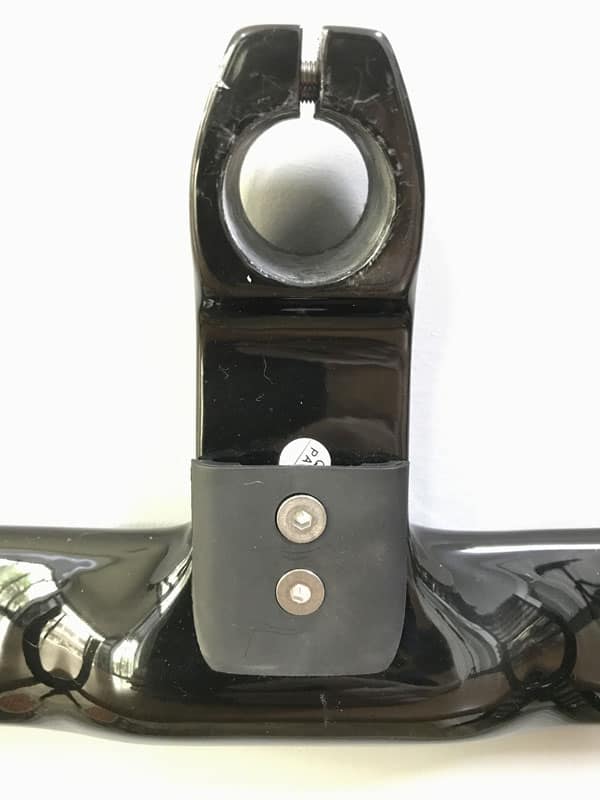
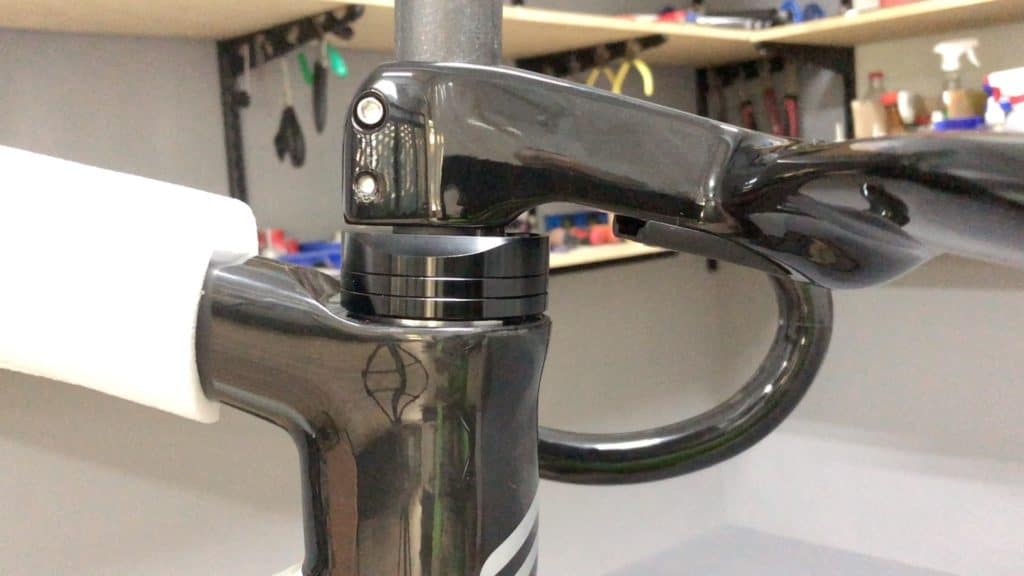
A cyclist can avoid the expense of a 100% cable integrated handlebar and stem by opting for a partial internal cable integration.
The cable housing emerges from the center of this type of bar below where the stem connects to it.
Hugging the stem, the cable turns 90° at the steerer entering the dust cap then continuing on through the head tube, top tube and down tube.
This saves on cost since a cyclist is not locked into an integrated handlebar/stem design.
Use any internal cable routing (non-integrated) handlebar and any stem; the dust cap is not integrated with the stem, so the stem sits on top as with a standard setup.
The advantage is there’s no need for the frame maker to place entry ports in the frame. Cables enter the frame through the headset. Plus cables are routed internally through the handlebar.
The disadvantage is you still have visible cable housing from the handlebar to the headset, which kind of defeats the purpose of the internal routing in the first place.
All bikes will likely incorporate internal cable routing over the next five years. If you like to maintain your own bike, though, life is set to get more complex since working with external cables and cable housing is much easier. The modular approach to ebikes promises to counteract the move to complexity since a frame’s internals are more easily accessed. But for traditional bikes, added complexity is the result.
Is internal cable routing absolutely necessary?
Is the added complexity worth it?
Tell us what you think.
recommended fork with opening in the steerer allows the brake’s cable housing to exit directly into the head tube
What about servicing/changing the headset bearings?
As I understand, to change a headset bearings, you have to disconnect the brake hoses at the leaver, pull out the shifting cables, unwrap the bar tape (in case of fully, not semi internal, you’ll have to cut the brake hoses), for just being able to take the bearings off.
Am I correct?
Depending on which brand of headset/bike you’re doing the changing on, you probably have to do each of those things, yes.
Hello, is it possible a full internal routing cable on a Merida Reacto 5000 my2020? Which headset should I get?
hellow iam write from venezuela….it is possible to use internal cable routing , in older bike with tapered direccion (1 1/2 down and 1 1/8 up), i use a derosa merak 2012 carbon frame with someone adaptador headset…thanks