A headset press is used to press bearing cups—that take caged bearings or sealed bearings—into the top and bottom of the head tube.
The headset’s other components then slot into place over and around the (threaded or unthreaded) fork steerer.
A headset press used to be one of the most important tools on the shelf.
Now that integrated headsets dominate bike design you don’t need one . . . except if you’re a bike shop or you’re into maintaining or restoring bikes that predate the change to integrated headsets.
Here’s what you need to know.
CONTENTS
Headset Press Components
Removal Tool
Headset Press Parts
Using a Headset Press
DIY Headset Press: 2 Examples
Headset Press Components
Headset press tools come in various configurations. But all consist of handles which thread onto a shaft.
Some sort of bearing assembly sits between the threaded handle piece and the upper block. The upper block slots into—and locks against—the sectioned shaft, although on some models the shaft is threaded right the way along. The lower block is held in place by a nut.
Headset Removal Tool
Since a headset removal precedes most headset installations and upgrades, a cup removal tool is a necessary complement to the headset press itself.
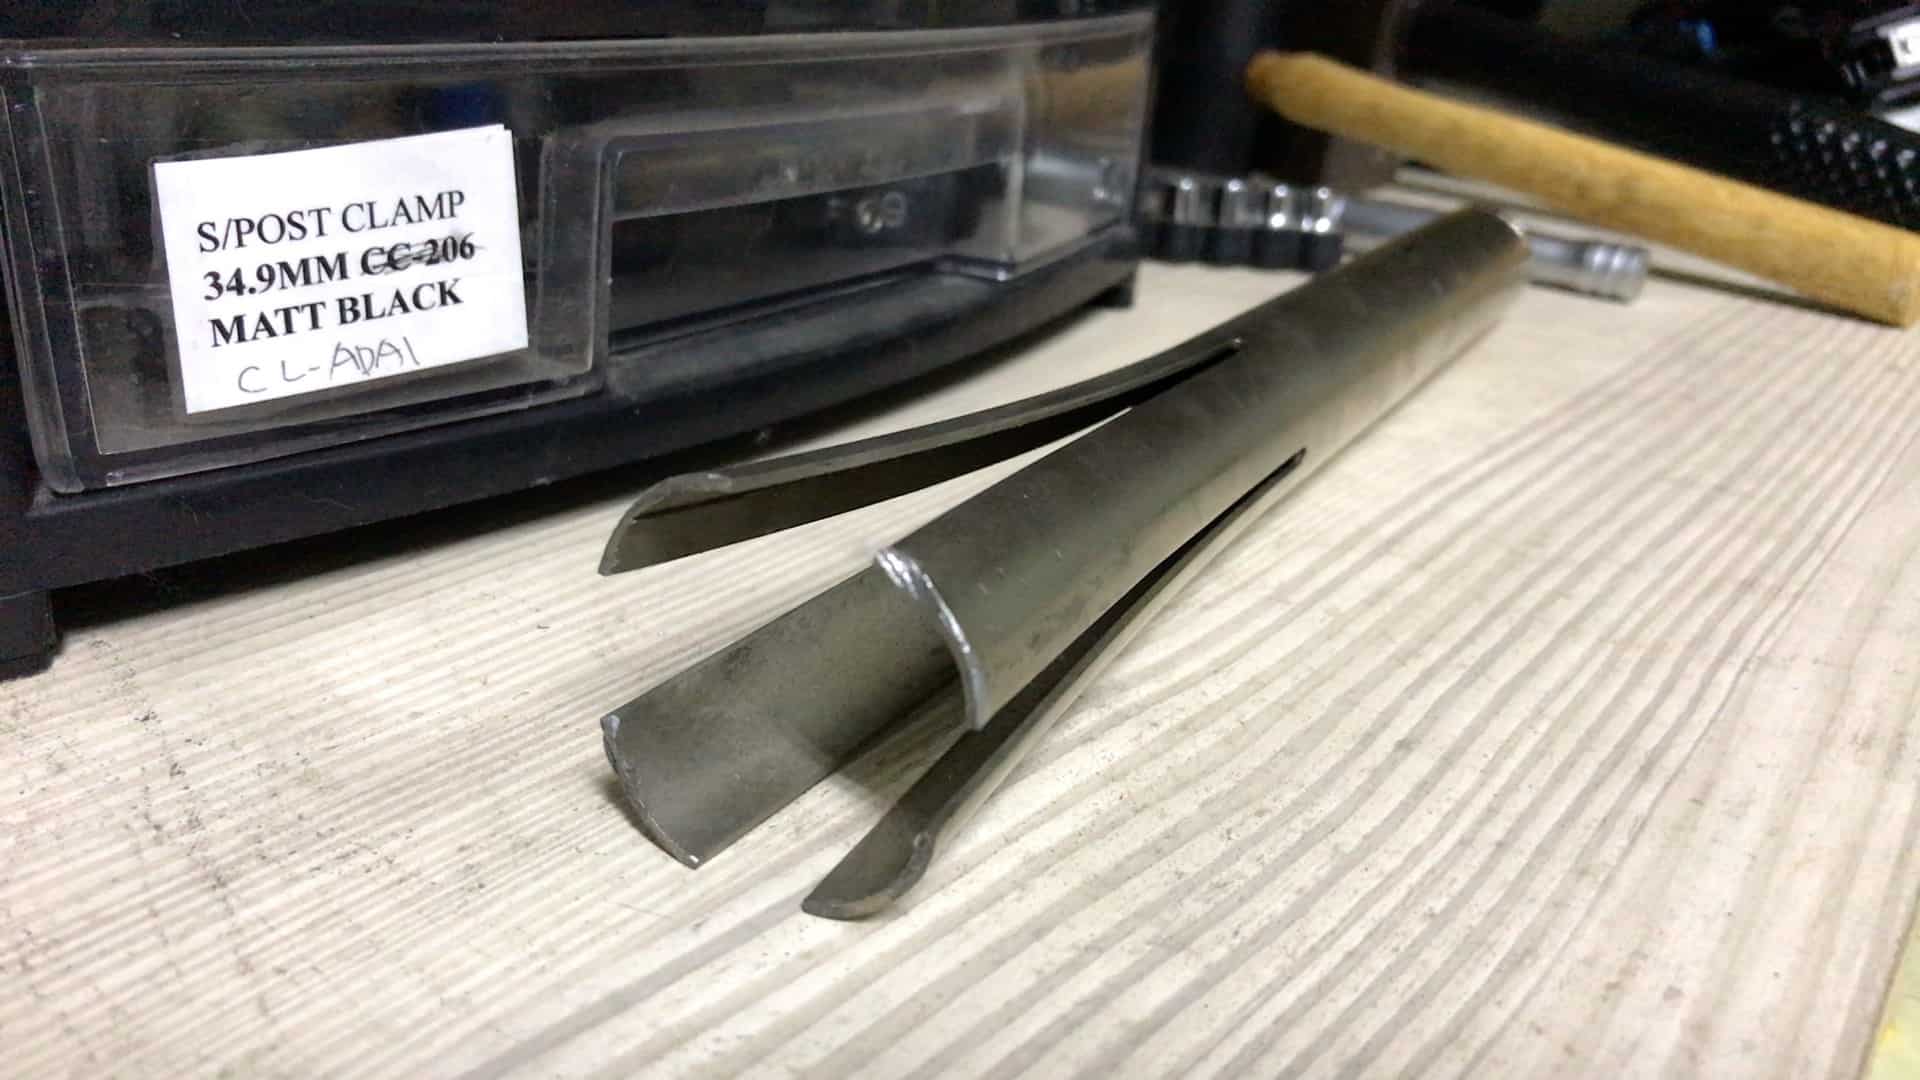
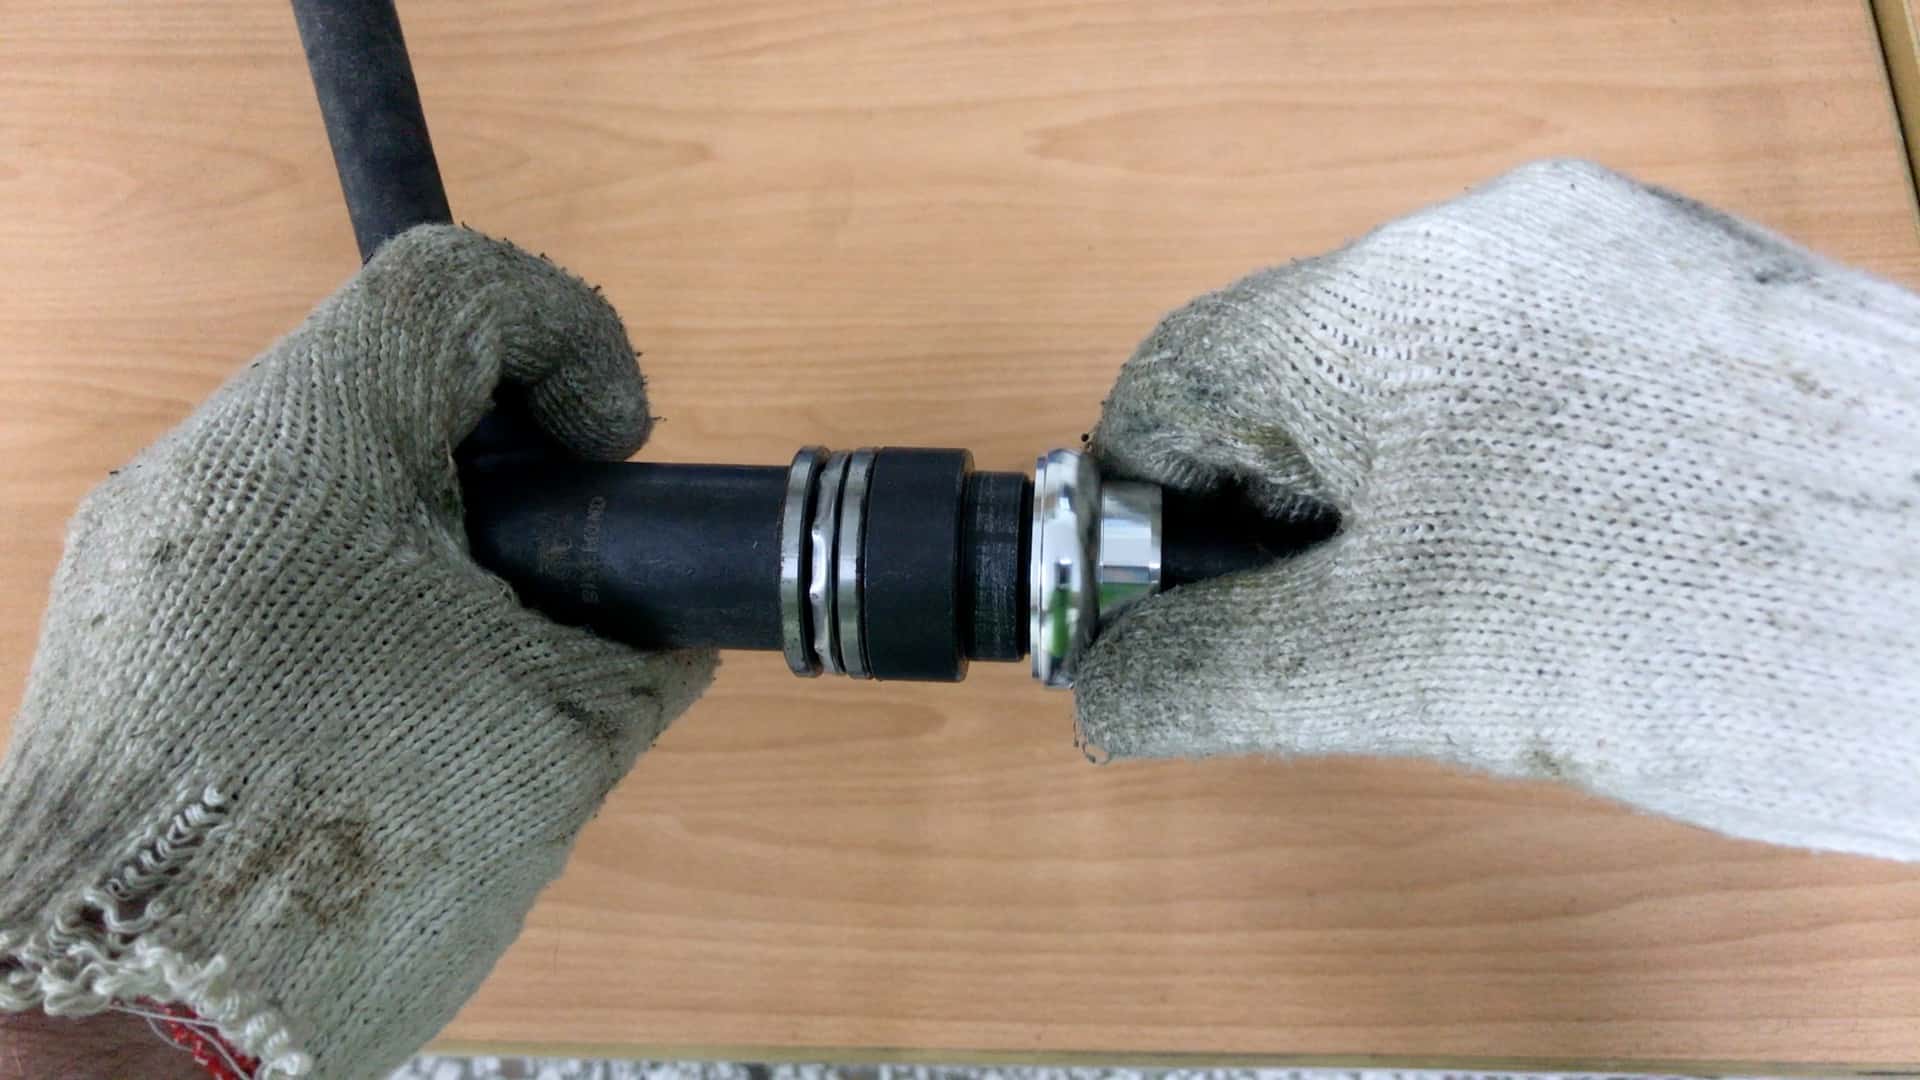
A headset removal tool is simply a split piece of pipe. The split ends are flared outwards to a circumference that fits head tubes from 1” up.
Sliding the impact end of the removal tool through the end containing the cup to be removed contracts the blades which snap out and lock against the cup having passed through the cup into the head tube.
A few hammer blows on the tool’s impact end is enough to pop the cup out of the head tube.
Headset Press Parts
Most headset press tools have detachable handles which thread into the top piece.

Detachable handles make it easy for the manufacturer to ship the tool. When fully assembled it’s easier to keep them in place; use them to hang the tool alongside others on the tool rack.
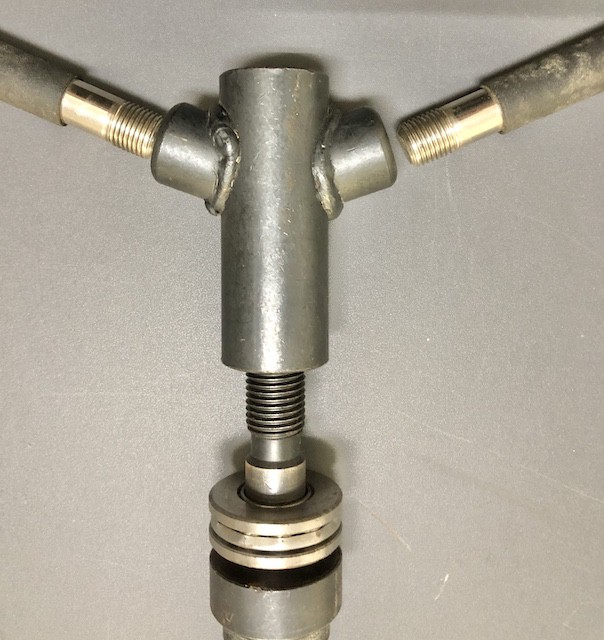
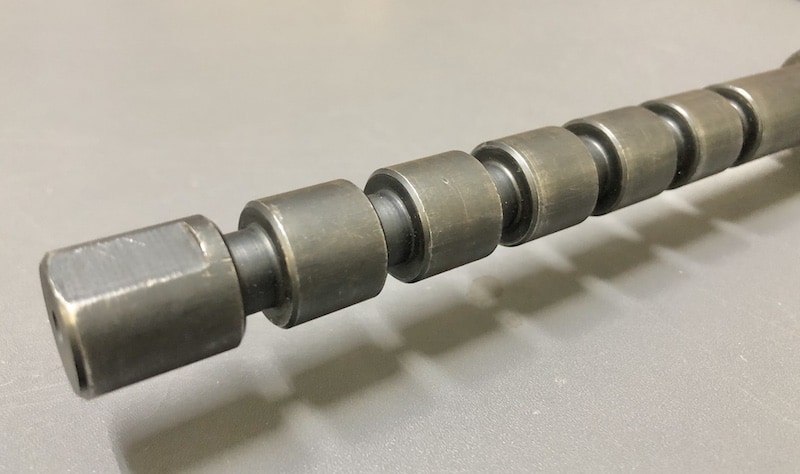
The mechanism works by rotating the top piece on the threaded shaft which pulls the upper and lower blocks (on which the cups are mounted) towards each other.
The bearing sits between the top piece and the upper block which allows easy rotation of the handles which in turn makes for smooth installation.
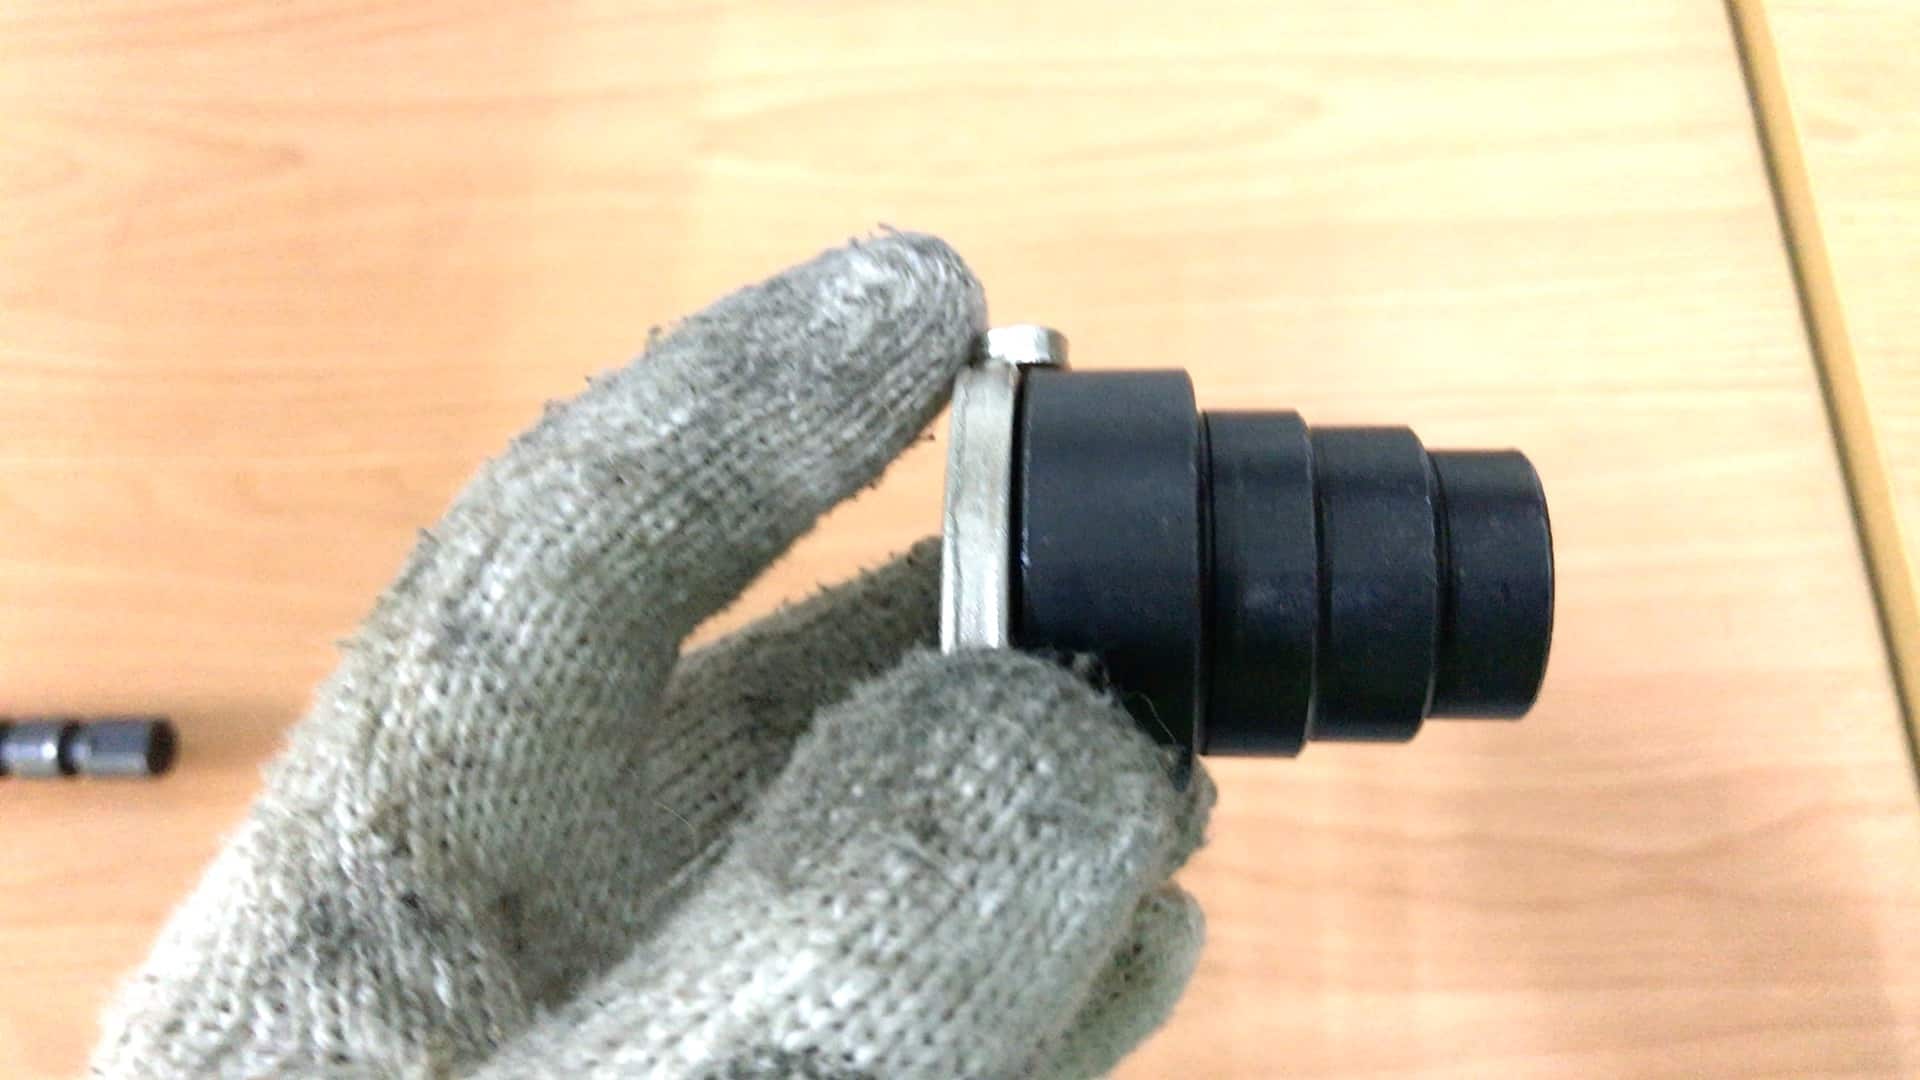
The top block consists of three sections each decreasing in size in order to accommodate every cup size.
Although some cups may not fit exactly against the upper edge of a section, one section will fit at least partially into a cup more or less matched to its size. Correct installation technique becomes crucial where the fit is partial since a cup can skew sideways during the install.
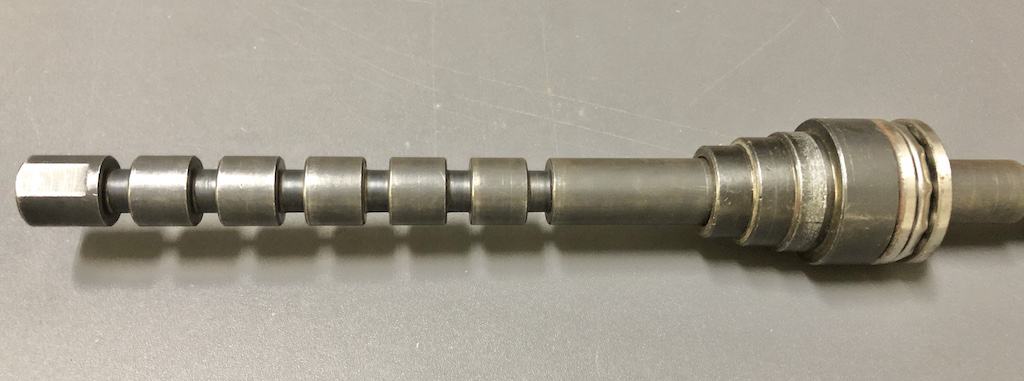
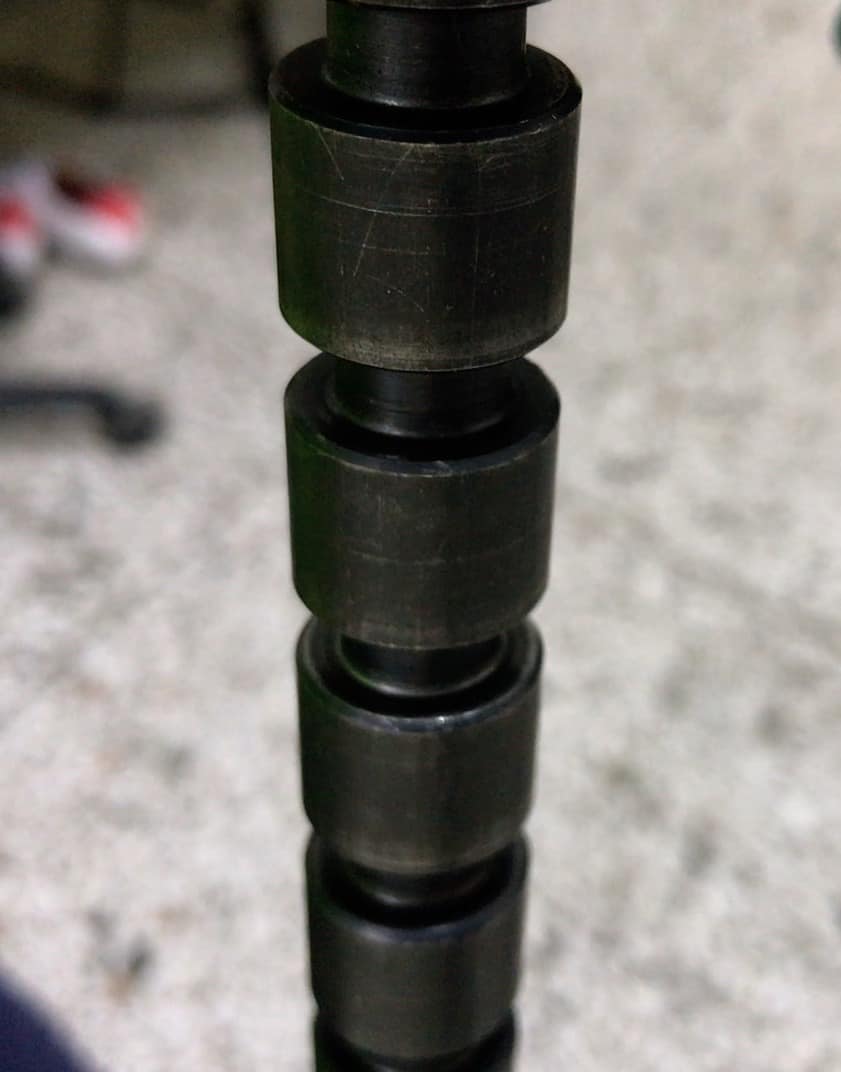
Each of the six notches in the shaft is a stop for the lower block—a sliding bracket slots into the notch holding the block and its cup firm at that point.
Head tubes range from very short to very long so most notches don’t align exactly with most head tubes. The remedy is to take up the slack by giving the top piece a few turns which firms the upper block and lower block against the top tube top and bottom.
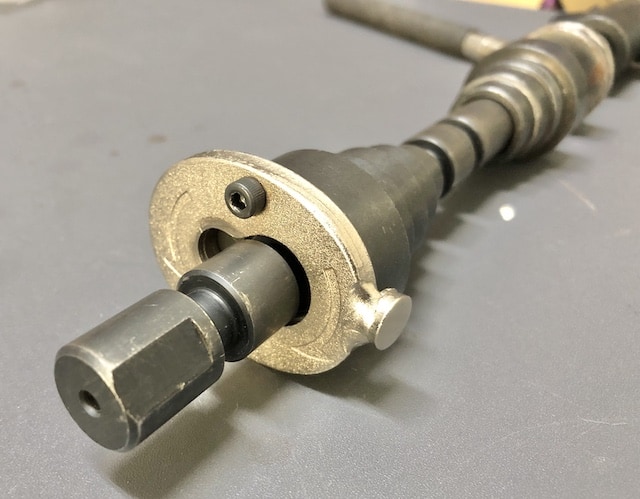
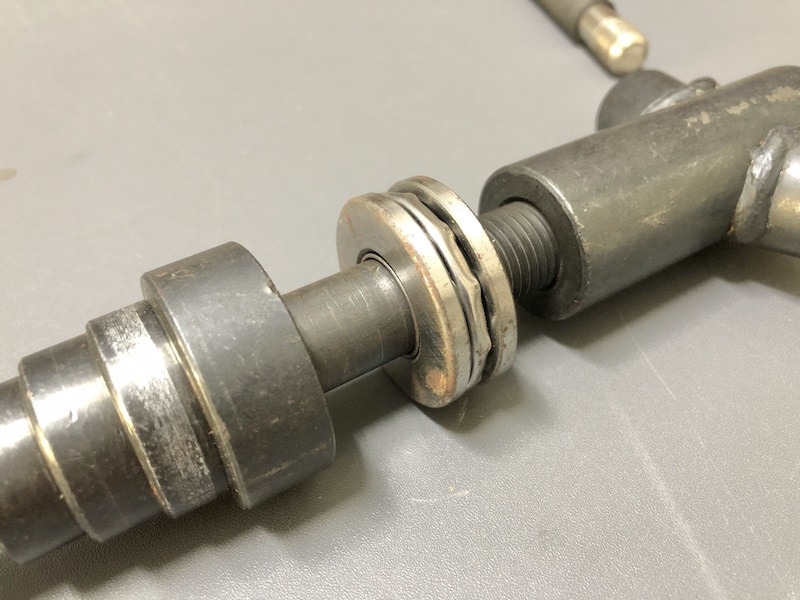
On this model, the lower block is locked against the shaft via a locking piece that rotates 10 degrees or so around the axis of the Allen bolt.
Shaped like a keyhole, the diameter of the wider opening is the same as the shaft which allows the shaft to pass through easily when selecting the most appropriate notch.
Rotating the locking piece slides the lower part of the keyhole into to the notch; lock it by tightening the Allen bolt.
Using a Headset Press
Using a headset press is not about pressing “headsets” at all—what gets pressed are the cups that contain the caged or sealed bearings which sit snugly within a headset assembly.
The only thing that can go wrong is not seating the cups squarely in the head tube.
As long as you seat the cups squarely on the headset press’s upper and lower blocks, then apply consistent gentle pressure, the blocks will press the cups into the head tube smoothly and perfectly. This section shows you how to make that happen.
There’s not much that can go wrong using a headset press.
Most cups fit squarely on one of the three sections (in this case). The job, then, is to monitor them during the installation and avoid either cup becoming too crooked in the head tube.
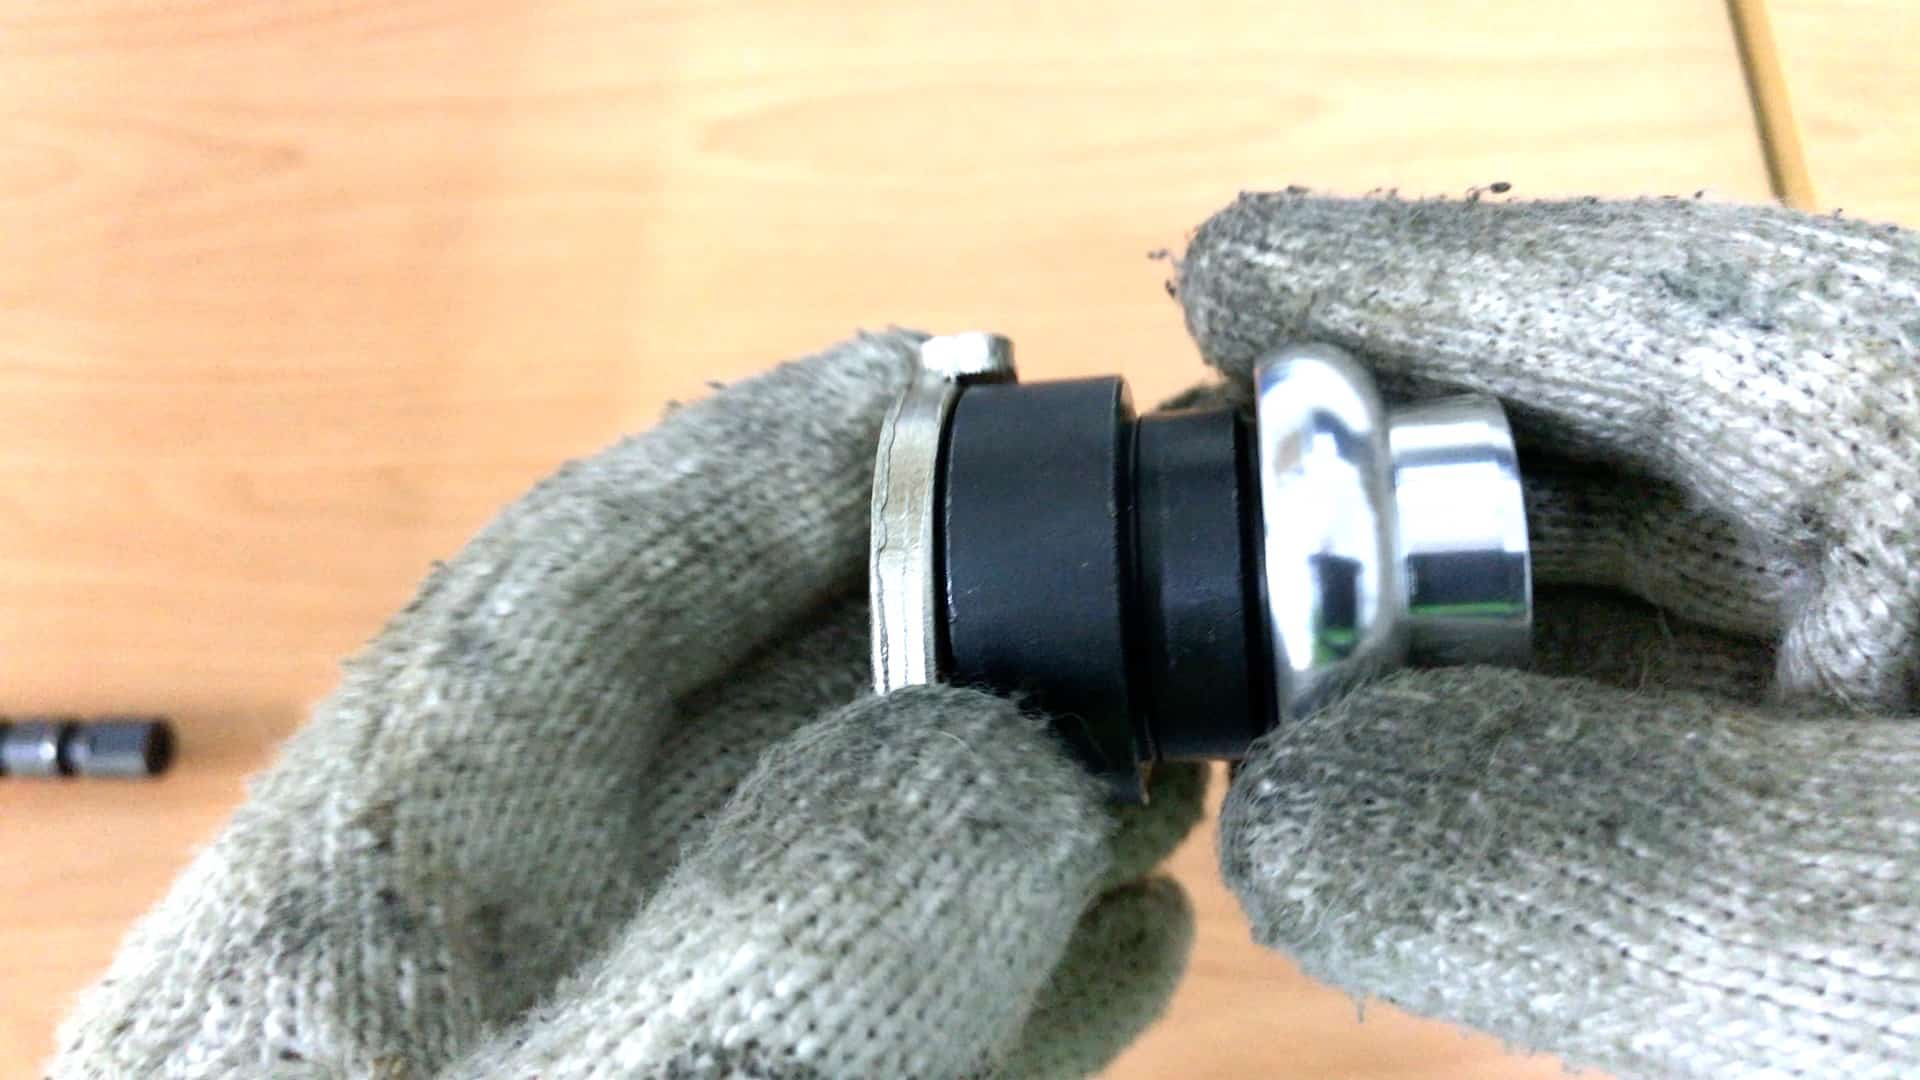
The first move is to set the top cup into position on the top block.
The cup slides up the notched shaft. Once in position you slide the shaft down into the head tube lowering the headset press’s top block with the mounted cup onto the top of the head tube.
Attaching and fixing the lower block into position is next.
Mount the lower cup onto onto a section that fits into it on the block; you then slide the block up the shaft to where the cup makes contact with the head tube.
What about applying grease to the cups?
Many mechanics don’t apply any grease. Many do. Depending on who you talk to it’s optional or essential with valid reasons for and against on both sides.
Bottom line, it’s a personal decision. FYI, no grease was used during the installation featured in these images.
The last step is to slide the locking piece into the notch. Providing the Allen bolt on the lower surface is tight enough this piece will hold in place in the notch.

Holding the lower piece in place, turning the handles slowly takes up the slack as the lower block firms against the head tube.
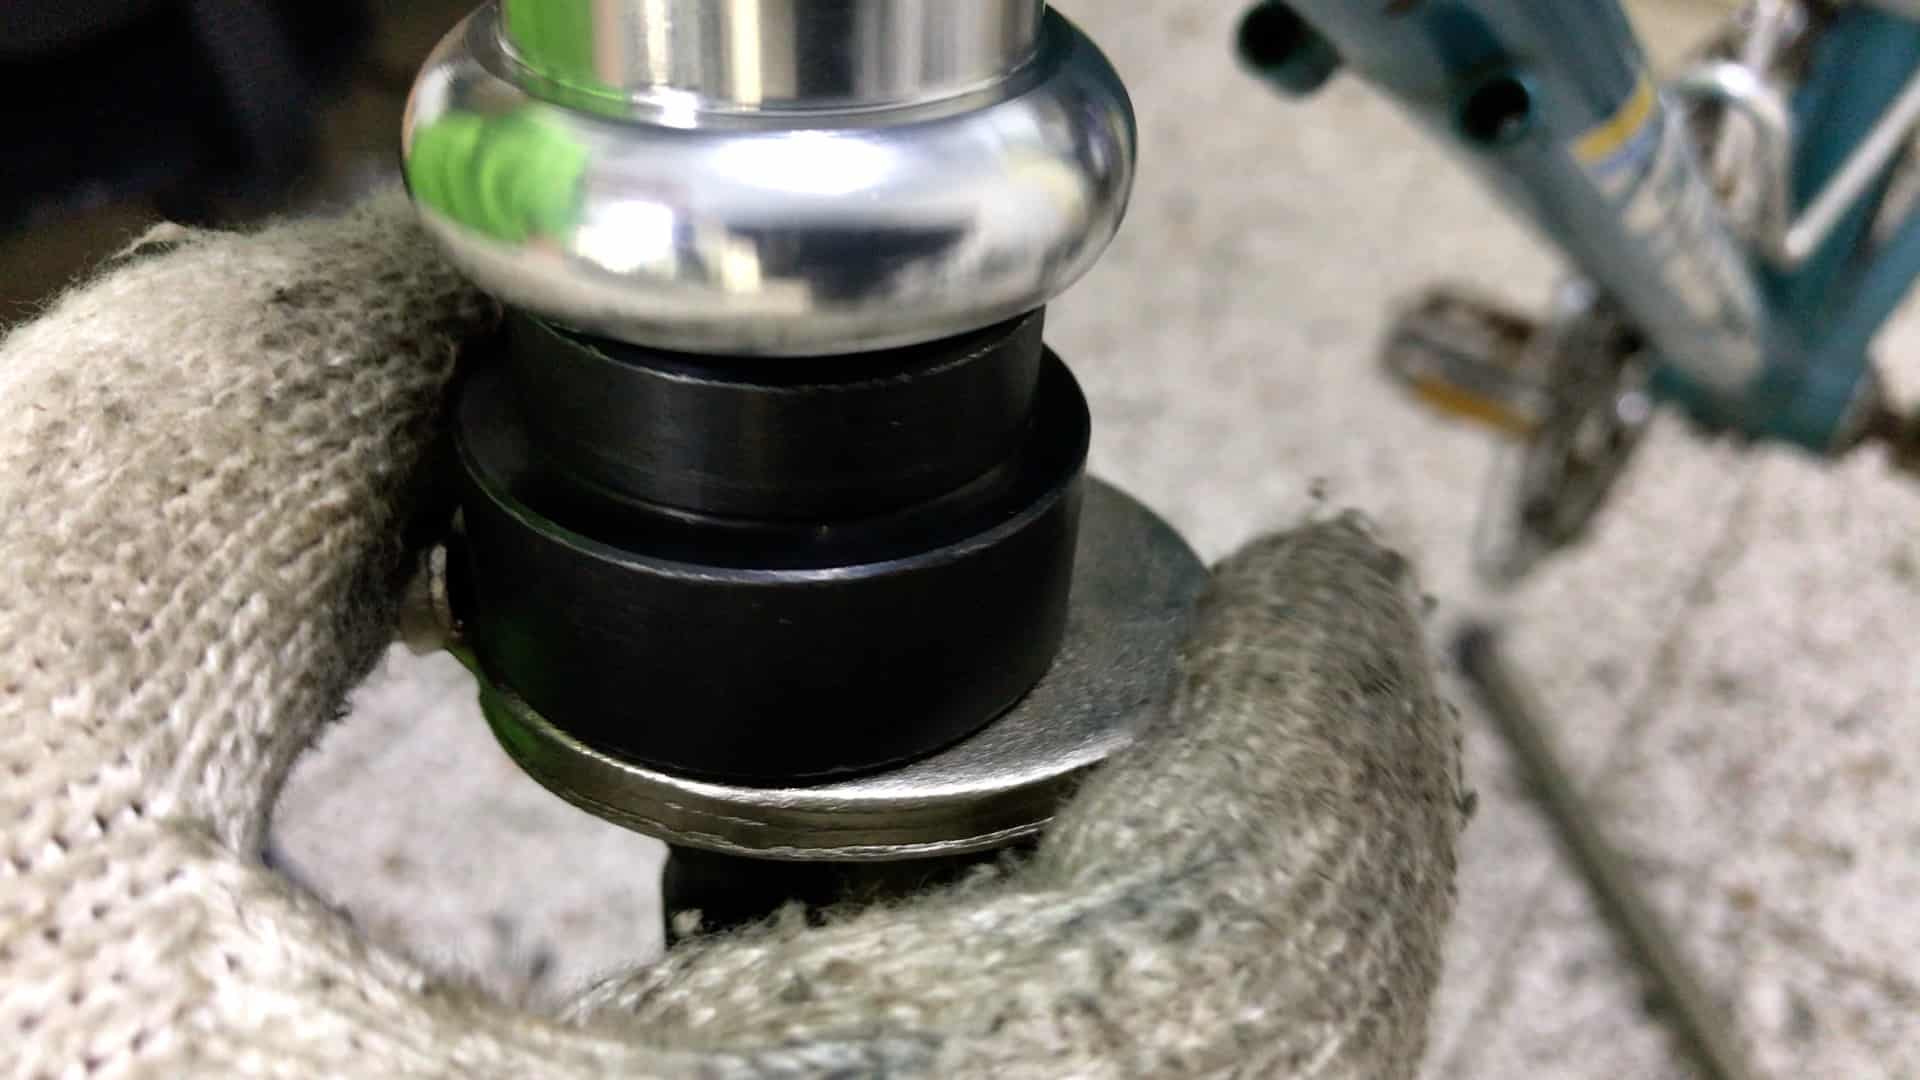
Then you turn the handles 1/4 at a time carefully noting whether either the top cup or lower cup starts to enter the head tube at too sharp an angle.
The cups usually don’t stay square to the head tube and routinely begin skewing slightly to one side or the other.
As long as the angle is not too acute, a crooked cup will straighten up in the last few millimeters of the install and end up firmly installed in the head tube.
Check out the complete installation process using a headset press tool in our video detailing a threaded headset upgrade.
DIY Headset Press?
All bicycle tools came from some budding mechanic who set out to find an easier way to install and/or remove a component.
Tools to press in (press fit) bottom brackets and headset cups use the same principles—a threaded rod, two large flat washers and a nut on each end.
However, on Amazon alone there are more than a dozen headset press tools to choose from, most of them very reasonably prices considering the time and hassle they save you. $20-$30 will snag a good one that will last.
Using a rubber mallet to tap a cup into the head tube also works. The difficulty can be getting a cup started the first few millimeters into the head tube. If the cup is a little too wide a headset press will be required to exert steady pressure and hold the cup in position as it’s pressed in.
Here’s a survey of several home workshop interpretations of headset press tools in case you prefer to make your own tools where it is practicable. Practicable because they are somewhat cumbersome begging the question of whether a branded tool is not the better way to go.
Cyclesnack.com points out that headset installation is a procedure that most bike owners will only carry out once or twice in a lifetime of bike ownership (or not at all in the age of integrated headsets).
So why not support your local bike shop by having the pro do this work quickly and without any chance of damaging your bike? They’ve got exactly the right tool, plus the expertise.
But if you’re into working on your bike for the love of it, then here are some ideas . . .
Instructables’ DIY Headset Press
Instructables.com provides a basic plan for making and and using a headset press based around a threaded rod.

A section of plastic pipe that won’t buckle under pressure is required for each end to fit the cup and brace against the washer. It serves the same purpose as the stepped blocks on the headset press we looked at in detail earlier.

You install one cup at a time with this tool, here the upper cup, coming at it from below.
The wood provides the anchor for the nut, washer and pipe; cranking the nut slowly drives the cup into the head tube
They warn that the pressure will probably crack the wood, although not to the point of failure.
Not the most elegant solution. Still, it’s a viable home-made headset press that will get your headset cups to where you want them.
BikeLife365
This version uses two threaded rods that work together and dispenses with the plastic tubing.

Using wooden blocks directly against the cups simplifies the preparation and operation of this neat DIY headset press.
The best home-made bottom bracket press tools take the same approach for the same reason—simplicity and convenience.
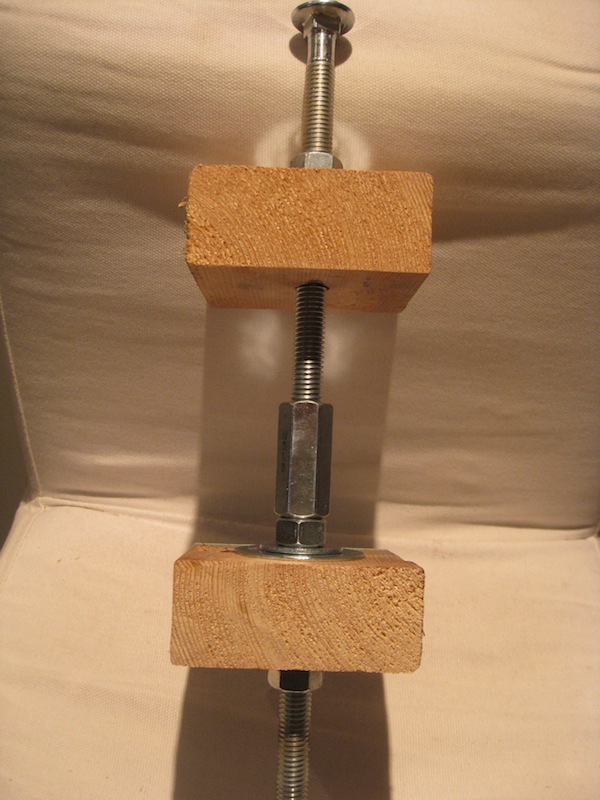
The nut in the center joins the threaded rods; tightening the nut on the top block creates the pressure that forces the cups into the head tube.
The lower block is fixed in position which is how most manufactured headset presses work.

A broad thick block creates a stable platform and you can install any sized cup in any head tube.
Of course, if you’re doing a lot of headset installs, having to unthread the nut to remove the mechanism will slow you down—getting a commercially available tool is the go.
FINAL COMMENTS
You could make your own headset press if you have a bike which uses need to use one.
The thing is headset presses are cheap and easy to obtain if you really need one.
And they are less complicated than home made devices.