In this post, we take a detailed look at removing and installing a threaded headset.
We demonstrate how to use the special tools you need to easily remove and install a threaded headset without damaging a bike’s head tube or the headset itself.
CONTENTS
What is a Threaded Headset?
How Does a Threaded Headset Work?
Can I Use a Threaded Fork with a Threadless Headset?
How to Remove a Threaded Headset
How to Install a Threaded Headset
WHAT IS A THREADED HEADSET?
A threaded headset screws onto corresponding threads on the fork.
There are two types of headset, threadless and threaded. The fork, however, is the key to both designs.
A threadless headset works with a fork that lacks threads on the steerer. Moreover, each steerer is the same length and is cut to a different size depending on rider preference. The steerer is normally 1 1/8 inch in diameter.
A bike stem is not inserted into the steerer but slides onto the steerer. Tightening the stem bolts secures the stem to the steerer.
A rider opting for an ‘aggressive’ racing position cuts the fork to fit the stem with no gap between the top of the headset and the stem.
A rider wishing a more upright position opts for a longer steerer, filling the gap between stem and headset with one or more spacers.
A threaded headset works with a fork that has threads running from the top down towards the fork crown for several inches.
The fork steerer is 1 inch in diameter. Steerer length is specific to the size of the bike into which it is installed.
HOW DOES A THREADED HEADSET WORK?
A threaded headset works with a threaded fork fitting the frame into which it will be installed.
A threaded top race screws onto the fork threads, then tightens onto the bearings which are either caged in a retainer or run free in the race.
The key to making a threaded headset work properly is by tightening the top race or preloading the bearing, noting the point where fork rotation becomes stiffer.
You want the whole headset unit to be compact with no play, but still easy to rotate left and right.
A washer sits on top with a locknut to prevent the top race loosening.
The exception to this rule is for threaded headsets that use sealed bearings which are much less sensitive to the amount of torque applied to the top race.
CAN I USE A THREADED FORK WITH A THREADLESS HEADSET?
Possibly.
The problem is not the headset but the fork’s length.
A threadless headset works in conjunction with a steerer cut to the required length. That length depends on a cyclist’s preferred stack height.
The steerer protrudes enough above the leading edge of the head tube for the top race, washer, and locknut to comfortably fill the space between the top of the steerer and the headset cup in the head tube.
There needs to be at least 36mm of steerer above the top tube to accommodate the stem.
If there is, you can install a 1” threadless headset to replace the threaded headset.
HOW TO REMOVE A THREADED HEADSET
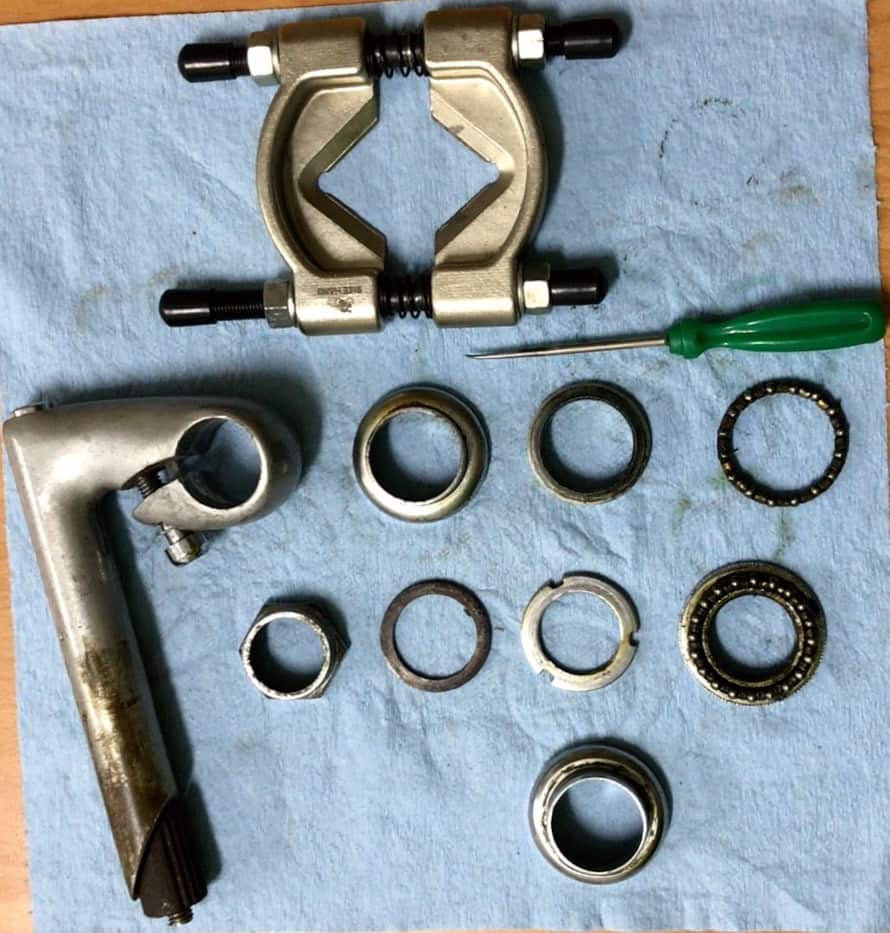
Removing and installing threaded headsets requires specialist tools. Successful removal and installation depends on using them correctly.
You can maintain or repair a bike without most specialist tools. However, the risk of damage to your bike frame, the component you are working on, or both, is high.
For this threaded headset job, we rely on a
- crown race puller and cup removal tool for removal
- headset cup press tool for installation
Threaded Headset Fork Removal
The bike we’re working on to demonstrate threaded headset removal and installation is a Nishiki from the early to mid- 1990s.
You would have seen bikes in worse condition than this one.
The frame has endured many scratches and gouges over the years.
The wheels desperately need truing.
The chrome finish is faded and pitted.
One of the shifters is partially melted (!!) from being too close to a heat source at one time or another.
Preliminary work included
► removing the brake and derailleur cables plus housing
► stripping the bar tape
► removing the handlebars and quill stem
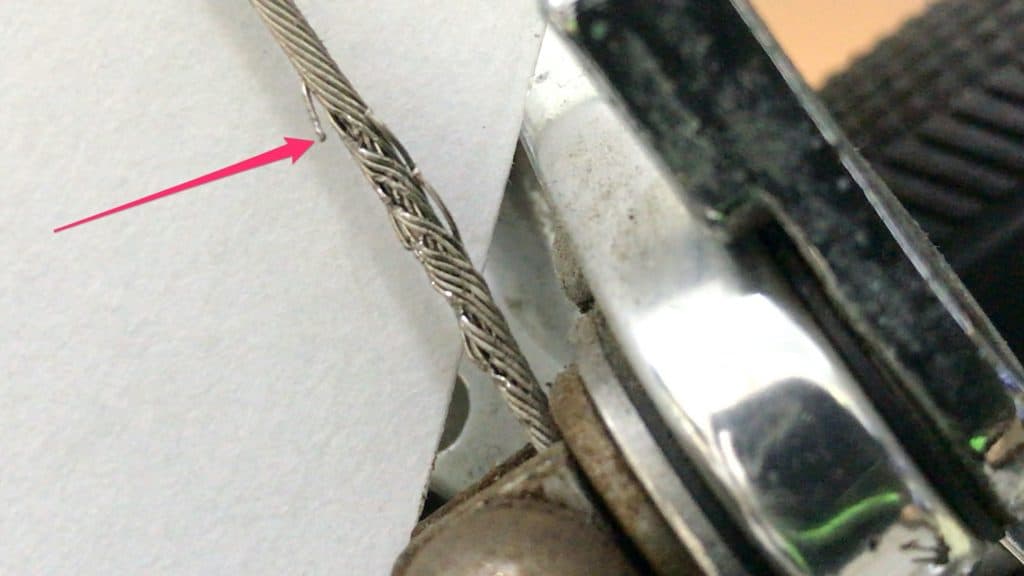
A word of caution about brake or derailleur cables with severed strands.
The cables on this bike have not been changed in a long time. Tightening and loosening cable bolts over time fatigues the strands causing some to break.
If you are an experienced bike technician you’ll understand what happens when you don’t notice or don’t take enough care.
As sharp as hypodermic needles these spikes are, inexplicably, way more painful. Always be on the lookout when working with cables…

Anyhow, having removed the cables, shifters, handlebars and stem, we are left with the threadless headset.
A crescent wrench or open-ended wrench loosens the locknut—it screws off easily. The washer is also easily lifted from the steerer.
A retaining ring holds the threaded top race in position on this older model. Once loosened with a flat-bladed screwdriver, you can remove it by hand.
You can also remove the threaded race beneath by hand.
The threaded race’s function is to hold the fork in the head tube as well as exert the correct pressure on the bearing, so support the fork in one hand as you turn it. Otherwise the fork will drop to the floor.
Having removed the nut, you can slide the steerer down through the head tube completing fork removal.
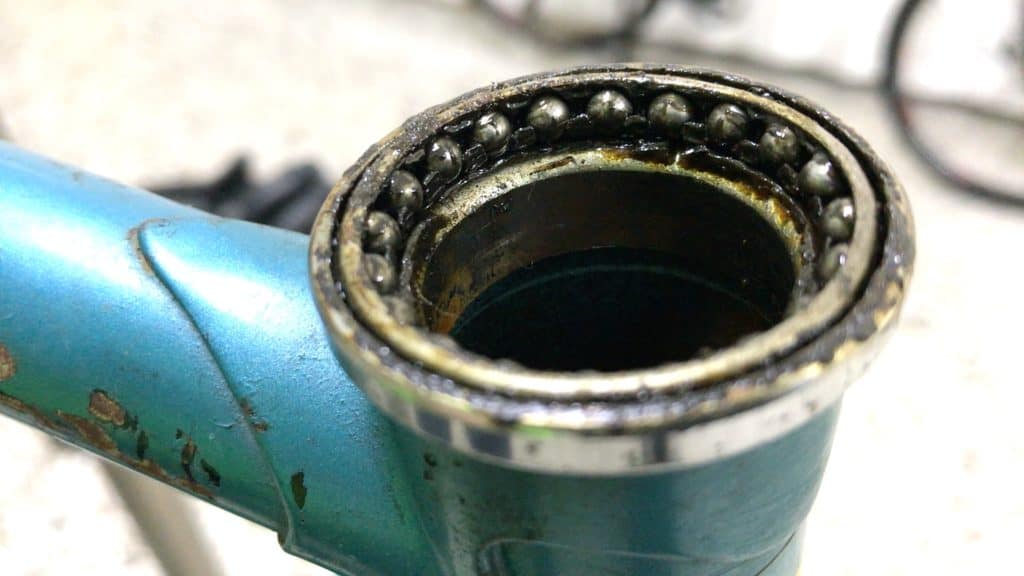
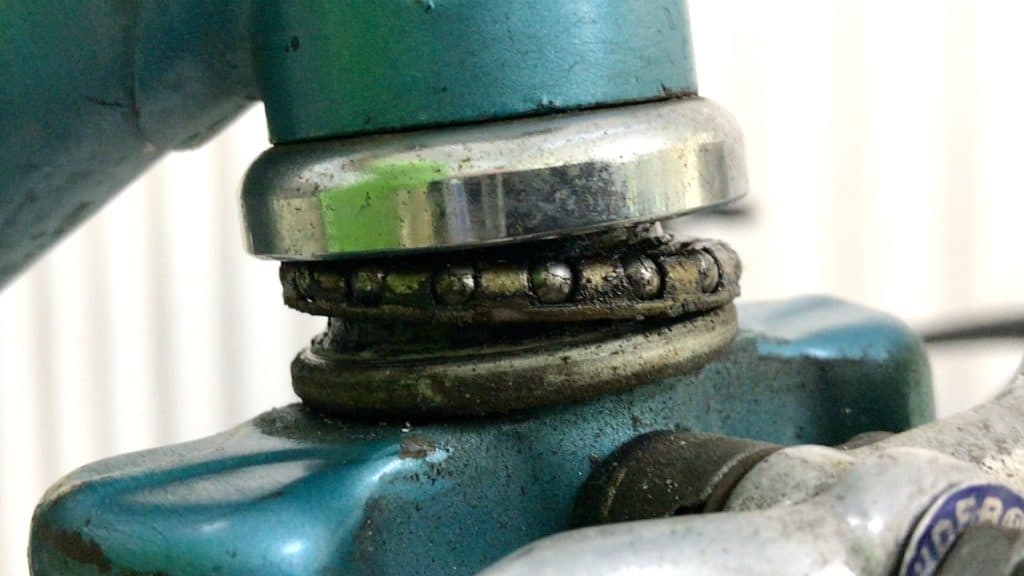
This Nishiki uses bearings fixed in a bearing cage or retainer as it’s also called.
You lift the cage out of the head tube cup once the fork is clear. The lower bearing comes out on the fork crown race. I’ll focus on removing the crown race below.
Threaded Headset Cup Removal
A cup removal tool is the right way to remove threaded headset cups. The blades distribute pressure evenly along the cup’s surface.
You can use a flat-headed screwdriver, though.
The technique requires continually moving the screwdriver to an adjacent point, giving a few light taps, then moving to the next point in succession.
If you hammer away for too long in the one spot, the cup may wedge at an angle in the head tube—very difficult to move should it jam sideways.
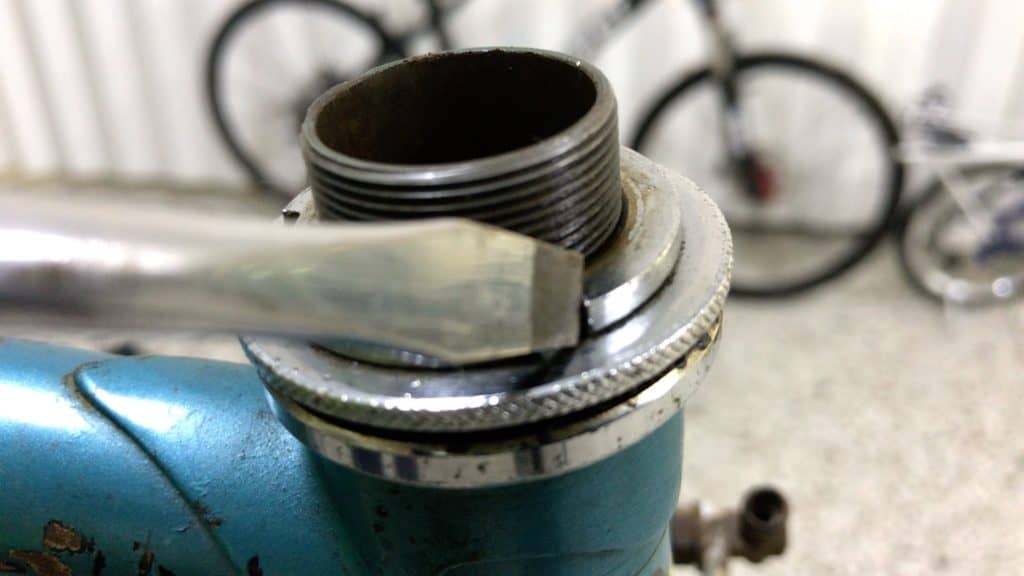
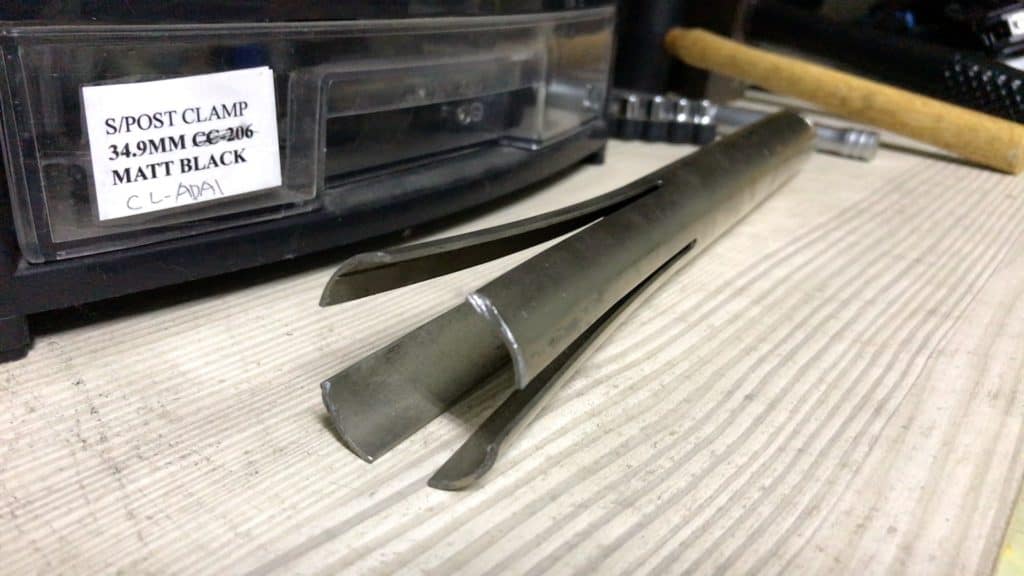
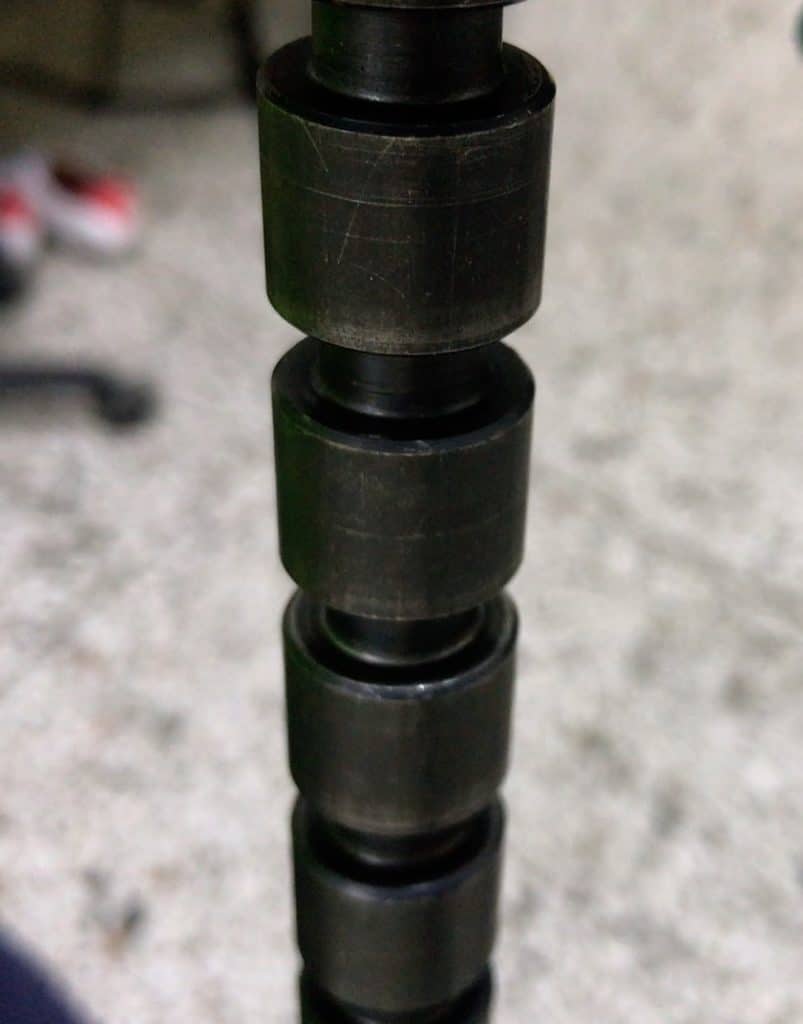
Threaded Headset Fork Crown Race Removal
The crown race sits firmly on the fork crown at the base of the steerer. To prise it clear, you need the right tool.
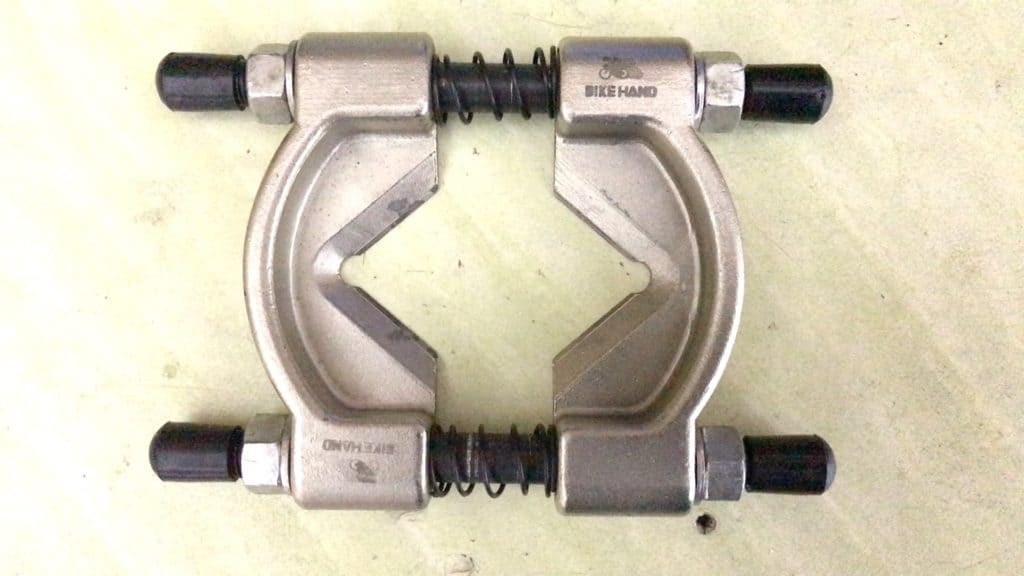
This is a crown race removal tool and looks a bit different to the Park Tool crown race puller, to say the least!

The Park Tool CRP-2 is way more tool than you need for this job. And 5x more expensive than the model we use—both are available on Amazon by the way.
You could go tool-free on this of course, using a broad-head screwdriver or something similar to lever the race free.
You’ll probably gouge the paintwork though. This method is also very clumsy. Investing in a tool is the way to go. Or take the fork to a bike shop.
Slide the tool down the steerer; the blades sit next to the crown.
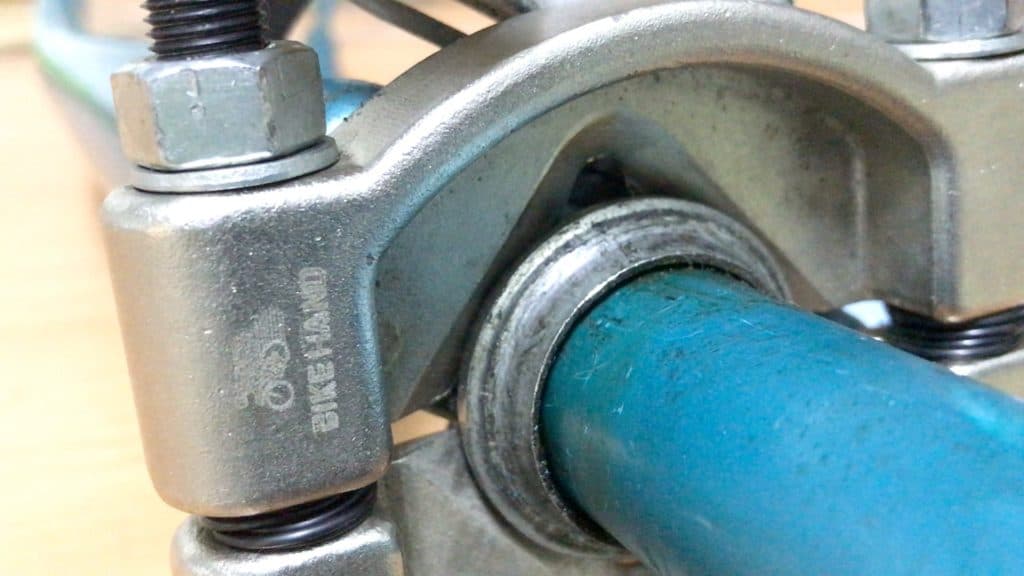
Tightening the bolts—alternating each side to keep them in balance—moves those wedge-shaped edges under the crown race gently lifting it away from the crown.
The removal complete, we can now turn to installing the new threadless headset.
HOW TO INSTALL A THREADED HEADSET
Bang the cups in, drop the bearing in the top, slide the fork on with the crown race beaing, tighten.
Mostly correct except the part about banging in in the cups!
Headset Cup Press Tool
You need a headset cup press tool to install the headset cups gently and evenly into the head tube.
A hammer and a block of wood is an option, but very clumsy. The risk of damage to the cups or the bike frame is high. No need for hammers at any point in the installation.
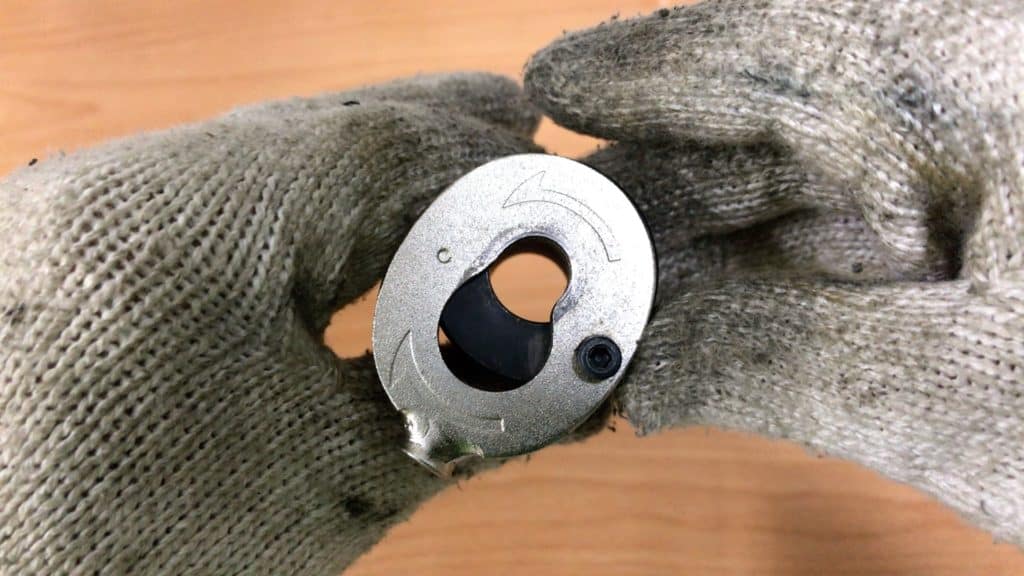
You firstly slip the top cup into the appropriate step on the tool shaft, the one that naturally catches the cup.
The foot is next.
You mount the cup onto the appropriate step then insert the shaft with the top cup into the head tube.

You slide the foot up towards the head tube until the cup makes contact.
There are 6 notches on the headset cup press tool’s shaft, each 15mm apart.
The objective is to lock the foot onto the notch closest to the head tube.
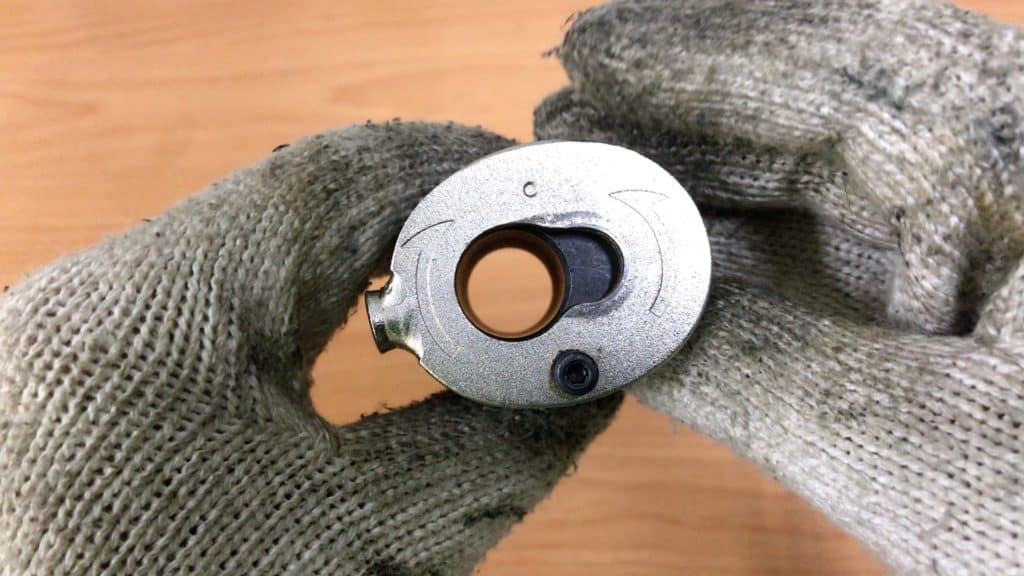
You’ll slide it on with the lock-piece open, like so.
At the right notch, slide the piece across into the notch. Tightening the Allen bolt ensures the foot will not move as you rotate the tool from the top.
Since the force exerted during the installation is enough to hold the foot firmly in place, using the Allen bolt is not essential.
Once lodged on the shaft, you slide the lock-piece into position.
The trick is to make sure both cups are sitting squarely in the head tube, top and bottom, under firm pressure. If so, evenly rotating the handles slides both cups into position.
The advantage of this tool is even if the cups begin their entry into the head tube slightly crooked, a few turns squares both perfectly.

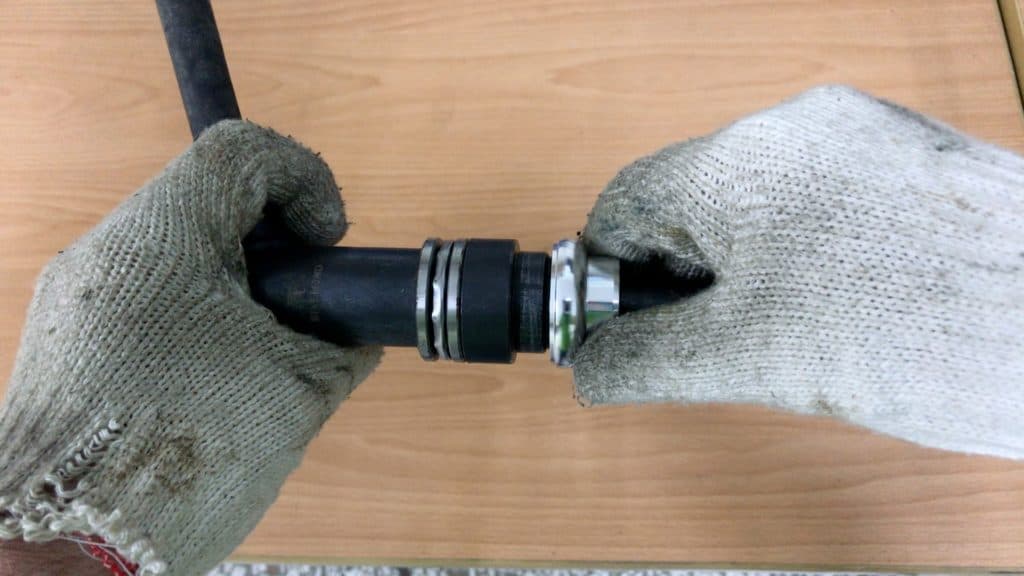
Smearing grease around the surface directly supporting the sealed bearing helps prevent creaks later.
Some mechanics prefer applying a thick coat of grease as a means to prevent any water penetration into the bearings whatsoever.
Whatever the case, a sealed bearing does a good job keeping water out by itself.
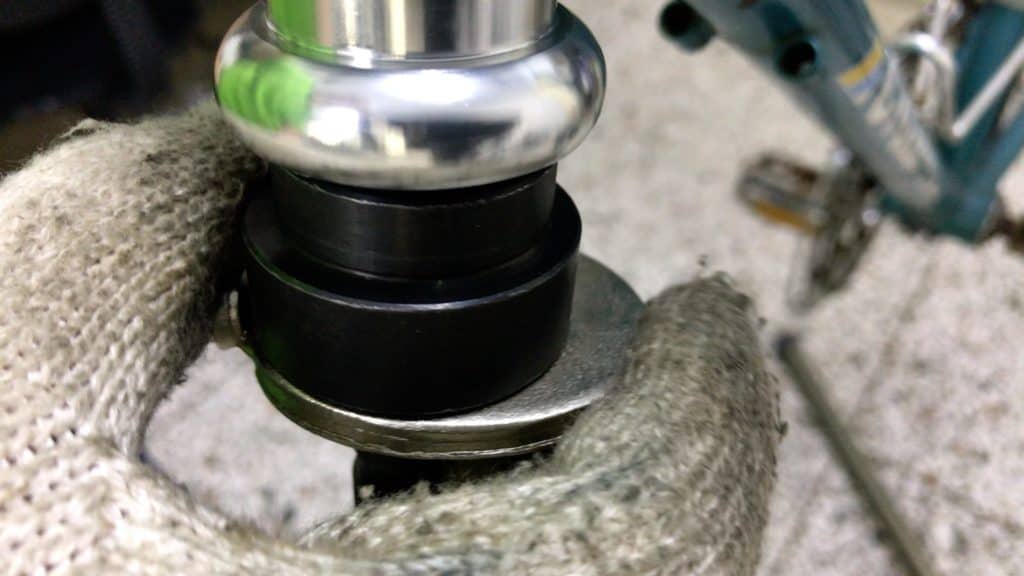
The leading edge of the threaded top race overlaps the rim of the cup which fits up into it. This design prevents water from penetrating into the bearing seat.
If a rider cleans his or her bike with a high-pressure hose, water will get in. There should be never any recourse to cleaning a bike with high-pressure water.
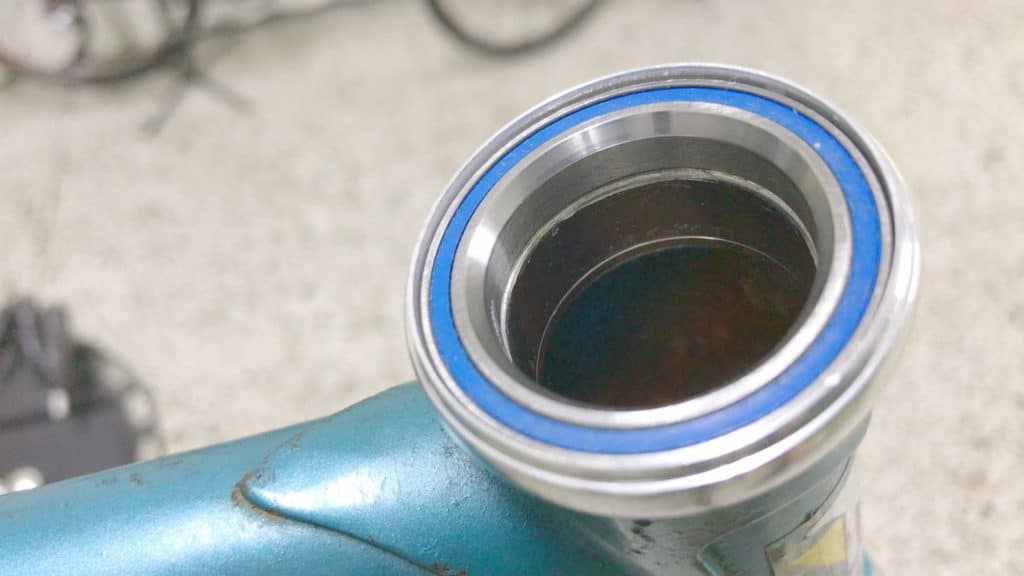
The sealed bearing is designed to fit very snugly into the cup with no movement to the front, back or sides.
You’ll see the bearing cup’s bevelled edge in this shot, helping to keep water completely out.
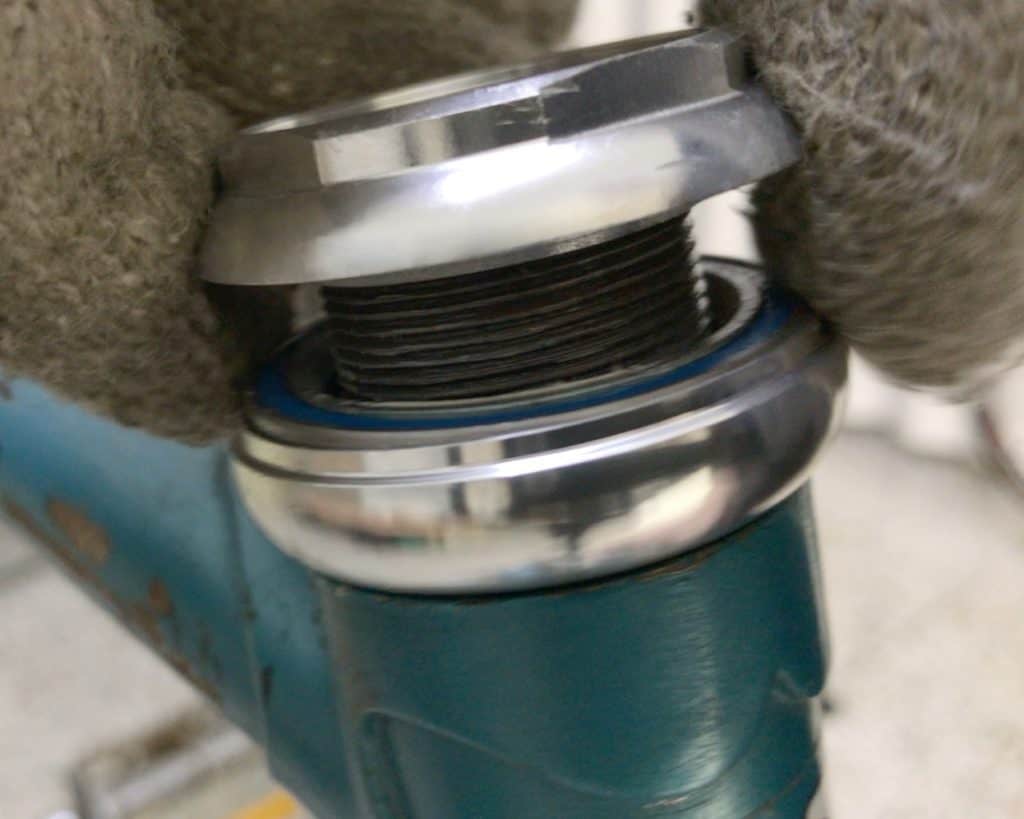
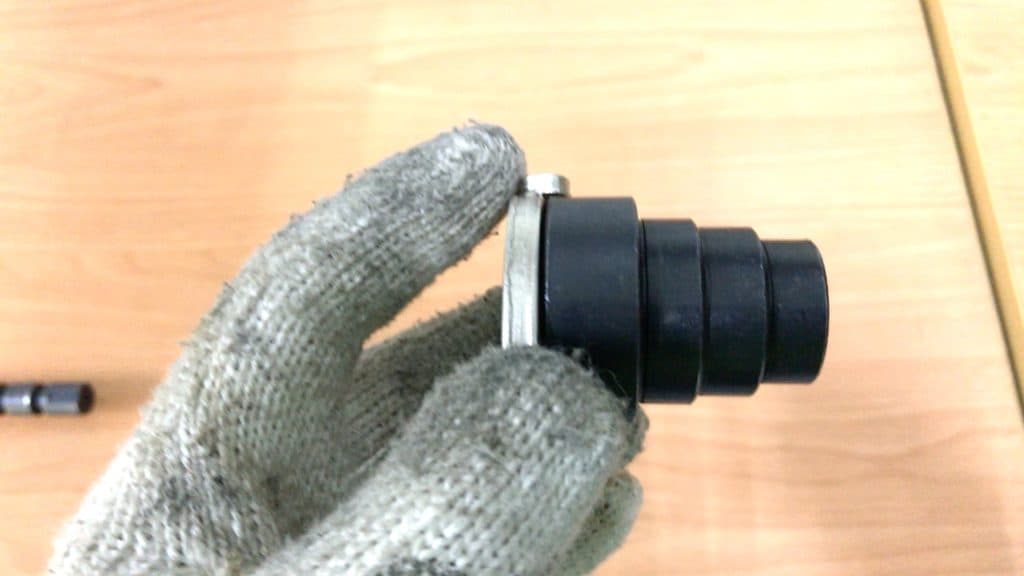
The threaded top race screws down onto the sealed bearing. The sleeve into which the threads are cut slopes up from the threads at a 45° angle.
This 45° surface engages the sealed bearing’s inner race; the point of pressure between the two. The tighter the top race, the firmer the fit between it and the bearing’s inner race.
Snugly tight is all you need here—a sealed bearing is nowhere near as sensitive to top race torque as with caged bearings or free bearings, so a much wider torque tolerance is acceptable.
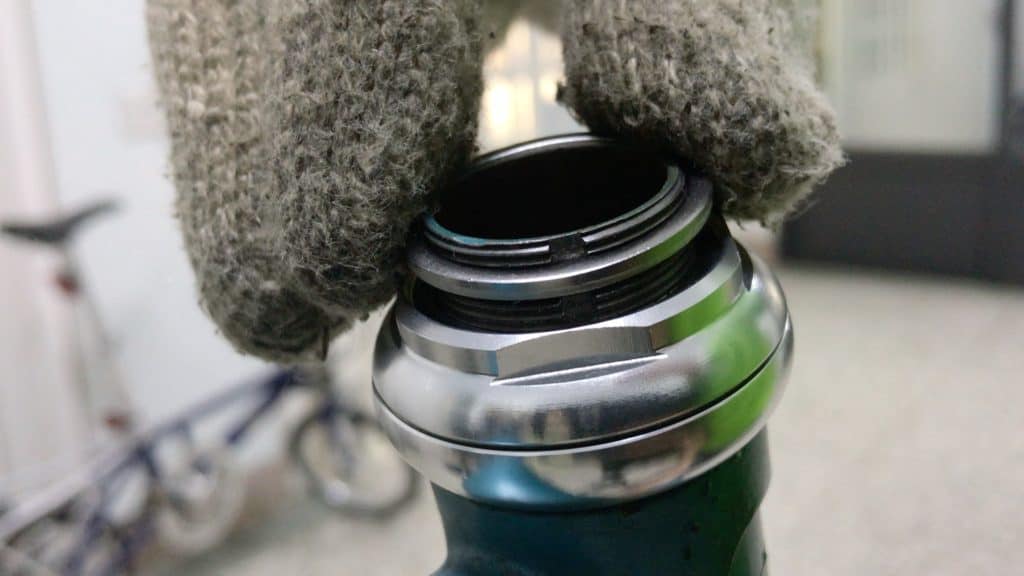
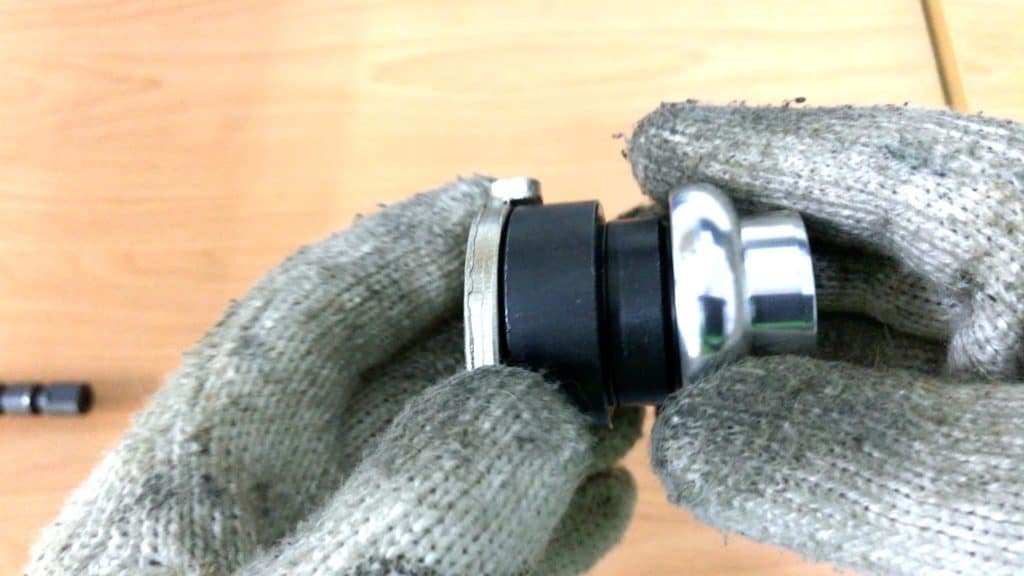
The washer slots down into the top race rather than onto it as with the old threaded headset.
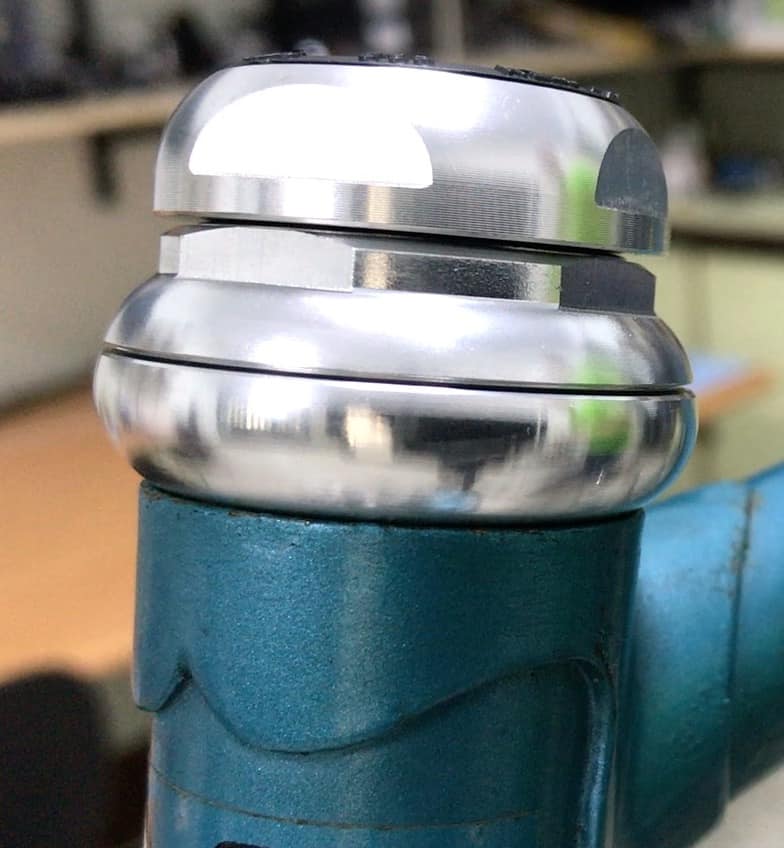
The locknut tightens down onto the race as with any threaded headset.
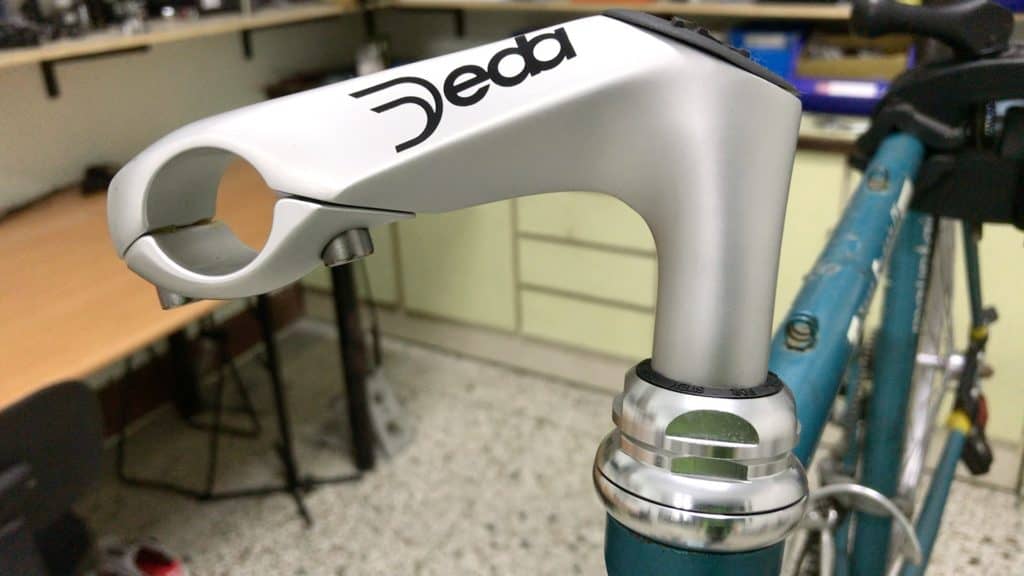
A Deda Elementi stem happened to be hiding in a corner of the workshop—glorious find … had completely forgotten that this piece of goodness was there. So, on it went. Way more elegant that the original piece of ugliness, you have to agree!
WHERE TO NOW?
Removing then replacing an older threaded headset—notably a caged or loose bearing model—with a more modern sealed bearing design is a great way to begin an old bike restoration.
The result is even better when you add an attractive new stem. There is still much work to be done on this bike however.
The brakes could be refurbished although their original shine is probably lost forever.
Best to replace both front and back calipers with classical-style replacements.
The biggest job is frame refurbishment. You need to remove all components; strip the bike down to the frame, then take it to a paint shop
Having dealings with a paint shop in Taiwan is handy. You can usually convince the owner to do a custom job for you. Matching the Nishiki’s color is no problem. And it’s monochrome. No two or more color combos to complicate the spray.
But what about the decals?
Well, you’d need another connection with a design and printing company, get a set made. Applying the decals takes a skilled worker less than five minutes.
With that core job out of the way we’d then install a spruced-up crank, toe-clip pedals, a new bar and classic shifters.
One day …
2 thoughts on “The Thorough Guide to Threaded Headset Removal & Installation”
Good article, I’m currently going through a restoration of a 1987 Raleigh Ventura, it will will get a custom paint job, and a headset as mentioned in the above article and a modern bottom bracket. Probably will keep the Shimano Golden Arrow crankset. Thanks to this article I know now what to do to replace the headset, cheers!
Sounds awesome!