External bottom brackets are practical, require little maintenance, and are reliable over long periods of time.
In this extended look at these dependable BBs, we cover the main types, as well as what to take note of in installation and removal.
We especially take a close look at the preparation procedure that hardly anyone talks about—neglecting this step can cause sub-standard performance and premature wear.
CONTENTS
What’s Special About External Bottom Brackets?
Types of External Bottom Bracket
Preparation for Installation (Tricky—but necessary—technique)
Tapping
Facing
Installation
Removal
What’s Special About External Bottom Brackets?
Two attributes of external bottom brackets brought about the most significant evolution of the drivetrain since the invention of the safety bike in the 1880s:
- bearings were relocated outside of the BB shell
- integrated cranks became standard on mid- to high-end bikes
From the early days drivetrains used cup and cone bottom bracket bearing setups housed inside the frame and which supported cranks secured by cotters.
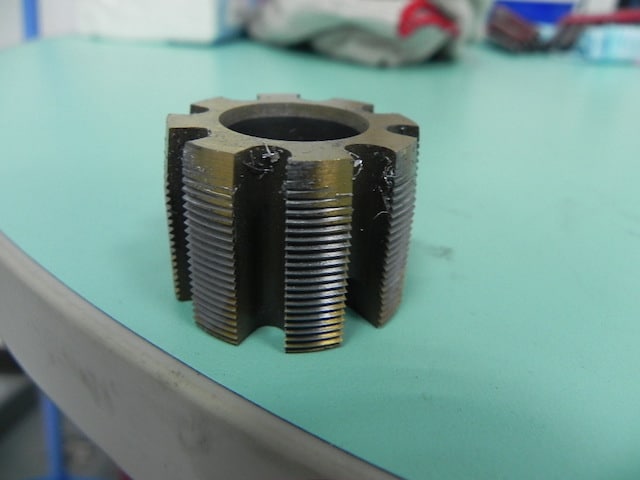
The cartridge BB revolution replaced cup and cone bearings with sealed bearings pressed into a container—the cartridge—which is installed or removed as a complete unit.
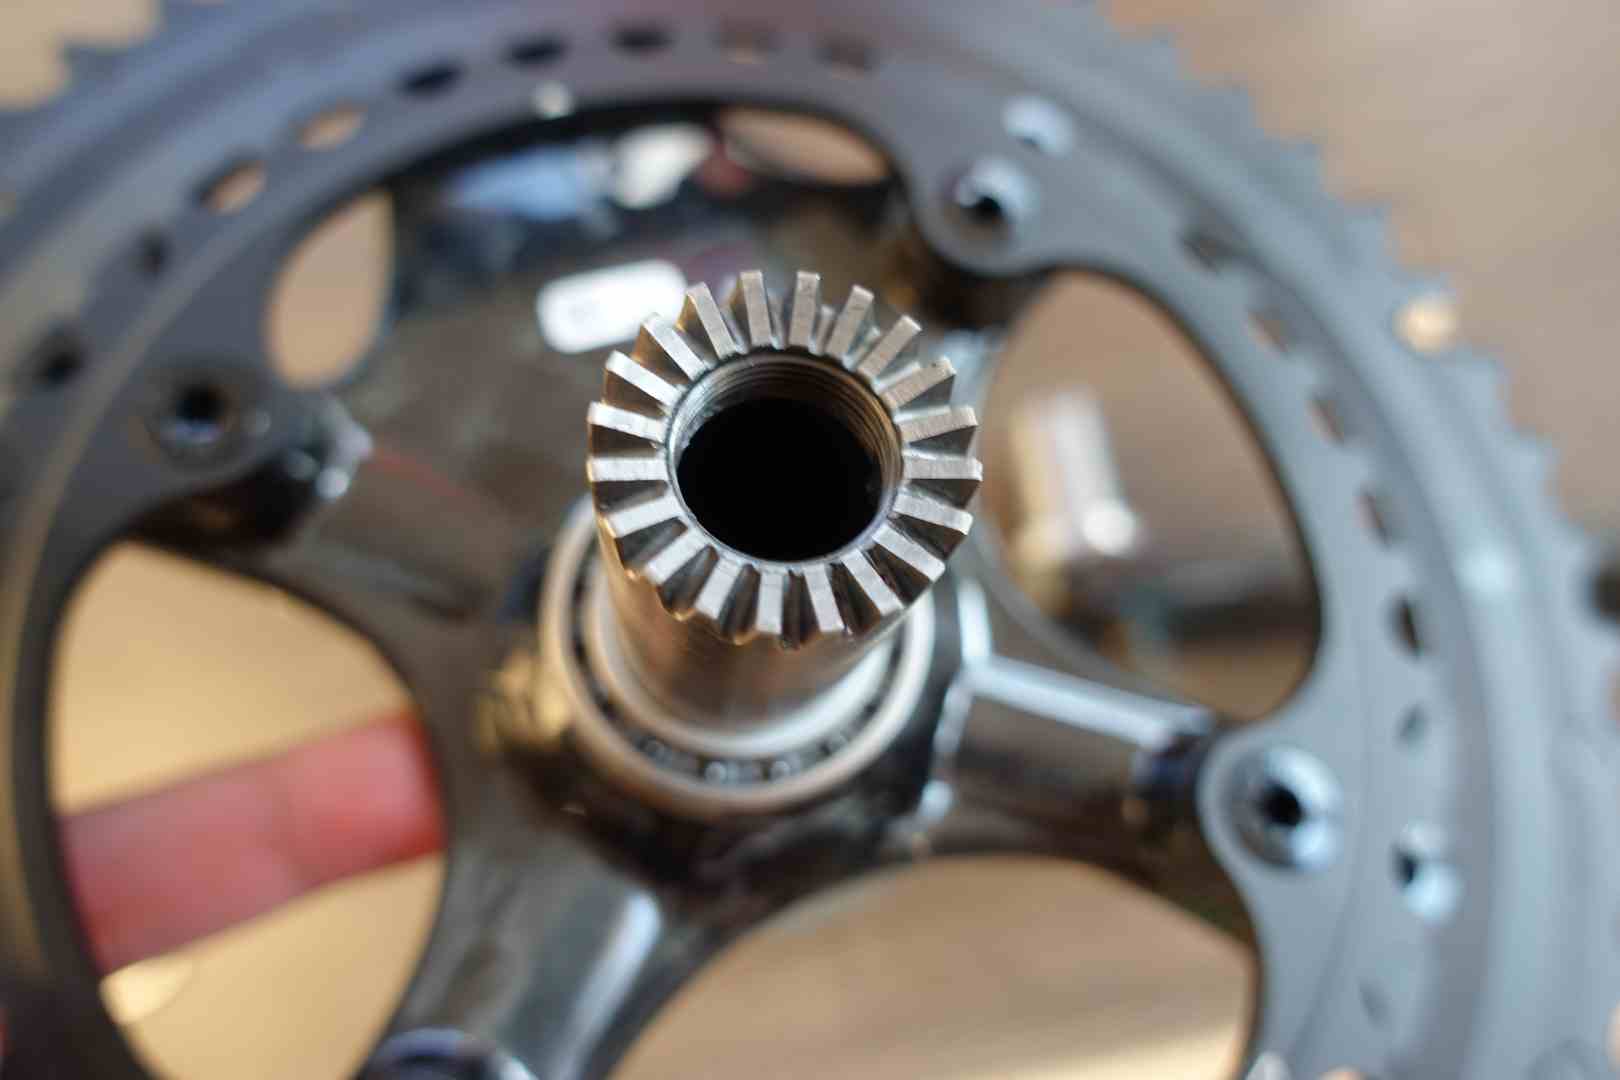
The cartridge contains a spindle; a crank bolts onto the end of each spindle. And all components are squeezed into tight proximity inside the frame.
External bottom brackets relocated the enlarged sealed bearings outside the frame and did away with the spindle into the bargain—enter the integrated crank.
A stiffer—and now hollow—spindle was fused to, or “integrated” with, the drive side crank; the non-drive crank either bolts into the spindle (SRAM style) or is secured to it by pinch bolts (Shimano style).
Campagnolo though employs a hirth joint effectively integrating a half-spindle with each crank; they mesh in the middle and are secured by a bolt that can only reached using an extra long Allen wrench.
The advantages of the external bottom bracket design come from the larger and thus longer-wearing bearings and the lighter and stiffer crank.
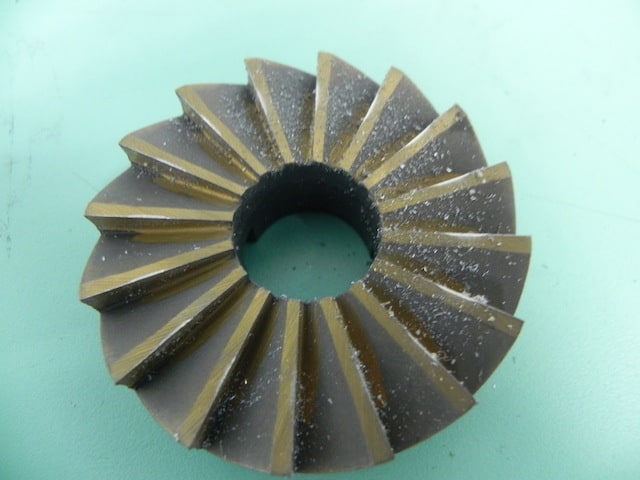
Types of External Bottom Brackets
There are a number of variations on the basic external bottom bracket structure offered by brands.
The key characteristics of these designs are that they fit a 24mm spindle and have a plastic sleeve which prevents water and grit from entering the sealed bearings from the inside.
FIRST Components specializes in offering external bottom bracket alternatives to Shimano and SRAM branded components.
The image displays an external BB that can substitute for a Shimano model.
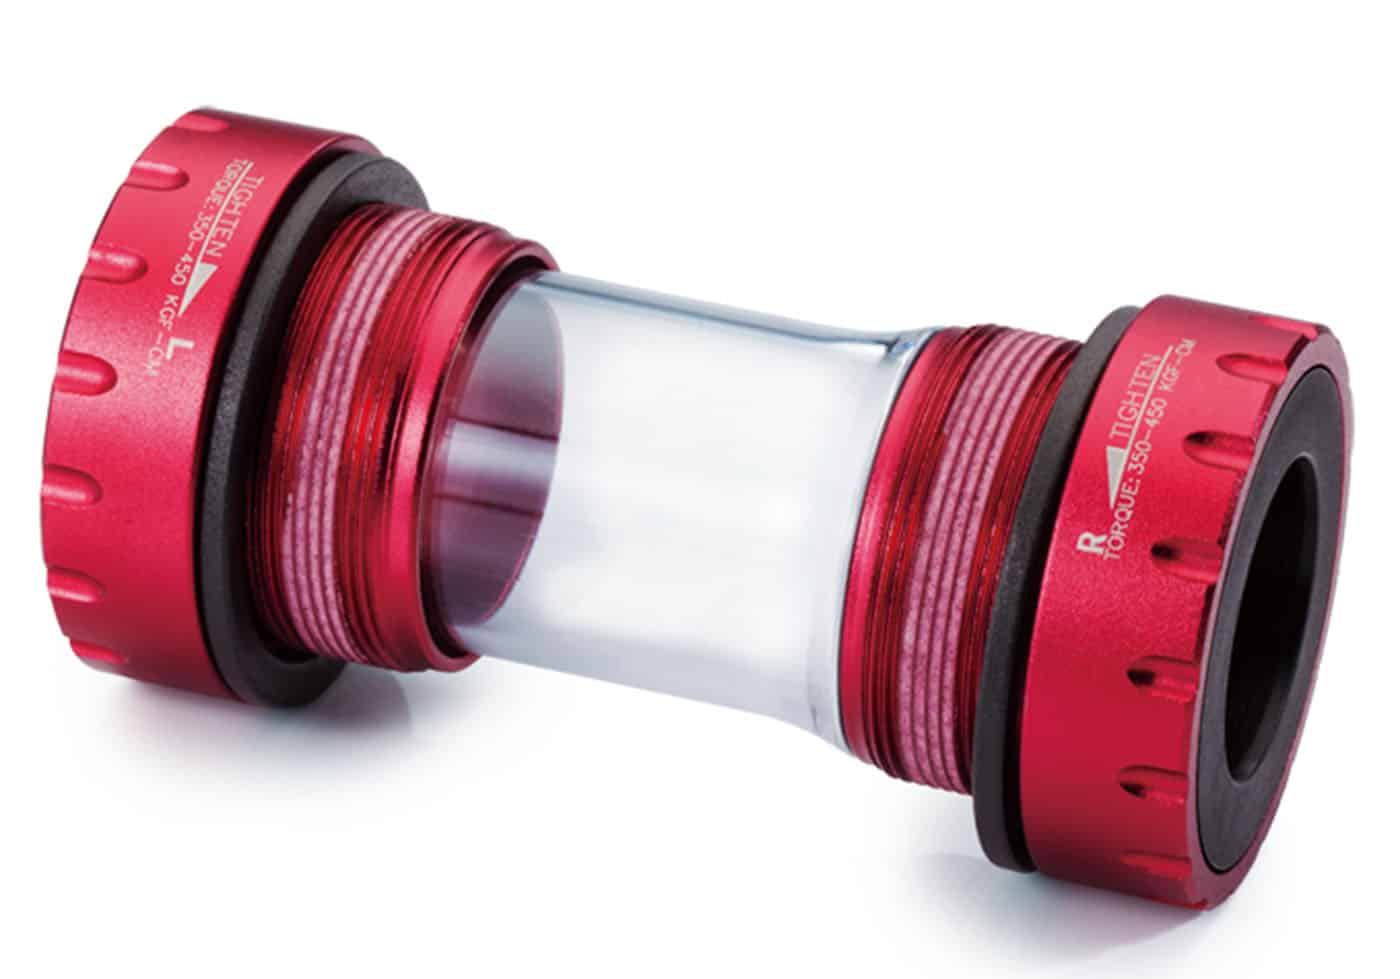
Likewise for SRAM branded components.
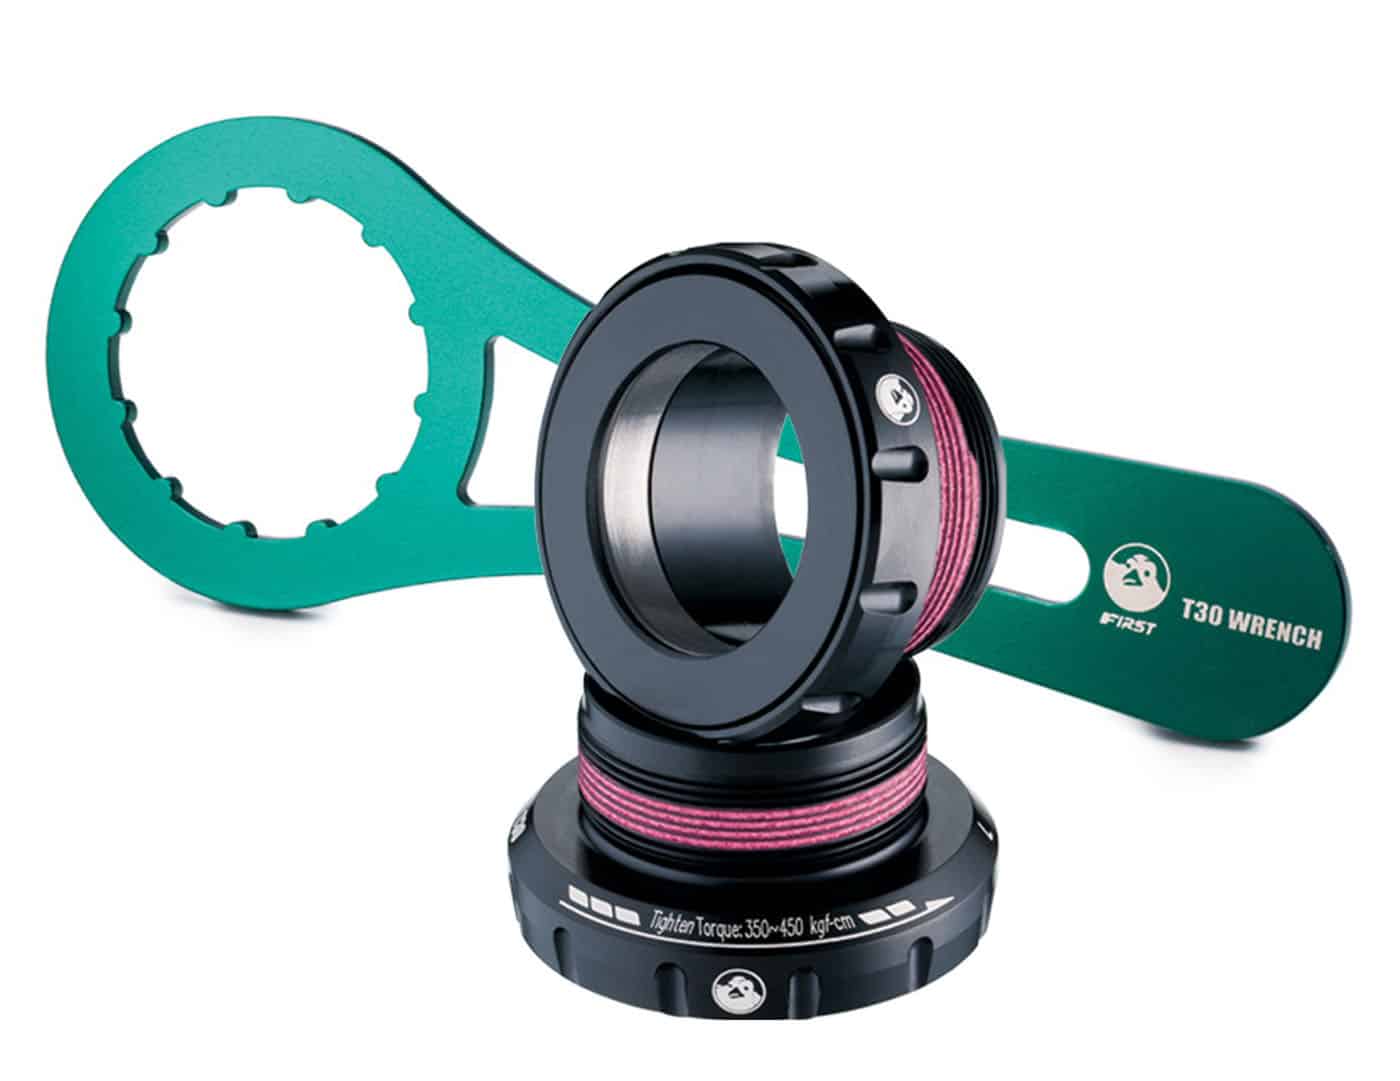
External bottom brackets were challenged by BB30 press fit designs not long after.
BB30’s key innovation was the 30mm spindle which is stiffer and lighter than the external bottom bracket’s 24mm spindle.
With the T30, a cyclist can abandon press fit and return to using an external bottom bracket yet continue to take advantage of the 30mm spindle.
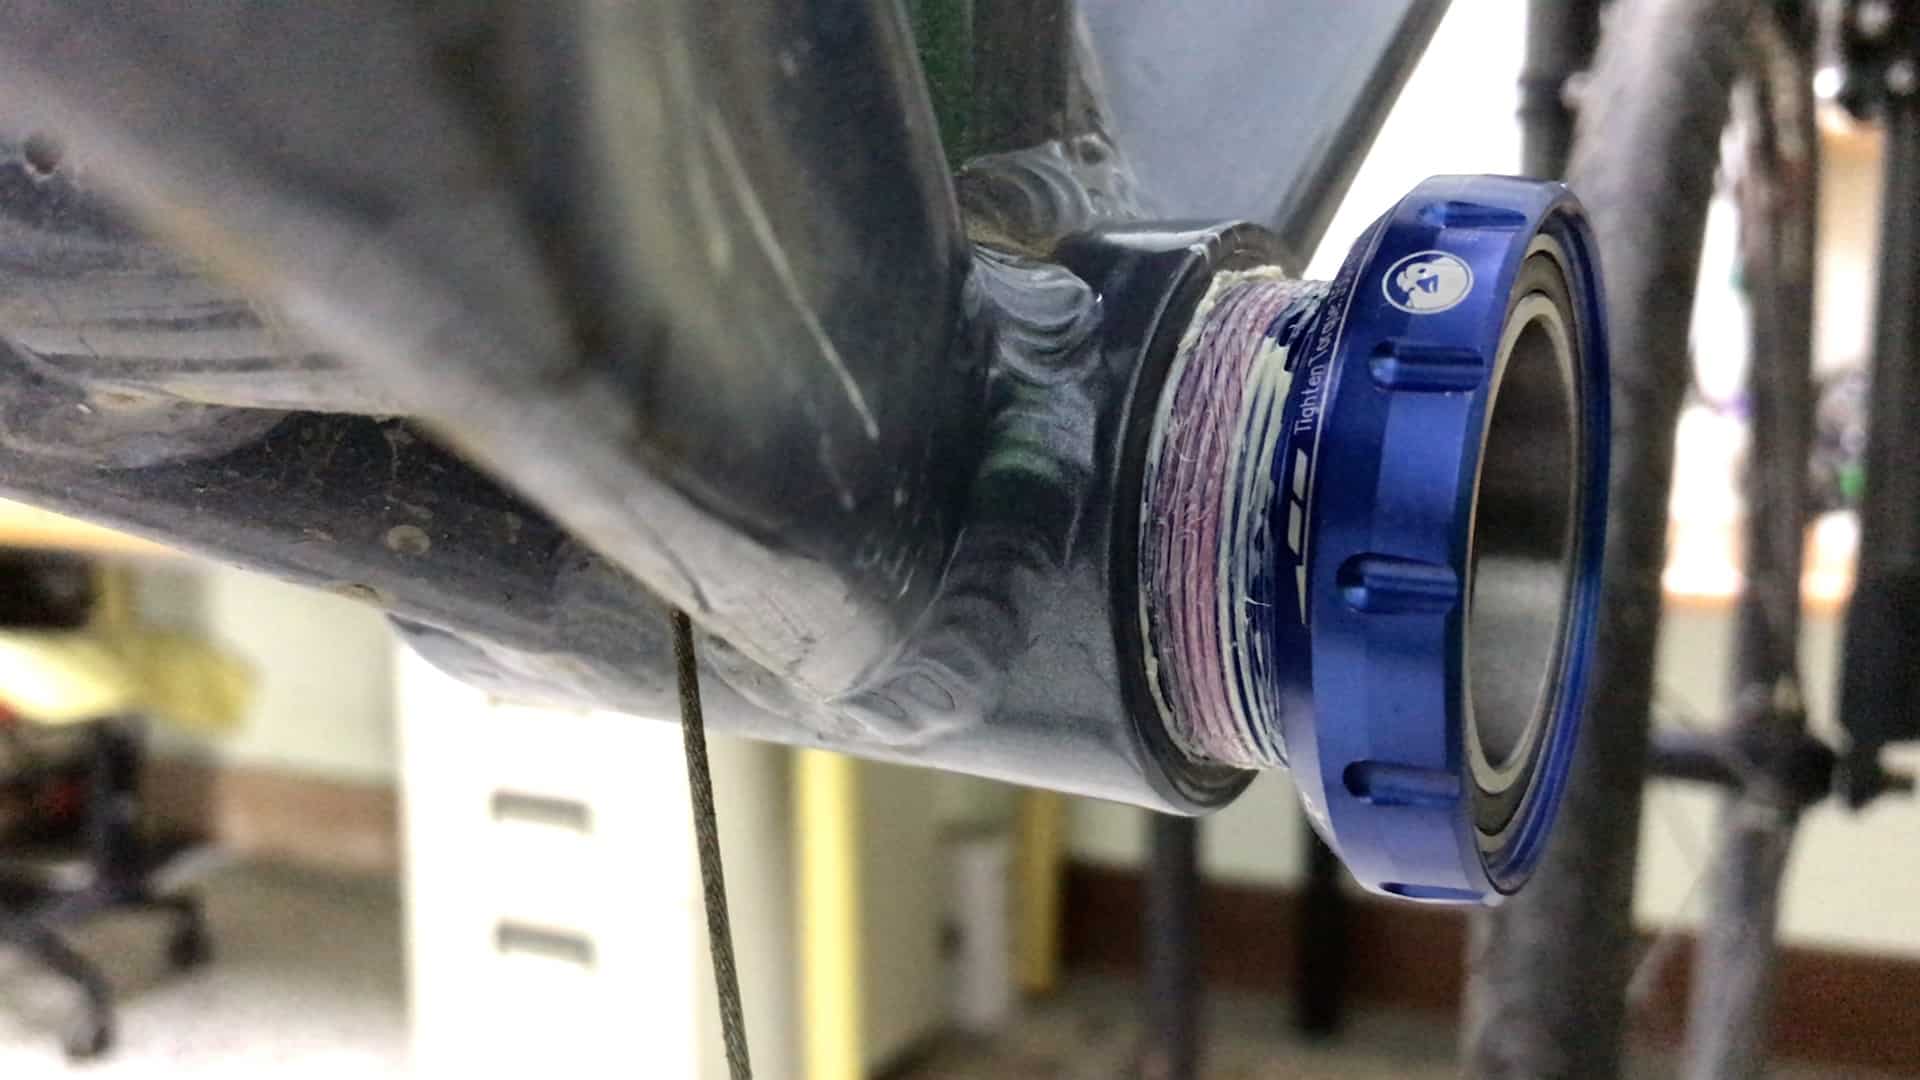
Preparing External Bottom Brackets for Installation
The last major stage in the production of modern bike frames is spray painting, decal application, then the clear coat application.
Bottom brackets shells are normally sealed with plugs to prevent overspray into the shell and thus onto the threads.
Although the plugs prevent overspray from heavily fouling the threads, the BB shell’s exterior becomes covered in a thick layer of paint and clear coat.
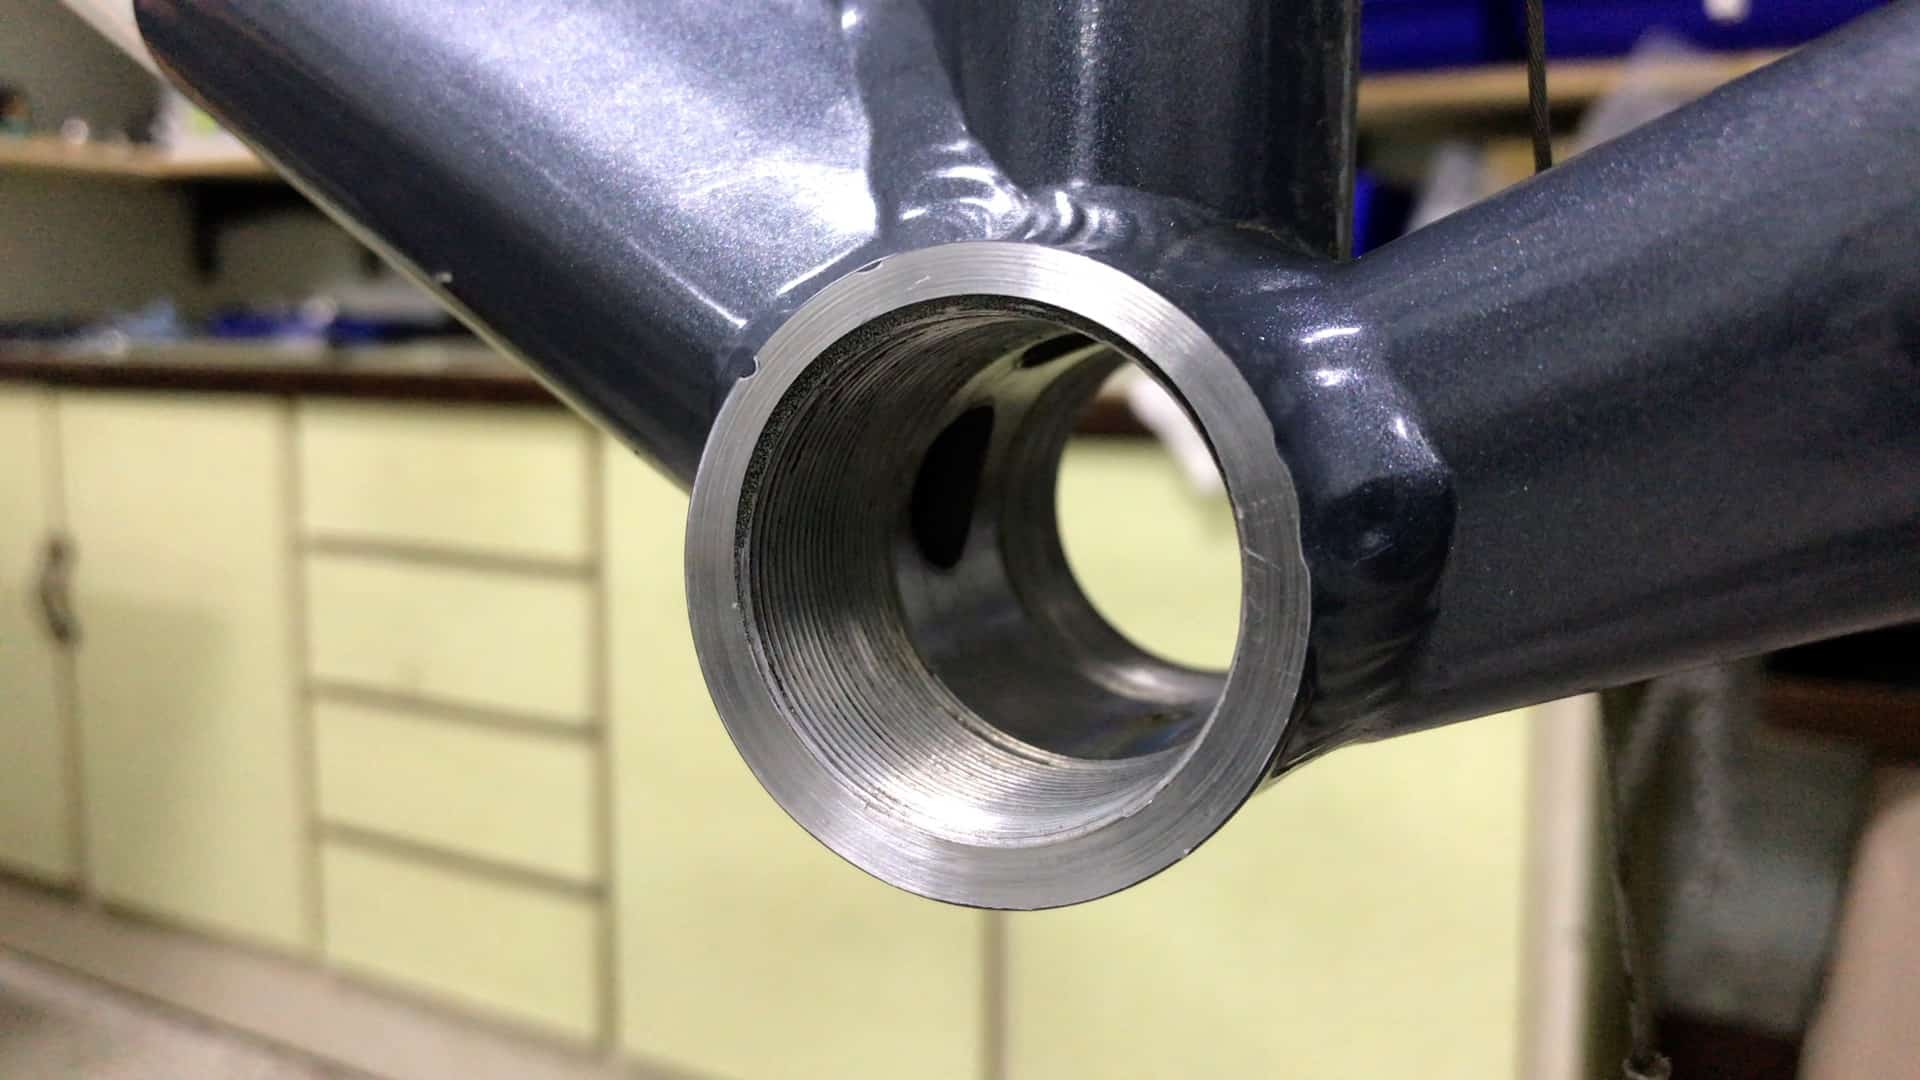
The inside face of an external bottom bracket bearing cup is machined flat.
To function perfectly in the shell it needs to fit squarely against the BB shell which is impossible on the uneven surface created by painting overspray.
The paint must be stripped back to the surface of the BB shell to create a flat surface for the external bottom bracket cup to sit squarely against.
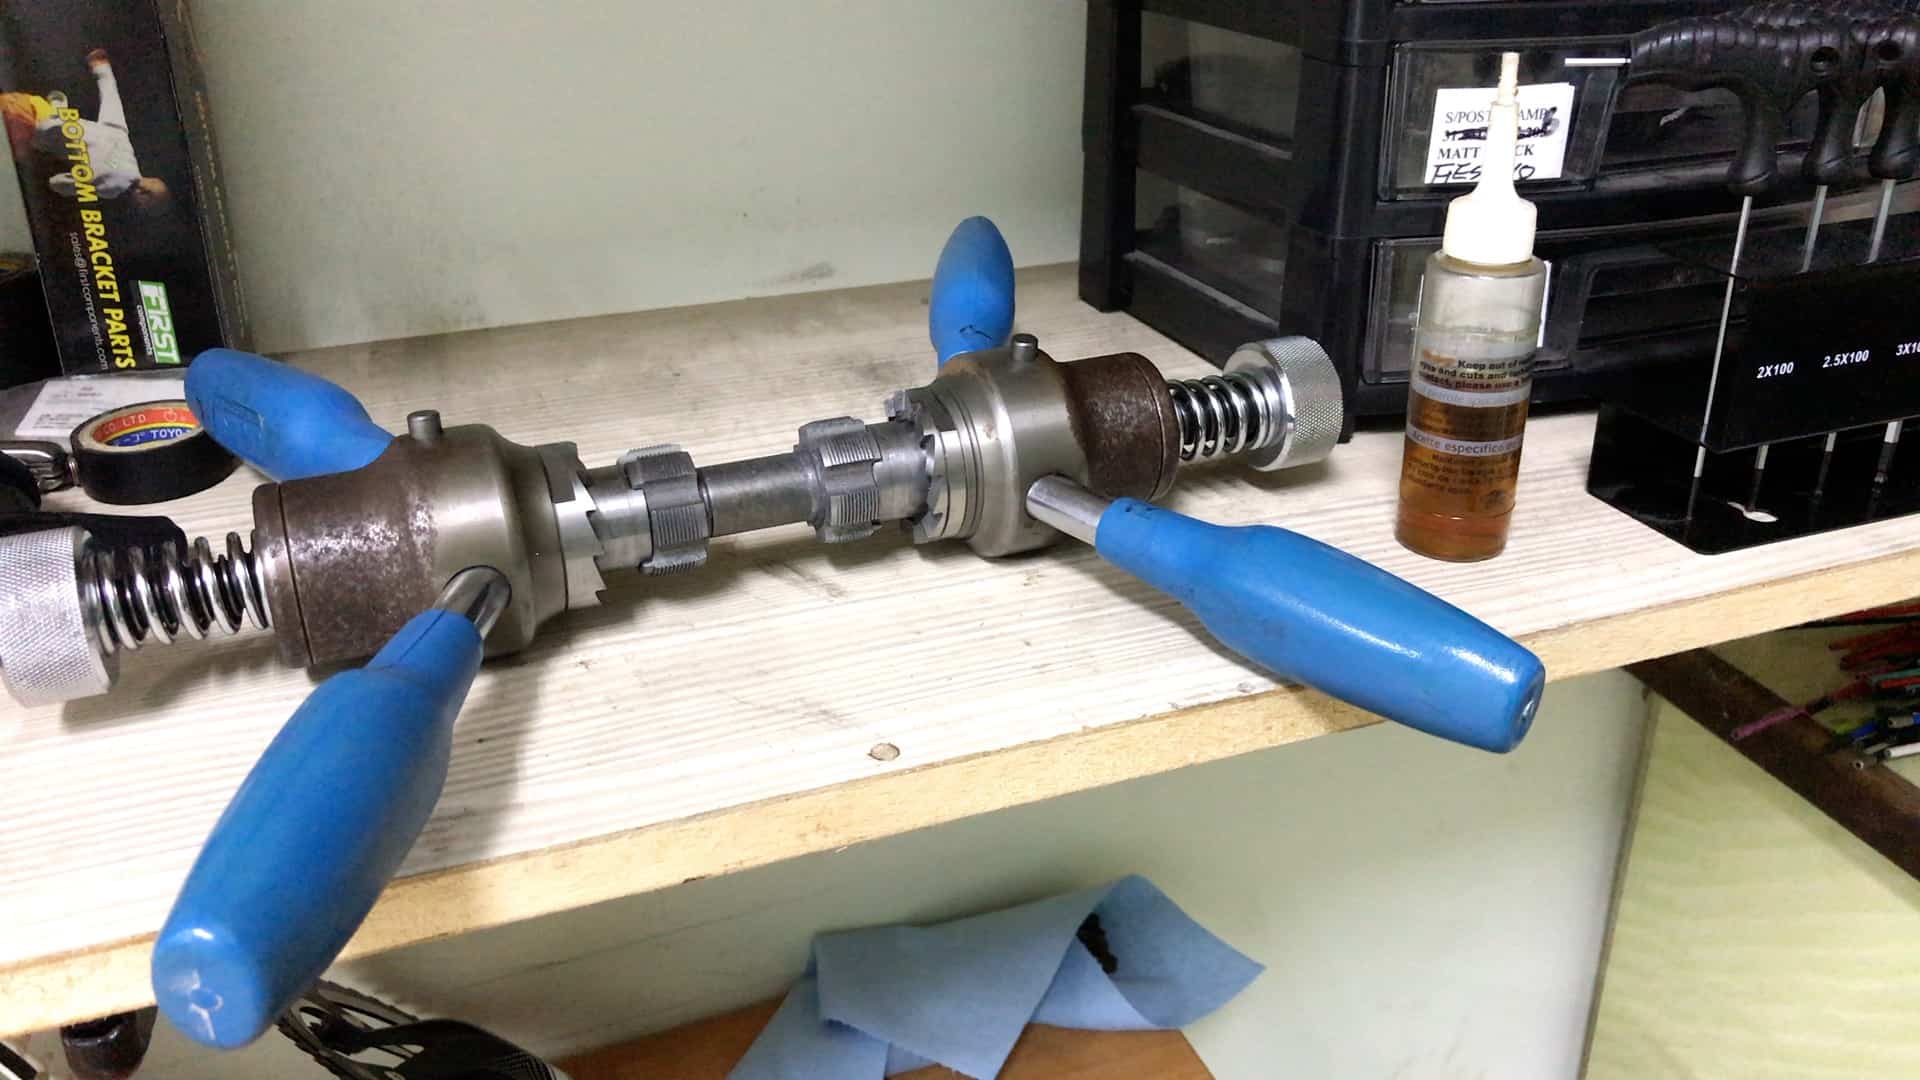
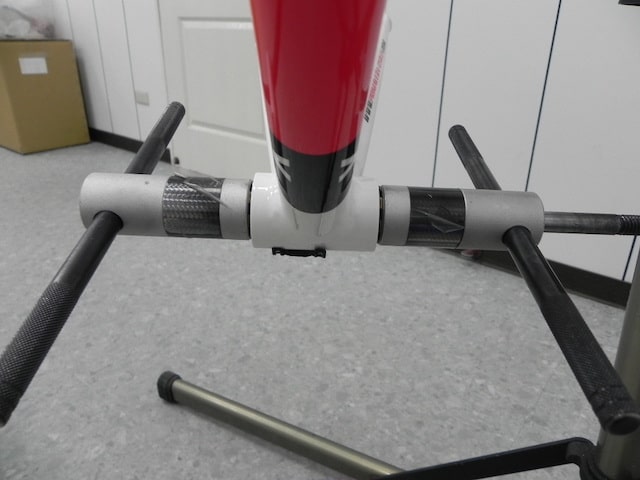
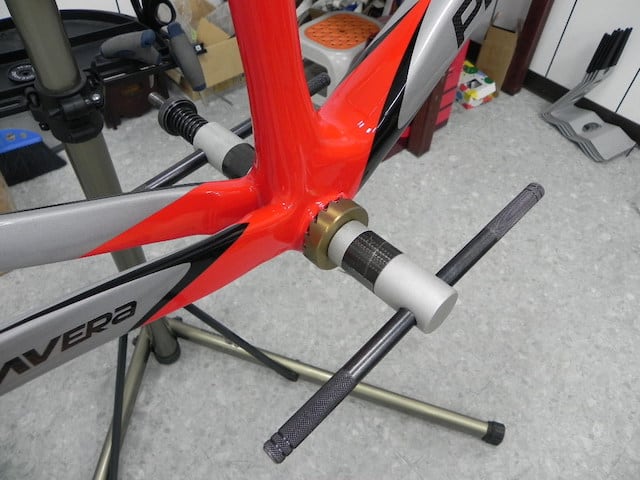
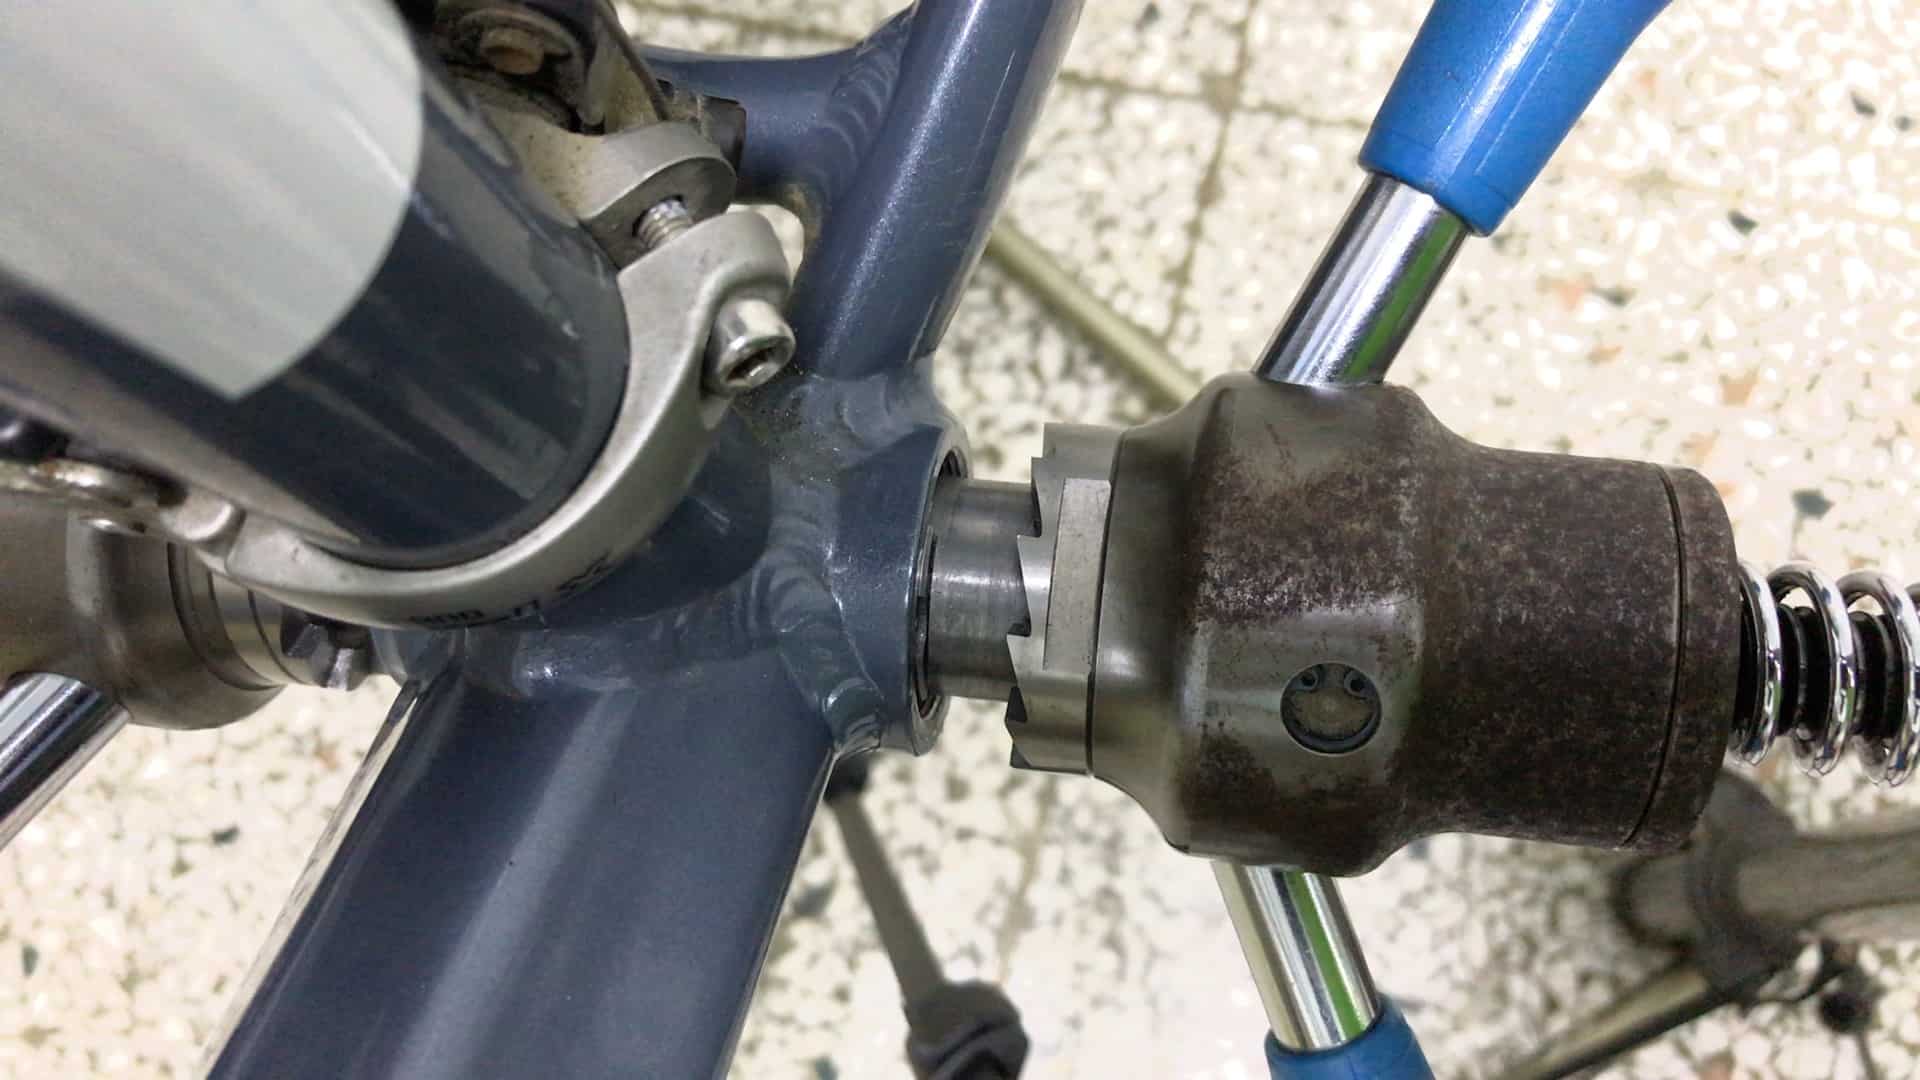
The way we create that perfectly flat surface is with a tapping and facing tool, the step often neglected by many professional and many more non-professional bike assemblers.
Facing is the procedure for removing material from the “face” of the BB shell. But before that we need to tap the threads to ensure they are clean and also to anchor the tool for the facing cutters to engage the face of the BB shell.
TAPPING
Running a tap through the threads of the BB shell before installation is not necessary but still highly desirable.
A professional bike mechanic or bike assembler preparing a frame for external bottom bracket installation should ALWAYS tap the threads.
Most frame manufacturers send frames out of the factory to have threads cut into the bottom bracket shell at a specialist workshop (as they often do for T4 and T6 heat treatments).
The procedure creates such clean and accurately cut threads that you can screw an external bottom bracket cup straight in 99 times out of 100.
Tapping the threads ensures that the slight imperfections of the occasional imperfectly cut BB shell are literally smoothed out.
Tapping is also a good idea where there is paint overspray which can make it tougher to get a cup to torque tolerance.
Cutting fluid reduces friction between die and threads thus helping to keep the die’s threads sharp.
Low cost tapping tools separate the tapping and facing functions.
The cutting dies for the left and right sides can be inserted at the same time as with this model.
But the tool only allows the cutter to be mounted one side at a time.
Home mechanics or professional shops that infrequently tap and face frames won’t be inconvenienced by having to swap the cutter to the opposite side.
If you’re doing a few frames a day, though, you’ll want a tool allowing a seamless transition from tapping to facing minimizes the fiddling around—you’ll save a LOT of time.
FACING
A pro tapping and facing tool with a cutter on both sides allows the simultaneous tapping of each side and then go straight into cleaning the faces of the BB shell.
The technique is to do this one side at a time though since you have to watch the cutting progress carefully to avoid removing more of the aluminum than necessary.
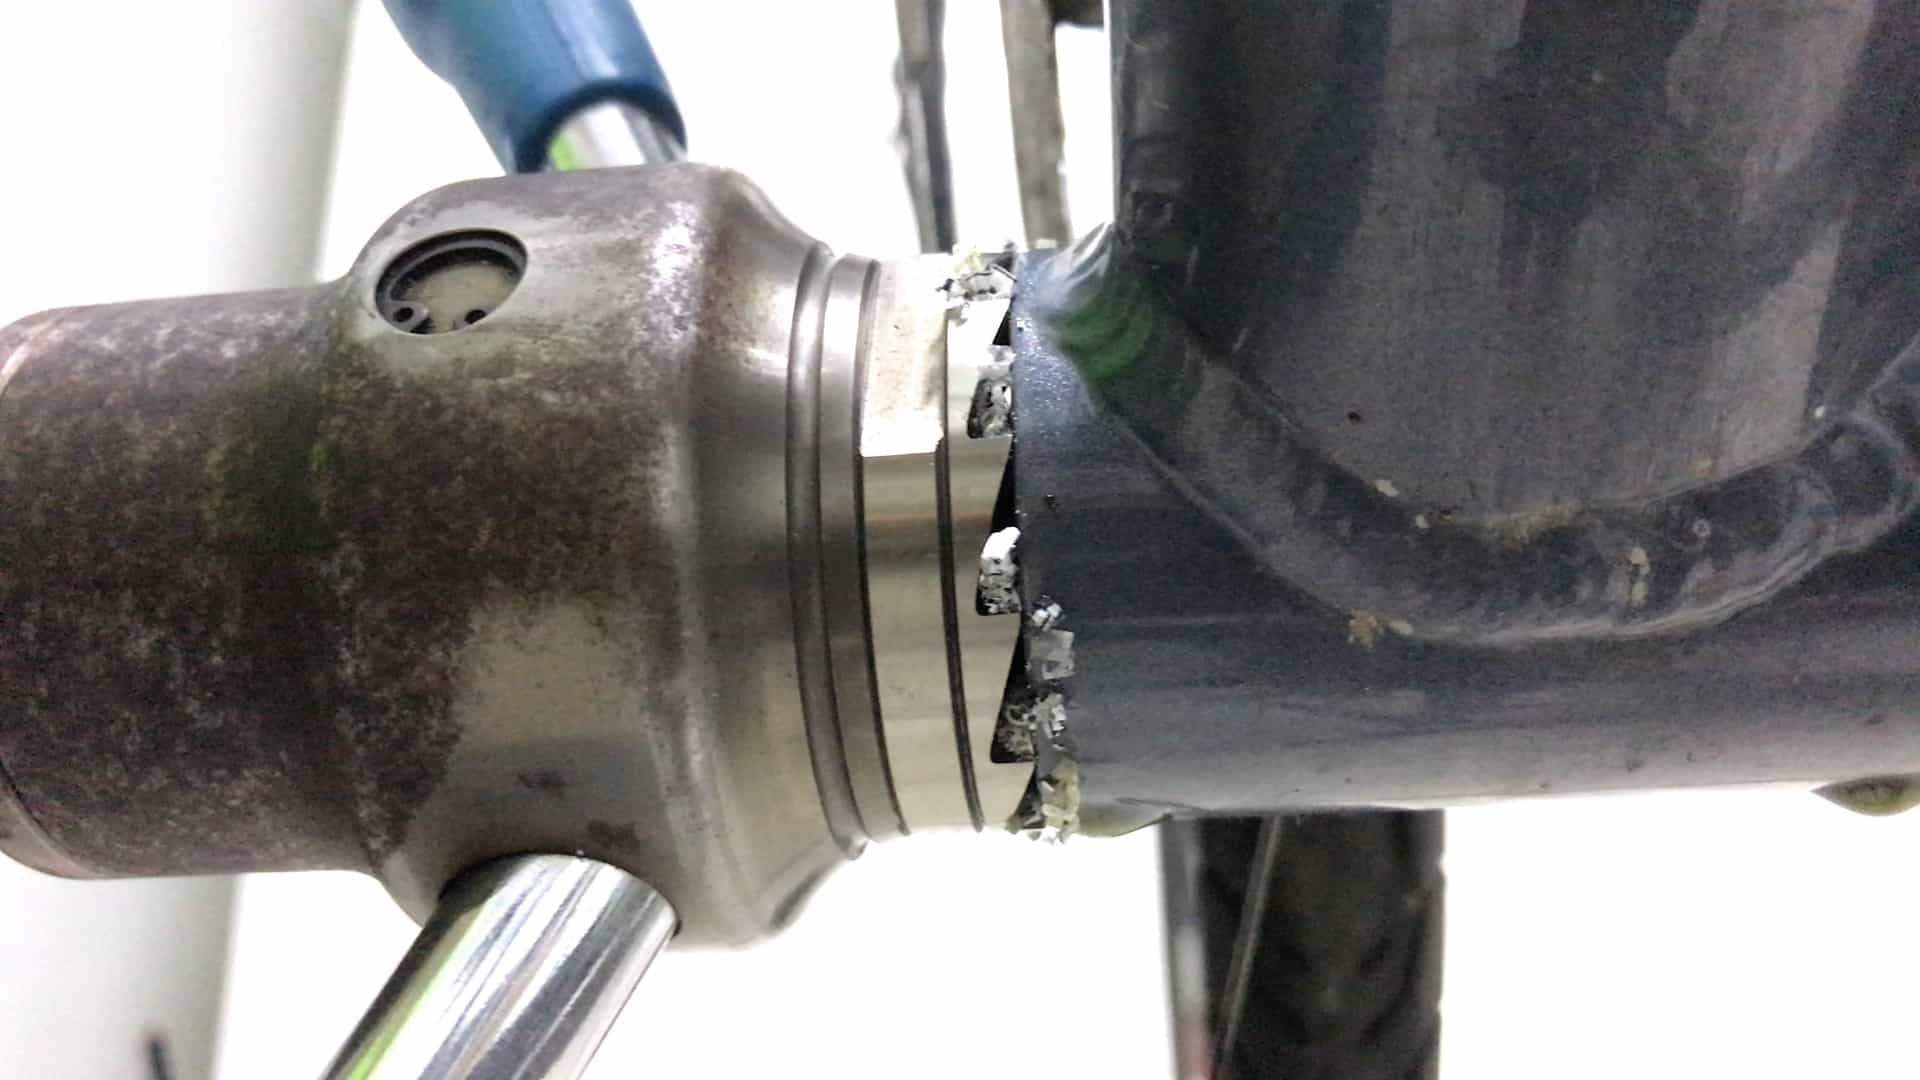
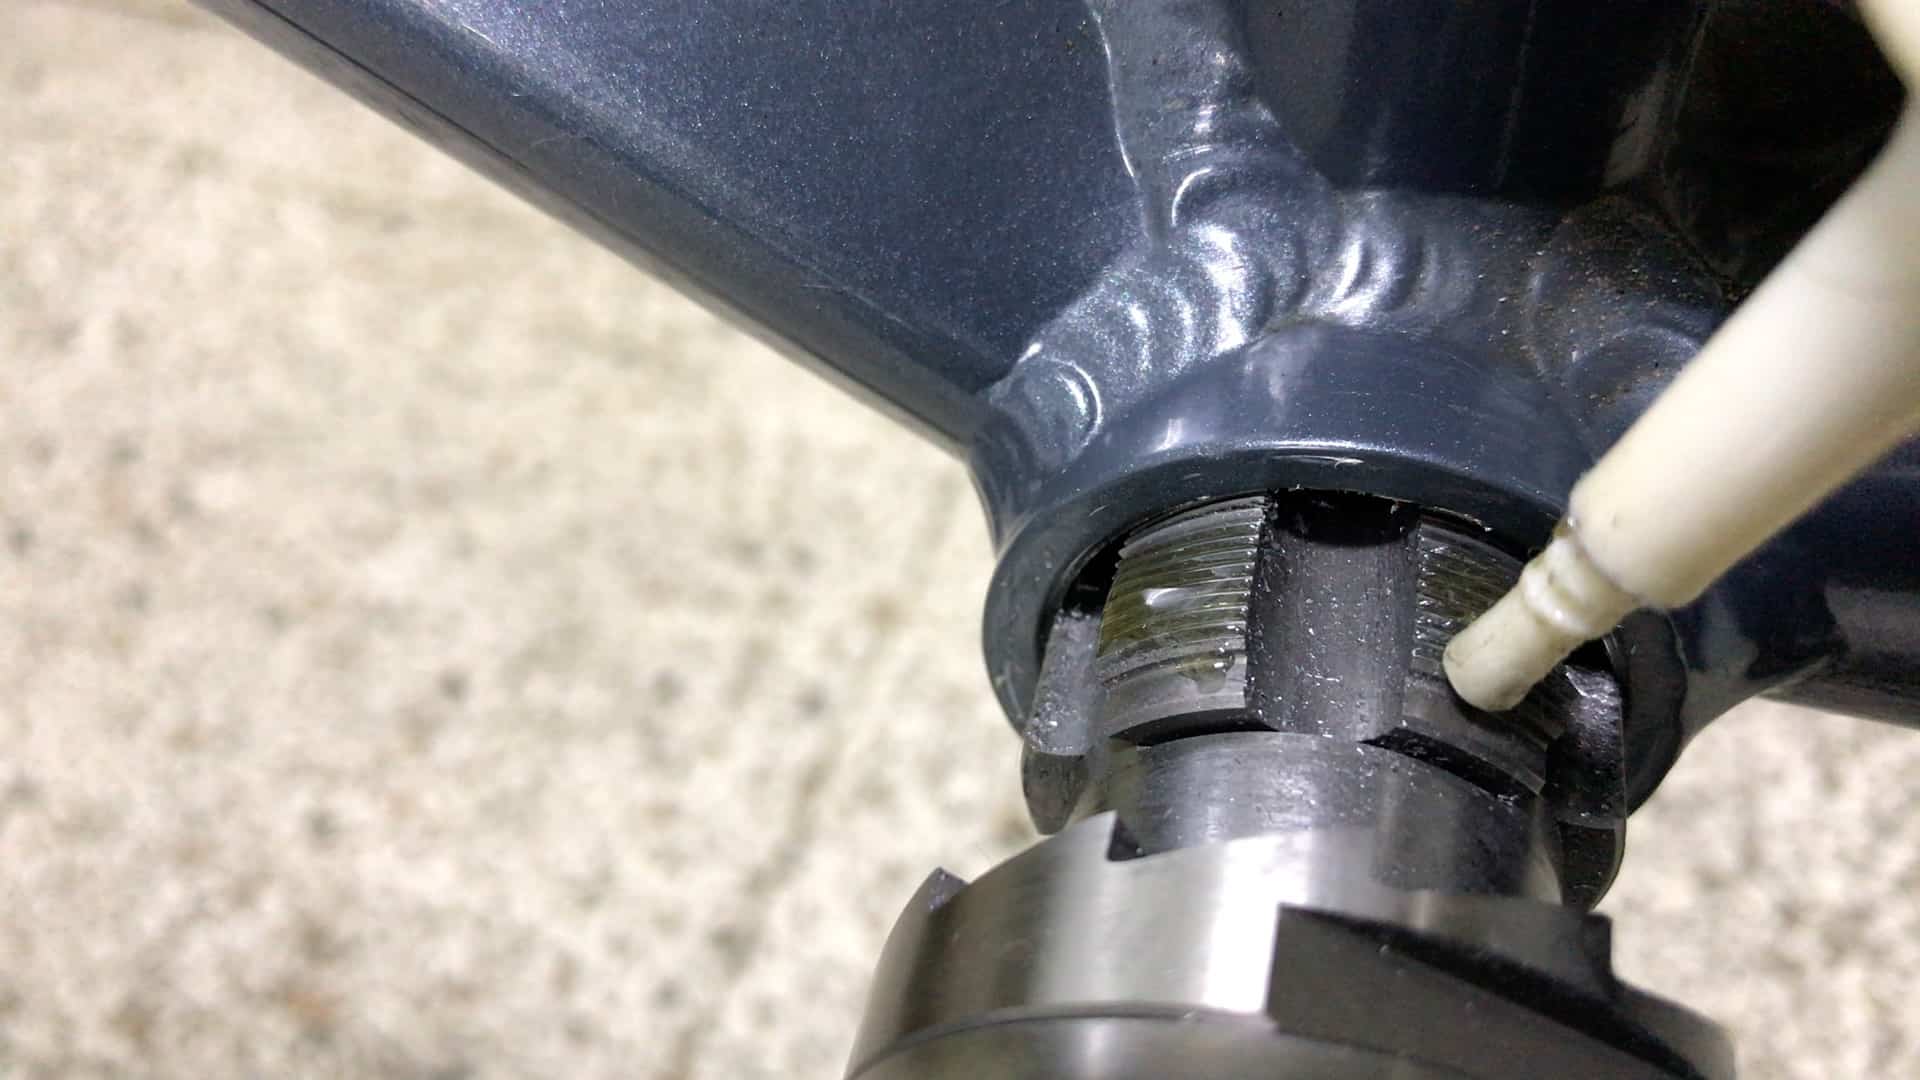
The operator clicks the release button to allow the cutter to slide into contact with the face, then adds a little cutting fluid.
Screwing the nut against the spring increases the pressure of the cutters against the face . . . which is where skill in using this tool comes in.
The nut must exert enough pressure for the cutters to begin to strip the layers of paint without cutting too deep.
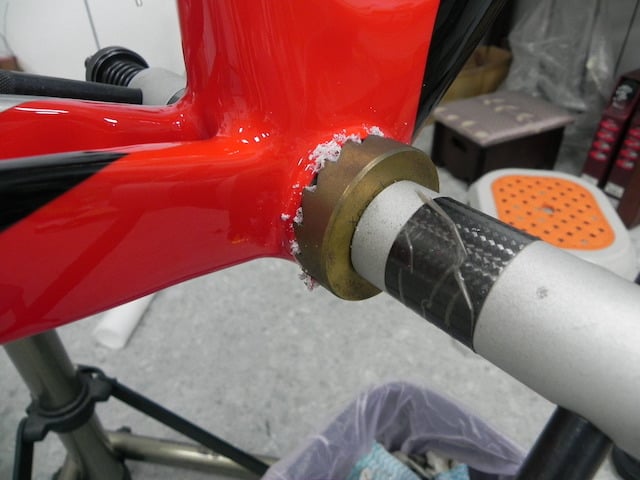
The goal is to gradually shave away the paint until the underlying alloy begins to be visible. Cut for three to four turns. Then release the nut, move the cutter away from the shell to check progress and add more cutting fluid.
The shell begins to show bit by bit which requires more frequent checks—the goal is to remove as little of the BB shell’s metal as possible.
In the final two or three turns to remove the last of the paint, it’s important to gradually release the pressure of the cutter on the shell.
If you stop cutting abruptly, the blades leave ridges and thus an uneven surface. Gradually releasing pressure ensures the surface is smooth.
INSTALLATION
Installing external bottom brackets requires the same care as with any threaded bottom bracket—avoiding cross threading the cups is the main goal, followed by tightening the cups to torque tolerance.
A layer of grease on the BB shell’s threads and the external bottom bracket cup threads is essential.
The first two to three turns are the most important. Any tightness requires extreme care since this is a sign of cross threading.
Even if you’ve tapped the BB shell’s threads, differences in the shape and dimensions of the BB shell could be the cause of any resistance (tolerances in BB shell shape and size vary amongst bike brands).
The best course of action is to remove the external bottom bracket and try again making extra sure there’s no cross threading.
Examine both the shell and the cup’s threads—a shiny surface where each has made contact with the other means the threads have been stripped.
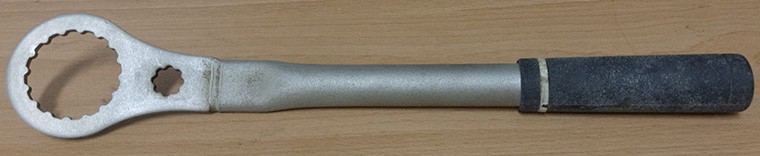
If not, continue the install. If the cup is still tight, use a long handled wrench such as this one and crank it into the shell bit by bit. The long handle will overcome the stiffness making the install a lot easier.
99 times out of 100, the cup won’t get any tighter but just remain stiff to turn.
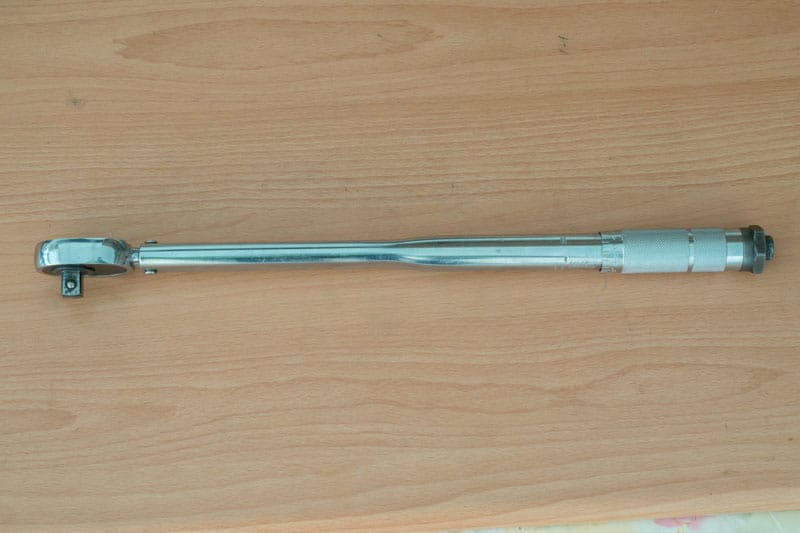
A long handled torque wrench finishes off the install—35Nm to 50Nm is the recommended range for Shimano-type cups; 47-54Nm for SRAM type cups. The torque recommendations are normally printed on the cups anyway.
REMOVAL
If an external bottom bracket’s cups have been tightened to correct torque tolerance on the install, removing them will be straight forward.
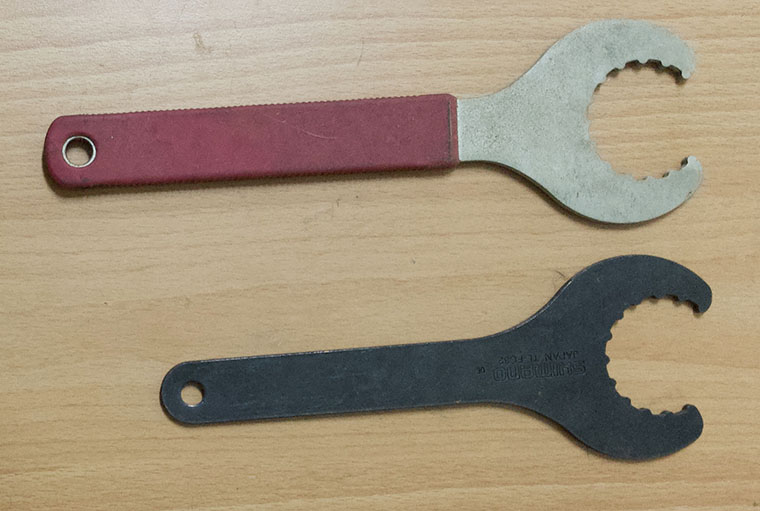
These are standard wrenches that can be used to loosen (and tighten…just finish off with a torque wrench) an external bottom bracket . . . one that has not been overtightened at any rate.
There are two disadvantages with type of wrench:
- the short handle
- the narrow contact surface of the jaws
These aspects together compound the difficulty of using these wrenches.
The narrow jaws can easily slip on the surface of an external bottom bracket cup where the trick is to keep the wrench square on the cup.
A slip can carve an unsightly scar into the relatively soft alloy of the BB cups, something that bike shop mechanics should be keen to avoid (most customers will be extremely unhappy).
The correct technique in using these wrenches is to get your body weight behind the tool and cup.
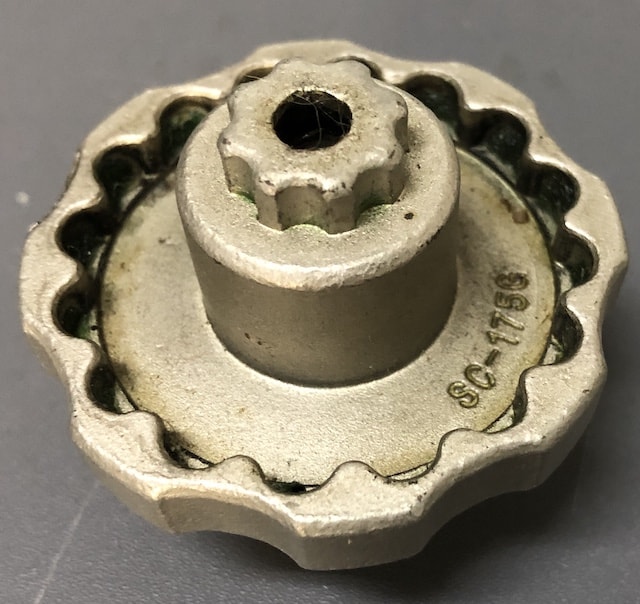
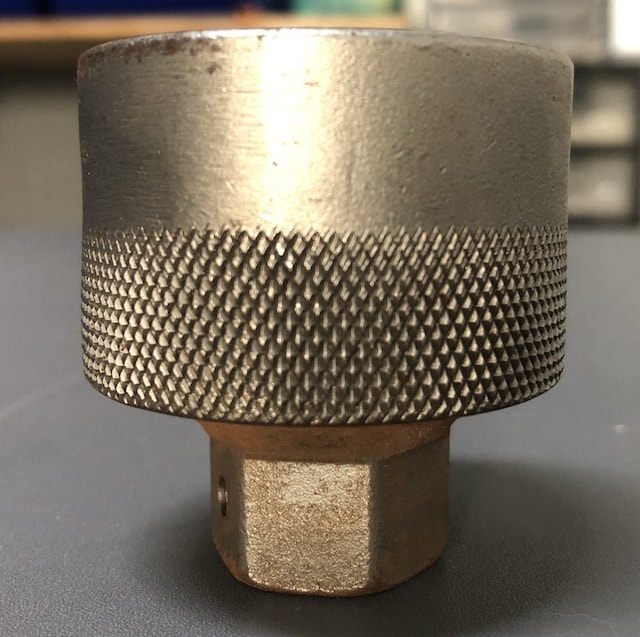
Using a socket fitted to a 1/2” drive long handled wrench is easier to use.
The long handle makes it easier to keep the socket square on the cup. The ratchet, of course, allows you to complete a removal in one smooth movement.

The crank cup bit built in adds convenience since you can do away with the plastic crank cap tool you would otherwise need to begin the crank and bottom bracket removal sequence.
The socket’s crenellated rim also makes it easy to grip in order to turn it by hand when the leverage of a long handle is no longer necessary.
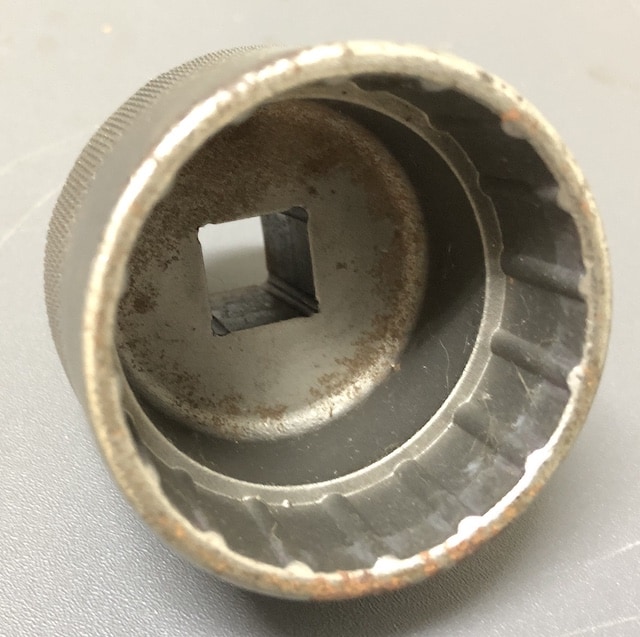
Using a socket is best—this one has 15mm of depth and so fits completely over an external bottom bracket cup.
The corrugated surface also means you only need to break a BB cup free of the BB shell before completing a removal by hand.
FINAL COMMENTS
Cartridge bottom brackets work well.
And despite gaining a reputation for developing creaks and squeaks, press fit BBs that allow the installation of 30mm (or 28.99mm) cranks also work well.
Nevertheless, external bottom brackets are easy to install and easy to remove making replacement and maintenance straight forward.
The keys to a smooth experience are
- carrying out the correct preparation procedure
- employing the correct installation technique
Get these right and you can be sure of enjoying many years of trouble-free cycling.