Is an oval chainring (or “elliptical chainring” for some) a
- technical wonder
- essential kit
- merely useful (but non-essential) or
- an over-hyped marketing trick?!
Just some of the questions we answer in this complete guide.
You’ll also find a comprehensive guide to
- installing a new crank with an oval chainring
- removing and installing chainrings
Skip to the installation guide.
Skip to the scientific research — Is the oval chainring just nonsense?
IS IT AN OVAL CHAINRING or ELLIPTICAL CHAINRING?
If you want to be exact you’ll be right on target using elliptical: an oval chainring is an ellipse.
Well, sort of.
Getting nerdy with it, a circle is a type of ellipse mathematically speaking.
By that logic, your standard circular chainrings are actually elliptical chainrings.
Everyone knows an ellipse when they see it. But just in case, an ellipse is defined as follows, in terms of the difference between a circle and an ellipse—
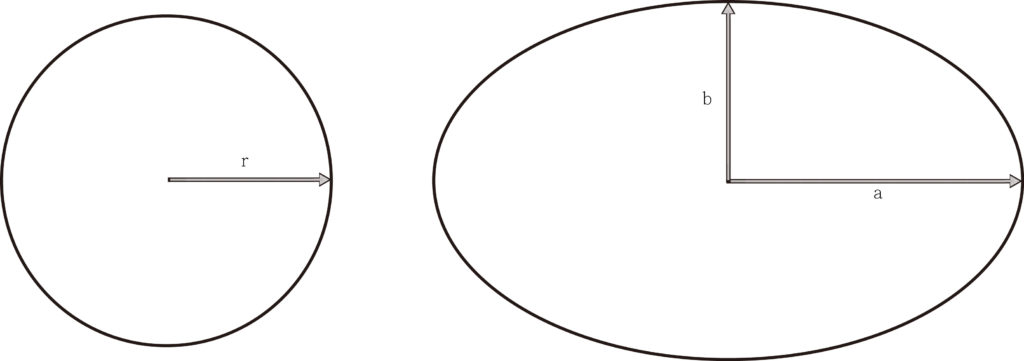
An ellipse has two radius measures—one horizontally along the x-axis (“a”), the other vertically along the y-axis (“b”).
The values differ in an ellipse. In a circle both have the same value. (ie. a circle is an ellipse where both radii have the same value).
The math is all well and good. However, since “oval chainring” is the more common term when talking about this chainring design, we’ll just stick with that.
NEW TECHNOLOGY or OLD?
This design most recently began to impact the cycling public’s imagination from around 2014.
Nevertheless, the oval chainring has been around for quite a bit longer.
Like almost every other aspect of bicycle component design, oval chainrings are not new.
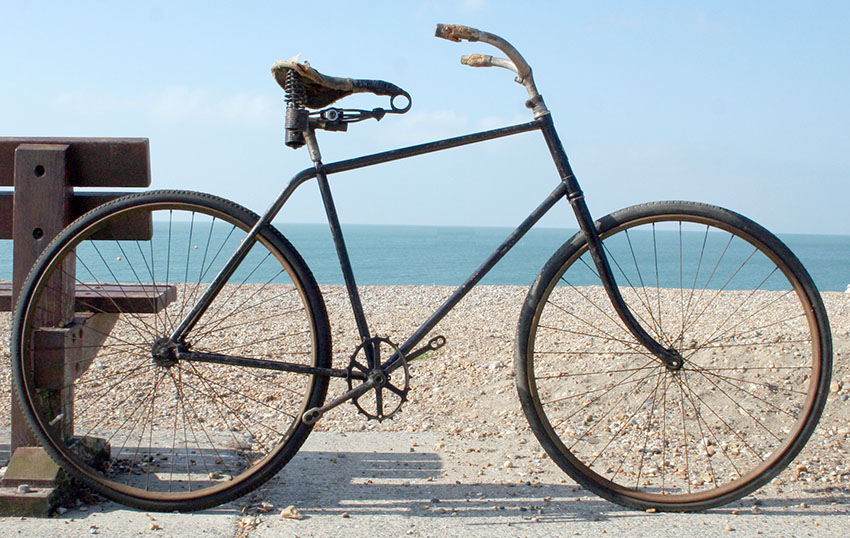
This is a 1893 model, manufactured a mere decade after the invention of the safety bicycle (Rover and Humber c.1884), the bike form we basically still have today.
A narrow-wide chainring would certainly come in desperately handy here by the way. You would have more than your fair share of chain drops combining the oval chainring with that drooping chain.
Oval/Ellipical designs have regularly appeared then disappeared over the intervening decades.
The theoretical benefits have tended to be overshadowed by (apparent) practical problems.
Shimano Biopace
One of the biggest developments was Shimano’s Biopace in 1983.

Sheldon “Better Than Round” Brown gives a clear explanation of the physics of this technology.
The bugbear of crank and chainring design is the deadspot at the 12 o’clock point of the pedal stroke. The cyclist pursuing perfect efficiency must eliminate the deadspot.
The Biopace approach was to obtain the greatest transmission of power at the dead point—getting rid of it by embracing it.
By the early 1990s Biopace was declared a failure after an evolution culminating in Biopace HP (High Performance).
The failure was largely due to a communcation/marketing problem that arose. Recent hard evidence*, however, proves Biopace indeed provides the technological edge it promised.
*The study was online until recently and linked to from here. It has since disappeared.
WHAT ARE THE BENEFITS OF AN OVAL CHAINRING?
The benefits and the disadvantages have been well documented over the years.
Great in Theory
The targeted benefit is sound in theory which goes something like this …
A perfectly circular chainring has just the one radius and uniform curvature. Being an ellipse, an oval chainring has not one radius but two which defines the non-uniform curvature.
The large radius drives or pushes the chain when the cranks are horizontal.
Greater pedal efficiency is achieved when the cranks are horizontal allowing you to push a higher gear.
The smaller radius when the cranks are vertical pulls the chain giving you a lower gear—you get past the dead spot sooner.
The important point to note is that an oval chainring does not give you more power. You simply achieve higher pedal stroke efficiency. Physically you are working less thus saving energy.
The noticeable effect on your power output will be a smoother delivery of power, or more exactly, of torque, to the rear wheel.
Quite apart from the physics is what you actually experience as a cyclist.
A circular chainring delivers an uneven pedal stroke. You can really feel the effect by unclipping a shoe from one pedal (for those using cleats). Your cadence becomes jerky and irregular.
Problems in Practice
Stress on the knees has been a commonly reported problem.
This is a big deal since the action of cycling is therapeutic for both backs and knees. Got a bad knee? Get on a bike . . . but avoid pushing a high gear.
If your knees are fine to begin with, a good cadence is where you maintain rhythmic circular motion with slight resistance.
Your knees will stay in good shape. (Engage a granny ring or a super-large cog on those tough ascents).
Trying to push that high gear is a classic knee stressor, completely negating the therapeutic benefits of cycling.
You effectively engage a higher gear when the cranks are horizontal. To compensate for the increased resistance you’ll push too hard. Voila! Knee stress.
Additionally, the (equivalent) low gear you push, when the cranks are vertical, means that your knees are moving faster through the change of direction, going up to down and down to up.
Knee acceleration through that change gives a whiplash effect. This alone puts many potential users off oval chainrings forever.
DOES AN OVAL CHAINRING MAKE A DIFFERENCE?
There is scientific evidence for and against the scientific (objective) effectiveness of an oval chainring. The evidence in favor of the effectiveness of oval chainrings is strong.
If you are interesting in going into the subject in greater depth, here are some rigorous scientific studies that explore the issues:
Cycling performance improvement with oval chainrings after 1 year of adaptation.
Seven male recreational road riders riding between 3000 and 10000 km a year and who were using non-circular chainrings for at least one year were put through tests. The conclusion was that cyclists using oval chainrings for an extended peirod seemed to adapt to a better pedalling technique that results in improved performance.
Physiological responses during cycling with oval chainrings (Q-Ring) and circular chainrings.
Using these rings did not significantly improve maximal power output and VO2max. The slight tendency towards improvement in power output when using the oval Q-rings (increase of 2.5–6.5 % relative to circular chainrings) that was measured suggests that Q-rings could result in slight improvement during on-road cycling performance.
Knee Joint Forces in Cycling at Two Workloads with Circular and Non-Circular Chainrings.
This study that suggests that reported knee problems may have nothing to do with use of non-circular chainrings.
At the end of the day it’s probably as much about the ride and how you feel when cycling with an oval chainring.
The moment you begin using one you will definitely notice a difference.
The questions you’ll face are
- can I get used to the new sensation?
- does it feel like the quality of my ride is enhanced?
HOW TO INSTALL OVAL CHAINRINGS
In this section we
- remove a standard crank (technically a compact crank in this case)
- install a crank fitted with oval chainrings
- change the oval chainrings to semi-oval
The video covers the process in detail. Check it out or scan down this page. We highlight the key elements in what follows.
Whether you install a semi-oval or fully oval chainring, taking the crank off is the easiest method.
Crank Removal 1—The Chain
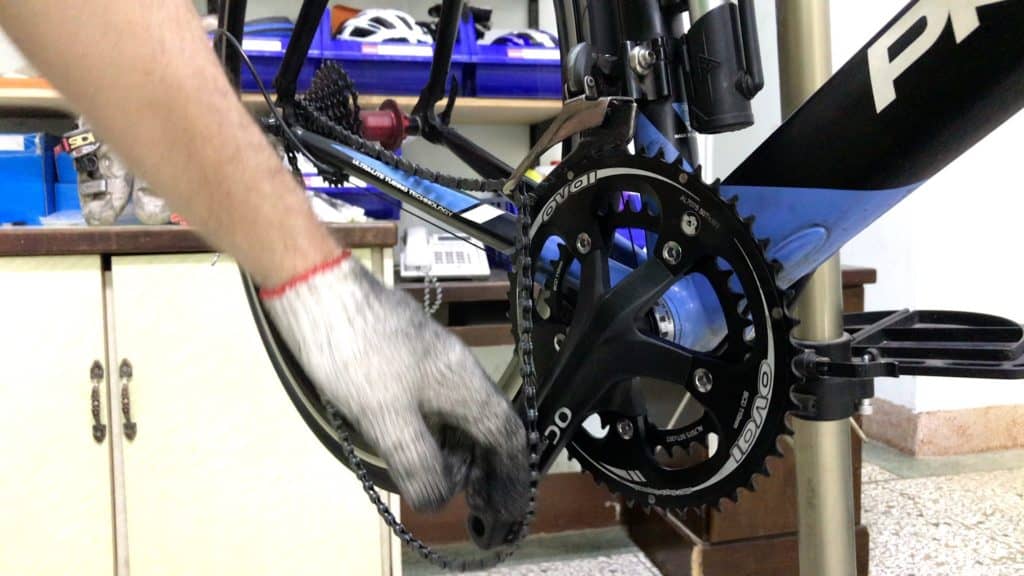
Removing your crank means removing your chain.
For speed, convenience and efficiency nothing beats having a quick release link installed.
None of this fiddling with connecting pins and a chain “cutting” tool. Simply open the link, then remove your chain.
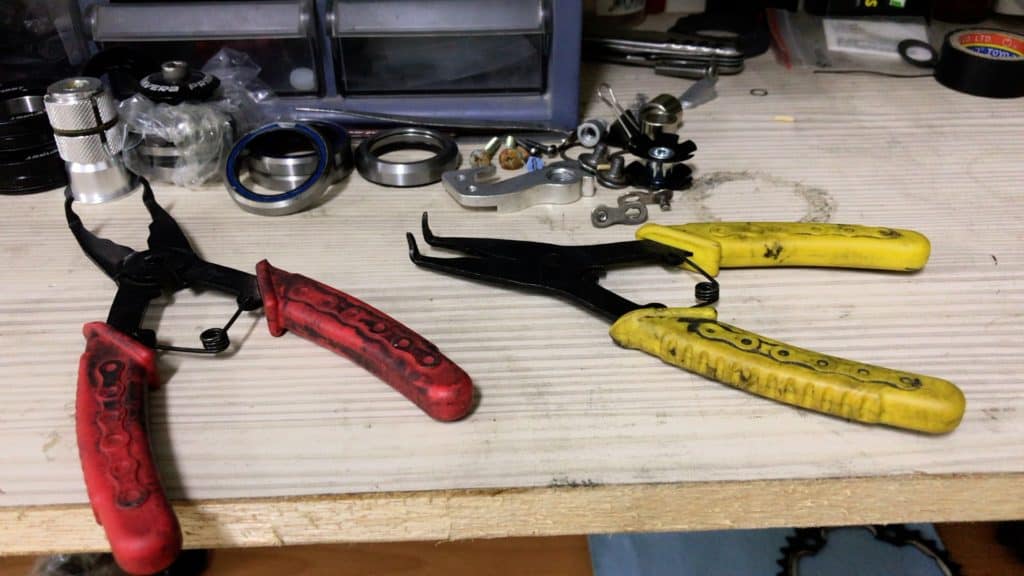
You’ll want the right tool, though, since the modern QR link locks into place. Locking and unlocking is only clumsily accomplished by hand.
Head over to Amazon and look up “master link plier”.
You won’t find any tools like the red and yellow above which allow you to engage the link horizontally though.
All commercially available tools appear to be exclusively designed for vertical use.
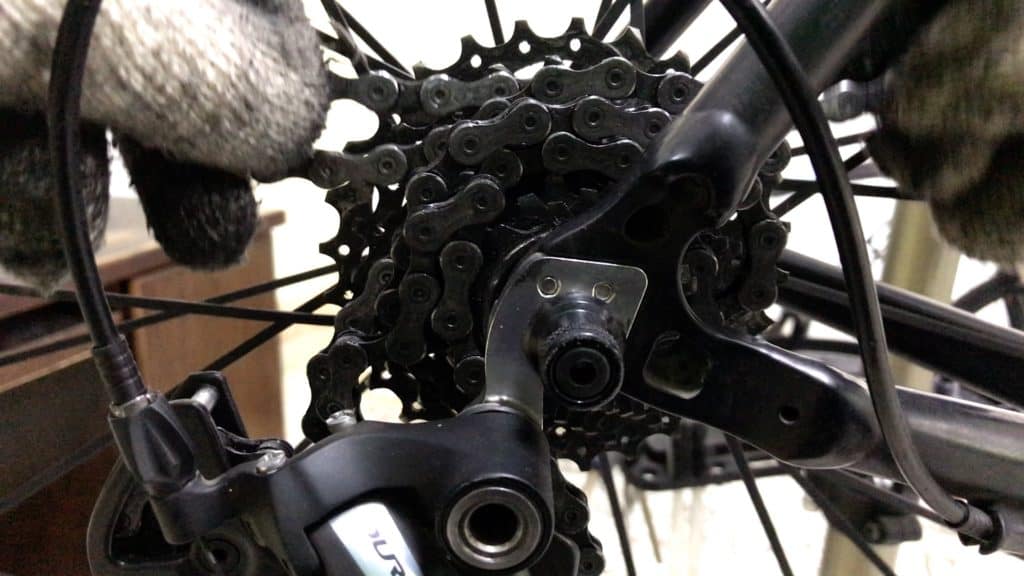
An alternative to removing the chain from the derailleur cage (you have the hassle of threading it back in later) is fold it over the cassette.
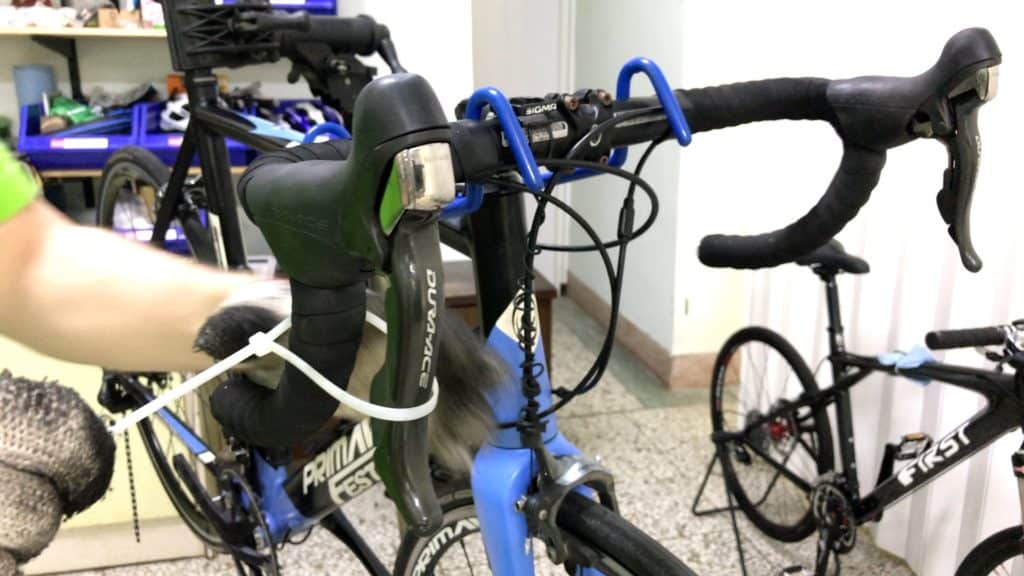
To prevent the back wheel rotating and sending the chain to the floor, zip tie the brake lever, locking it down.
Crank Removal 2—The Crank
Loosen the pinch bolts a little in turn.

Pro Tip: When tightening or loosening crank pinch bolts (or stem bolts for that matter), always tighten or loosen in increments.
A crank arm fixing bolt removal tool is harder to come by. Still, the bolt should not be tight. The maximum torque recommendation for these is normally around 1 nM.
That just leaves the safety plate. Once you move that forward, the crank slides off easily.
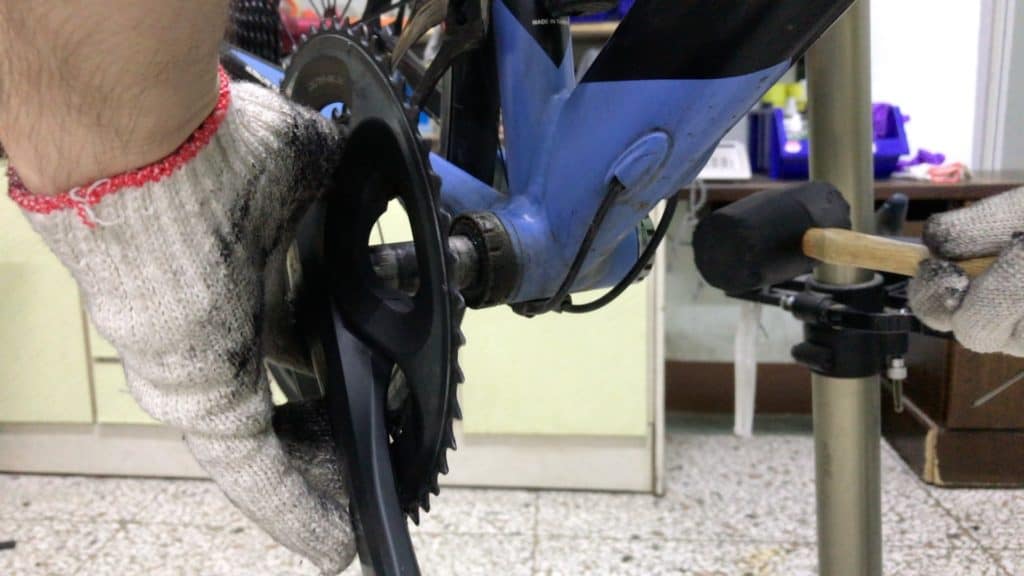
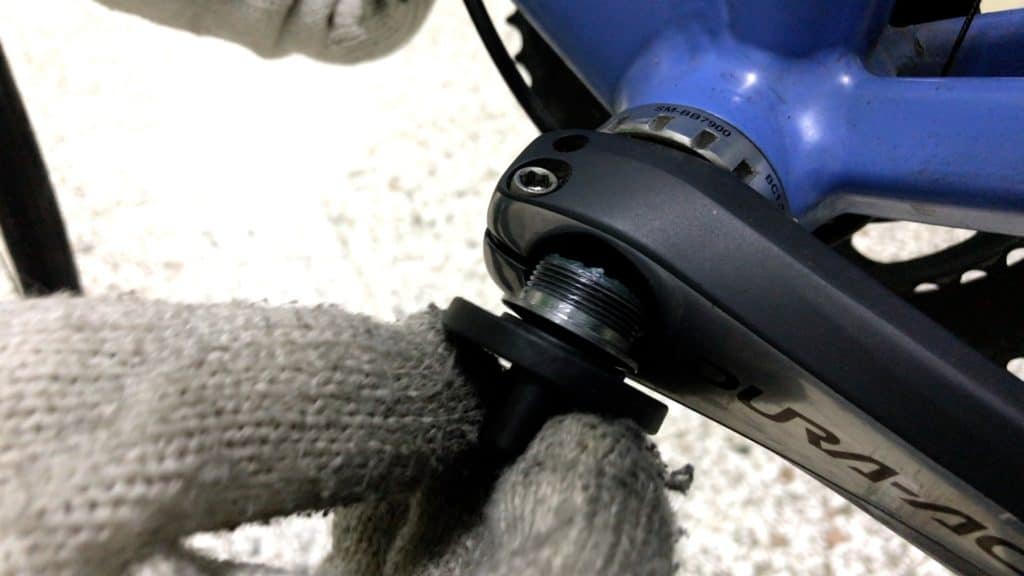
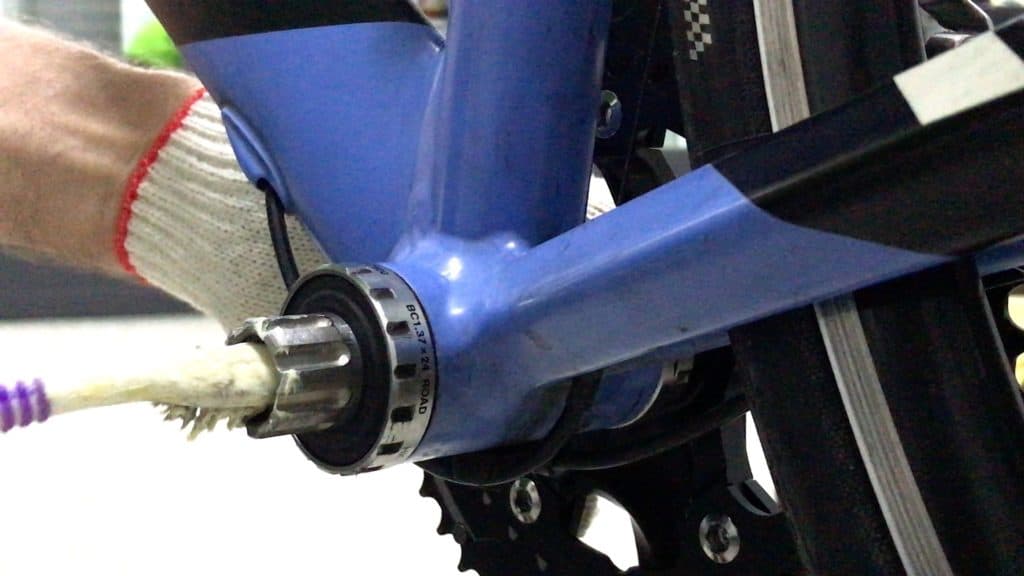
Cranks fit precisely to their respective bottom brackets. That can mean a light tap with a rubber mallet to break the spindle free from the BB’s grip.
You can use a ball peen hammer. Just be sure to cushion the spindle’s end with a thick cloth or pad to avoid direct metal-on-metal contact.
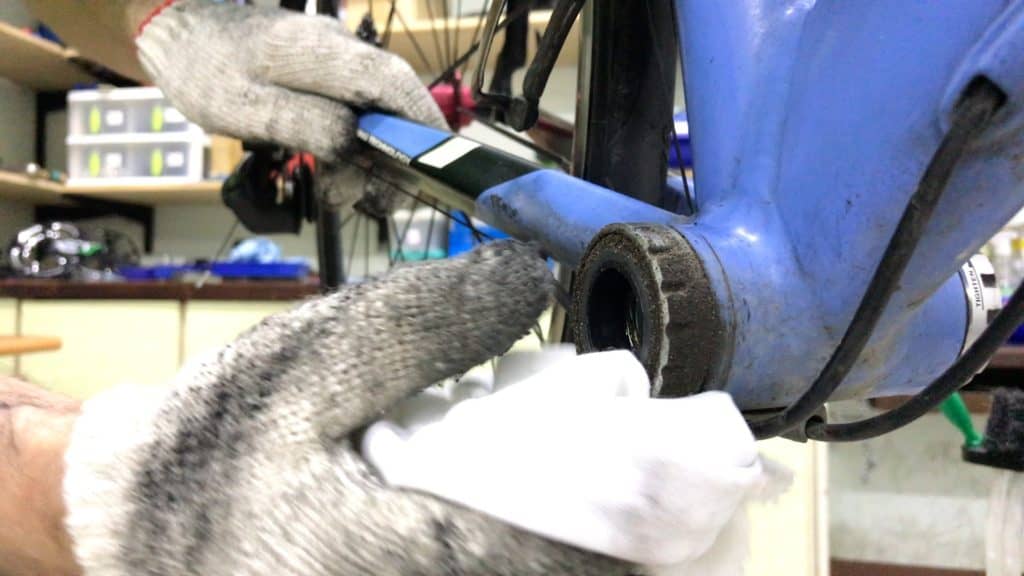
A good opportunity to clean accumulated grime from around the bottom bracket prior to (re)installation.
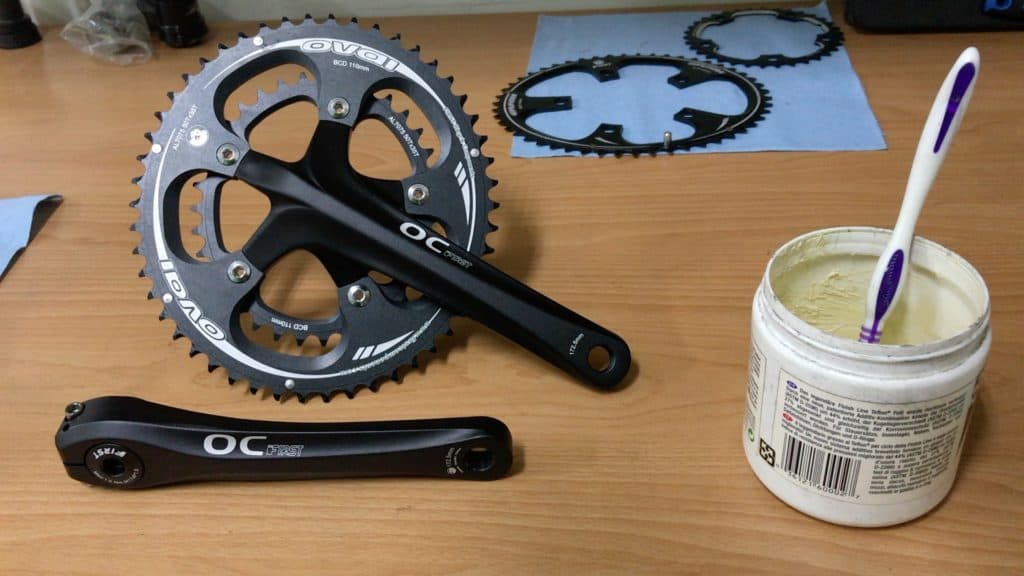
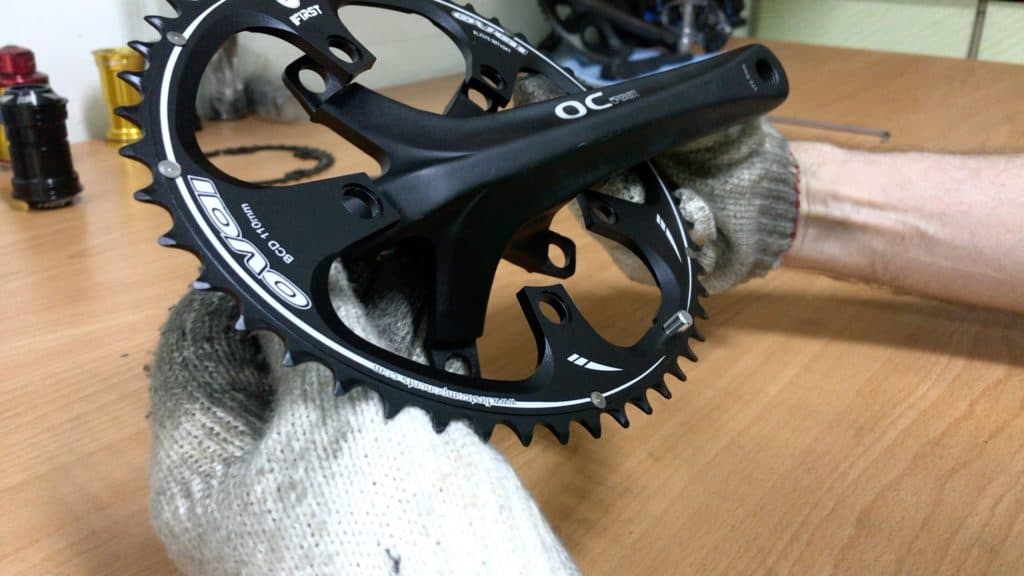
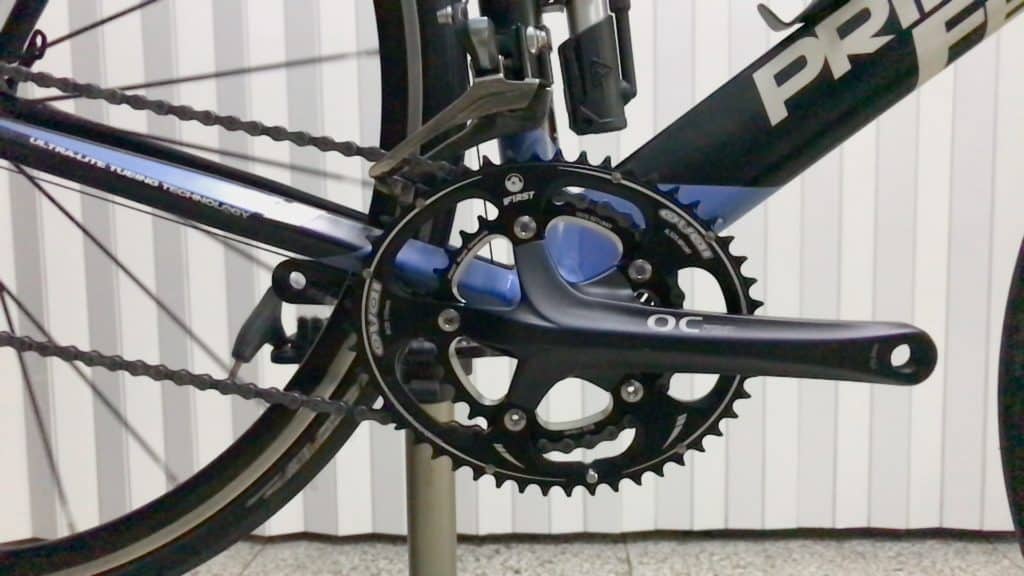
Here’s the bad boy we’ll be installing.
Later we’ll swap out the oval chainrings, replacing them with the semi-oval chainrings which you see in the background.
Pot of grease is ready to go.

Grease the spindle where it contacts the bottom bracket inner race’s outer surface. Otherwise it may get stuck on the install, tempting you to force it in.
Applying too much force places an unhelpful degree of side-stress on the bearings.
Having positioned the crank snugly in the bottom bracket, you’ll now have to solve a problem with your front derailleur.
Oval Chainring Derailleur Adjustment
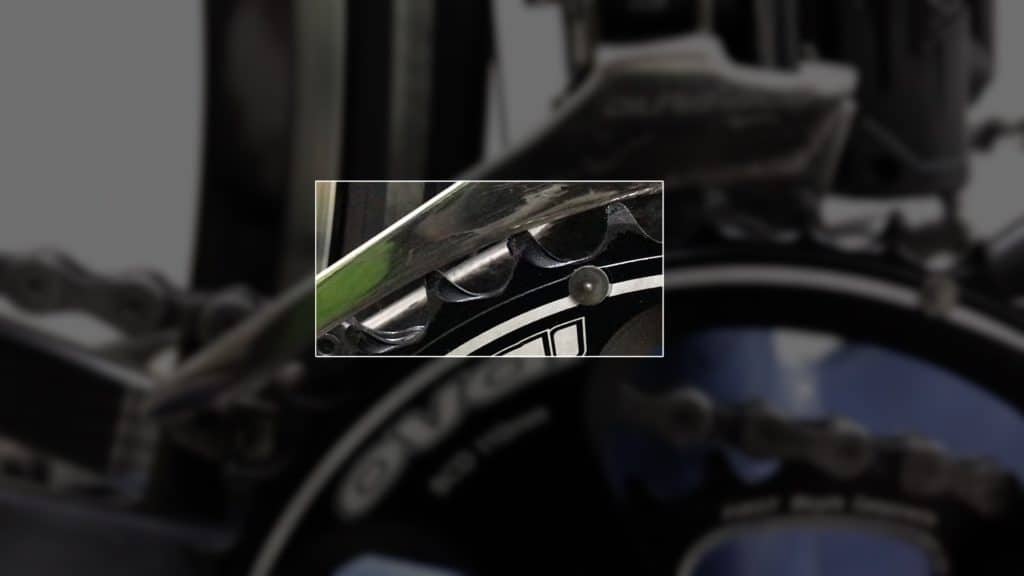
Because the chainring is elongated, the teeth lining the two elongated “ends” now touch the derailleur cage.
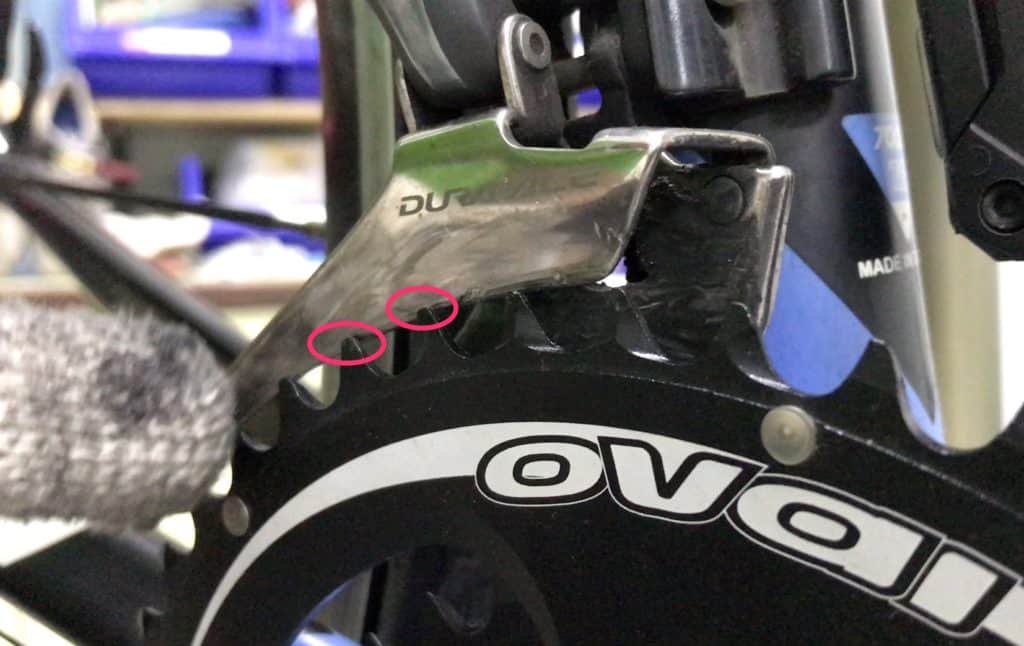
You need to adjust the derailleur cage up, so that when the oval chainring reaches the highest point in the arc, you will have the required 1-3mm gap between derailleur cage and chainring tooth.
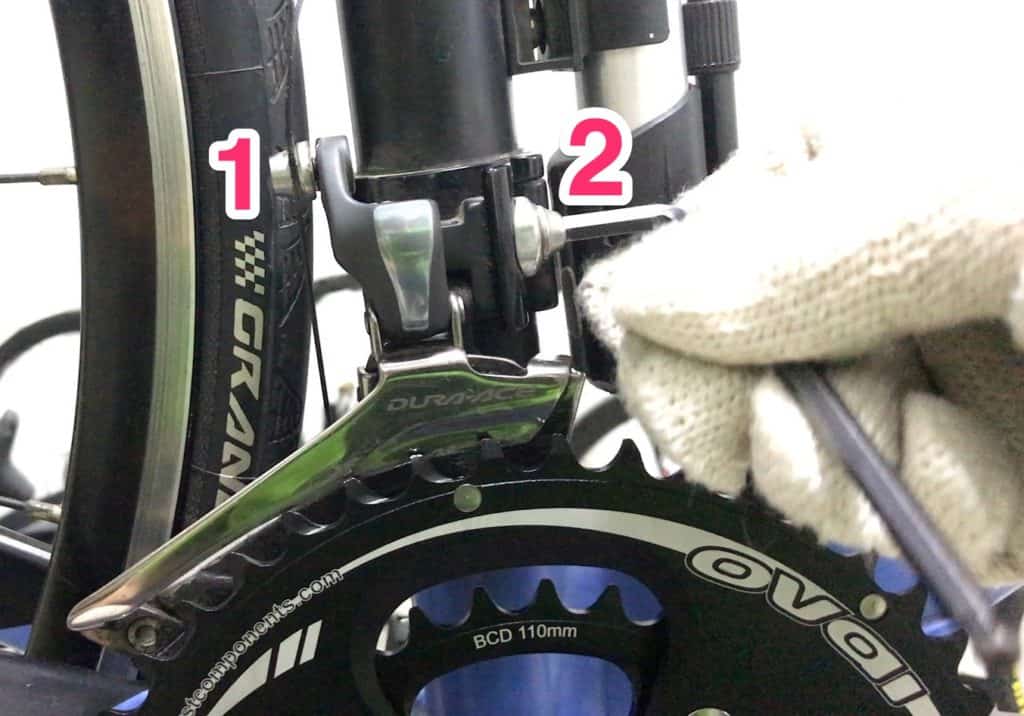
Firstly ensure there is no tension on the derailleur shifting cable.
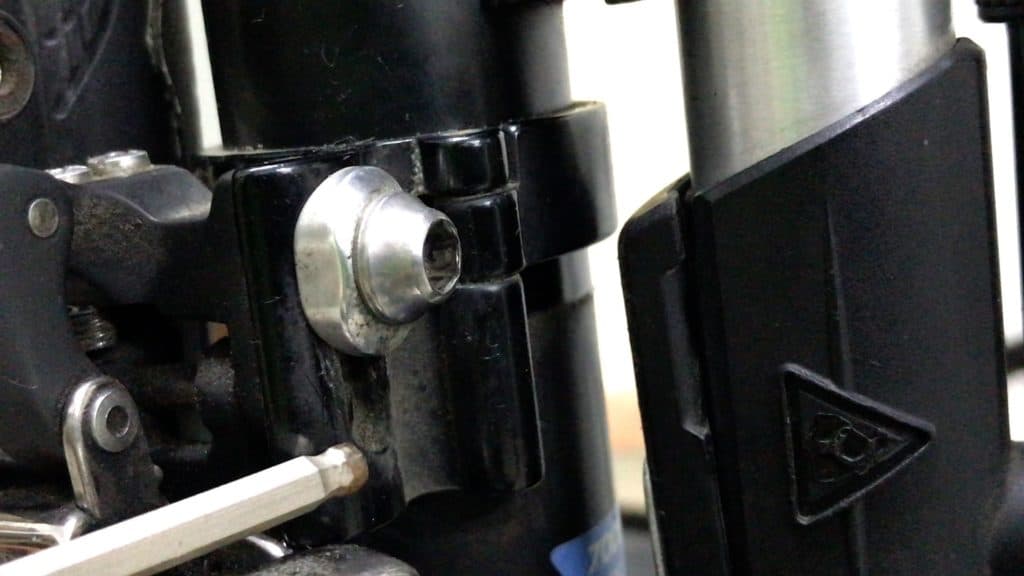
- Loosen the bolt, release the cable.
- Loosen the clamp bolt. Slide.
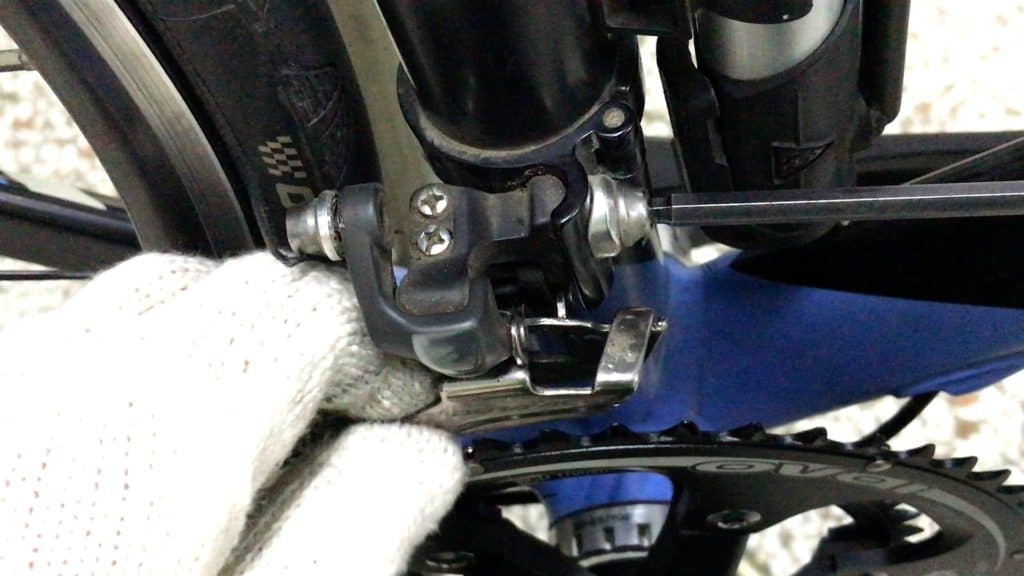
Push the derailleur cage out against the spring across the chainring teeth. Then allow it to return making sure the clearance is right.
Then re-tighten the clamp bolt (use a torque wrench to achieve correct tolerance on all bolts once the installation is completed).
Perfect clearance.
Re-fit the the derailleur cable, tighten the bolt, then complete the rest of the crank installation.
Crank Arm Installation & Pinch Bolt Torque
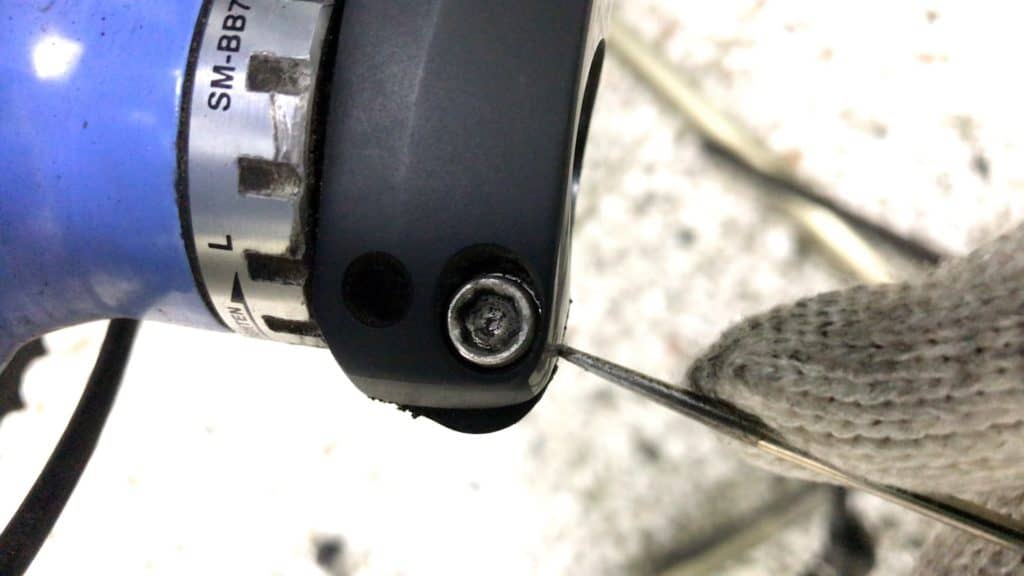
A smear of grease on the spindle, and the threads inside, ready for the crank along with the crank arm fixing bolt.
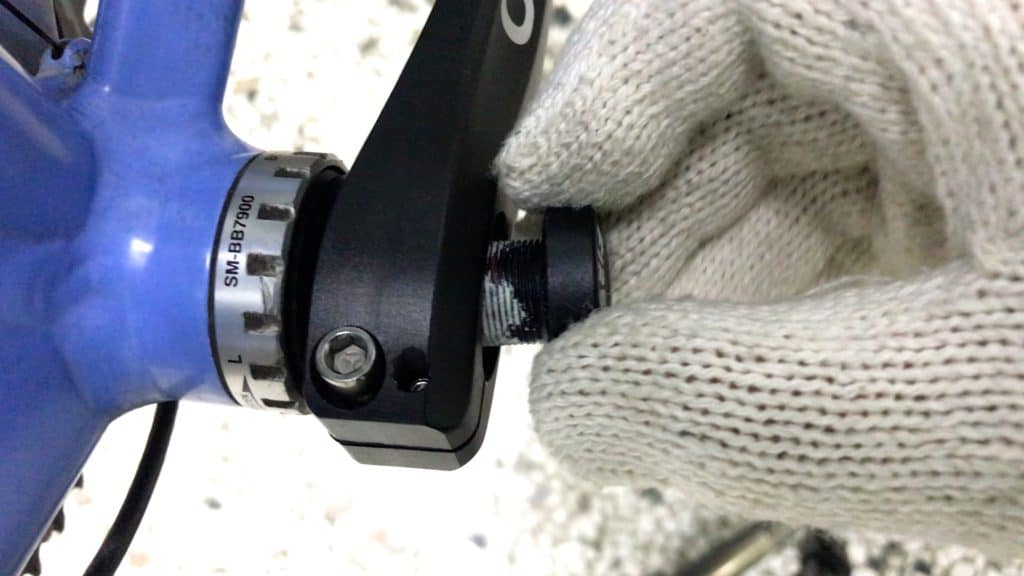
A smear of grease on the crank arm fixing bolt as well doesn’t go astray.
Although we apply a loctite compound to this bolt to discourage loosening, there is no conflict with the grease.
Grease smooths installation and removal; loctite discourages premature loosening. (If the correct torque settings are applied, though, you’ll never have to worry about losing a bolt when you least want it … remember Murphy’s Law … ).
The torque for FIRST crank arm bolts like this one is a little higher than Shimano—1.5 nM vs 1 nM.
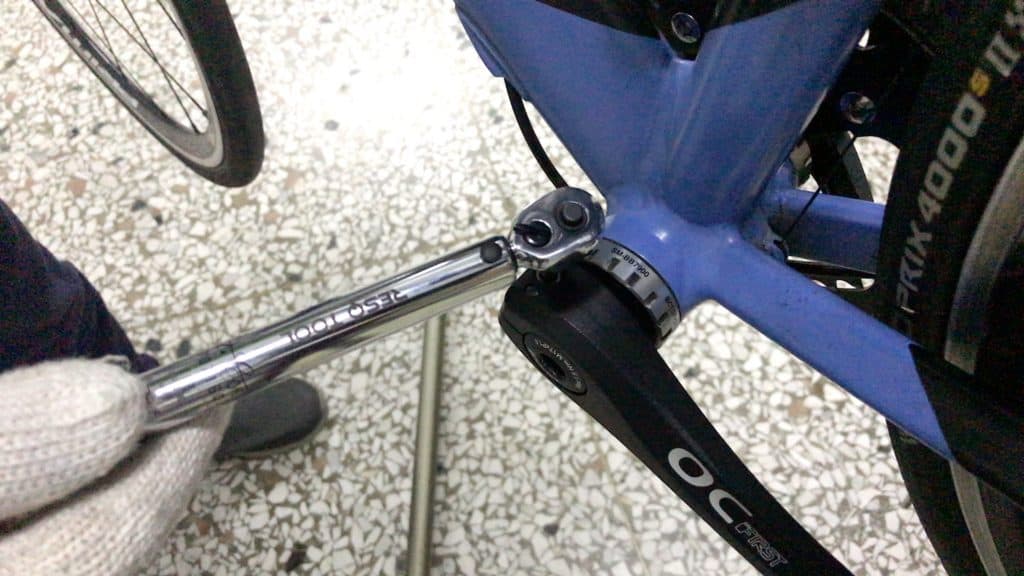
The torque setting for the pinch bolts is 12-14 nM. The torque wrench “gives” at the point the set tolerance is reached.
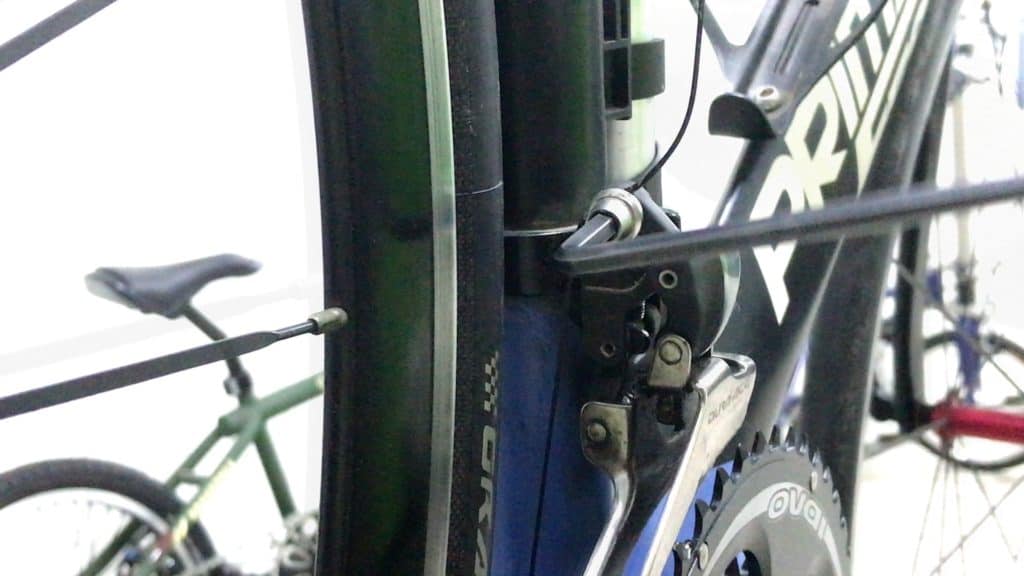
Derailleur Limit Adjustment
You spin through the gears on the first test, shift to the big chainring and kerchanngggkk … the chain drops.
Chain dropping is more likely with oval chainrings/oval cranksets.
The gap between the chainrings and the derailleur cage on the flattest part of the elliptical curve is several centimeters. Way outside any practical recommendations.
Right now the outer limit is not limiting enough. This adjustment will not reposition the cage but merely restrict the outbound movement which right now is traveling a tiny whisker too far to the outside, thus pushing the chain off the chainring.

A half turn of the limit screw is enough to prevent the cage from moving that fraction of a millimeter too far.
In the next shifting test, the chain snaps into position, no longer dropping off the chainring.
Change Chainrings – Oval to Semi-Oval
To recap, the difference between an oval and semi-oval chainring is that the semi-oval’s small chainring is circular—just the big chainring is elliptical.
Changing chainrings is simple.
Undo the bolts. Change the chainrings. Re-tighten.
Let’s break it down, step by step.
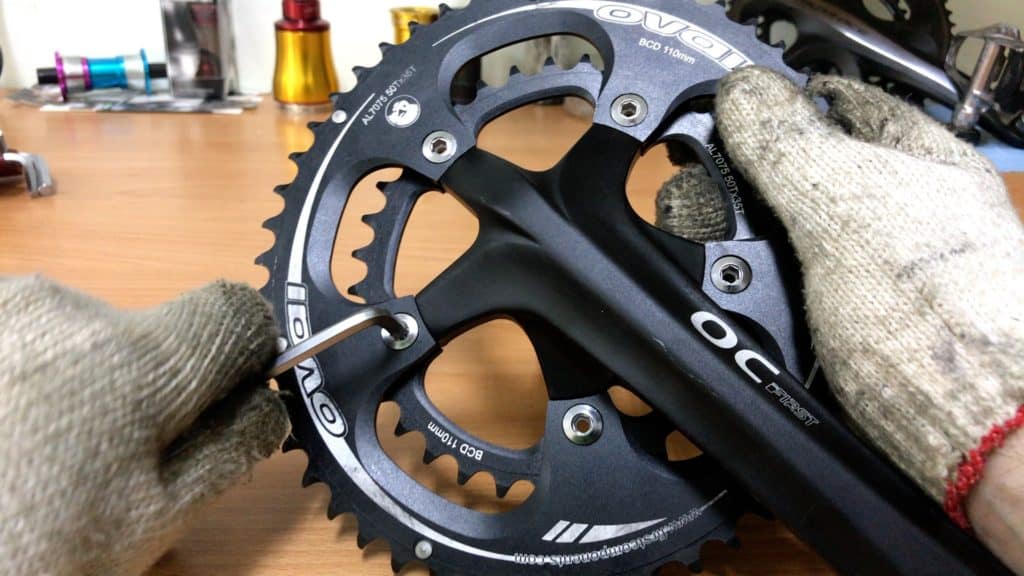
Loosen each bolt a little, each in turn.

The bolt slips out easily leaving the nut in the rear.
The rear nut pops out.
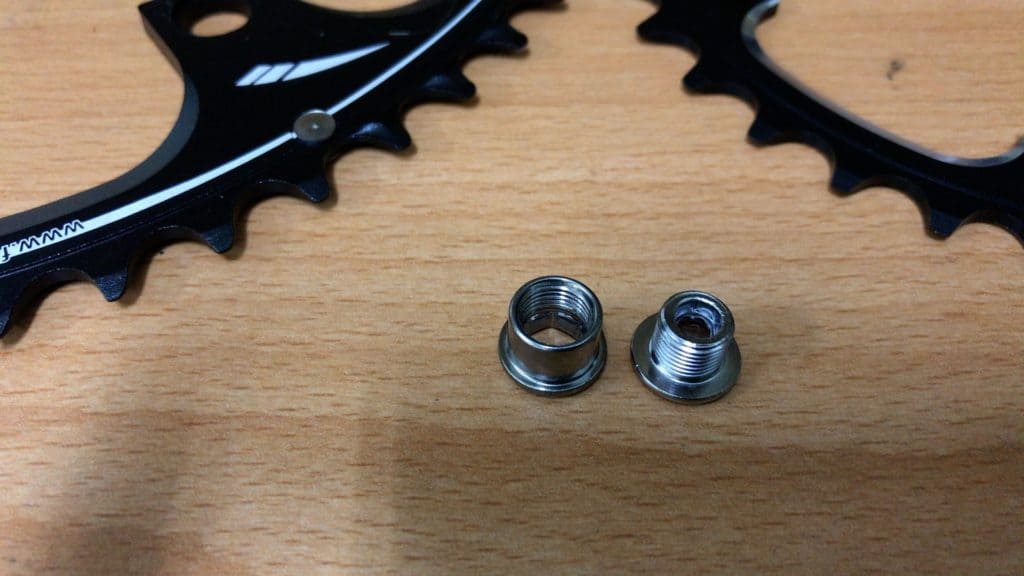
By the end of the procedure, you’ll have removed four or five pairs (five with this spider).
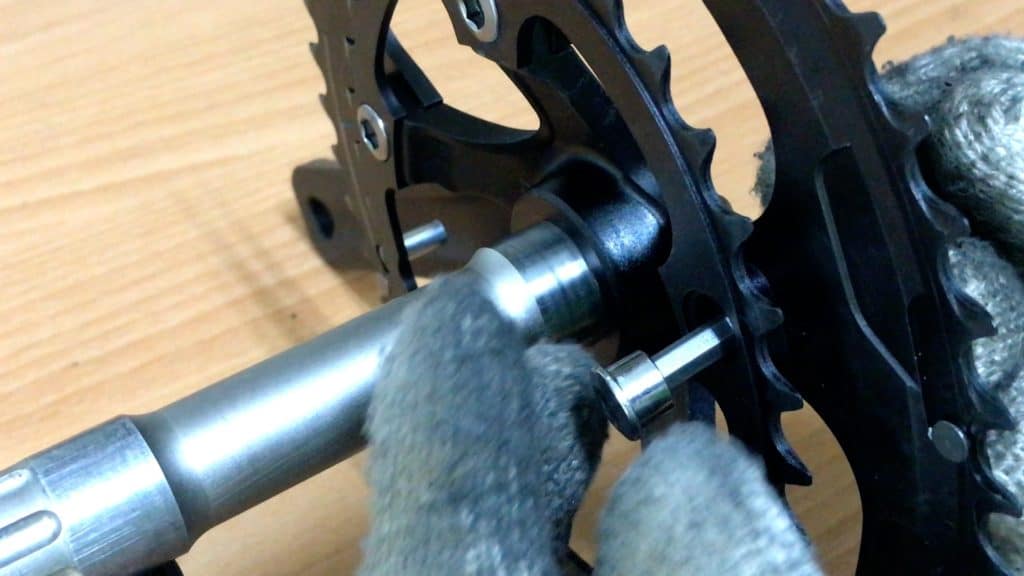
Remove the small chainring first by lifting it along, then over, the spindle.

Remove the spider from the big chainring then bring the spider into the new big chainring in the reverse of the removal.
Flip it over. The big ring drops into the spider’s bolt holes.
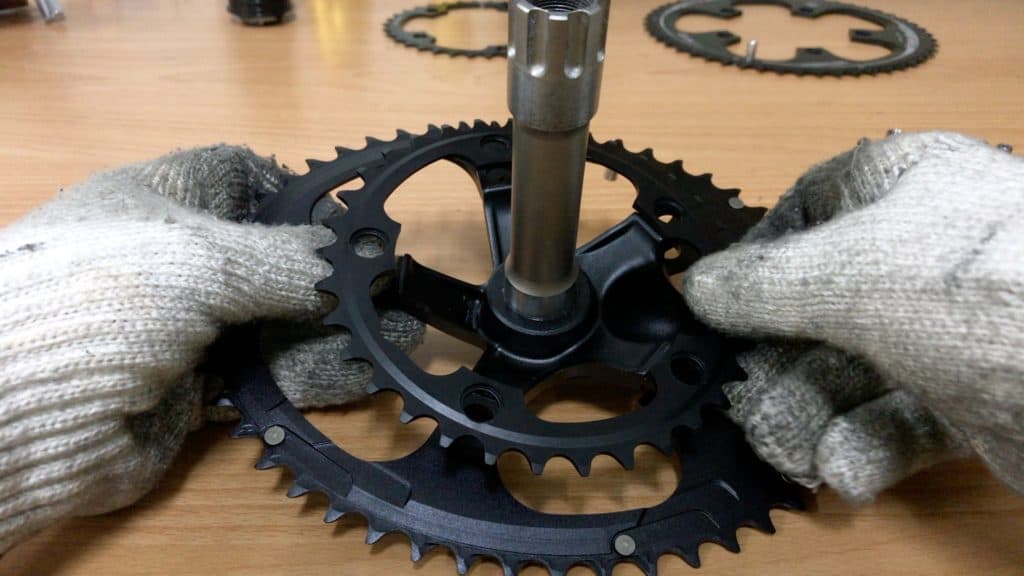
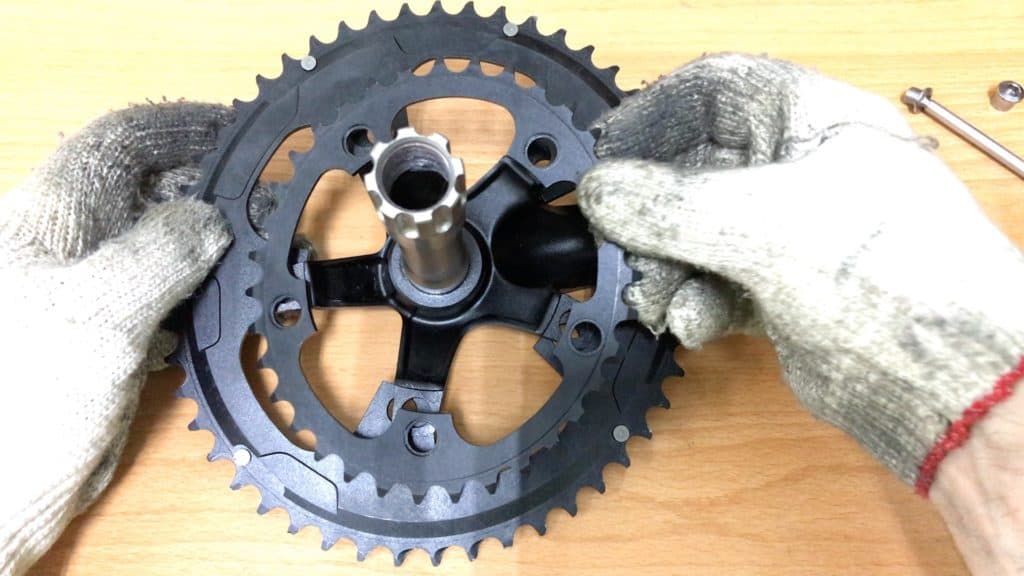
Install the small chainring.
Note that since this is a semi-oval setup, the small chainring is circular, not an oval.
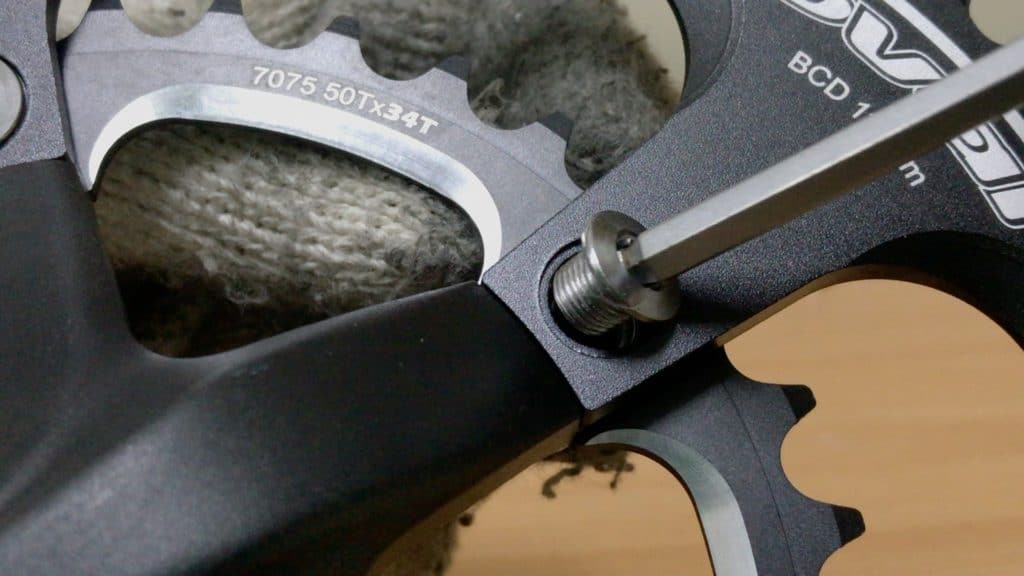
Install the bolts loosely, but still firm enough to hold both chainrings against the spider.
When each bolt is in place, move around the bolt circle tightening each in turn. If you have a torque wrench (grab one from Amazon if you do anything beyond tinkering with your bike)—10 nM will do it.
Semi-Oval Chainring – Adjust Front Derailleur Again
The big ring ellipse for this oval chainring combination is more elliptical than the chainring it replaces. So the chainring teeth catch on the front derailleur cage meaning a further adjustment northwards.
The difference now is that the derailleur clamp bolt is at the uppermost limit. You can see it sitting right at the top of the clamp bracket range.
The only way to adjust the clamp higher is by moving the unit up the seat tube. Around one centimeter should do it.
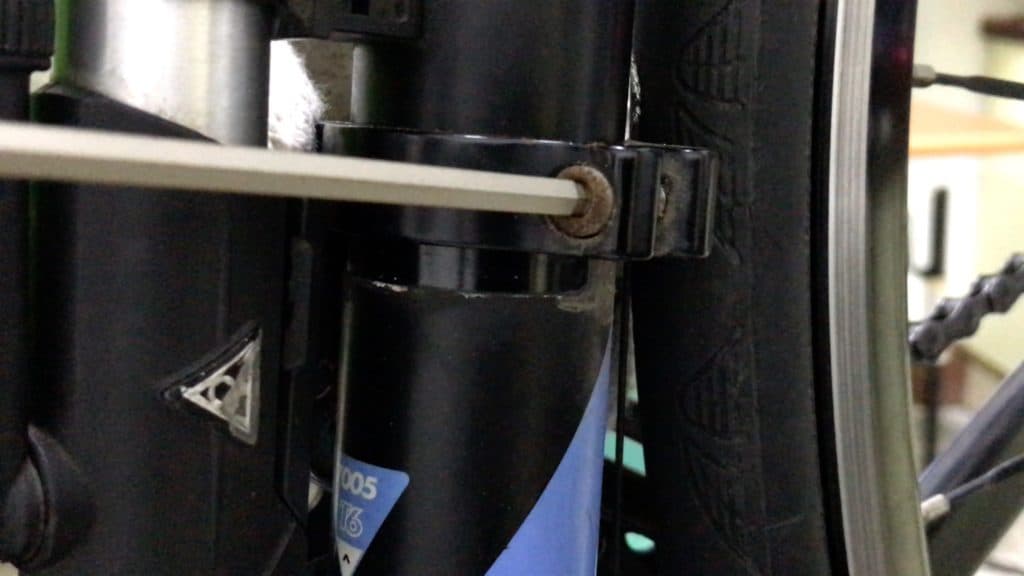
Loosen the bolt enough to be able to work the derailleur clamp up the seat tube. (That rusty bolt has been replaced by the way … ).
The derailleur will need both vertical and lateral re-alignment because of this.
If you have a brazed-on derailleur bracket you will likely have enough clearance to work with.
It would be advisable, however, to do the calculations prior to investing in an oval chainring set. Make sure you will be able to get the clearance you need to have a functioning front derailleur.
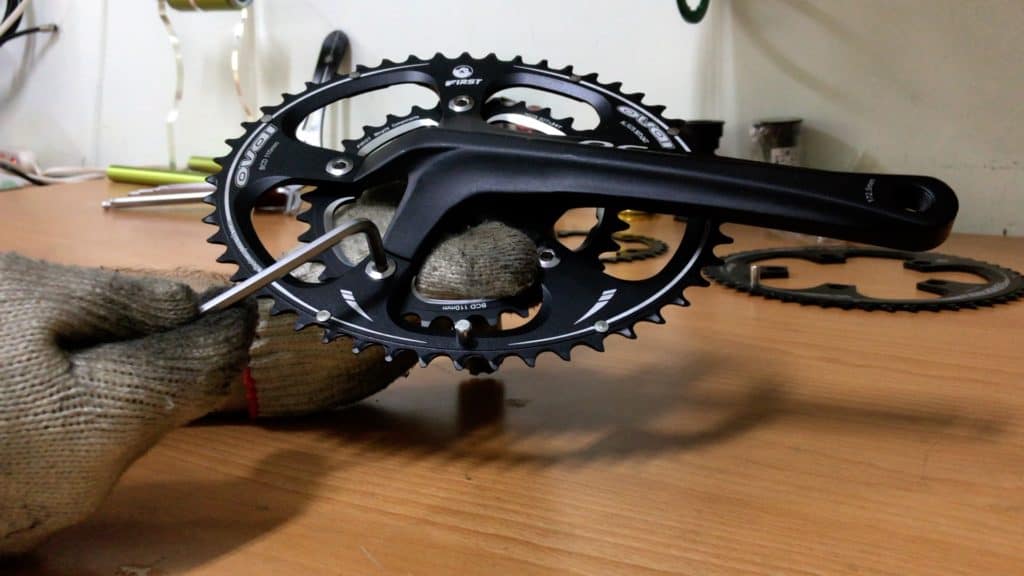
And there you have it. Ready to go.
Oval Chainring Pros and Cons in Sum
Pros
There is hard scientific evidence that oval chainrings are technically superior and give a cyclist an edge in particular circumstances (eg. where energy efficiency is important such as in racing).
- Smoother pedal stroke – good for knees at the very least
- Pedals return to optimum power zone more easily, less resistance
Cons
- Chain drop potential higher
- Possible whiplash effect problem – bad for knees
- Feels weird to begin with … a feeling you may not ever get over
Should you try one? Yes, why not?
Having read through this guide, you’ll be better prepared for the experience.
When you do give ‘em a try, let us know? How did it go?
Or if you have already put down countless miles on an oval chainring, then share your experience.
4 thoughts on “Oval Chainring – The Ultimate Guide”
The link in your article is dead but it originally linked to an april fool’s day post. Here is the wayback machine’s copy of it:
https://web.archive.org/web/20220122114644/https://blog.artscyclery.com/general/shimanos-ill-fated-biopace-validated-in-university-study/
Hint: click the link to read the “full study” at the end of the article.
Got it. Thanks for the info.
You may just want to remove the part about “hard evidence” since the study never happened.
the big ring in the last and cover image appears to be fitted 72 degrees off. making the dead spot worse