Everything important you need to know about bike crank arms, including why “crank arm” is technically the wrong term, is contained right here.
Some of what we cover:
Types of Crank Arms
How to Fix a Crank Arm
What Crank Arm Length Should You Use?
How a Crank Arm is Manufactured
WHAT IS A CRANK ARM ON A BIKE?
A crank arm is just a crank, which is specifically defined as a “bent or vertical handle”. It comes from the Old English word cranc as part of crancstaef, a “weaver’s instrument”.

When you add arm to the mix, it’s akin to saying DVD Disc (DVDisc), or GPS System (GPSystem) or PIN Number (PINumber). What a nerd might call a tautology.
“BUT!”, you say, “Crank and arm are two different words, so it’s not the same thing.”
“Yes, at face value,” I’d reply. “The difference for bike pros, though, is that crank and arm are exactly the same thing.”
I’d guess that a weaving loom—referencing the definition above—included some sort of lever mechanism. Nevertheless, we often need to point out which parts of a crankset in particular (spider, chainrings, or crank arm) we are talking about, for accuracy sake. In this case, talking about crank arms adds clarity to a conversation.
Since the term crank arm is widely used, and the particular part of a crankset comprised of the arm is our focus here, we’ll follow convention by continuing to add arm to crank.
Structurally, the non-drive side crank arm consists of the one simple lever-arm; the drive side crank arm is a little more complicated due to the addition of the spider and the chain ring(s).
BIKE CRANK ARM DESIGNS AND TYPES
The history of bike design largely centers on bottom brackets and their corresponding crank modifications through the decades. The most significant changes have only come in the last few decades.
One-Piece Crank
A one-piece crank remains close to its origins in the automotive crank.
Yep, the one sticking out the front of the car that you took hold of and, literally, cranked to kick over the engine, in the days before we had starter motors (and no, I don’t remember those ?).
The forged—or cast—rod zig-zags through the bottom bracket shell, held in place by threaded bottom bracket flanges that tighten against the bearings.
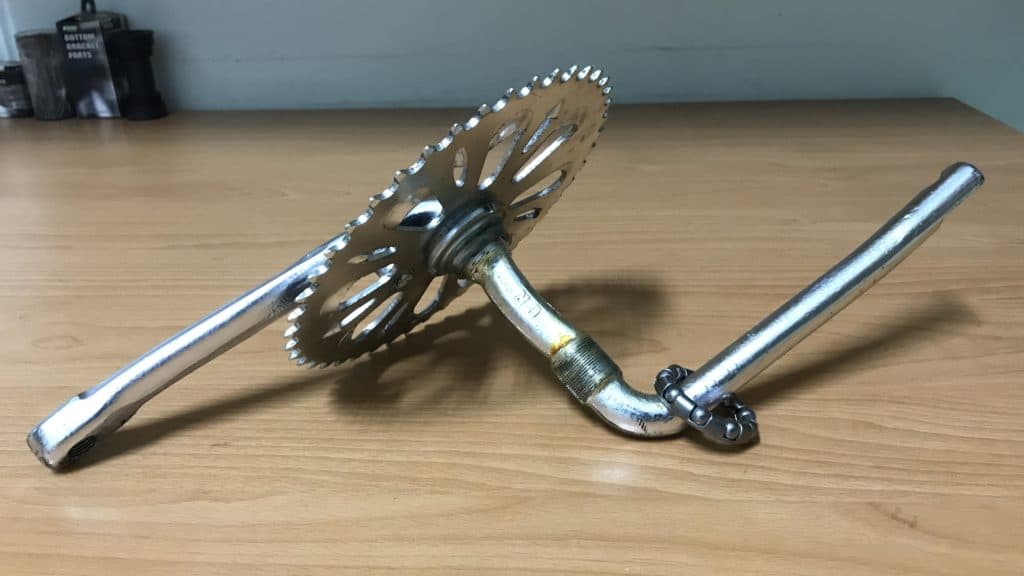
Cottered Crank
With cottered cranks, independent crank arms are attached to the spindle through a cotter pin.

Crank arms slip onto the spindle and are secured by tightening the cotter pin nut. Keeping it tight avoids play and thus rapid wear of the contact area. The cotter pin tightens against the machined edge visible on the left, holding the whole assemblage securely in place.
Square Tapers & Splines
Square taper designs maintain the separate crank arms characteristic of cottered cranks, but improve on the way they connect to the spindle.
There’s no underestimating the simple engineering power of a wedge coupled with bolts inserting laterally into the spindle instead of vertically through it.
Four faces with a tapered wedge fitting into a corresponding tapered aperture on the crank arm creates a tight and reliable fit.
We attach the crank arms by means of bolts threaded into the spindle; applying the correct amount of torque ensures crank arms are firmly secured to the spindle when installed, and easily removed come maintenance or upgrade time.
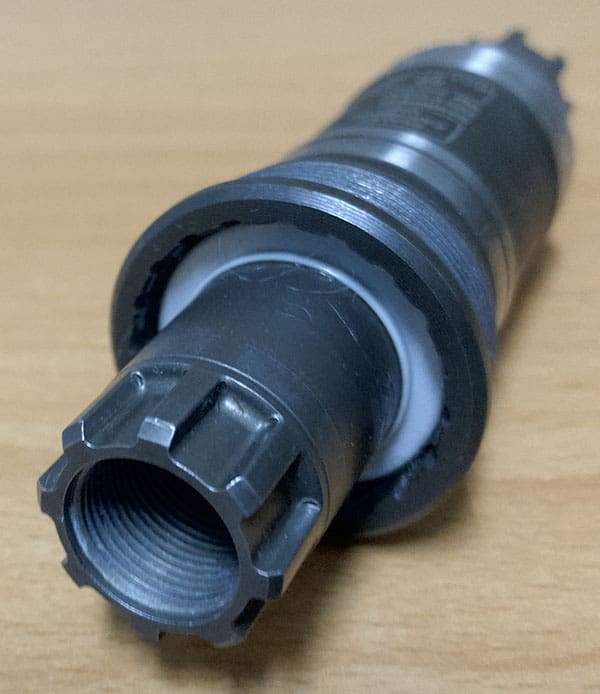
Shimano’s Octalink splined bottom bracket and matching crank arms were an alternative for a while. But crank design quickly moved to integrated cranks. Square taper has stood the test of time (for low-end bikes) whereas Octalink is long gone.
Integrated Crank
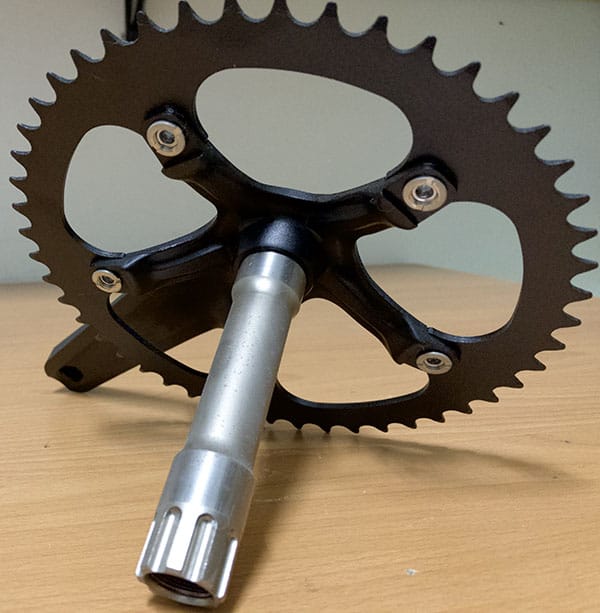
In a way this design is a step back to the simplicity of a one-piece crank, although much lighter and stiffer.
The drive side consists of the spider, crank arm, chainring and spindle together in one piece.
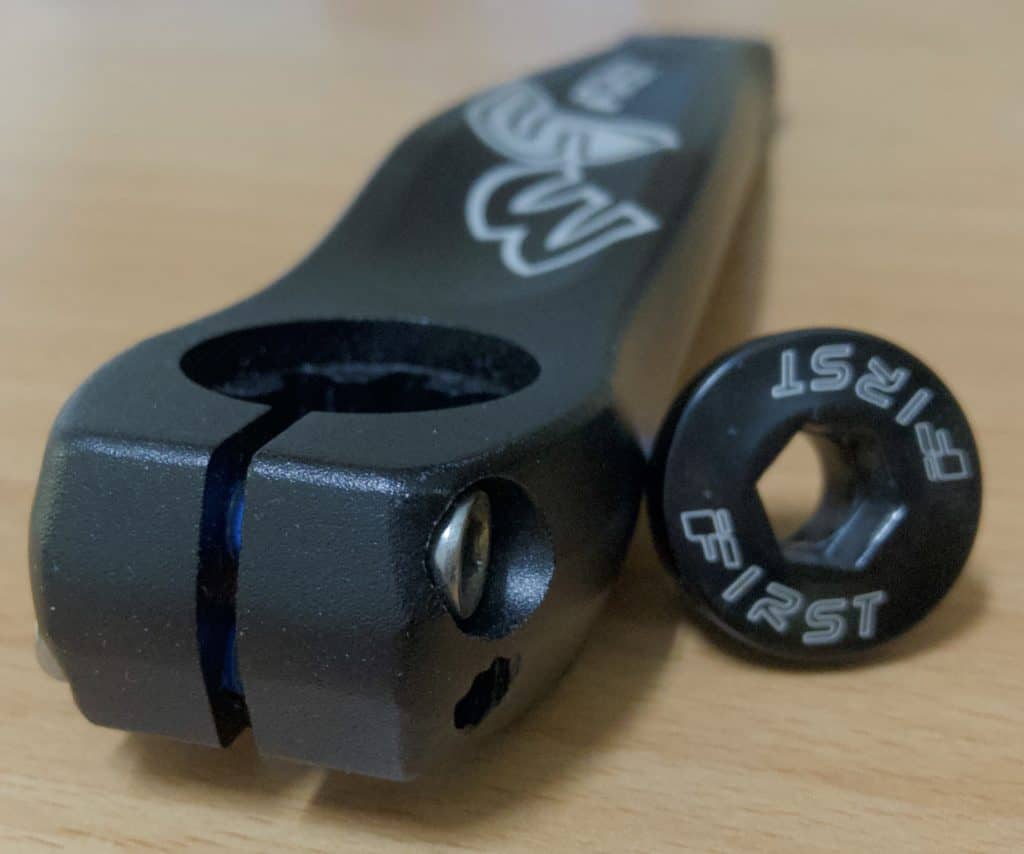
The non-drive side crank arm slots onto the spindle and is secured by a bolt threaded into the spindle. Alternately the crank arm clamps around the spindle with a pair of pinch bolts.
HOW DO YOU FIX A BIKE CRANK ARM?
Fixing a crank arm all depends on how you damaged it and how much damage is involved.
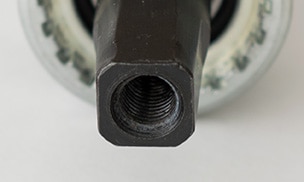
Pedal threads are not easy to damage, but careless installation that even partially damages the threads may render the crank unusable. Even if you could install a pedal, tightening to torque tolerance would likely be impossible.
Re-tapping the threads may work as RJ demonstrates:
Avoiding damage through using a light oil or a smear of grease on the threads when installing pedals is the best way to go. And, of course, always take care not to cross thread the pedal into the crank.
You could make this error by mistaking resistance as a result of cross-threading for a natural tightening as the pedal moves into the crank arm. You apply an Allen or pedal wrench to get it in the rest of the way only to find you’ve stripped the threads.
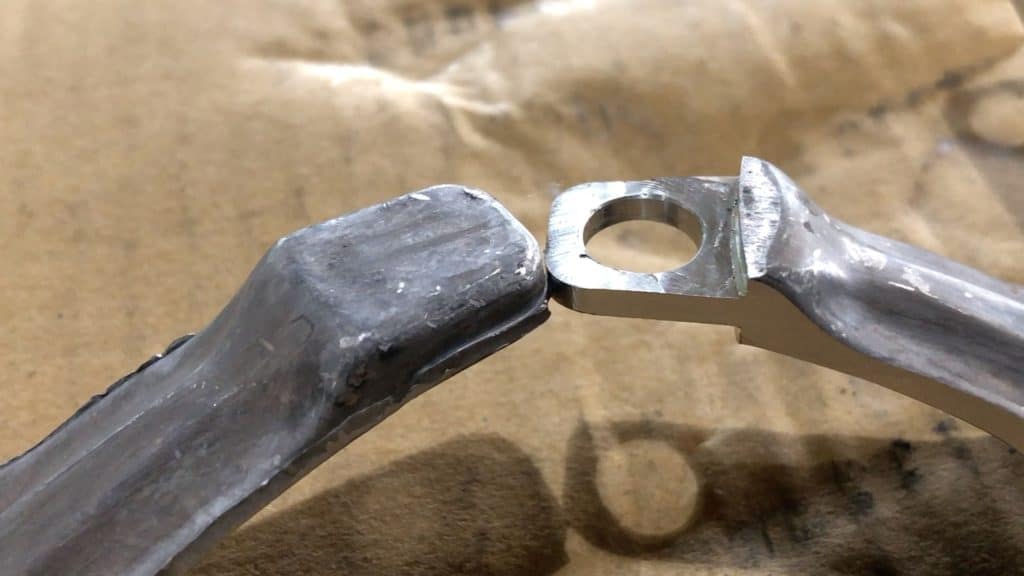
The other main problem is bending the crank in a heavy impact event; something hits your bike (hopefully you are not anywhere near it at the time!) or you cannon into a rock out on the trail. Your only recourse is to replace the unit: expensive on the drive side, less so in the case of the non-drive side.
WHAT LENGTH CRANK ARMS SHOULD I USE?
Are shorter crank arms better than longer crank arms? Surely a question every serious cyclist has asked at some time
The convention is that the longer your legs, the longer the crank; the shorter your legs, the shorter the crank.
Chris Froome at 1.86m in height uses 175mm cranks whereas Nairo Quintana at 1.67m uses 172.5mm, although if you were a bike shop advising him, you’d probably suggest 170mm or even shorter. Clearly there’s a personal preference angle involved.
Scientific Studies of Bike Crank Length
RoadBikeRider summarizes Dr. Jim Martin’s research suggesting crank length doesn’t matter.
The variable power output from cyclists using adjustable cranks ranging across lengths from 120mm to 220mm, reported a maximum 4% difference in power output.
Repeating tests with crank lengths varing a maximum of only 25mm, the differences in power output did not exceed 1.6%.
According to this study, then, crank length does not matter.
However, a study of 7 MTB athletes of similar stature measured the time taken to reach supra-maximal peak power output using 170mm, 172.5mm, and 175mm cranks. This test revealed a mean performance advantage of almost 28% using a 170mm crank versus 175mm. Clearly length was a significant factor.
Yet another wide ranging study of 16 cyclists investigated the effects of cycle crank length on
- maximum cycling power
- optimal pedaling rate
- optimal pedal speed
as well as the optimal crank length to leg length ratio for maximal power production. Crank lengths ranged from 120mm to 220mm.
The study produced mixed findings.
Increasing crank length significantly decreased the optimal pedaling rate: 136 rpm for the 120mm cranks; 110 rpm for the 220mm cranks.
Optimal pedal speed, on the other hand, increased significantly with increasing crank length, from 1.71 m/s for the 120-mm cranks to 2.53 m/s for the 220-mm cranks.
The study determined optimal crank length to be 20% of leg length, or more specifically, 41% of tibia length.
When it comes to applying standard scientific research method to the issue, we see that crank length can indeed make a difference.
Nevertheless, the only generally applicable, practical observation to make about crank length, despite (or even perhaps because of) the science, is that it’s an extremely personal subject, which very few cyclists take into account, and for whom it practically makes no difference anyway.
So, if you’re an athlete looking for an advantage anywhere you can get it, a shorter crank is probably optimal. Otherwise sticking with the rule-of-thumb of longer legs = longer crank, shorter legs = shorter cranks, comfort is assured.
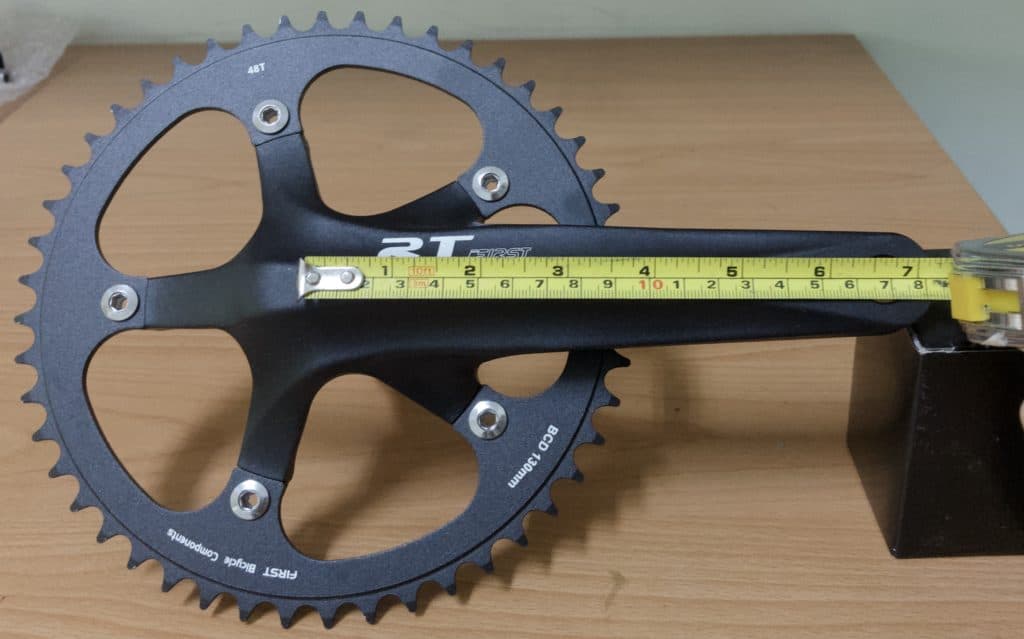
How to Measure Crank Length
Whilst hardly essential since crank length is clearly visible on every crank arm, knowing about the center-to-center measurement method is still quite handy.
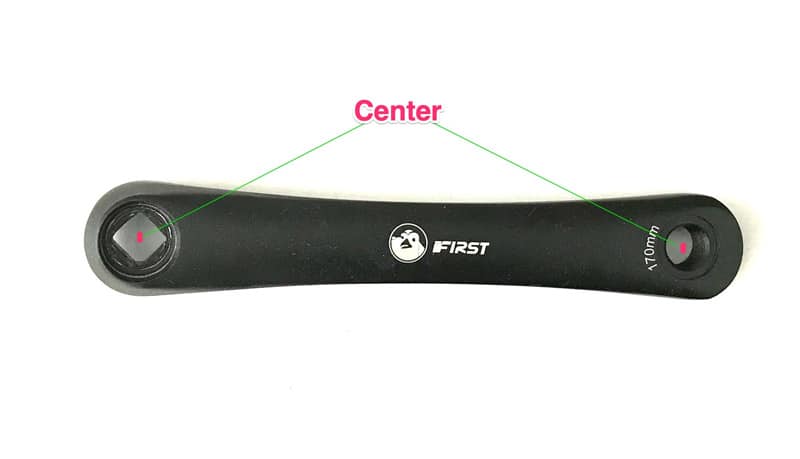
C2C is a general bike measurement principle, meaning that taking a specific measurement begins and ends at either the actual, or the theoretical, center point of a component which is usually empty space.
Locating the centers on non-integrated cranks is simple: the center of the spindle aperture to the center of the pedal aperture—you don’t measure at the end of the crank arm.
For integrated cranks, locate the drive side crank arm’s center point with reference to the spindle on the reverse side. You can guestimate the crank spider’s geometric center within 2-3mm accuracy.
MANUFACTURING BIKE CRANK ARMS
The manufacturing process spans several stages. A specialist workshop, often run by no more than two skilled operators, one of whom is usually the owner, performs a specific process at each stage.
All the big brands rely on hundreds of small operators like this across Taiwan: small workshops perform the processing cheaper than if a brand were to do it in-house themselves. If you are a B2B buyer thinking to take your business to one, bear in mind that they rarely contract work to be done directly, as we’ll see below.
Design
In contemporary manufacturing, the major hands-on role for a brand is in the design stage. Technicians shape potential designs in 3D CAD programs; the actual manufacturing of approved designs is then outsourced to the one company which normally handles all subsequent manufacturing details.
This is the role that FIRST Components plays for many well-known brands.
It’s also common for a the manufacturing partner to have significant input into the design phase as well, known in industry as ODM or, Original Design Management.
Having a great design is well and good. However there are always technical problems to be solved in actually realizing a great design. The broad, deep experience of companies such as FIRST Components means that coming up with solutions to seemingly impossible engineering conundrums is all in a day’s work—we’re used to it.
Of equal importance to the the component design is the mold, or molds, used in fashioning the main parts of a component. A product mold is often the single most expensive item in the product management process, with some productions requiring several.
Once you’ve created your mold, you can reuse it in multiple productions, so you have to be sure your sales projections are good.
Forging Bike Crank Arms
The production sequence begins with forging the crank. Raw alloy is pressed into shape with our proprietary mold.
Where the crank arm is for our own production, anyway.
Otherwise the mold belongs to the brand whose crank we are manufacturing.
You may hear the term “open” mold in the bike industry, or manufacturing generally for that matter. A mold so classified is available for anyone’s use. A brand not wishing to go to the expense of developing their own mold for a component can select an open mold. The downside to this, of course, is that the finished product is not unique.
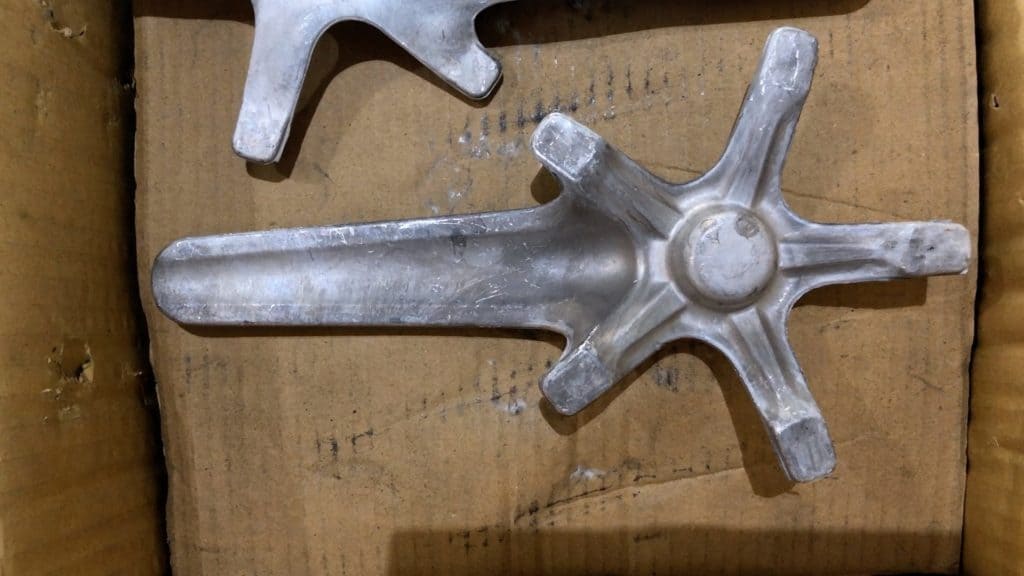
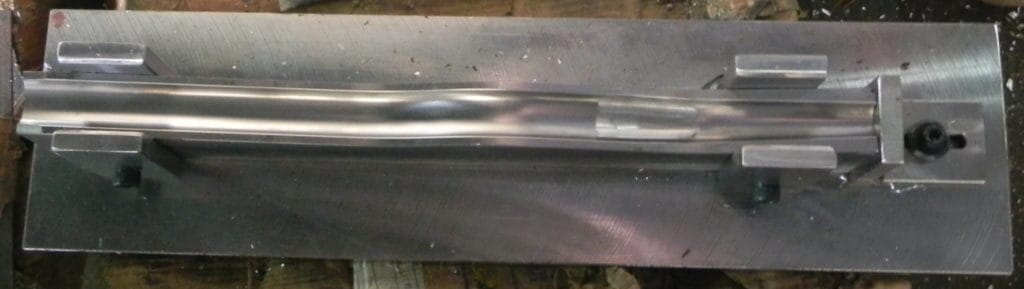
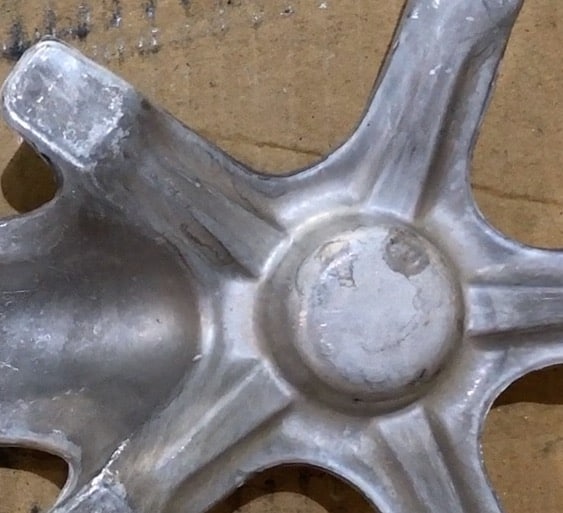
This is a crank arm and spider in its raw state after being pressed. The next stage refines the design by removing alloy to 0.01mm accuracy from the
- crank arm itself
- spindle receptacle
- spider arm-ends (chain ring seat and bolt holes)
CNC Processing
Nowhere in the world is Computer Numerical Controlled (machine unit) processing carried out to the same level of precision and quality you’ll find in Taiwan.
The advantage of the small-scale CNC operators in Taiwan is they’ll accept small, custom orders. MOQs (Minimum Order Quantities) can be as low as a few dozen, or even a few pieces, in some cases, depending on the size and complexity of the product.
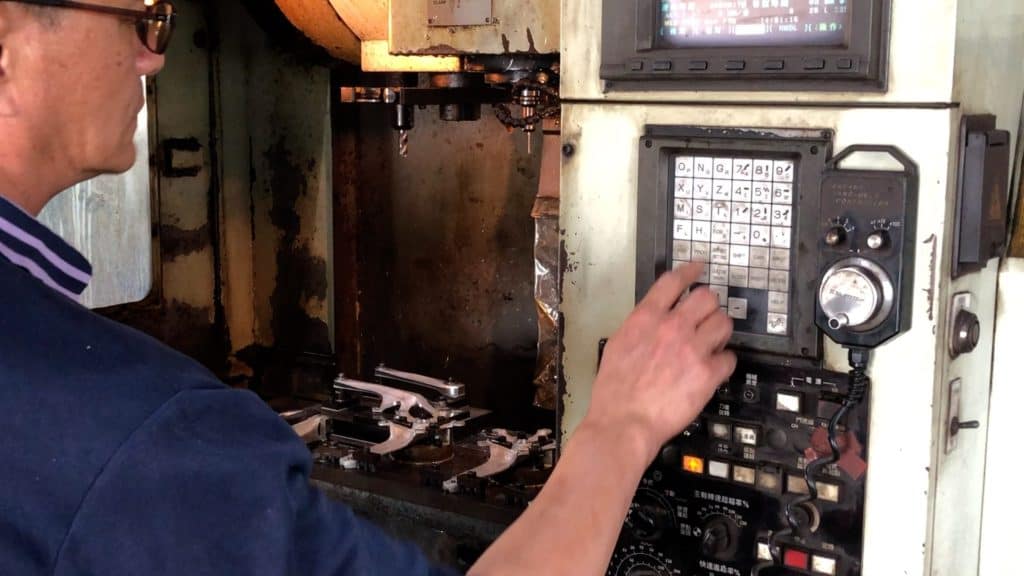
The program specifying the sequence of cuts (the CNC’s cutter head moves along the x, y, and z, or vertical, axes), with the depth and angle is loaded; fine tuning adjustments can be made where necessary.
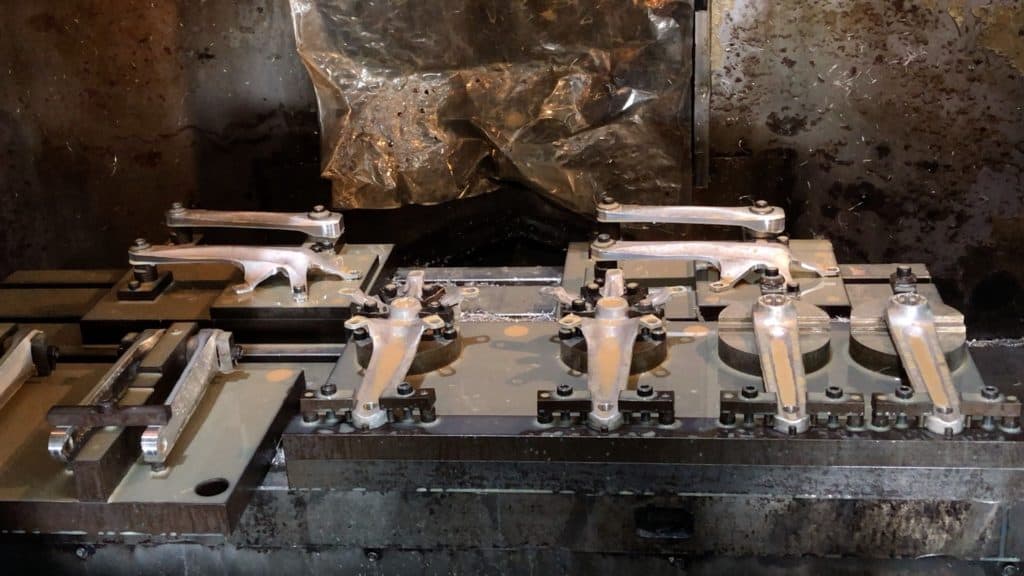
To increase efficiency, both the drive and non-drive side crank arms are processed simultaneously: top, bottom, left side, right side.
Still, all these pieces must go through four sets of processing before being ready to go onto the next stage.
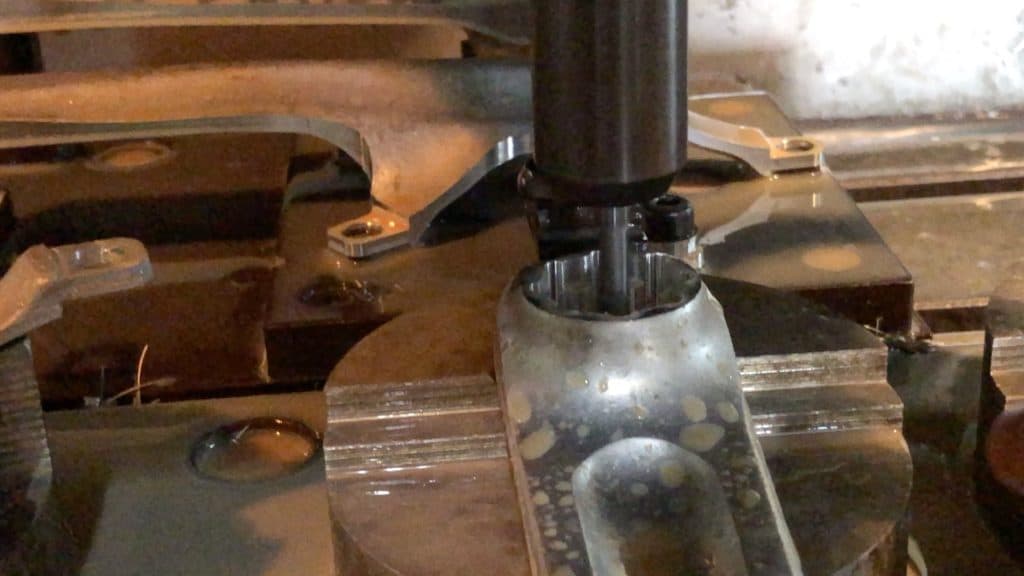
Here the cutting head (a drill bit rotating at high speed) shapes the crank arm’s spindle receptacle, or where the bottom bracket spindle connects into the crank arm.
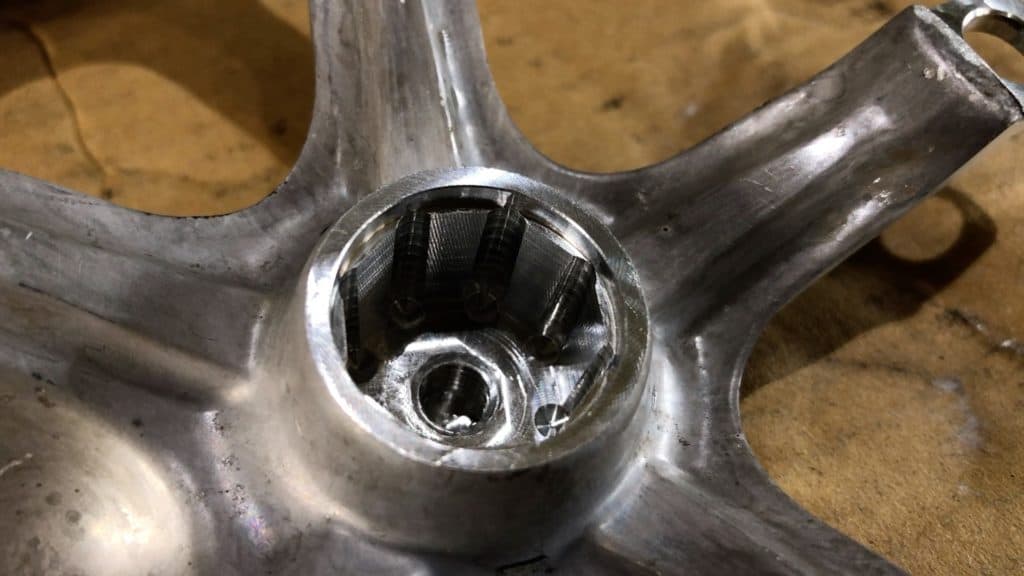
A closer look at the drive side cut, where the spindle connects to the spider—spindles will be fused to the spider at a later stage in production.
Having a carbide-tipped cutter remove the much softer alloy is best, even despite the off-cut excess produced; all offcuts are recycled of course.
Next up, the surface must be perfectly clean before the final major process—anodizing—commences. Sand Blasting is the most efficient means of achieving an almost completely uniform surface.
We would like to show you both processes. However the workshops which are expert in both procedures don’t like to expose their operations to scrutiny; so even though the production belongs to us, it must remain out of the public eye. Factory policies vary from place to place across Taiwan. However reluctance to reveal production techniques is not unusual.
Anodizing
Anodizing, quite a step up from painting , is an electrochemical process that alters the surface of the crank.
A crank arm is immersed in an electrolytic solution ie. an electrically conductive liquid, such as sulfuric acid. A positive charge runs through an aluminum component whilst a negative charge is run through the solution creating a layer of aluminum oxide on the surface of, in this case, a crank arm. Only diamond is harder than this material.
Scrapes and knocks mess up your bike frame’s clear coat, decals and paint. You’ll find the surfaces of anodized components way more resistant to wear and tear since anodizing, in essence, is not an addition to the alloy, but a transformation of it. Comprehensive info on anodizing here.
Final Remarks
On a general note, once you understand how bike crank arms are made, you’ve pretty much got the whole story of how brands (OBM) or factories (ODM) design and manufacture any aluminum bike components.
More specifically, the rapid rise of ebike mid-drive motor designs has arguably arrested the continued evolution of crank design since square tapers or splines are optimum for connecting crank arms to motor-driven spindles. Electric assist drive trains require more robust chainrings and chains to withstand increased torque load, rather than crank arms.
7 thoughts on “The Comprehensive Guide to Bike Crank Arms (Right Length, Design etc)”
I used a Murry adjustable crank one time. I went up a steep hill in the 155mm setting. It was like I was walking up hill, rather than pedaling in a circle. I was in a 39 X 21. A high gear for that climb. It was in Cazadero California. Austen creek road. It would have not been like walking up that hill in a 175 crank. It would be a longer turn over for the legs. The Murry cranks did not hold up under the stress I put on them. The crank snapped in two on one ride, when I attacked after another rider. I eased up a lot at the top of the first climb. I would have passed him on the next up hill, like I did on the first, but the crank broke.
I have bought a mountain bike for 2 years, about a year on my left crank arm has came loose and just keeps coming loose constantly. I’ve read on other forums that cranks once they come loose they never really tighten up properly again, is this the case ?
If a torque wrench is used to achieve the right tolerance on the bolt(s), should be a problem…
thanks for reply
If it wasn’t tightened correctly the first time it was installed and it was used when loose, what happens is the eyelet develops wear. The inner point of the of the eyelet and outer points wear leaving a high spot in the middle. This means the crank will always feel loose and make creaking or a rocking feeling even when torqued to the correct setting. You might get away with it on a tapered BB but only over torquing the bolt.
thank you for the article
Article should be titled, “When road cyclists try and explain to mountain bikers what crank length they should have.”
Crank length determines stability and control of a mountain bike, it’s not just about max power output.