Welcome to your complete guide to BB86 & BB92 bottom brackets.
What are they? What are the differences?
And how do you install and/or remove this type of bottom bracket?
You’ll find all the answers here.
If you are just looking to fast-track removal or installation, the jump to the installation and removal section right here.
CONTENTS
- From Threaded to Press Fit
- What are the Differences Among BB86, BB90, & BB92?
- Are BB92 and PF92 the Same?
- What Cranks Fit BB92?
- Will BB30 Fit BB92?
- Unique BB92 Removal & Installation Tool
- Installing BB86 & BB92
- Removing BB86 & BB92
FROM THREADED SIMPLICITY to PRESS FIT COMPLEXITY
The press fit revolution has produced a variety of innovations and particular specifications.
BB30 kicked it off with PF30 quickly following. Both took the spindle diameter – 30mm – as their measure.
PF30 Bottom Bracket—The Complete Guide
The press fit standards which followed made it possible to use 24mm spindle cranks in a press-fit environment.
A complicating factor is that the bottom bracket shell diameter of each standard is different: 41mm BB86/92); 42mm (BB30); 46mm (PF30).
And that is just for the most common variants. Individual brands have their own specifications alongside of these.
The latest chapter in the press-fit saga is SRAM’s DUB system.
SRAM DUB Toolset—The Only One of its Kind
You get the advantages of a 30mm crank (28.99mm to be exact) and either a threaded or press-fit bottom bracket to fit the range of the most common (41,42,46mm) bb shell diameters.
Also check out our Bottom Bracket Tool post, covering bottom brackets and the tools you need to install, remove, and maintain them.
WHAT ARE THE DIFFERENCES AMONG BB86, BB90, BB92?
BB86 vs BB92? No difference. They are one and the same bottom bracket.
Well, BB86 refers to road bikes with their 86.5mm shell; BB92 refers to mountain bikes with their 91.5mm BB shells.
BB90 is Trek’s proprietary standard and is the odd one out here.
Like BB30, the bearings sit directly in the bottom bracket shell. Neither BB90 nor BB30 is as widely used as the others. BB90 is obviously brand specific. BB30’s issues has seen it long since overtaken by PF30.
BB86 and BB92 enjoy widespread adoption these days probably because they strike a compromise between a radical break from the past vs a degree of continuity.
And, of course, they are the standard offerings from the market leader, Shimano.
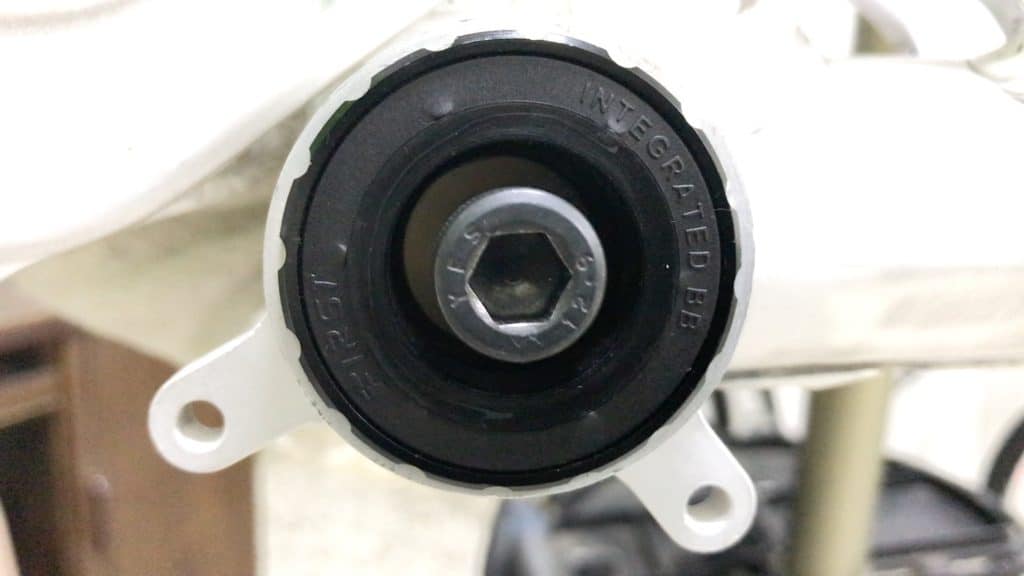
BB86 & BB92 Examples
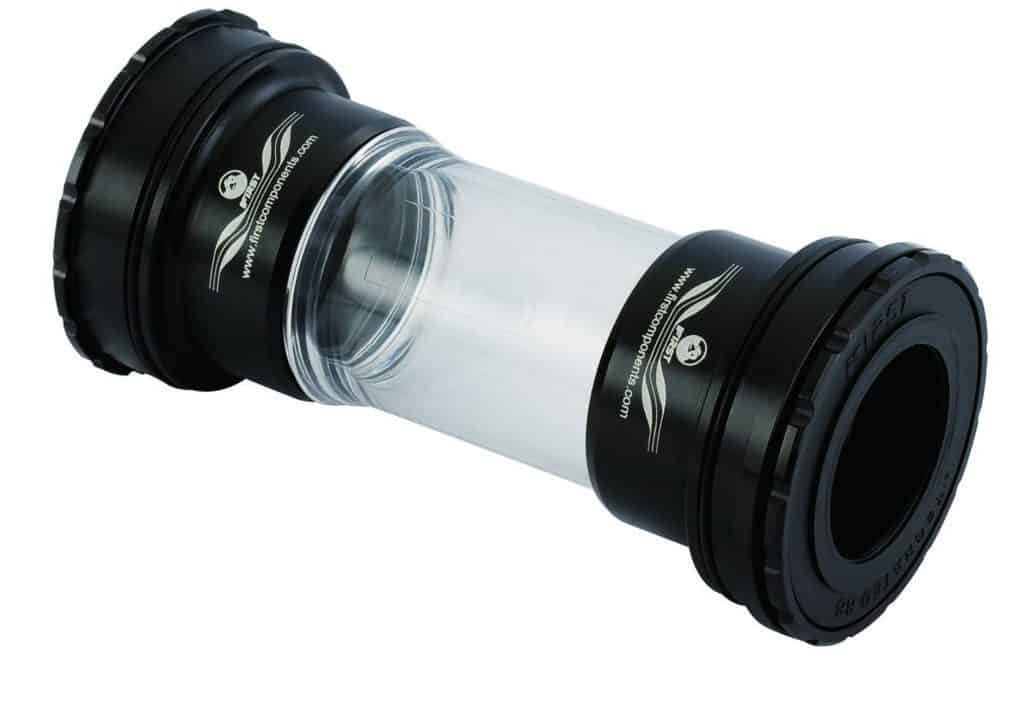
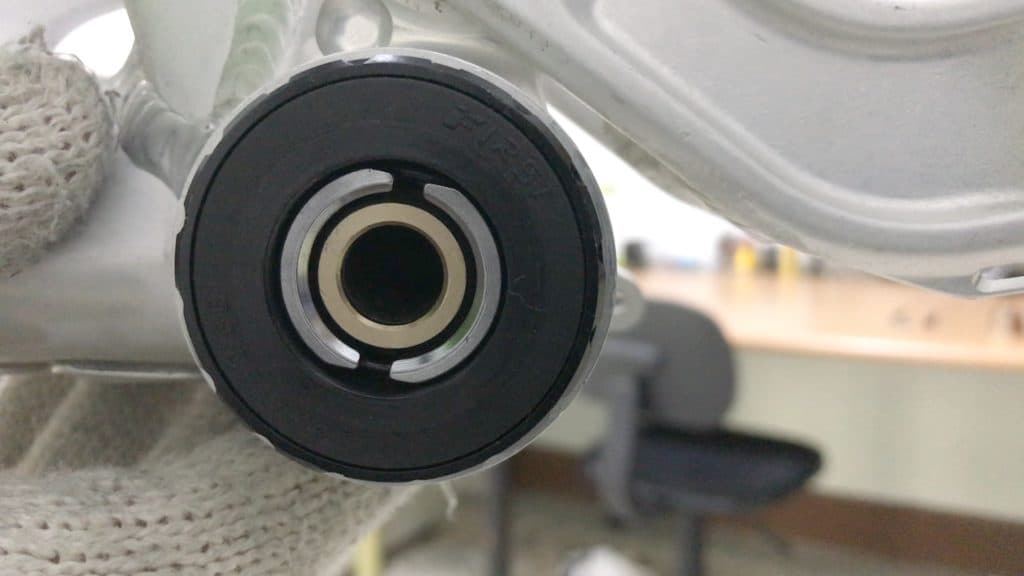
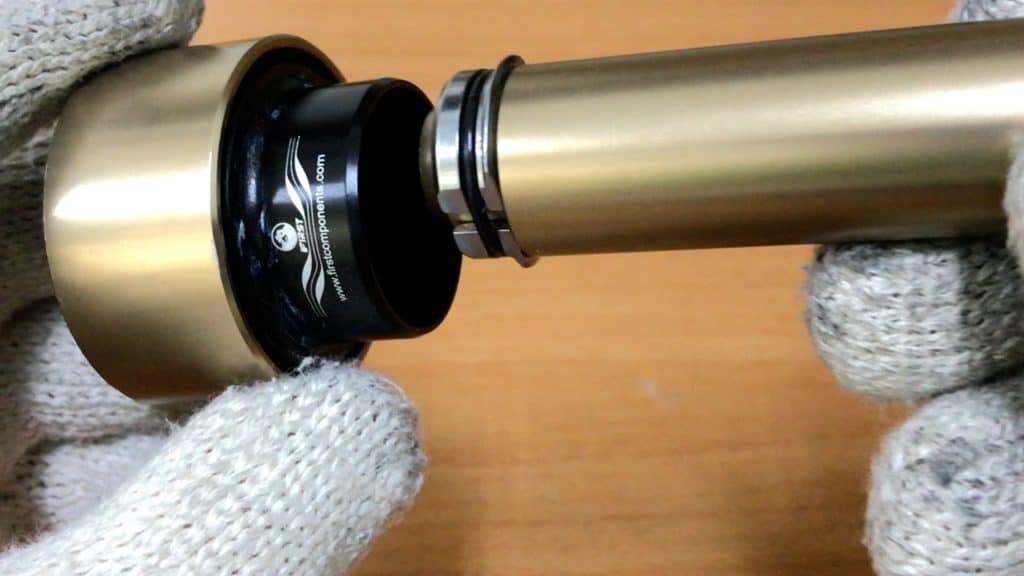
This is a typical BB86 / BB92 bottom bracket.
It fits into a 41mm diameter bottom bracket shell and has aluminum bearing cups (with a choice of ceramic bearings for greater efficiency).
Shell widths range from maximum 92 mm on down.
Or, more accurately, this bottom bracket design will adjust to fit a BB shell inside that limit.
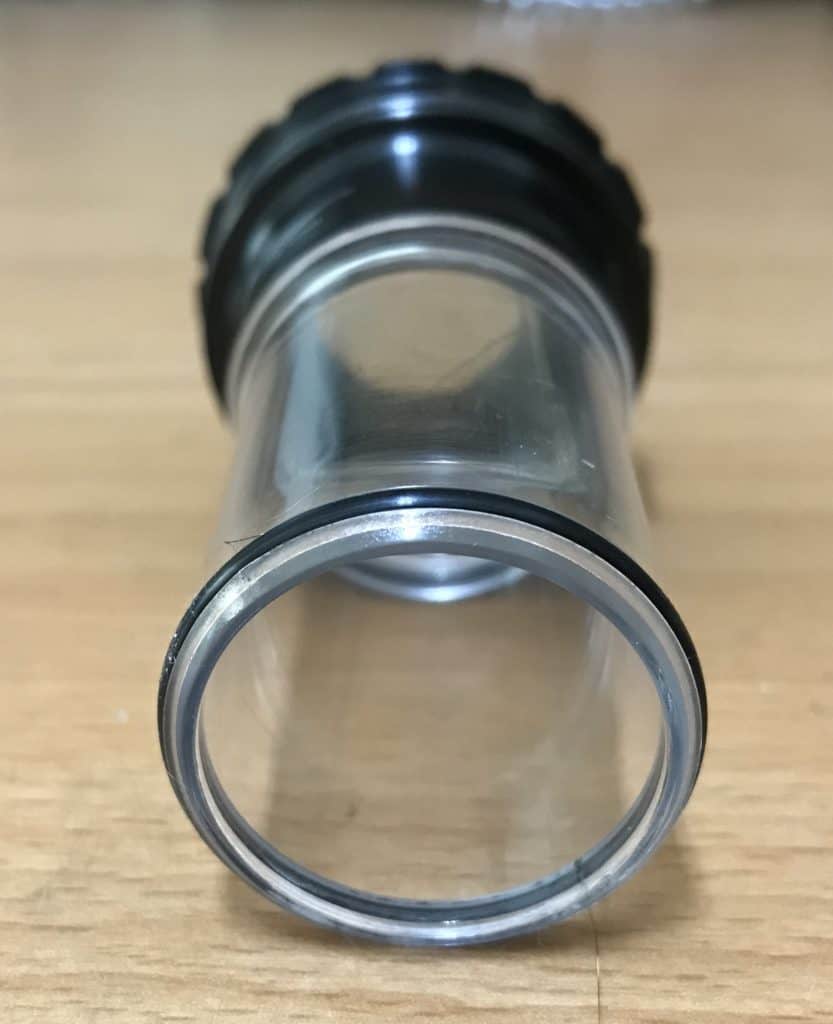
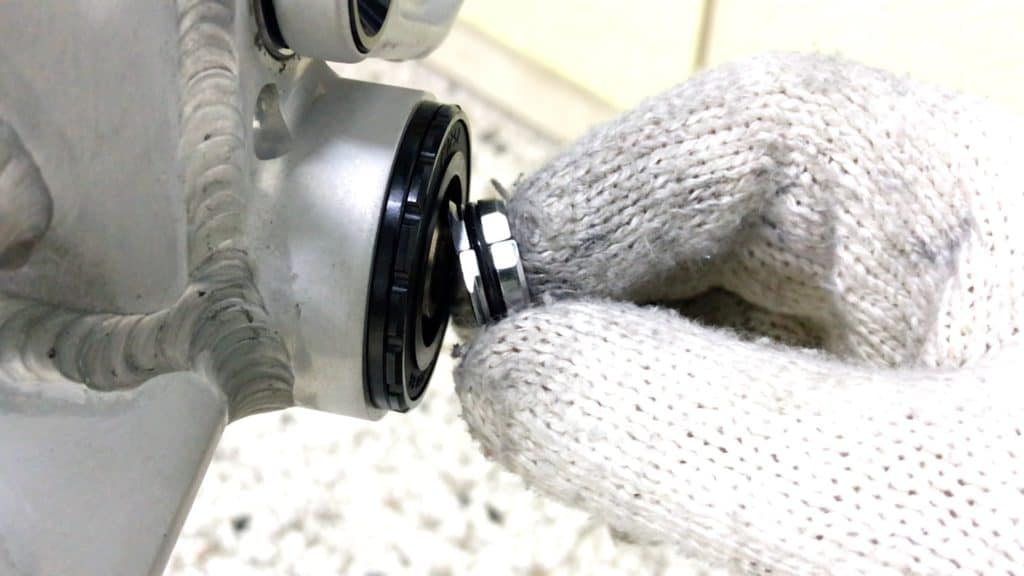
The sleeve’s rubber O-ring seals against the entire length of the non-drive side bearing cup’s inner diameter. The sleeve slides along the bearing cup as you press the cup in with the seal in place at that position.

This variant has the same options. The difference is the bearing cups/adapters are nylon.
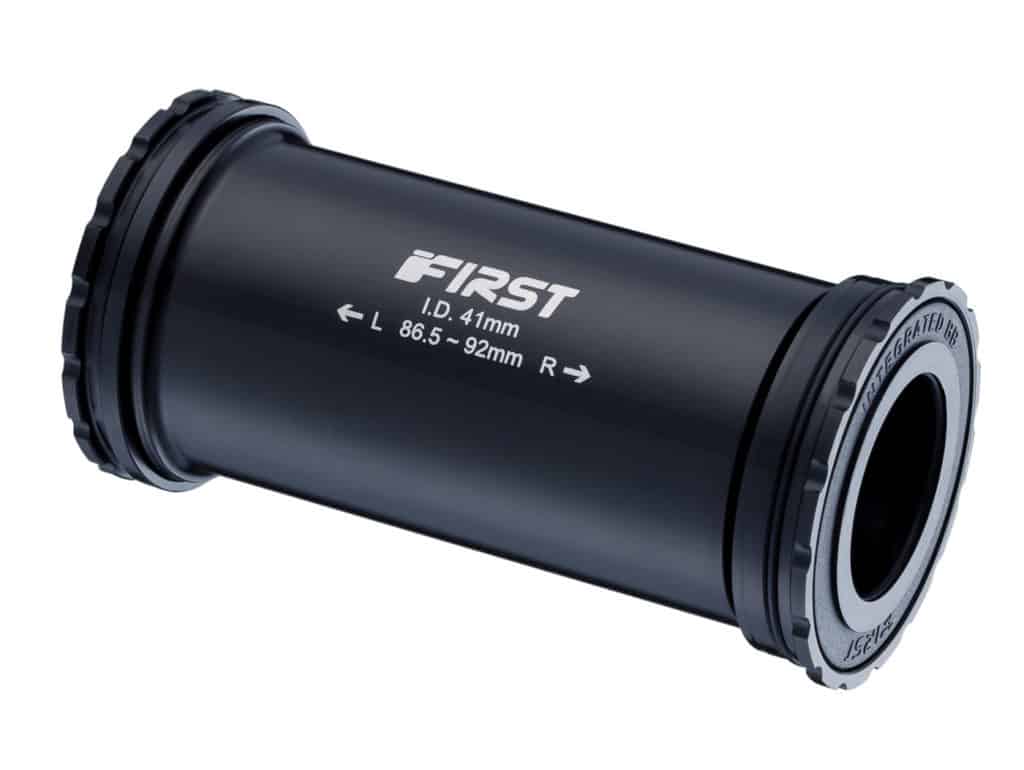
A self-installing, self-extracting model like this is the way to go should you be looking to avoid having to use a dedicated toolset.
A Shimano 16T wrench is all you need.
Mount both sides into the bottom bracket shell. Then turn the drive side with the tool. The internal threads draw each side into the BB shell.
Extract it by turning the drive side BB cup counter clockwise.
Before we get to the subject of installing and removing a BB86/BB92 bottom bracket unit, let’s briefly cover several Frequently Asked Questions.
ARE BB92 and PF92 the SAME?
Yes. It’s a matter of manufacturers’ technical terminology vs the cycling public’s way of speaking.
“PF” 92 is perhaps more accurate since it references the intrinsic nature of the bottom bracket—that it presses into the frame.
A common way to also reference BB92 is “Shimano Press Fit”.
WHAT CRANKS FIT BB92?
If you are thinking of upgrading from your current mountain bike with its 73mm bottom bracket shell/external bearing setup, you’re in luck.
This is a good move, by the way. The idea behind the BB92 standard is creating a beefier frame around a 24mm standard drive train.
You get to
- upgrade to a superior rig and
- reuse your existing crank and chainrings into the bargain.
WILL BB30 FIT BB92?
Two different things entirely—apples to oranges if you like.
BB30 refers to the spindle diameter, specifically:
- 42mm BB shell diameter
- bearing with a 30mm internal diameter
- 30mm diameter spindle on the crank
BB92 refers to the bottom bracket shell width, specifically:
- 41mm BB shell diameter
- bearing with a 24mm internal diameter
- 24mm diameter spindle on the crank
BB92 REMOVAL (& INSTALLATION) TOOL
Removing or installing a BB86 or BB92 bottom bracket is a breeze if you’ve got the right tools.
In this section I cover both installation and removal on a mountain bike.
Do I Need an Impact Tool?
A very important point: avoid employing an impact tool to remove a press-fit bottom bracket
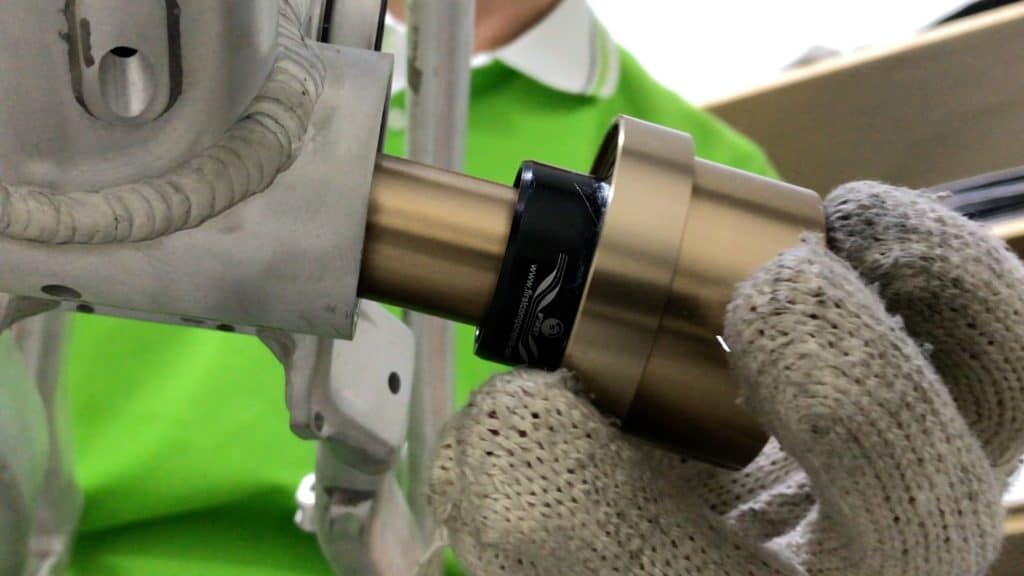
This is the “business end” of the tool.
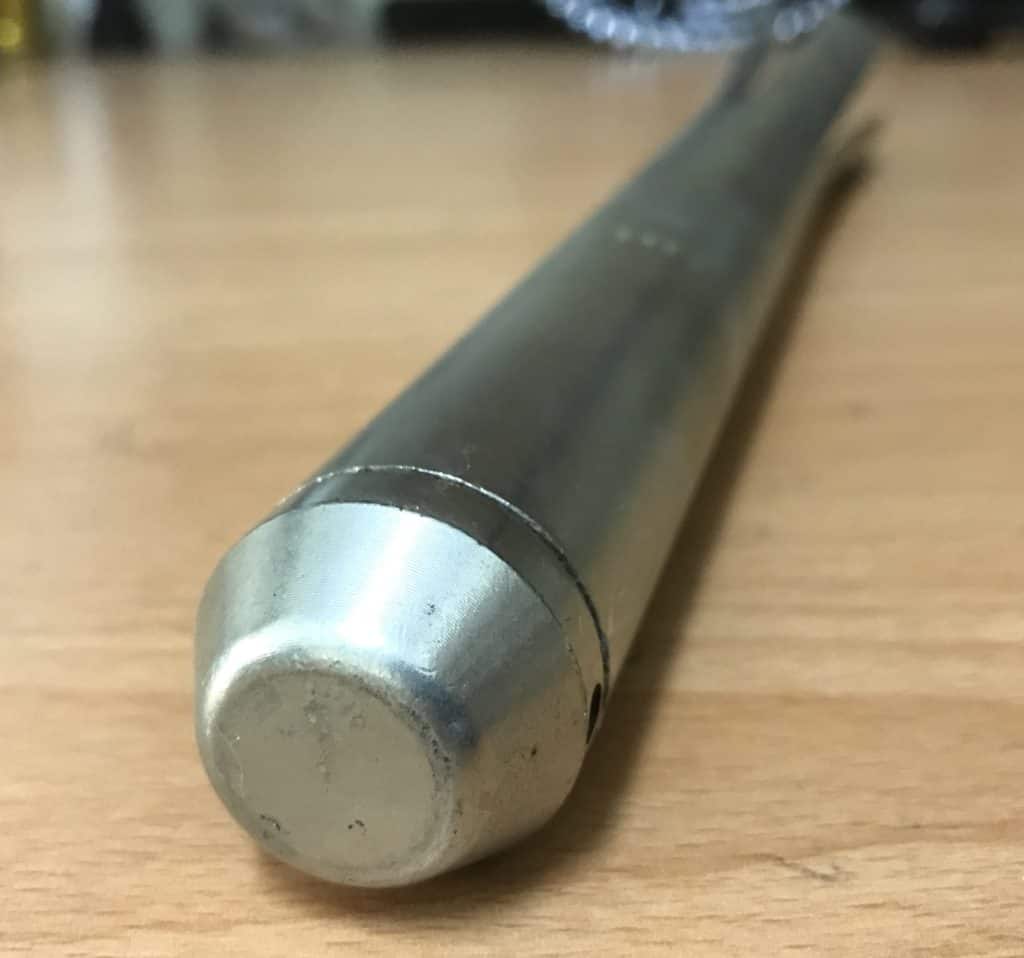
You run the shaft, blunt end first, through the bottom bracket.
The flanges on the other end compress into the bottom bracket then “pop” open as they expand, having moved past the bearing cup.
You grab a hammer and bang away on the blunt end. The flanges brace against the bearing cup enabling you to “tap” it out.
The longer the bottom bracket has been in place, the harder the removal. Ok, not necessarily. But as a rule of thumb, that’s the way it usually goes.
“Tapping”, then, won’t be sufficient. You’ll have to let loose with several solid thumps.
Even if you are able to simply tap the BB free, there’s certainly going to be damage to the bottom bracket bearing cup.
In this day and age we don’t have to resort to this type of blunt-force trauma to maintain or upgrade our bikes.
Precisely machined tools, comprised of CNC-honed components, enable quick and gentle bottom bracket removal including BB92 along with all other types of press fit bottom bracket.
The video demonstrates in fine detail how to carry out installation or removal quickly and easily. For a summary keep on skimming down the page, or check out the video for detailed coverage of the procedure.
Installing BB86 & BB92
First up, a simple grease preparation procedure is important.
Applying a light smear of grease to both the bottom bracket bearing cups and the bottom bracket shell is advised.
Installation and, maybe more importantly, removal becomes easier.
Additionally, any minute movement (which will depend on the manufacturing precision of the frame maker’s BB shell) may generate a press-fit creak, not an uncommon complaint for this type of bottom bracket.

There is is no particular method of application. I would make the point though, that if you mess around with bikes a lot, you will be in frequent contact with a variety of chemicals in the oil, grease, and de-greasers you use over the years.
Over the long term your skin will continually absorb tiny amounts. Over the long term that adds up.
In the interests of reducing the odds of damage to your health somewhere down the track, keeping a barrier between your skin and these chemicals is beneficial.
Smearing grease on with a fine brush – a toothbrush will do the job – or fingers (nitrile gloves are recommended) is enough.
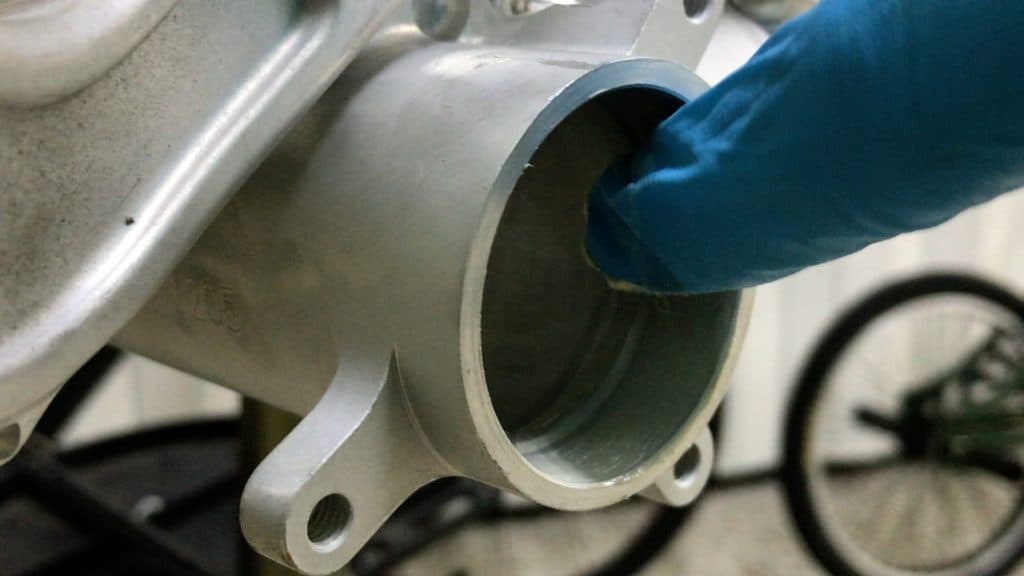
All you need is a light smear across the 10mm where the bearing cup sits inside the BB shell.
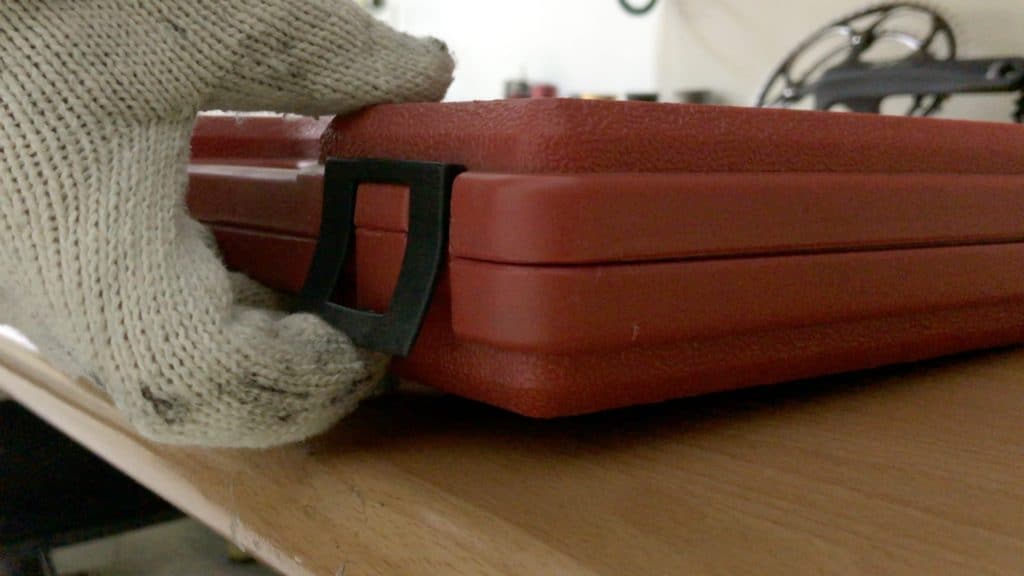
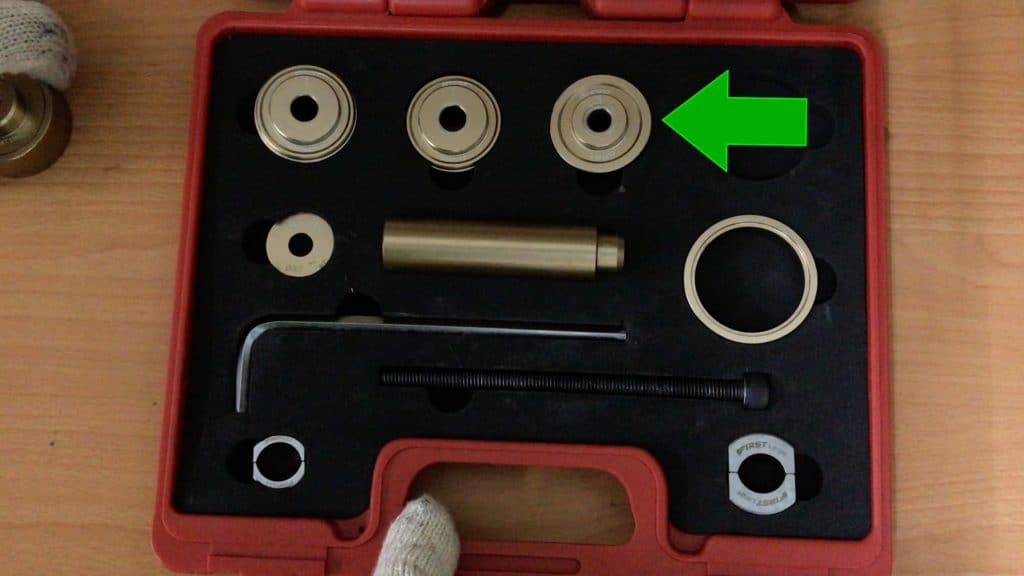
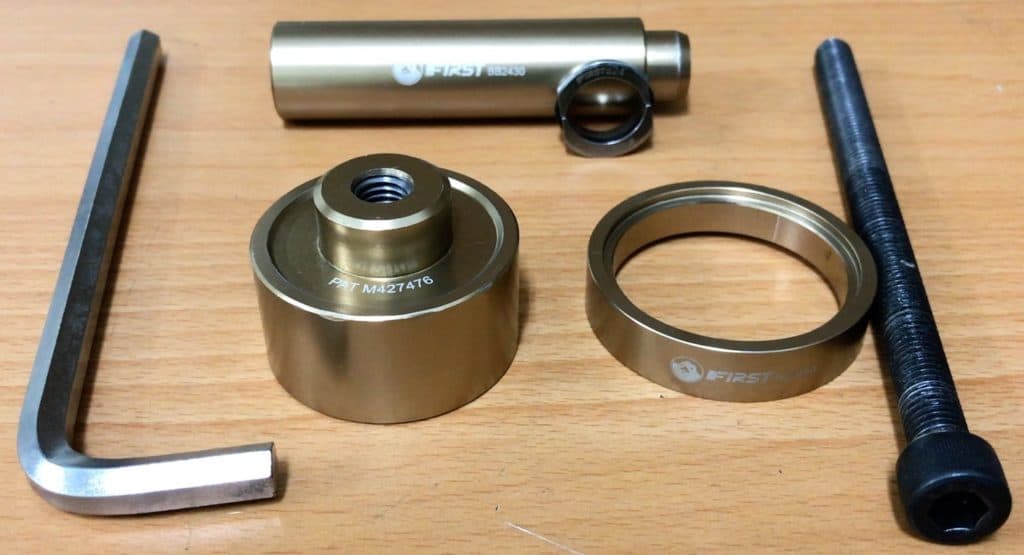
This tool is housed in a robust plastic shell with hard and durable – and flexible – closing clasps.
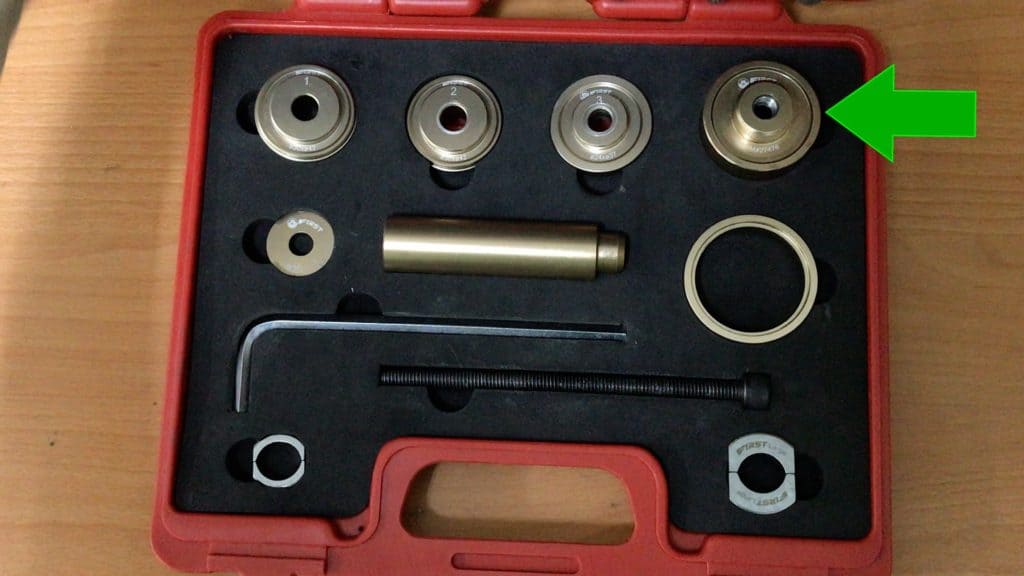
The retaining cup is used for both installing and removing a BB92 bottom bracket.
Its thread takes the bolt used to press-in a bottom bracket and also serves as the capturing vessel when you remove a bottom bracket.
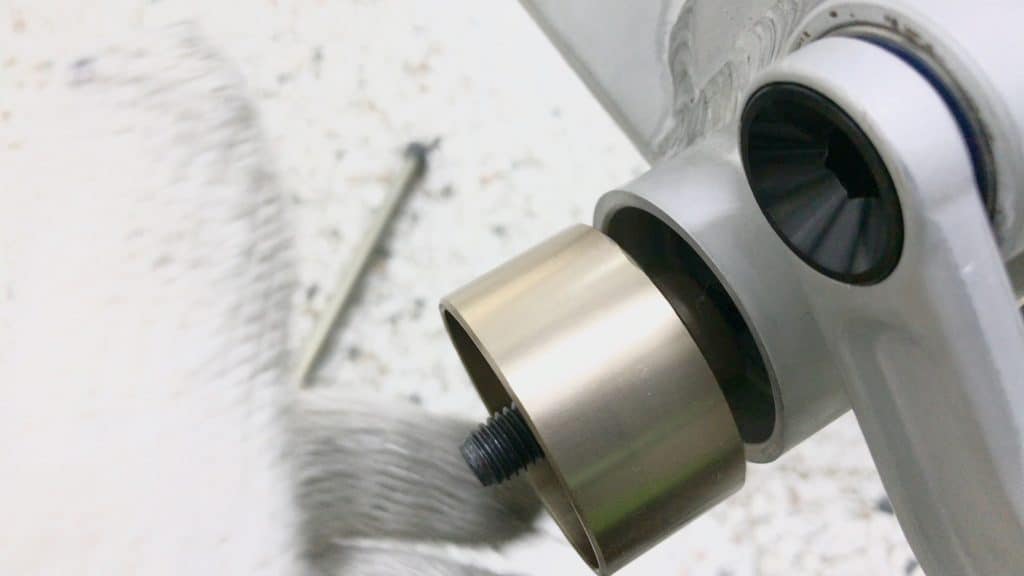
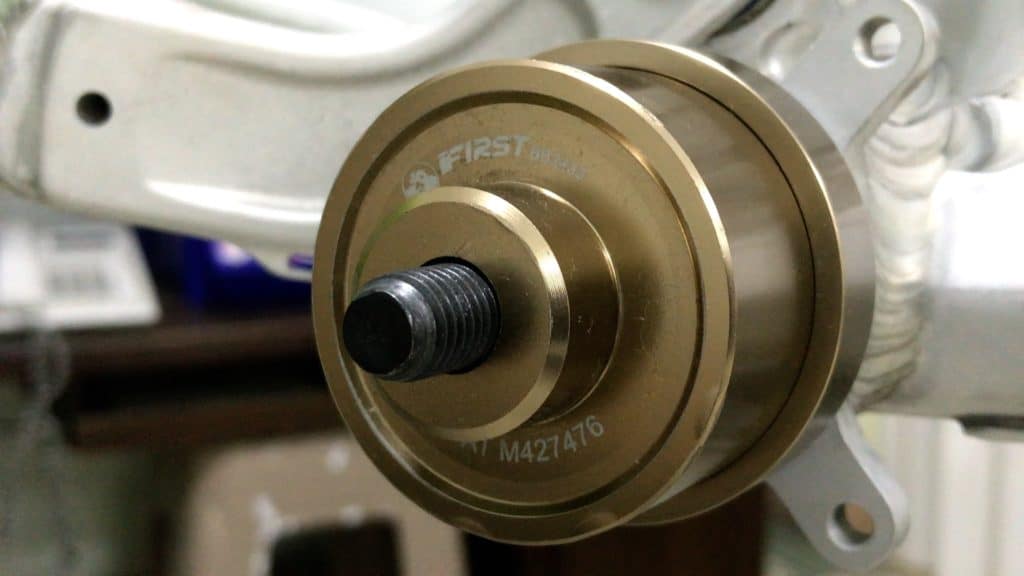
This piece presses against, as well as inserting into, the bearing cup.
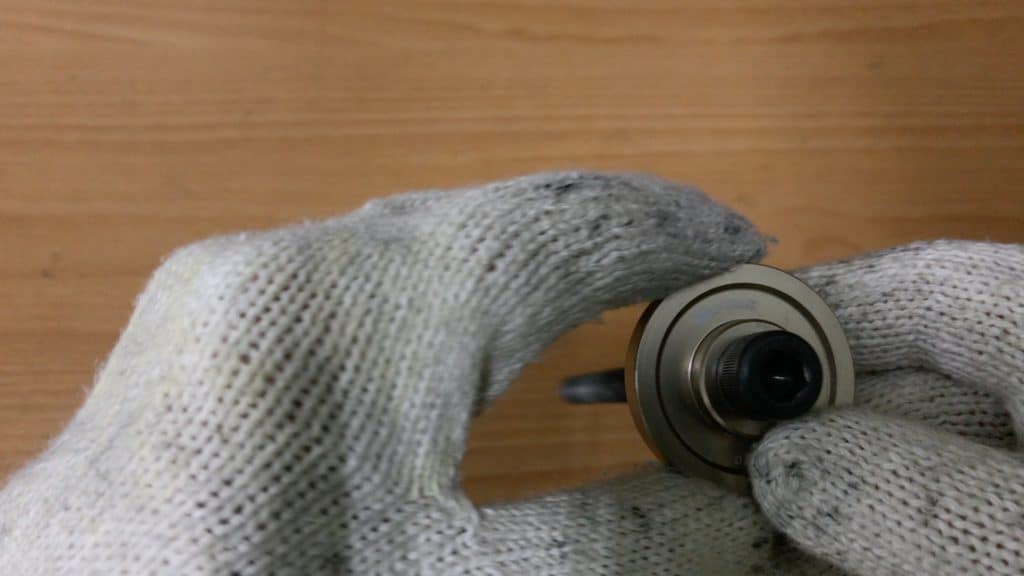
The 22mm surface faces out. The other side’s 24mm surface inserts directly into the bottom bracket—24mm is the spindle diameter of course.
The 16cm bolt inserts through the piece and into the retaining cup. This piece presses the bottom bracket into position.
The retaining cup helps to keep it square so the bearing cups are pressed into position on the correct plane.
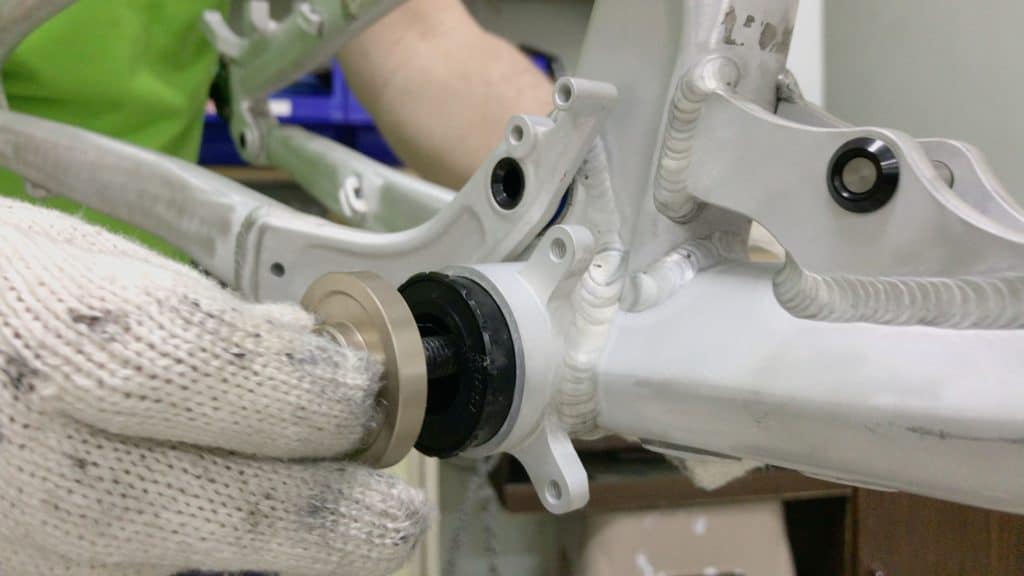
The piece also aligns perfectly with the bottom bracket’s outer diameter. Once the pressure is applied, this disc guides the BB squarely into position.
There will sometimes be a tiny bit of sideways BB drift as soon as you begin turning the bolt. But the tool’s design straightens the bearing cup.
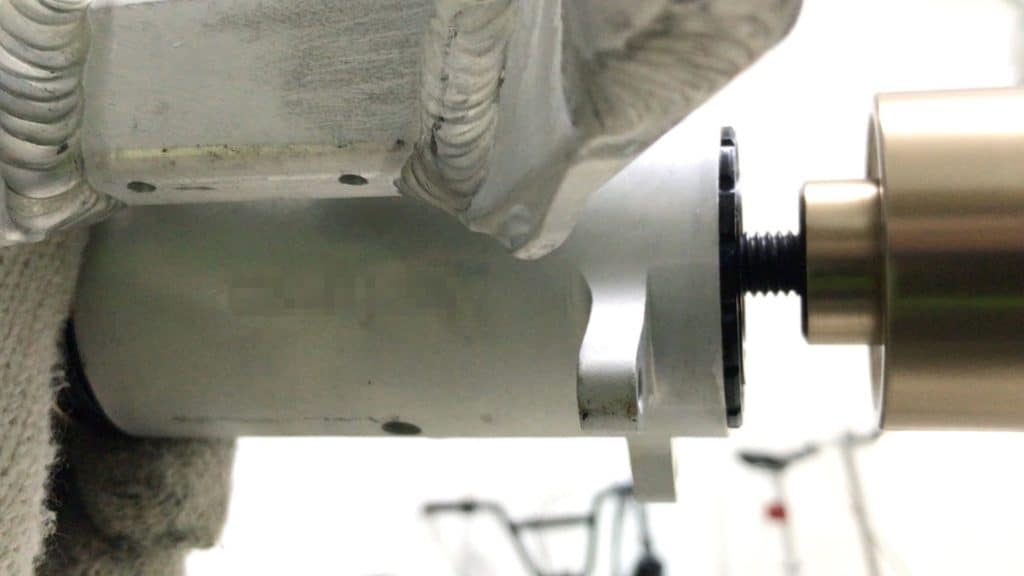
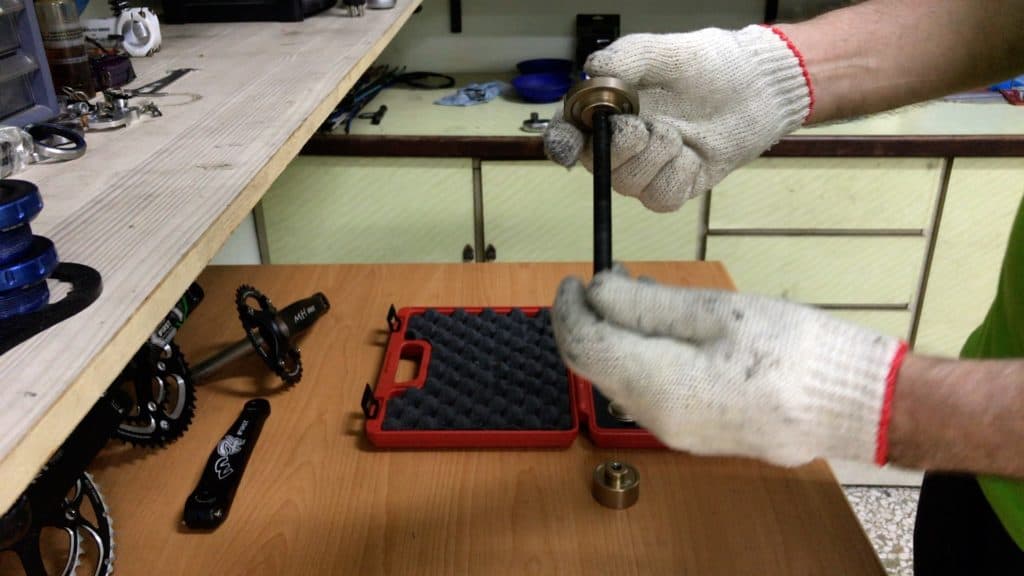
Screwing the retaining cup into its direct connection with the BB shell ensures this 3-piece ensemble (press-fit piece, bolt, & retaining cup) is perfectly square to the BB shell.
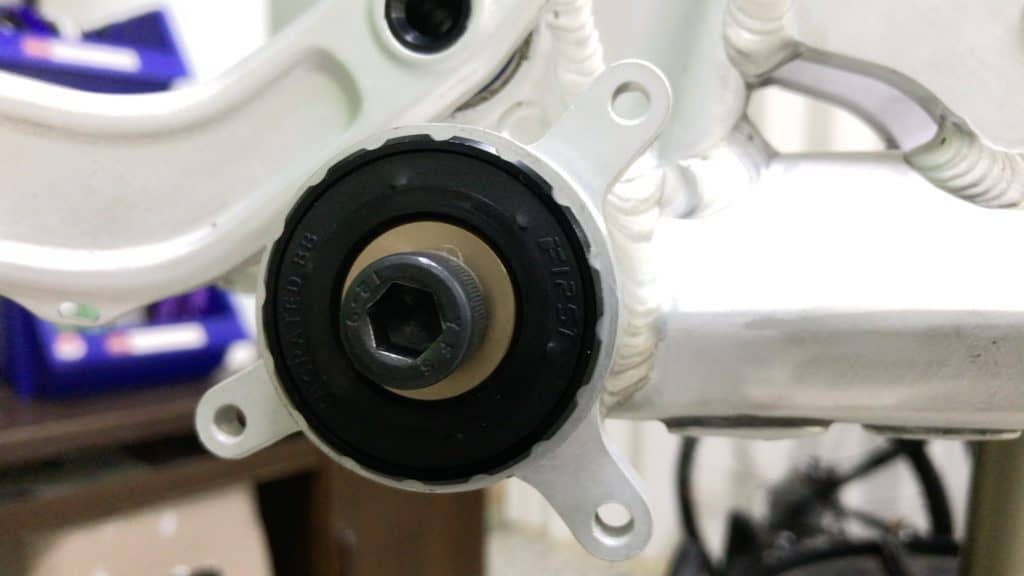
Getting the bolt finger-tight is enough. Provided the retaining cup is snug against the BB shell on the opposite side, you are good to go.
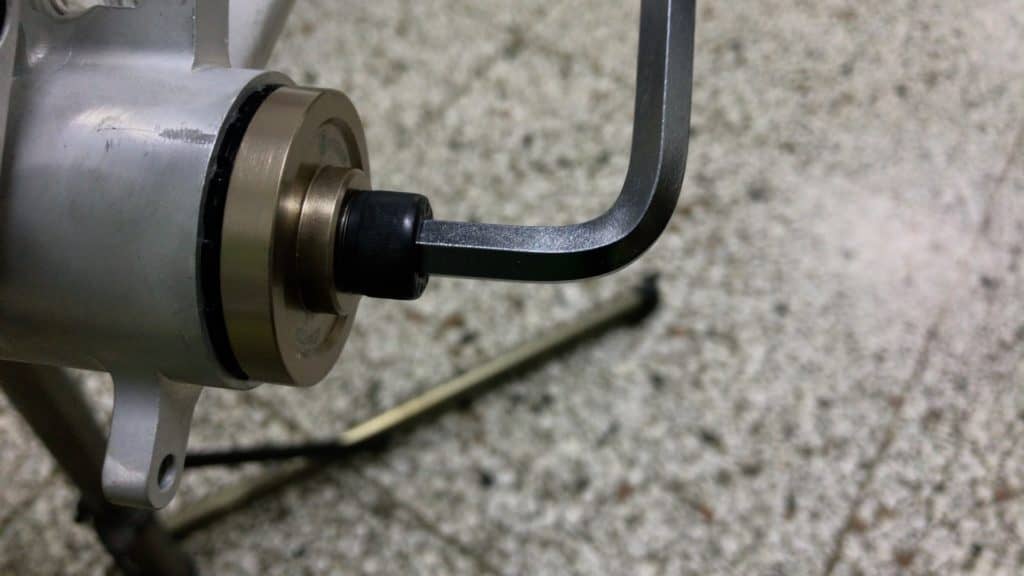
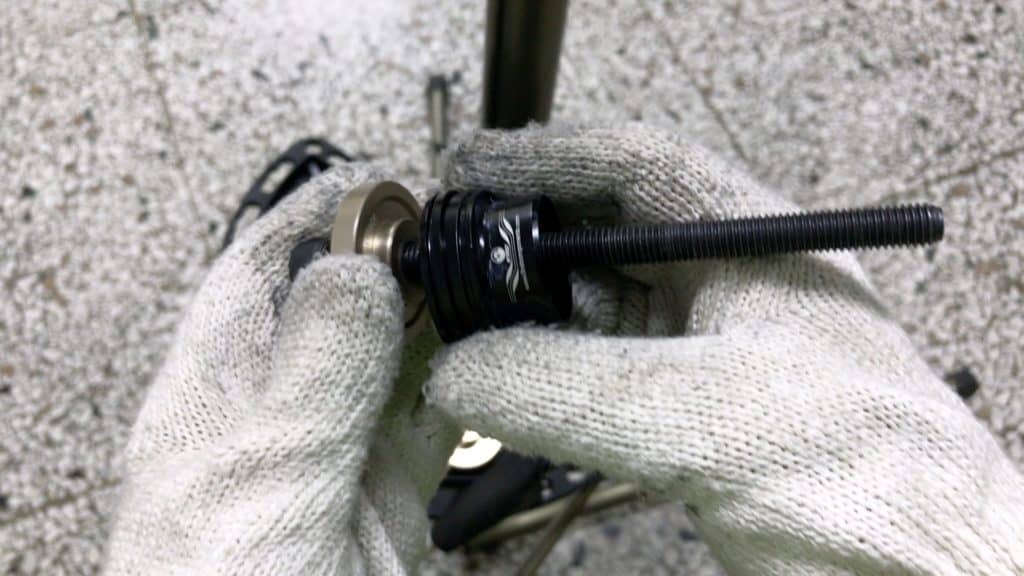
A few turns of the supplied 8mm allen wrench quickly moves the bearing cup into position.
When you’ve got to this point, the drive side installation is complete.
Fractionally turn the the bolt in the opposite direction to loosen the assemblage. Then simply unscrew the retaining cup from the bolt.
Mount the non-drive side BB92 bottom bracket cup onto the press piece and bolt.
The procedure is exactly the same installing the non-drive side.

Installation is complete ready for crank installation.
Removing BB86-BB92
We need a few more components to assist in removal.
Installing is simpler as we apply the force required to press-in a BB92 (again, any press-fit bracket for that matter) from outside.
With removal, the force comes from inside. The trick is to install the components allowing this to happen.
We take away the press-piece (bracket used to press the BB into position). They include the
- retaining cup ring
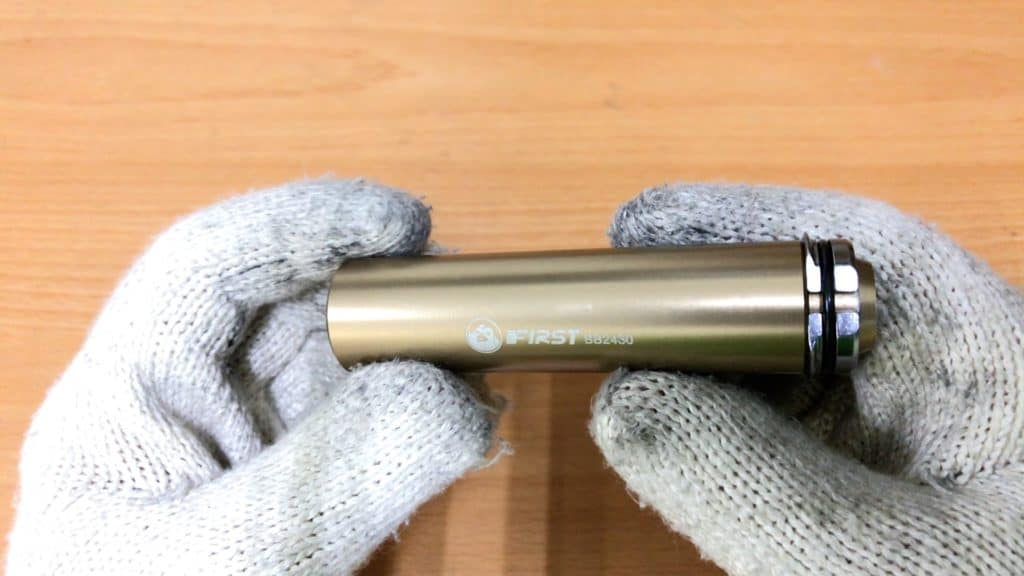
- the driver
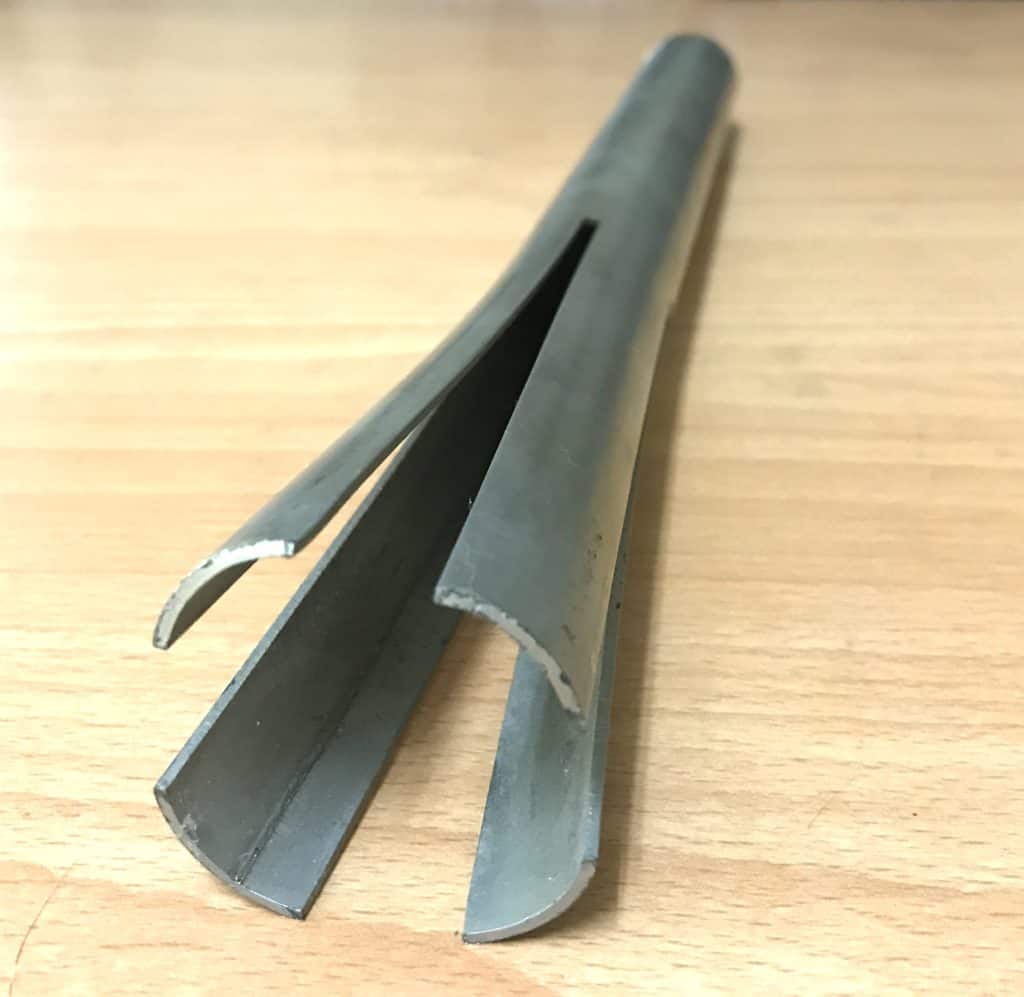
- the split steel-hitch
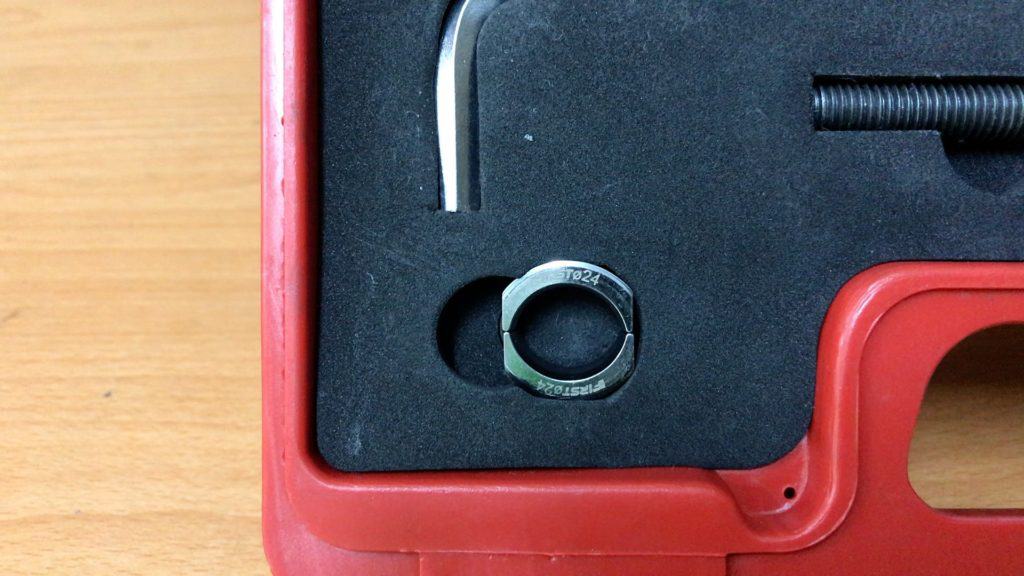
The split steel-hitch is a bracket comprised of two equal pieces kept together by an elastic rubber grommet.
This component enables the gentle transfer of force from the driver to the bottom bracket without stressing or damaging it.
The split steel-hitch sits on the driver like so, expanding over the end. Under tension, the rubber grommet keeps it firmly in place.
The driver and the split steel-hitch, as a unit, press the BB92 bearing cup out of the BB shell.

The driver’s diameter is 24mm. The fit is snug as you slide it through, although not quite as close as a crank spindle. There is no need to apply grease as it easily slides through.
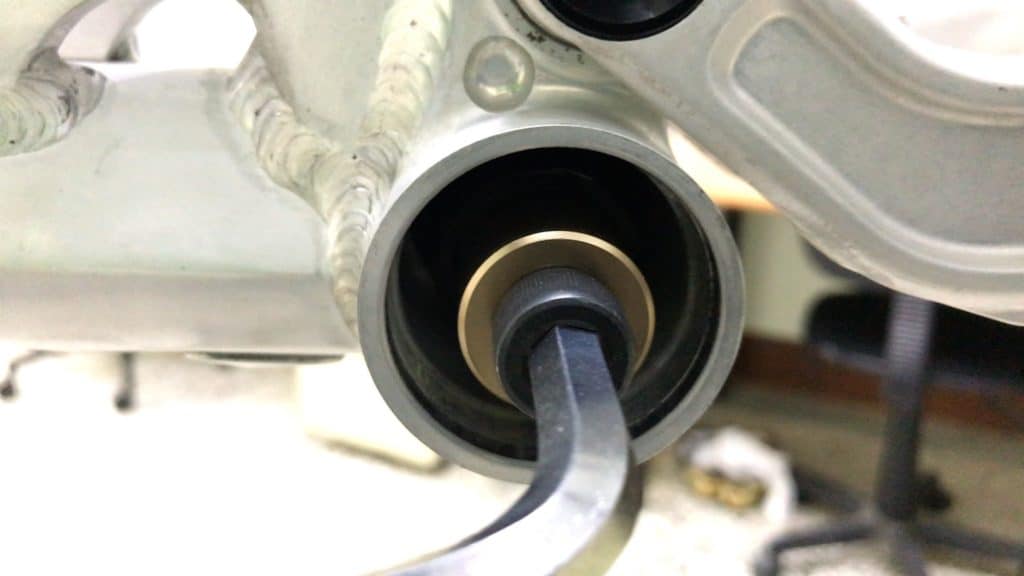
- The technique is turn the split steel-hitch slightly sideways.
- Slide the driver back into the BB shell.
- Slide the steel-hitch inside the bearing cup then push it over the end of the driver.
- The rubber grommet expands allowing the steel-hitch to grip the driver.
- Slide it back into position then move the driver forward so that the split steel-hitch’s edge contacts the bearing cup’s inside edge.
Here we see the split steel-hitch fully expanded around the driver, fitting firmly and precisely inside the bearing cup’s 24mm bottom bracket.
You use the retaining cup, again, not just as the “nut” to the bolt, but also as a receptacle that holds the bearing cup once it is pressed out of the bottom bracket shell.
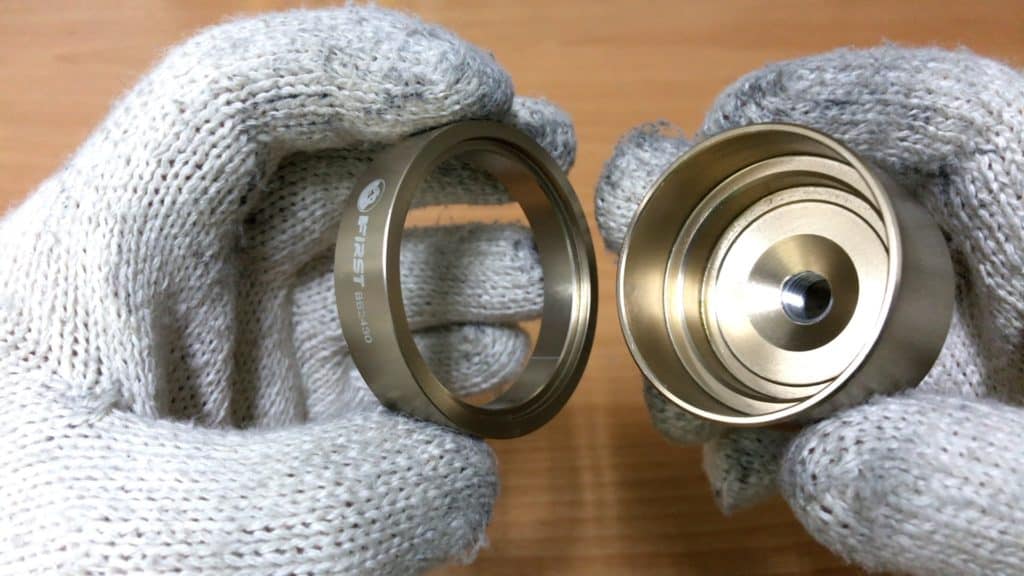
The retaining cup won’t connect neatly with the bottom bracket shell. Hence the ring.
The ring is machined to fit exactly to the bottom bracket shell on one side, and the retaining cup on the other.
Slide the bolt through the driver from the opposite side and screw it into the retaining cup until the cup becomes firm against the ring.
The bolt is through as far as it can go without putting pressure on the bearing cup.
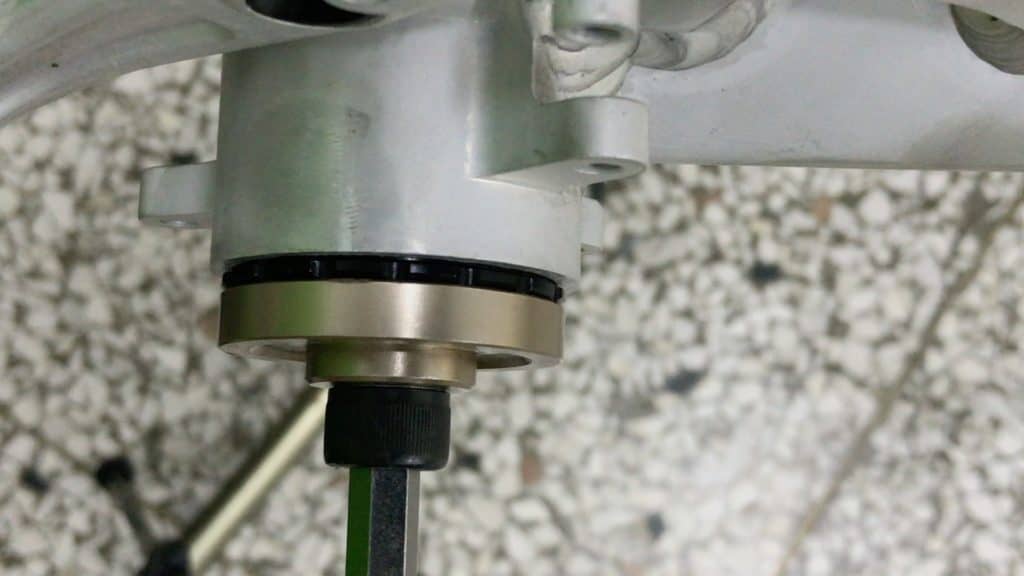
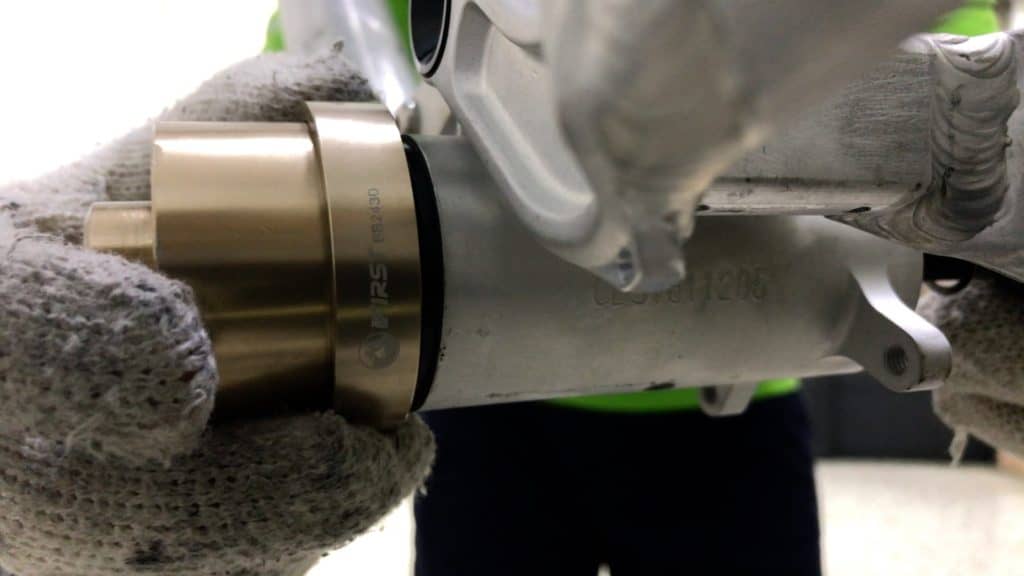
The driver side is ready for the 8mm allen wrench.
As you turn the bolt, the driver moves into the bottom bracket shell.
5 or 6 turns pushes the bearing cup (on the opposite side) out. It “gives” at the point where the bearing cup exits the BB shell completely.
The removed bearing cup sits in the retaining cup but also remains positioned on the driver.
You remove the whole lot in one clean movement.
Retrieve the bottom bracket from the retaining cup.
Remove the split steel-hitch from the driver.
You are ready to remove the drive side.
The difference this time around is that with one BB86-BB92 bearing cup removed, the driver no longer has support of the (now removed) bearing cup.
Despite appearances, that won’t be a problem.
Once the bolt engages the retaining cup “nut”, the driver squares up.
Turn the bolt as with the previous bearing cup removal. The right side bearing comes out just as quickly and easily.
WRAPPING UP
Upgrading, maintaining or replacing a BB92, BB86, or BB30 bottom bracket is quick and easy with this toolset.
Yes. An aspect I did not mention is that this works with a BB30 system as well.
Here’s a question:
- Is your press-fit bottom bracket system the bee’s knees?
- Or would you go back to a threaded bottom bracket in a heartbeat?
2 thoughts on “BB92 (&86) – Complete Guide to Installation and Removal”
This is literally one of the best press fit bb instructions i have seen on the internet. Thanks!
I’m new to the ‘press fit’ bottom bracket technology, due to having a threaded system on my relatively old frame (2011). However, I’ve just inherited a carbon frame with a press fit system. I had difficulty just removing the crankset; it needed a fair whack. I’ve never been a fan of press fit parts. So yes, I would elect for threaded in a heartbeat. It seems so much simpler to me.