Here’s a deep dive into several headset subcategories that enable riders to fine tune a bike’s performance and comfort factor:
Angle Adjust: raise or lower the headset angle 1-2° or more.
Reach Adjust: reposition the steerer relative to the center of the head tube.
Angle Limited: restricts the handlebars turning arc to not exceed 180°.
Riders who spend a lot more time their bikes compared to the average rider, and who probably own more than one steed, seek out and even rely on the subtle changes that a millimeter here, and 1° there, have on a bike’s handling under a particular set of circumstances which are extremely context specific—it’s a very personal thing.
Angle Adjust
Angle adjust headsets allow the user to effectively alter the head tube angle of their bike. Asymmetrically machined cups (thicker on one side than the other) tilt the fork steerer to the front or rear of that axis by one or two degrees.
Before taking a deep dive into it, we need to consider what is perhaps one of the most little-understood yet vitally important aspects of bicycle geometry: Trail and Mechanical Trail.
Trail vs Mechanical Trail on Bicycles
The terms trail and mechanical trail relate to the steering geometry of bicycles, but they differ slightly in their definitions and implications for bike handling.
Trail
Trail (also called ground trail in some circles) describes the horizontal distance between
- the point where the steering axis intersects the ground and
- the center of the tire’s contact patch.
Trail is influenced by several factors:
Head tube angle: A slacker angle increases trail, while a steeper angle decreases it.
Fork offset: A larger offset reduces trail, whereas a smaller offset increases it.
Wheel size: Larger wheels generally increase trail.

In terms of the actual experience of bike handling, trail describes the degree of steering ‘twitchiness’. Increasing trail results in more stable handling, or rather more predictable handling. Increasing the trail makes the steering much more responsive (fork offset complicates this somewhat, but we’ll leave that for another day).
Mechanical Trail
Mechanical trail is a more precise measurement. It is defined as the perpendicular distance from the steering axis to the tire’s contact patch. This measurement accounts for the actual leverage exerted by the offset and provides a better representation of steering dynamics than trail. However, mechanical trail is less commonly used in the cycling industry, which tends to rely on trail for simplicity and consistency in comparisons.
Trail, then, is widely used for practical purposes, while the usage “mechanical trail” is the gateway to a more nuanced understanding of steering dynamics that engineers would include in their frame of reference.
Leaving aside the issue of fork offset, a key variable is the head tube angle, which is fixed in position of course—we don’t (yet) have frames allowing adjustment of this crucial geometrical vector. The next best thing is the ability to move the angle forward or aft of the fixed head tube axis of any particular frame.
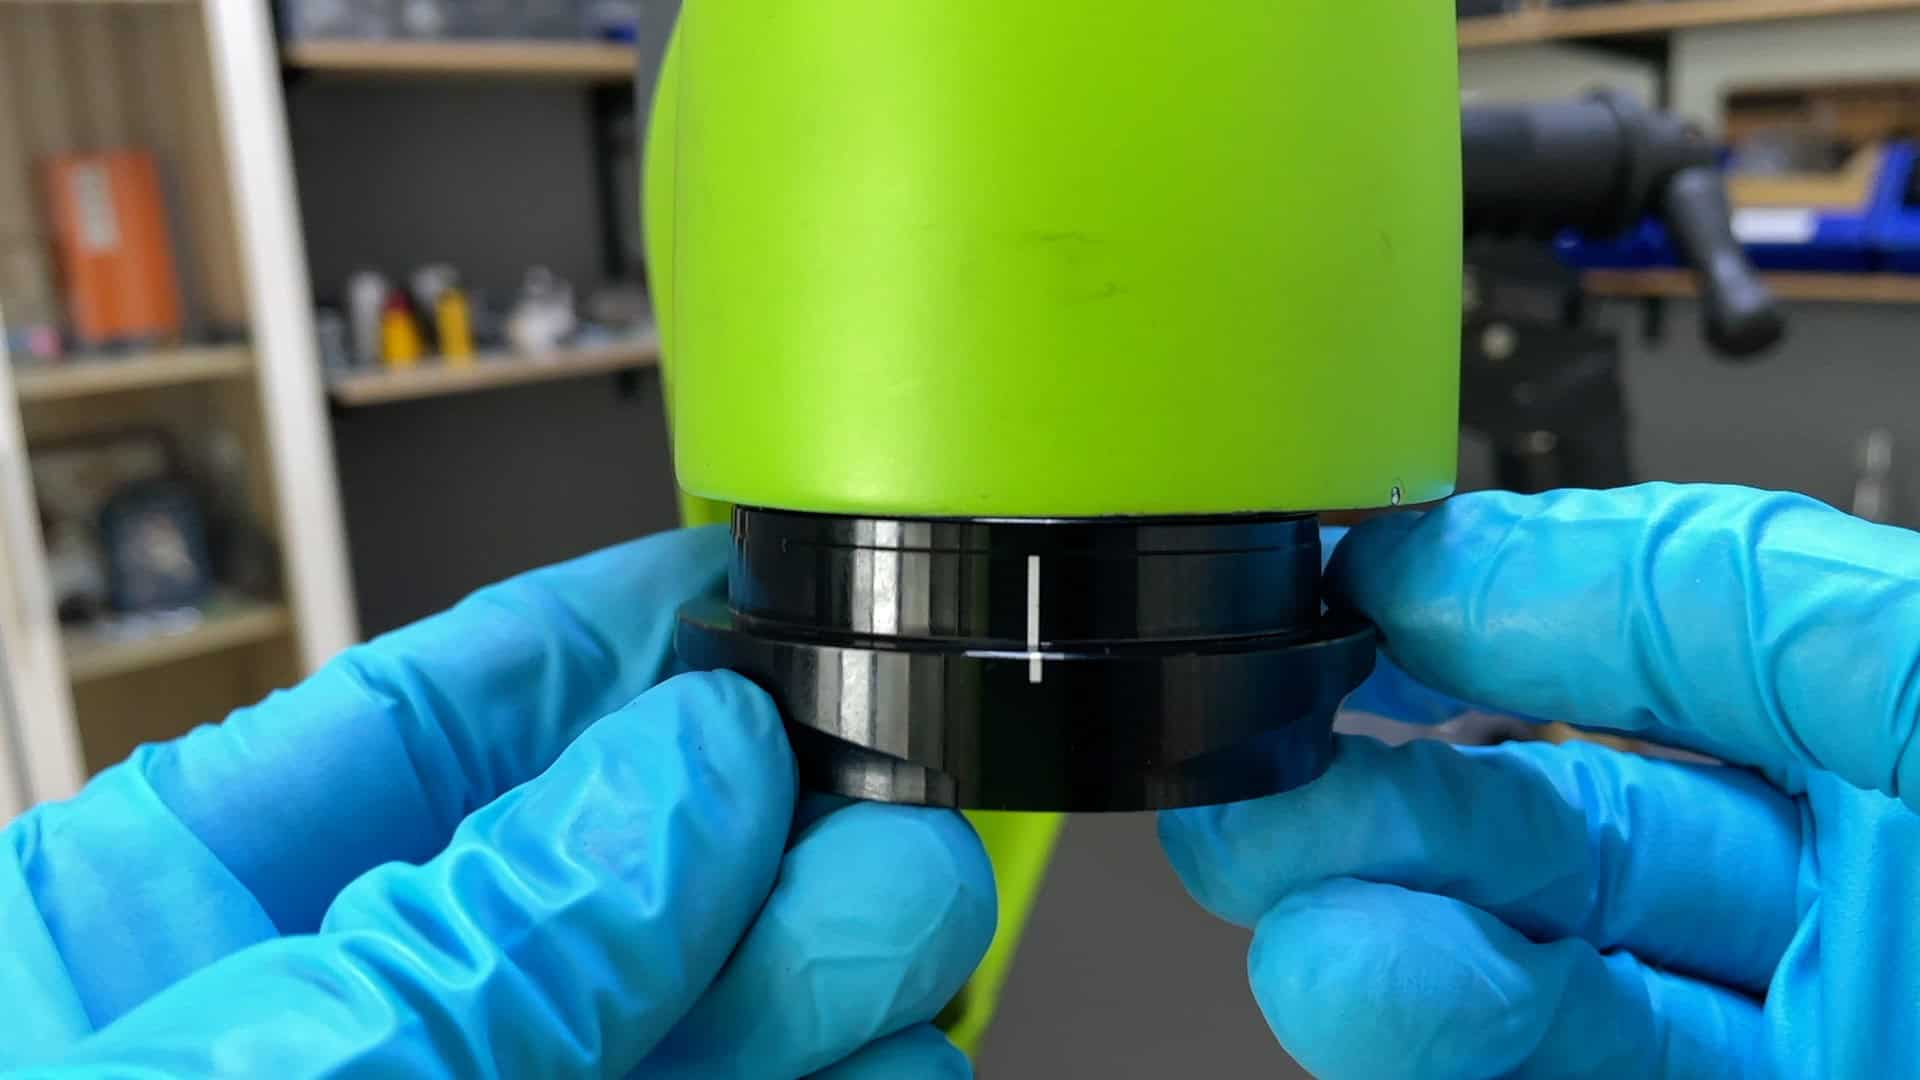
First Components’ Angle Adjust Headset
Firstly, these are not for use in integrated headsets. You need a ‘clean’ head tube that requires cup installation for the headset to work. The way to achieve the changed angles is in the way the cups are machined.
Standard headset cups sit in the head tube square to the steering axis. Or exactly aligned, if you like, to the plane of the top and the bottom of the head tube. Angle adjust headset cups are CNC machined at an angle, thinner at one edge, thicker at the opposite edge.
So installing this cup into a head tube (bike facing left) would tilt the handlebars slightly towards the rear pushing the fork to the front. In other words, the trail is increased. Install the cup at 180° to this tilts the fork towards the rear which decreases the trail.
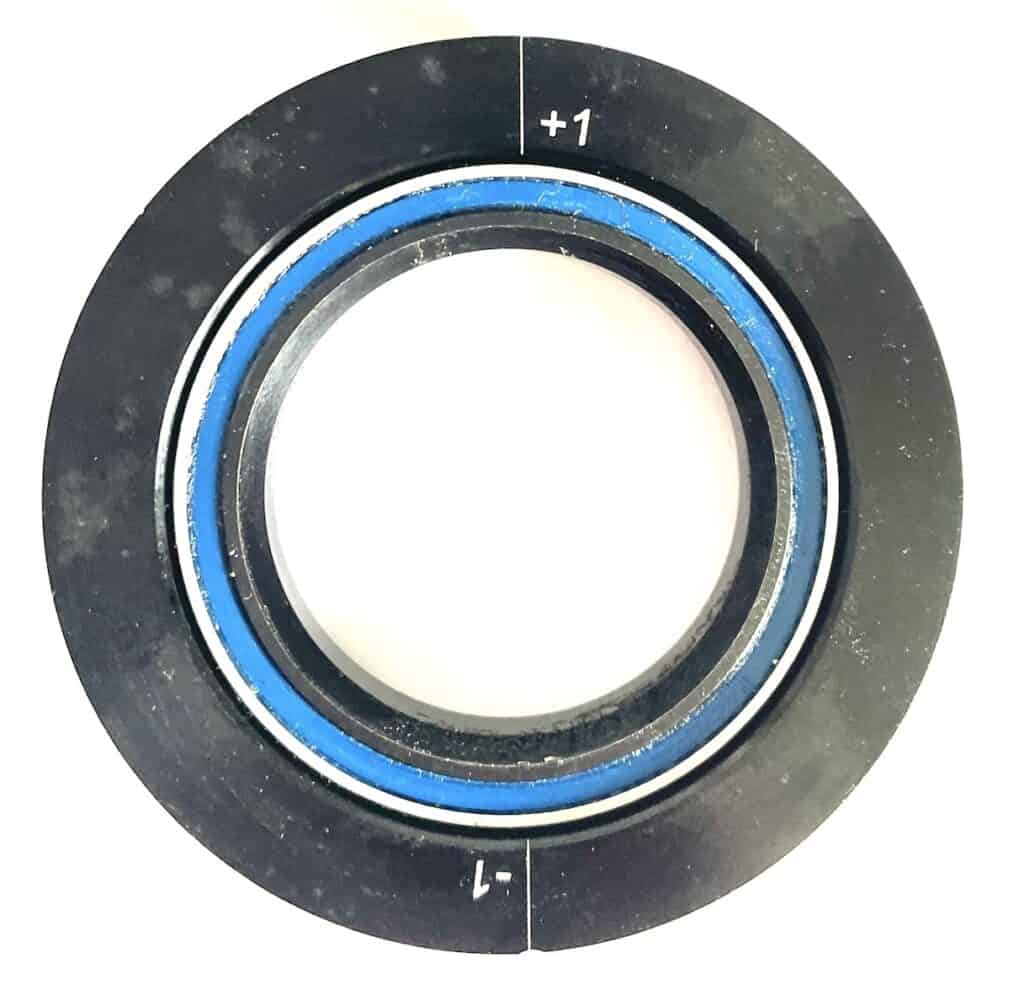
FIRST offers an angle adjust headset of either 1° or 2°. You install the cup as you would any other, one into the top and one into the bottom, making sure the center of the head tube is aligned to the cup’s centerline. If not, you’ll get a slightly skewed install which will affect the steering to the degree the install is off center.
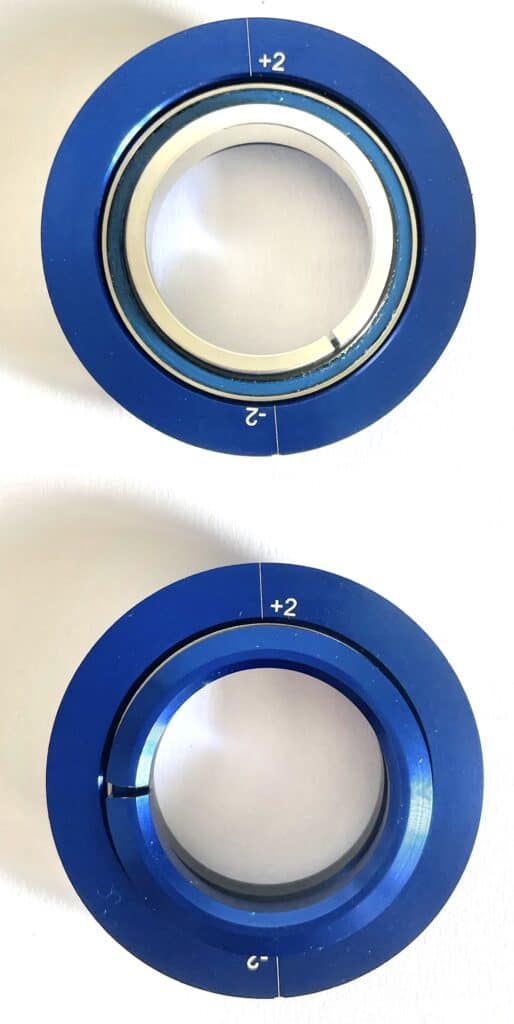
The top cup in the +2°/-2° (2nd image) includes the compression ring. Given an MTB head tube angle of, say, 70° the overall difference is 4° which significantly affects handling for riders looking to tweak their bike’s performance.
Reach Adjust
There are two elements to bicycle reach: one is geometric; the other is experiential.
In terms of geometry, the reach on a bicycle is the distance between the center of the BB shell (bottom bracket spindle) measured at the point directly above, intersecting a plane extending from the top of the head tube in the direction of the seat tube, measured from the center point of the tube (Note: tube measurements in bicycle geometry are always ‘center-to-center’ unless otherwise specified.)
The math is simple. What is most certainly not simple is the variability in cycling experience resulting from even the smallest change in the geometrical mix.
Most cyclists have experienced backache in the saddle. A mild pain in the lower back can emerge quickly early in a ride, occasionally, or slowly over the course of many hours on the road or trail becoming a long-term, ongoing source of misery.
A significant contributing factor or even the main cause of backache is the saddle position relative to the handlebars—in other words, the reach. Three ways to determine saddle position and thus adjust reach are 1. top tube length 2. stem length 3. seatpost offset.
Determining top tube length is beyond most cyclist’s control since the distance from head tube to seat post is determined by overall frame geometry which varies for each frame size, unless there is a bespoke frame builder involved.
The main means of adjusting reach, then, falls to stem length with seat post offset supplemented, perhaps, with a reach adjust headset.
Taking road bikes for example, most stem lengths are in the 80mm to 120mm range with 90-110 being the most common, reflecting average body sizes and comfort levels.

The smallest stems are 35mm with the longest up to 200mm, extreme sizes for specialist circumstances. You’ll note that most cyclists in the pro peloton go for very long stems (means you can go for a shorter top tube).
How a reach adjust headset works
Adjusting bike reach through the headset is limited to minor adjustments up to around 6mm. In the case of this example, FIRST Components’ R56-1, the limit is 5mm.
The mechanism depends on the bearing cups. Standard bearing cups are “concentric” which means they are machined equidistant from the center, that being the steering axis and which follows the angle of the head tube. RA headset cups are machined offset to the center.
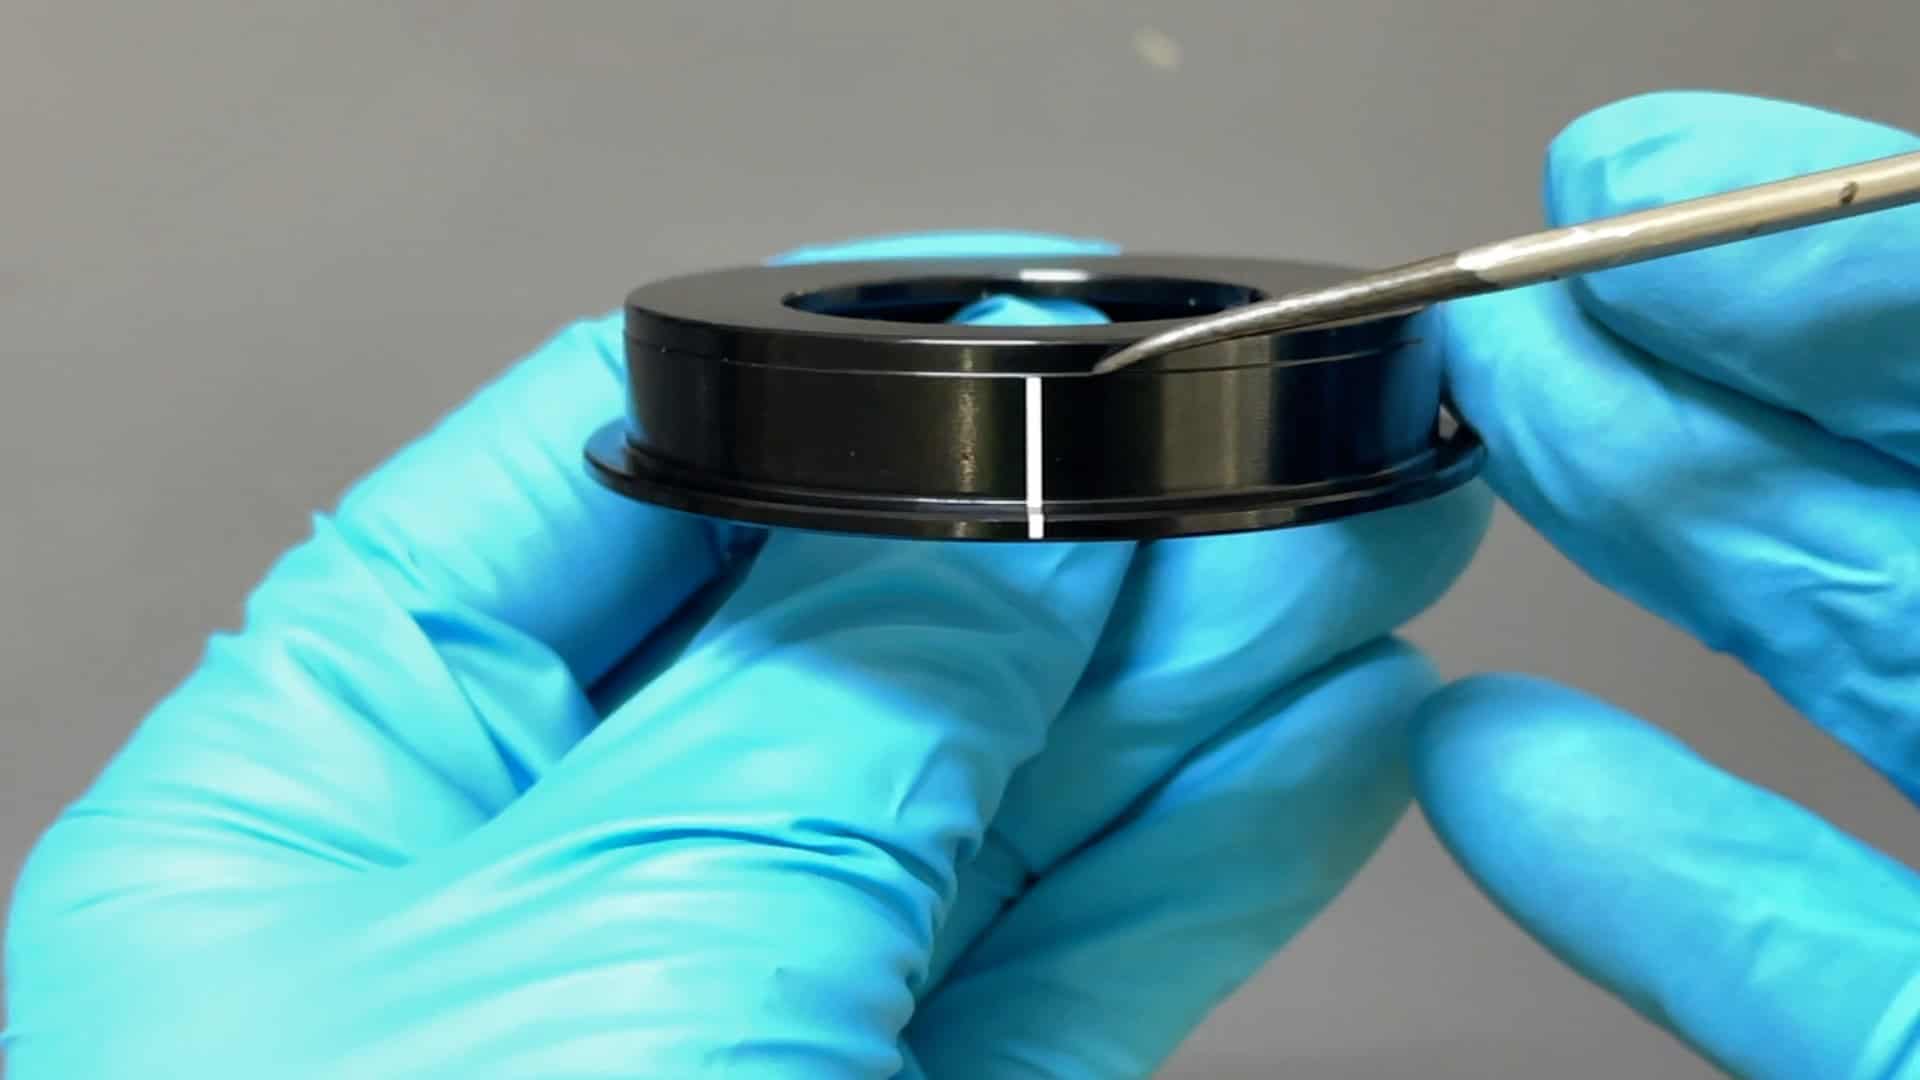
To achieve a “positive” reach, meaning you increase the reach by the amount allowed by the particular headset you are using, the cup is installed with the “thin” side to the front—it goes to the back to reduce the reach.
The installation is tricky because you need to make sure the cup is precisely centered. If installed slightly off-center, the fork will install at an angle and potentially play havoc with the steering.
We mark a line on both the upper and lower cups. The cups is correctly installed by aligning this with the center of the head tube.
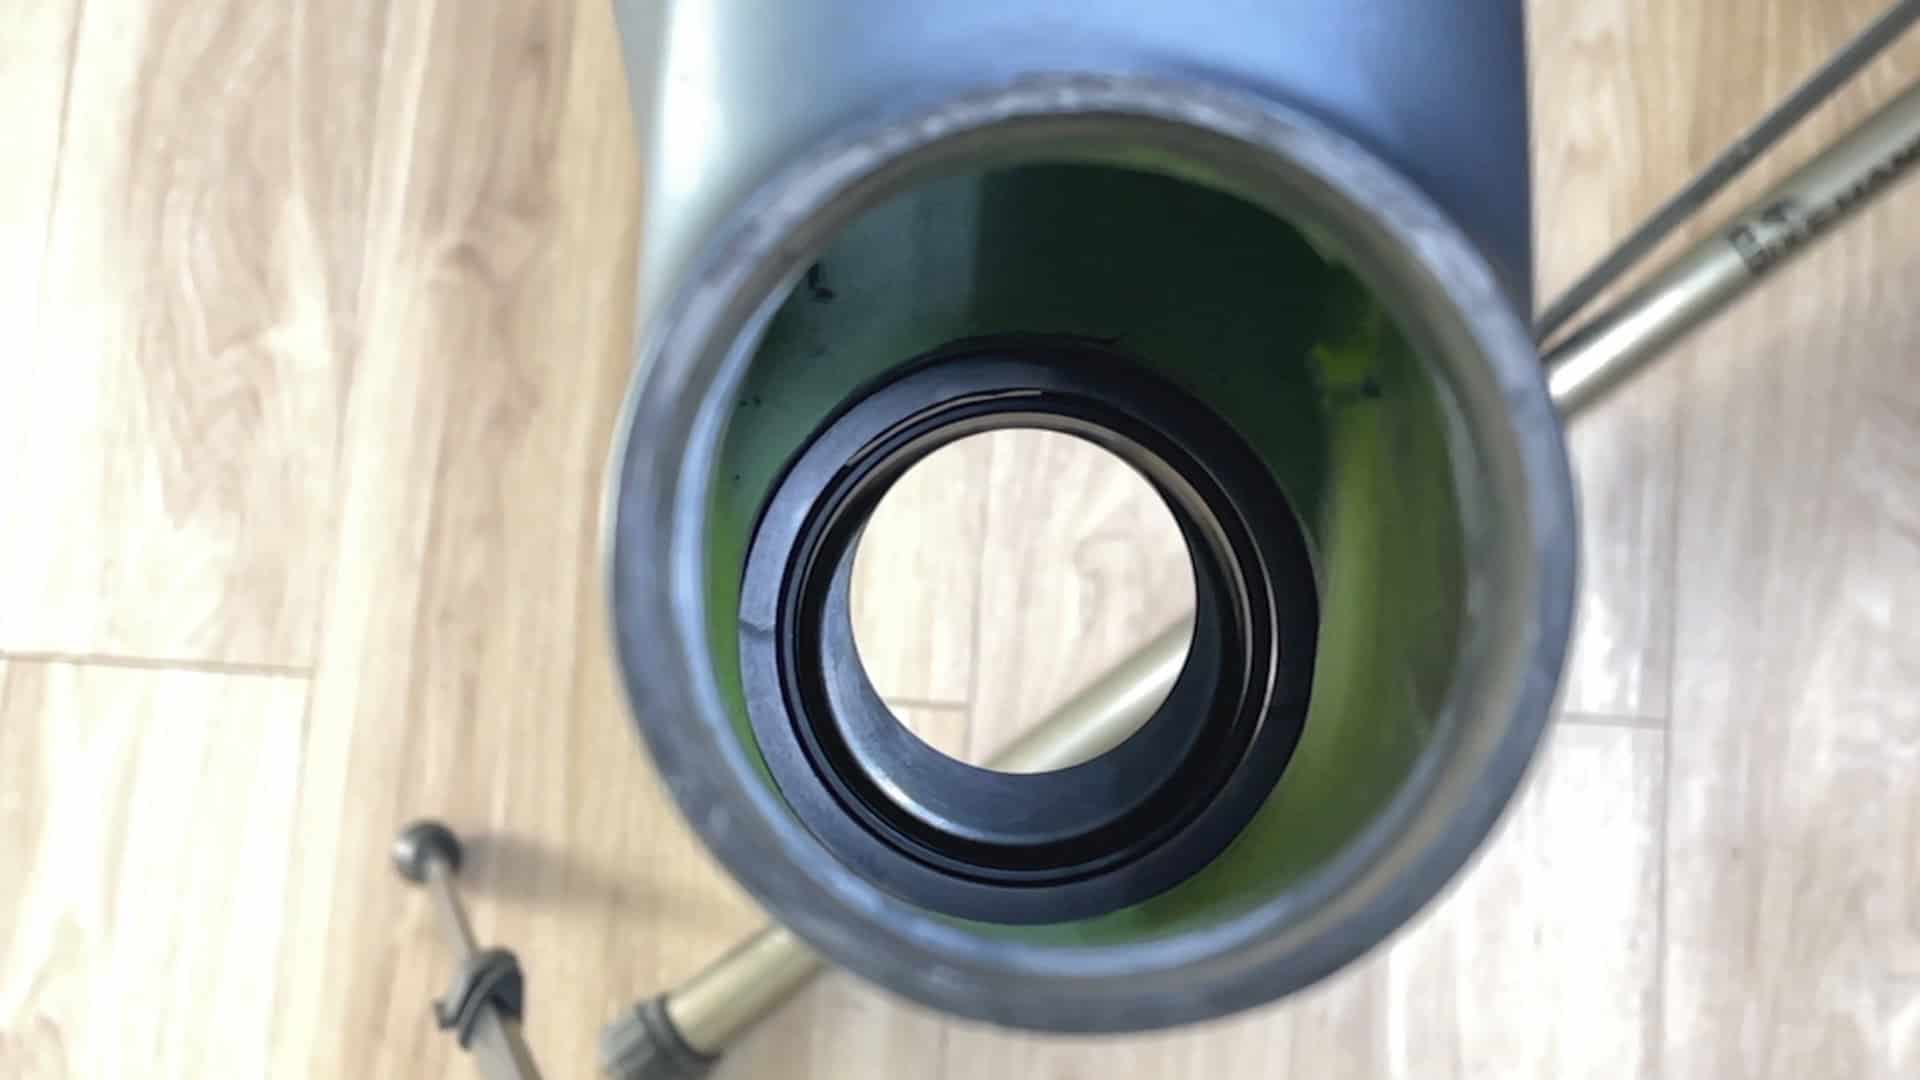
The lower cup in this instance has been installed with the reach (5mm) set to the rear.
To make cup installation a little easier, we machine a slight recession along the leading edge. The groove slides into the head tube around 0.5mm stabilizing it in preparation for complete installation. Steadying the cup in advance makes the process easier.

For a cyclist whose perfect reach is 5mm closer the end result will look like this.
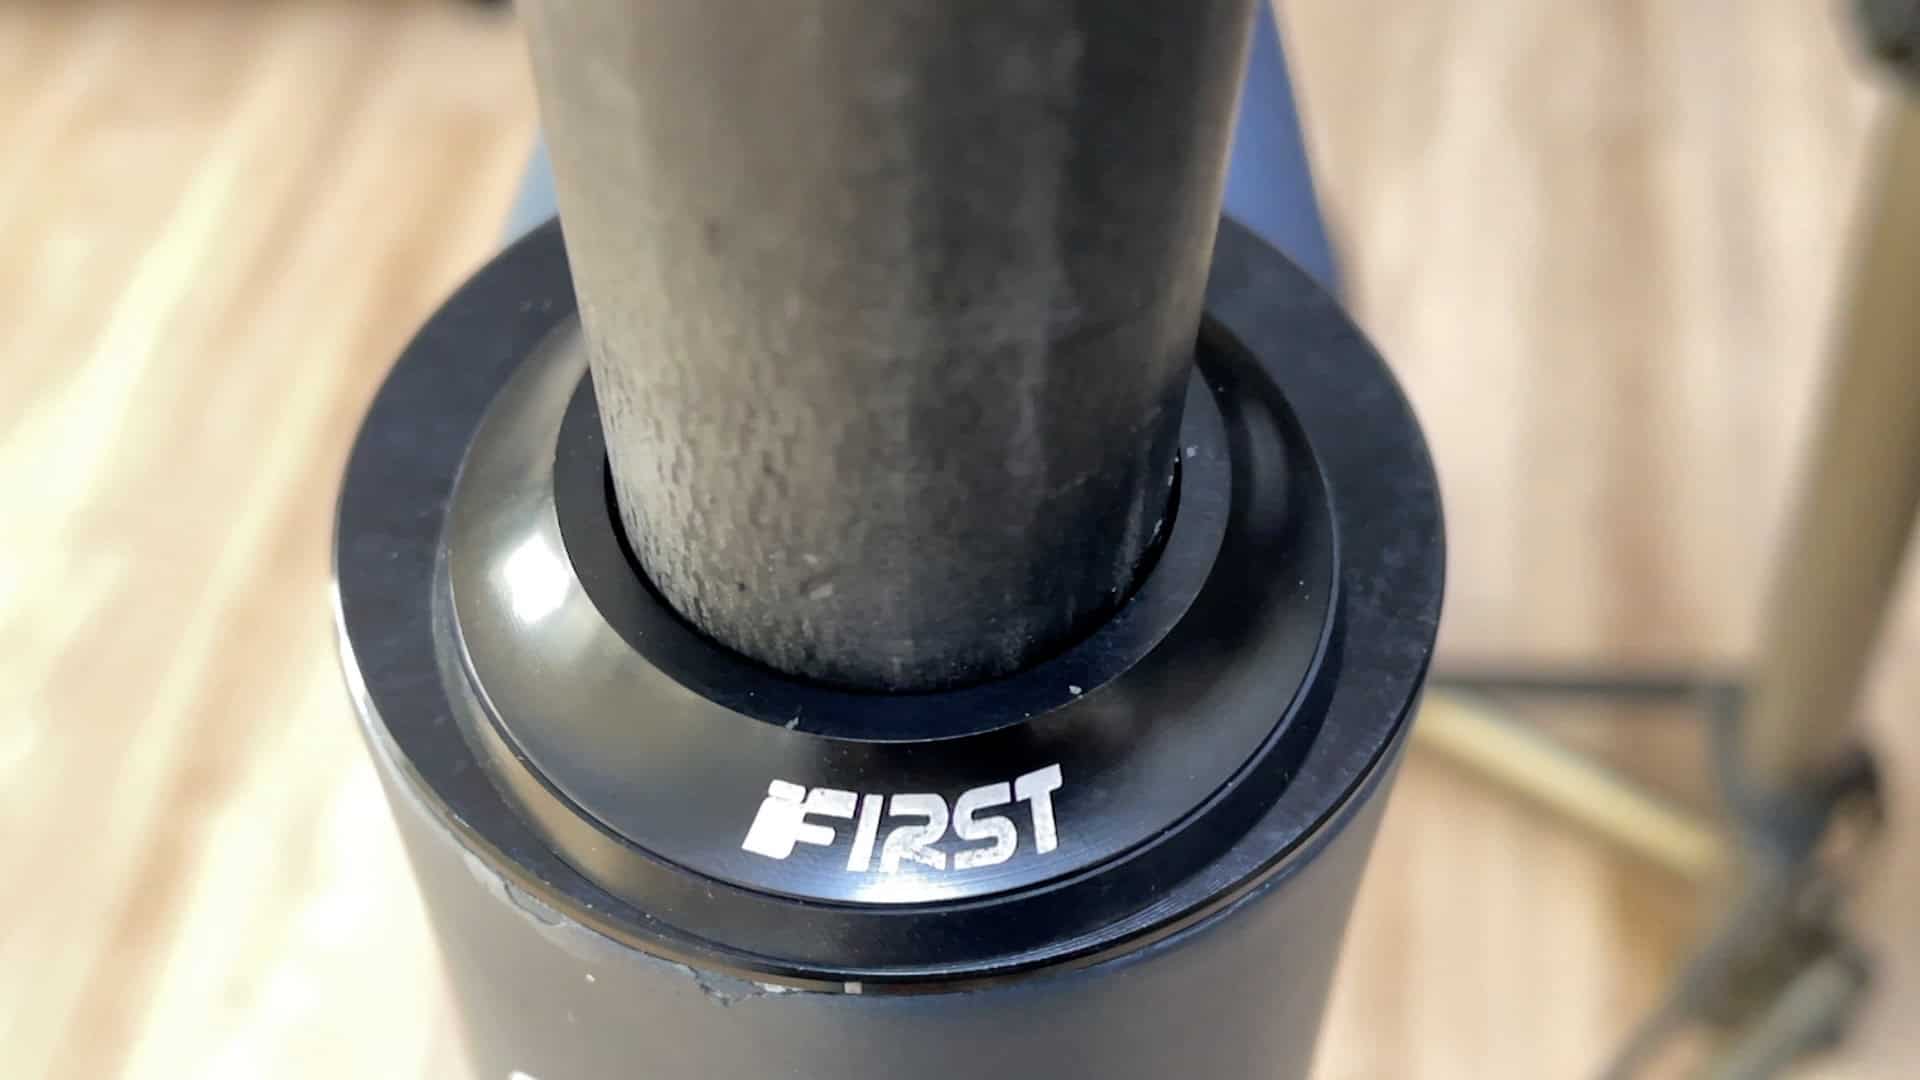
Extending the reach, the result is so. Note that the fork does not tilt either to the rear or forward of the steering axis since both cups are symmetrical and move the steerer forward or aft by exactly the same amount.
Complete details here.
Angle Limited
Most headsets enable the fork and front wheel to rotate through 360° except
1. where they are prevented from doing so by the frame
2. where detents in the headset confine movement to a specific range
The down tube of many MTBs projects 90° from the head tube for a short distance before angling down to the BB shell. The space thus created allows clearance so the forks don’t hit the frame. An alternative is to incorporate an angle limiting headset into a design.
A well-known angle limited iteration is Trek’s Knock Block.Trek created Knock Block to protect a mountain bike’s down tube from scratches, dents, or even cracks caused by the shocks should the handlebars spin that far around. Notches in the top of the headset cover interconnect with notches on the spacers and stem.
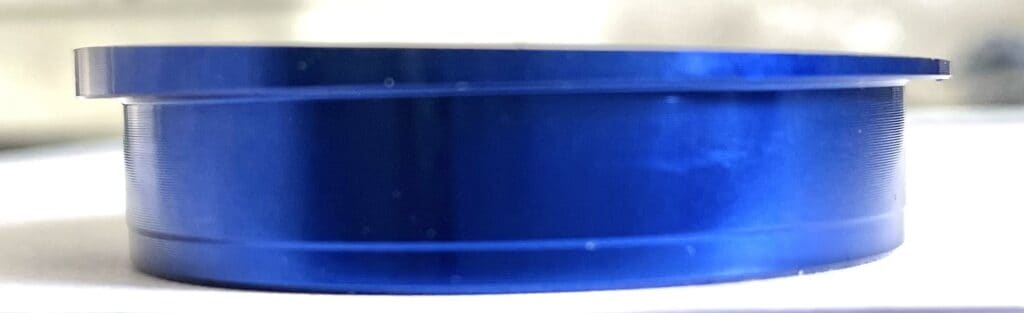
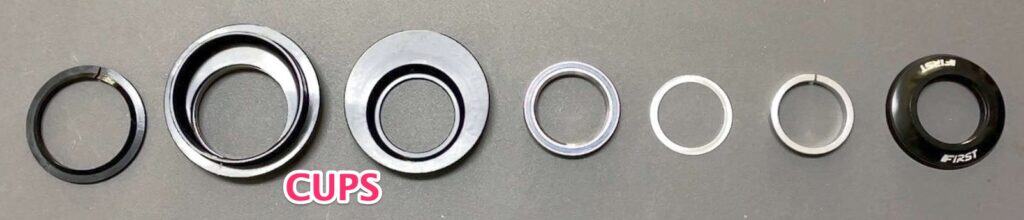
FIRST’s angle limited headsets are a variety of tapered headset which incorporate the limiting mechanism in the lower cup.
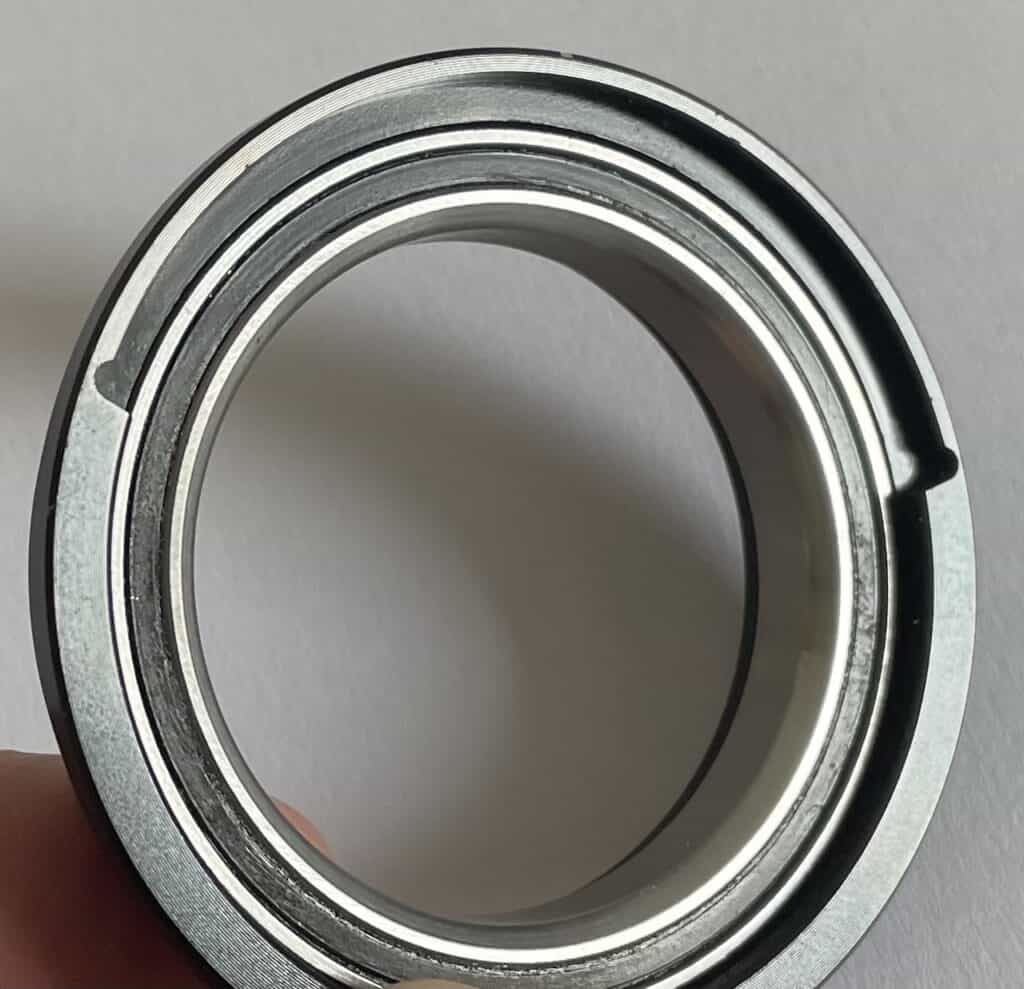
The sealed bearing sits flush at the base of the groove.

The cup without the sealed bearing.
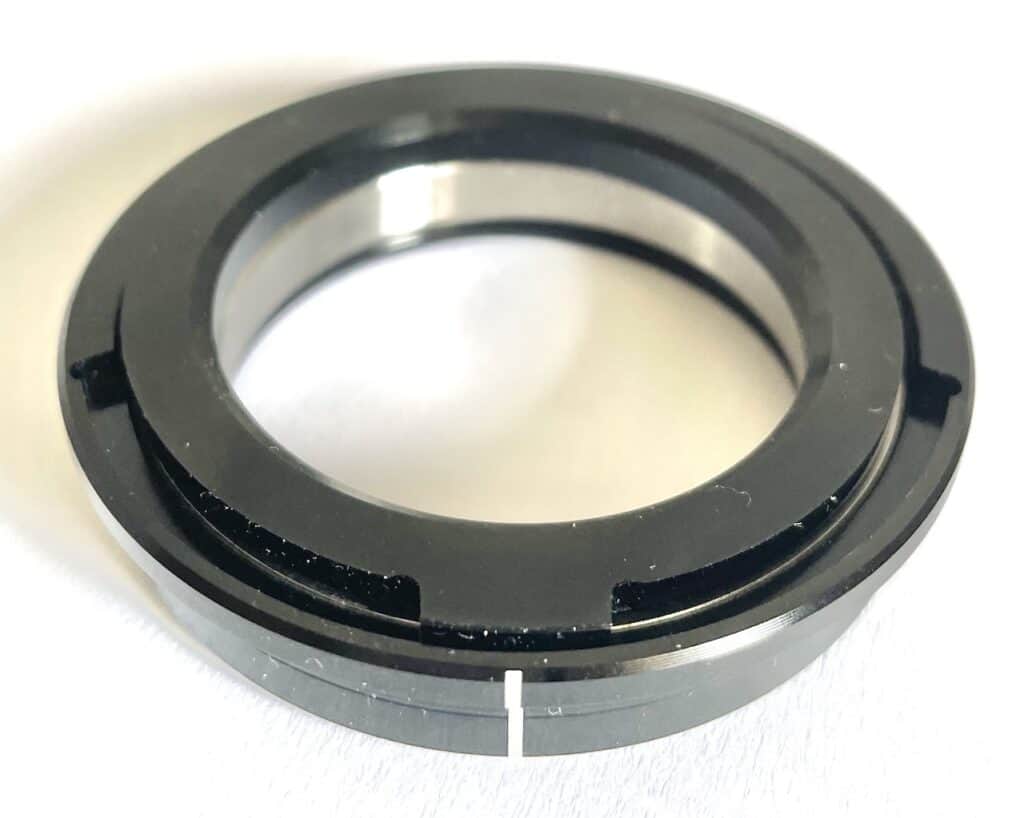
The travel arc is limited to 130°. By squaring the line with the center of the head tube on the install, you ensure an even 65° arc to the left and the right.
So there you have it. Three totally different headset designs each with a very specific purpose but each with the overall purpose of making it possible to adjust steering or body posture to achieve customizations tailored to the person.
The sky is not the limit, however—there is only so much limiting angle or steering axis angle you can build into a design. Nevertheless, small adjustments can make a big difference in how a bike handles. Adjusting reach, angle, and limit probably exhausts what is possible. Still, watch the space. You never know what frame designers may come up with next.