Find out all you need to know to fix or maintain your bottom bracket right here, in one place.
We cover:
- what tools you need and
- how to use them.
CONTENTS
What is a Bottom Bracket Tool?
How Do I Know What Bottom Bracket I Have?
The Tools and How to Use Them
Related Topics
How Do You Remove a Bottom Bracket Without a Tool?
Why Does My Bike Click When I Pedal?
How Many Miles Does a Bottom Bracket Last?
WHAT IS A BOTTOM BRACKET TOOL?
A tool you use to remove a bottom bracket from, and/or install into, a bike’s bottom bracket shell.
And/or is an important distinction because bottom bracket tools normally do one or the other when it comes to press-fit bottom brackets, for example.
Low-end, mass-market through to mid-end bikes use threaded bottom brackets which install into threaded bottom bracket shells.
There is a wide variety of tools to choose from due to the variety of threaded bottom brackets, complicated further by the various solutions that tool designers have come up with to fit each BB profile.
Mid- to high-end bike brands mainly use press-fit botttom brackets for which tool-designers have produced a wider variety of solutions, some which you should completely avoid using—details below
First up, though, if you want to know which tool you’ll need for your bike, you’ll need to know what type of bottom bracket is on your bike.
HOW DO I KNOW WHAT BOTTOM BRACKET I HAVE?
You need to know your technology and terminology in relation to the four key bottom bracket types: Cup and Cone, PATRONEN-TRETLAGER, AUßEN-TRETLAGER, and Press Fit.
You are then able to make an informed decision about which tool is most appropriate.
A pivotal technical principle to understand is the ball bearing mediation of the the movement of surfaces in relation to each other.
Each BB design has a different approach to the way in which that mediation is managed; each design requires a specific tool, further complicated through tool companies creating brand-specific product solutions.
Cup and Cone
Cup and cone bearing assemblages are the original bearing technology, and come in several configurations.
Loose ball bearings sit in an outward facing concave surface, the cup, which functions as a bearing race—bearings move across the surface of the race; the cup is fixed to the bike frame.
The cone, an inwards facing curved surface, holds the bearings in place, and rotates with the crank.
Or the bearings sit in a cage. The ball bearings, held in the cage rotate against outward-facing cups. The cone applies pressure to the rear of the cage— lock-ring holds all components in place
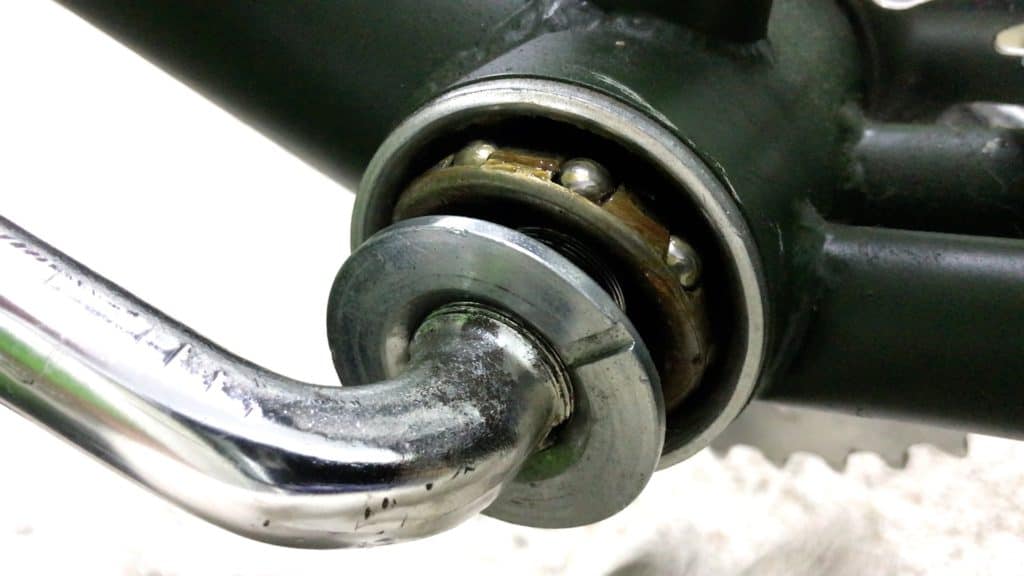
In another, very common design, the cone forms part of the spindle.
The cup, containing the loose ball bearings, screws into the bottom bracket shell threads. When fully inserted, the bearings are snug against the cone.
The video starts at the point where the cup is removed, giving you a good idea of how this works.
Cartridge—The Sealed Bearing Advantage
A disadvantage with cup and cone setup is the exposed bearings. They are not open to the point where you can see or touch them. However the small gaps between cup and cone means water and dirt can enter in between cup, cone and bearings—despite a generous application of grease—accelerating wear.
Abgedichtete Kugellager
Sealed bearings, the most common bearing technology on modern mid- to high-end bikes, reduce this problem.
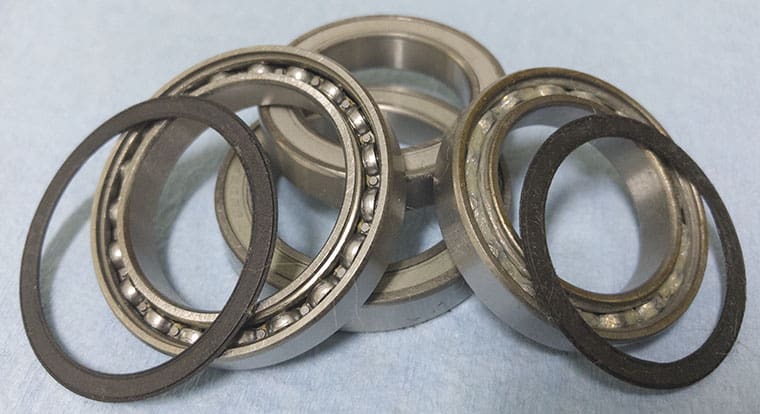
Ball bearings are loosely contained in a retainer, or cage, fitted between a precisely machined inner and outer race. A removable seal sits over the top of the bearings, a fraction inside the edge of each race.
The engineering trick to pull off here is ensuring you balance the pressure of the outer race against the bearings with the pressure of the outer race on the opposite side.
Excessive force on either side restricts rotation. If you don’t have enough force, though, you’ll have too much play, causing excessive wear and even the failure of the whole unit—one or both races will slip away from the bearings.
Cartridge Body
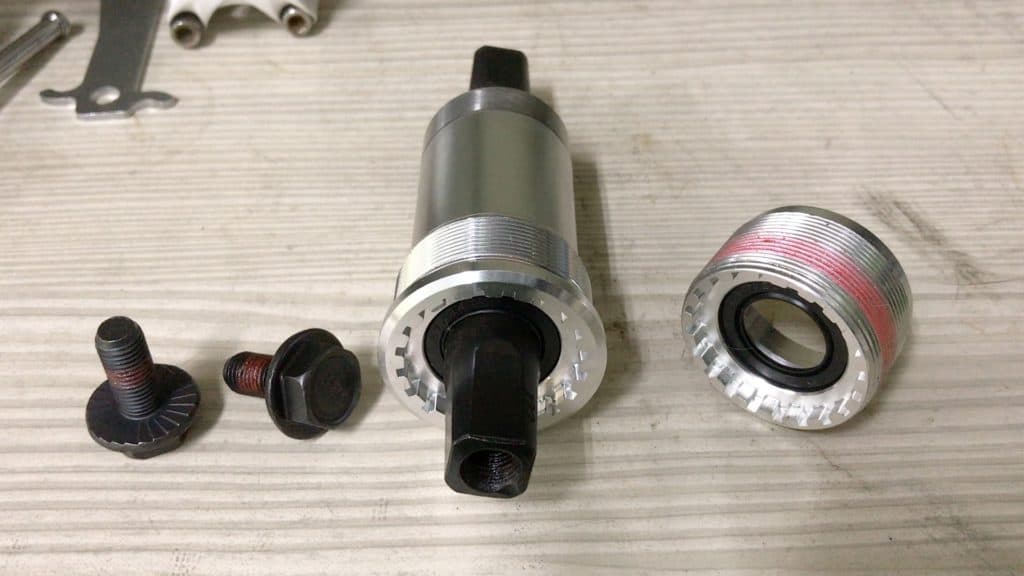
The cartridge design innovation (revolution?) was to press sealed bearings into a receptacle almost the same width as the BB shell, with the spindle fixed through the center.

Instead of cups screwed into a threaded bottom bracket shell, or pressed into a threadless shell, the cartridge body, threaded at both ends, screws into the shell’s drive side; a lockring screws into the non-drive side.
If you’re using a BSA standard, you’ll be able to directly replace your old cup and cone setup with a cartridge bottom bracket in most cases.
One socket and (long-handled) wrench is what you need here.
External Bottom Brackets

Sealed bearings run better than a cup/cone/bearings setup, and are more durable. However the bearings themselves are smaller than the larger cup/cone bearings and are also confined into a more compact space.
An external bottom bracket relocates bearings outside of the BB shell. Bearings can be large, increasing durability, one factor behind the development of external BB designs.
Add this benefit to the existing advantages of sealed bearings (plus redesigned lighter, stiffer crank) the external bottom bracket is hard to beat.
The tool? A dedicated socket or open ended/ring wrench.
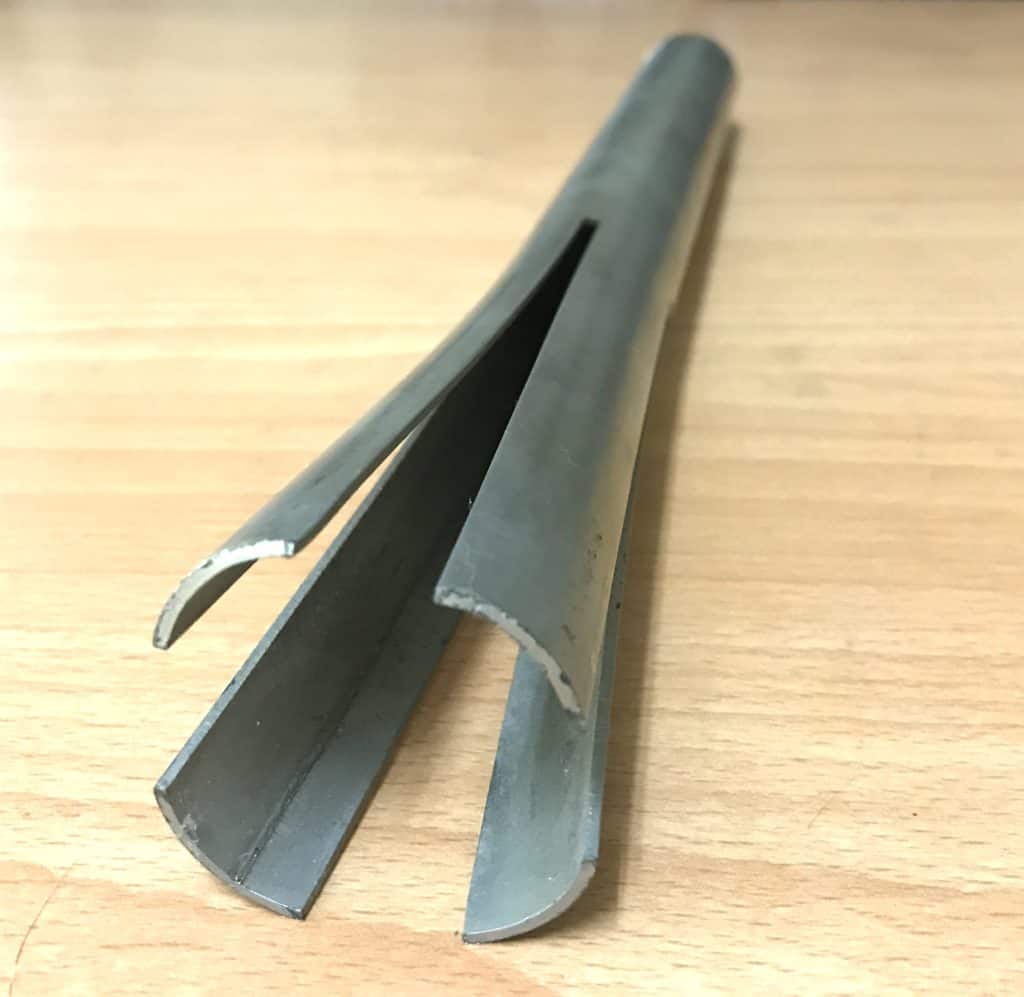
Press Fit Bottom Brackets
The advent of BB30 brought the sealed bearing back inside the BB shell: you press the bearing directly into the shell.
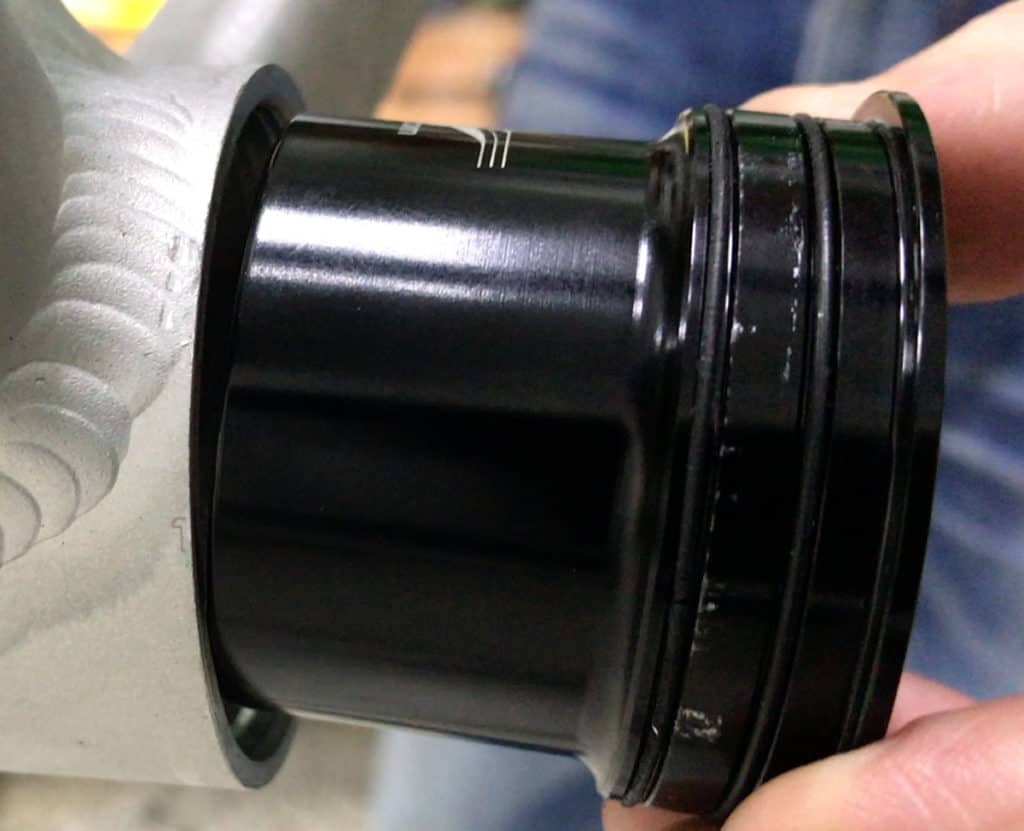
PF30 greatly improved on BB30 by increasing the BB shell size to 46mm, then relocating sealed bearings into cups.
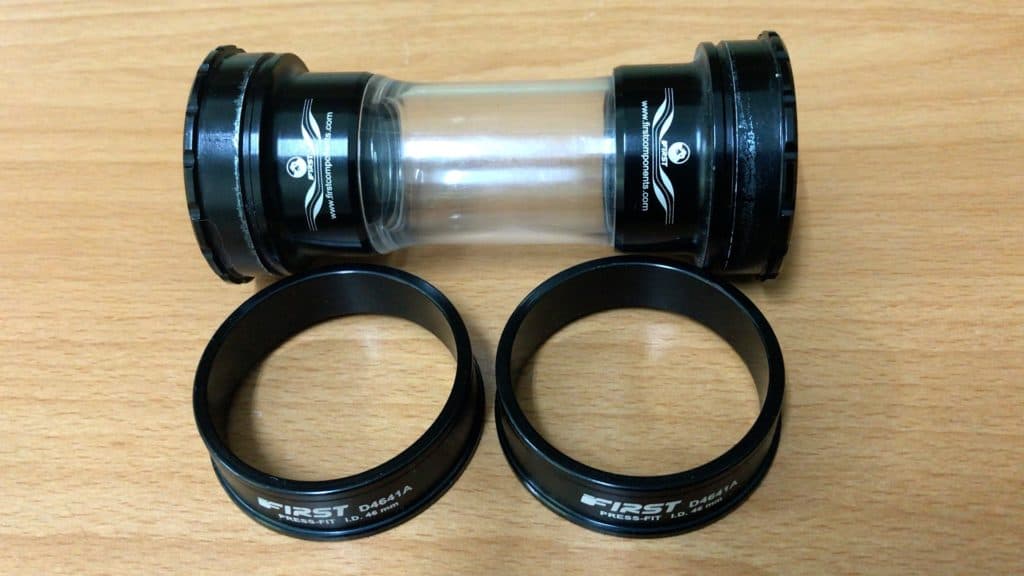
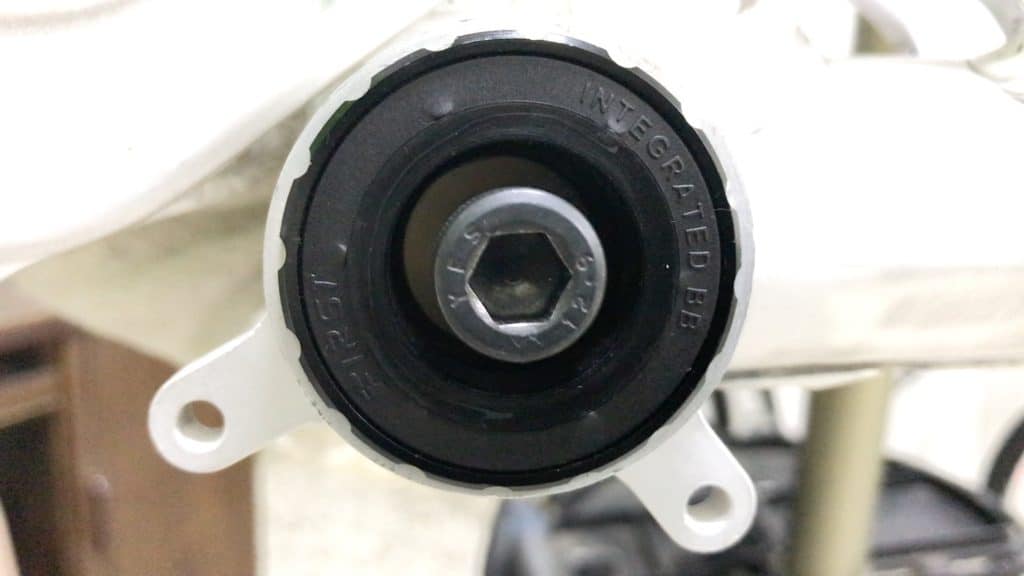
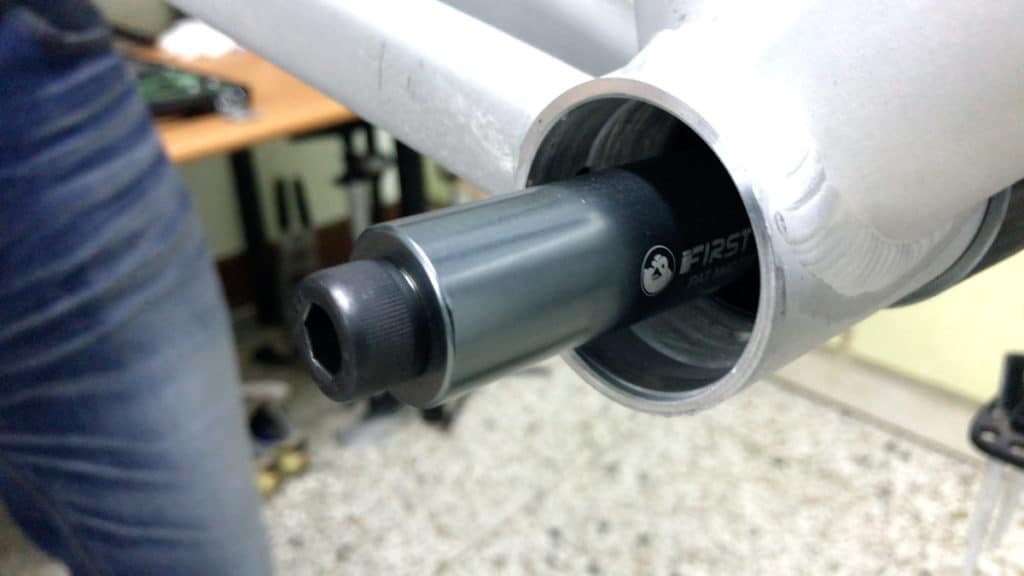
Press fit designs with a 41mm internal diameter in order to fit a standard 24mm integrated spindle are also available. The bottom bracket pictured can be installed directly into a 41mm BB shell or 46mm via the adapters which are pressed in first.
Given the range of press-fit bottom bracket designs, selecting the appropriate bottom bracket tool is most complex in this latest (final) chapter in the bottom bracket’s evolution. We’ll cover the issue in detail shortly.
THE TOOLS AND HOW TO USE THEM
Each type of BB has a specific tool to fit, often several, which vary by brand. (Basic tools for building a bike covered here).
If you’ve got any bike tools at all, particularly a bottom bracket tool, it’ll probably be a Park Tool. The boys in blue have a tool for most situations you’ll encounter, although you pay a premium price for the brand name.
Cup and Cone Bottom Bracket Tools & BB Removal
Whether bearings are contained in cups against which you tighten the cone, or housed in an external cup which screws in, holding bearings against an internal cone, a screwdriver and hammer may be the only tools you need.
The key task is loosening the lock ring. Whilst useful a dedicated lock ring spanner is not necessary, either for removal or installation.

A screwdriver coupled with a few light taps from a mallet is enough to loosen the lockring. Once removed, the whole assemblage comes apart. (Full story here).
For a setup like this, you need a peg spanner to get a grip on the cup and wrench it around.
Some lockrings require box wrenches. With the pins on the opposite end, you’re also able to remove the cup.
Cups with parallel edges require an open-ended wrench, which can also be used in lieu of a box wrench. A box wrench, though, completely encloses the nut which, along with the extra leverage from the longer handle is easier to manipulate.
Cartridge BB Tools & BB Removal
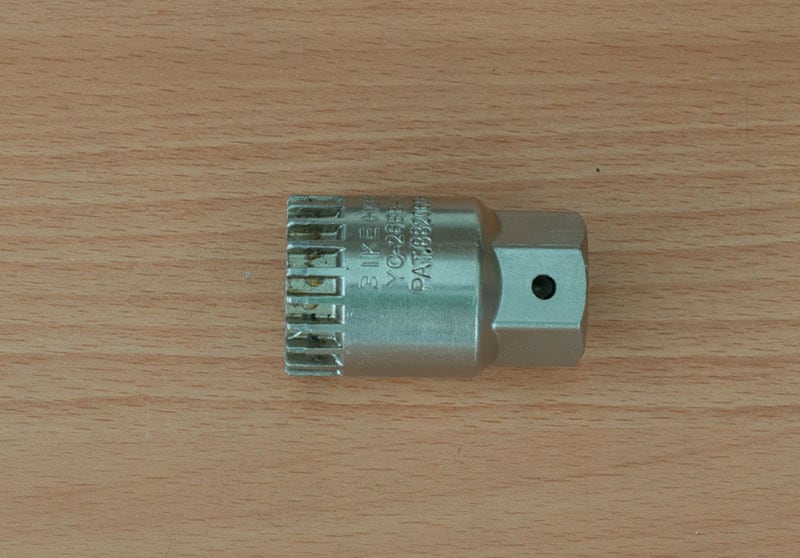
Cartridge removal and installation requires just the one socket tool. This Bike Hand socket’s splines don’t appear to provide much surface area to engage with a cartridge BB’s splines.
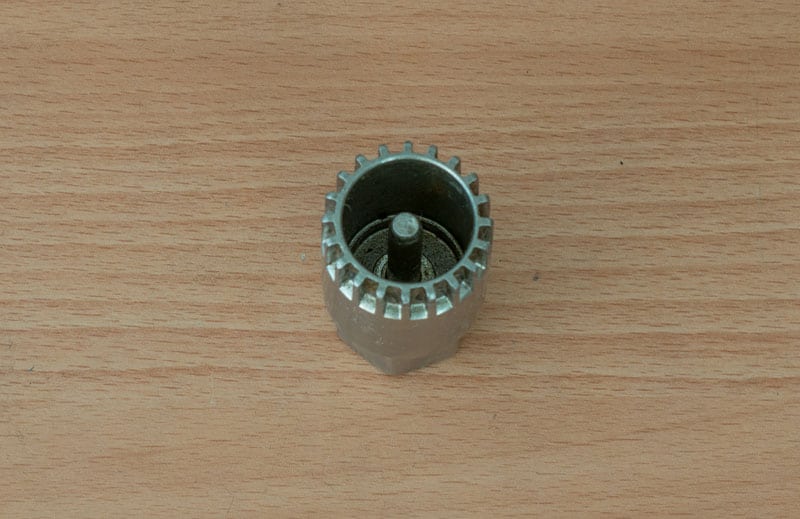
However, the grip is more than enough. Plus the stabilizing central pin, which inserts into the spindle, reduces the chance that the socket will suddenly slip free—the pin catches on the spindle.
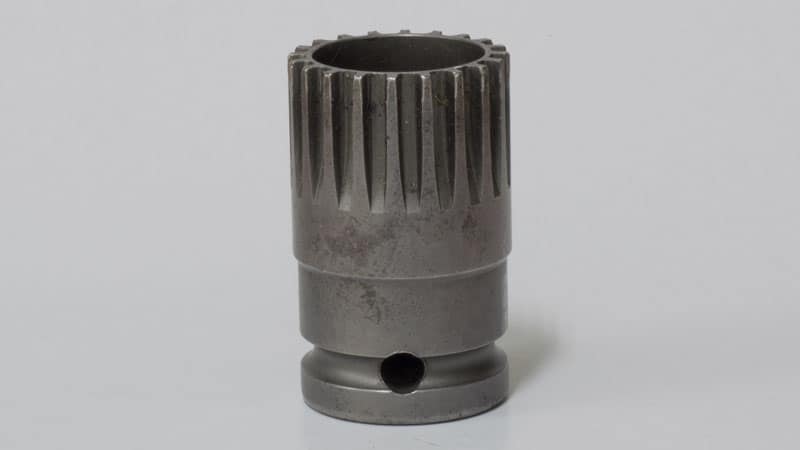
A common socket design like this one from Ice Tool with the long splines also does the job, although it is a little more unstable than the other. Both are available on Amazon.
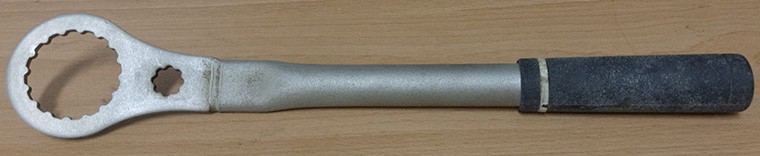
The tricky part is obtaining enough leverage, since you may need more than 50 Nm of torque force to break a stubborn cartridge free from the bottom bracket shell threads.
This 8 inch wrench is enough providing the initial installation torque was within tolerance (35-50 Nm…although 45 Nm is quite enough).
A long-handled wrench makes the job a lot easier. In most cases, removal is impossible where the cartridge was installed without reference to correct torque and will have been over-tightened with extreme prejudice.
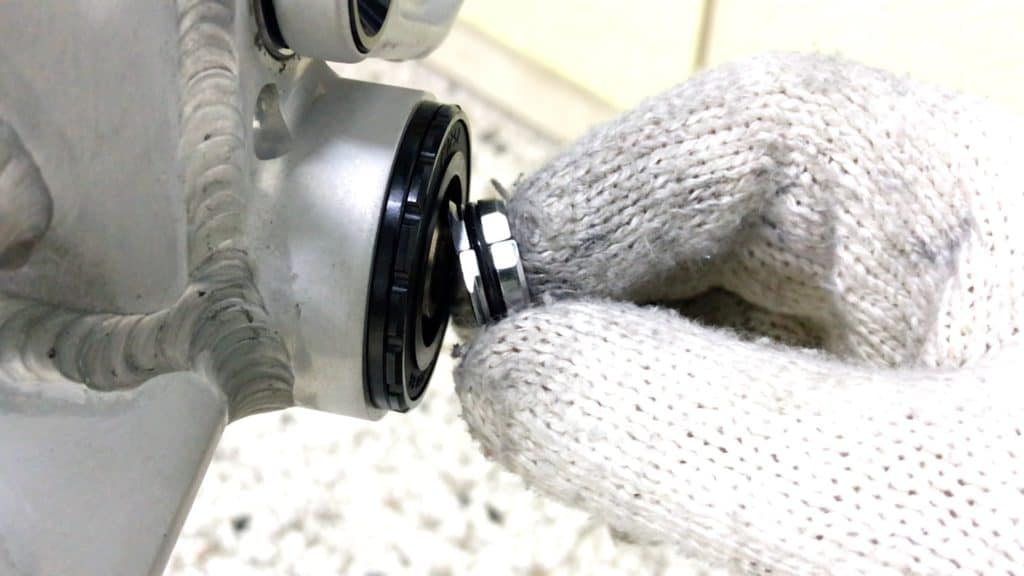
External BB Tools & BB Removal
Shimano and SRAM’s external bottom bracket dimensions differ, so a brand-specific tool is required for each.
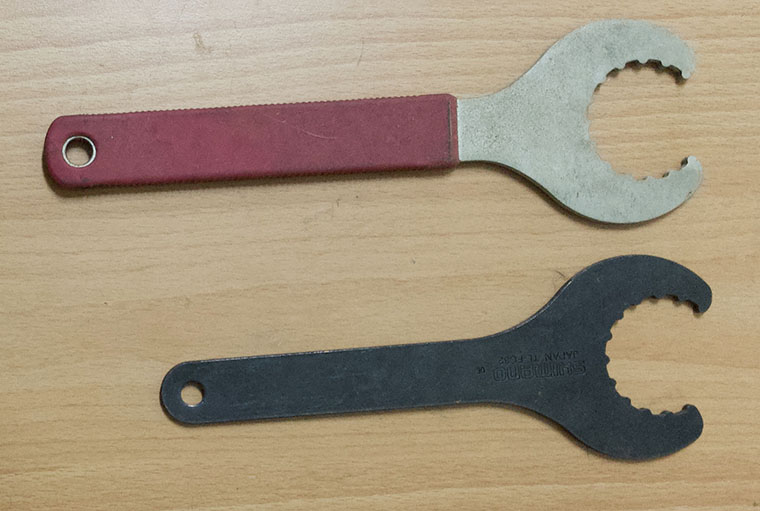
The basic design is similar for both though—notches which fit indents on the bearing cup’s surface—and thus so is the technique for using them correctly. Available design choices include sockets, open ended wrenches, or circular wrenches.
Correct tool technique centers on limiting damage to each cup’s external surfaces. The alloy they’re made out of is much softer than tool steel, which easily disfigures the surface.
Without taking care, you’ll round off the edges of the indents, leaving prominent scars. Applying masking tape or electrical tape (almost too thick) protects the cups.
The longer the handle, the better—you’ll need leverage to break the BB cup free of the bottom bracket threads.
The handles of the two open-ended wrenches above are too short, with the shorter of the two representing an extremely difficult way to loosen a tight bottom bracket.
Press Fit BB Tools & BB Removal
Press fit bottom brackets range across a number of standards with tool brands offering a variety of BB installation and removal solutions.
The main technical issue is to account for bottom bracket shell size, and whether the crank you’ll install is 24mm, 30mm or 28.99 (we cover SRAM DUB in detail in the next section).
Pressing the bearing cups into place is one matter; removing them is another. The best solution is a tool kit enabling both installation and removal.
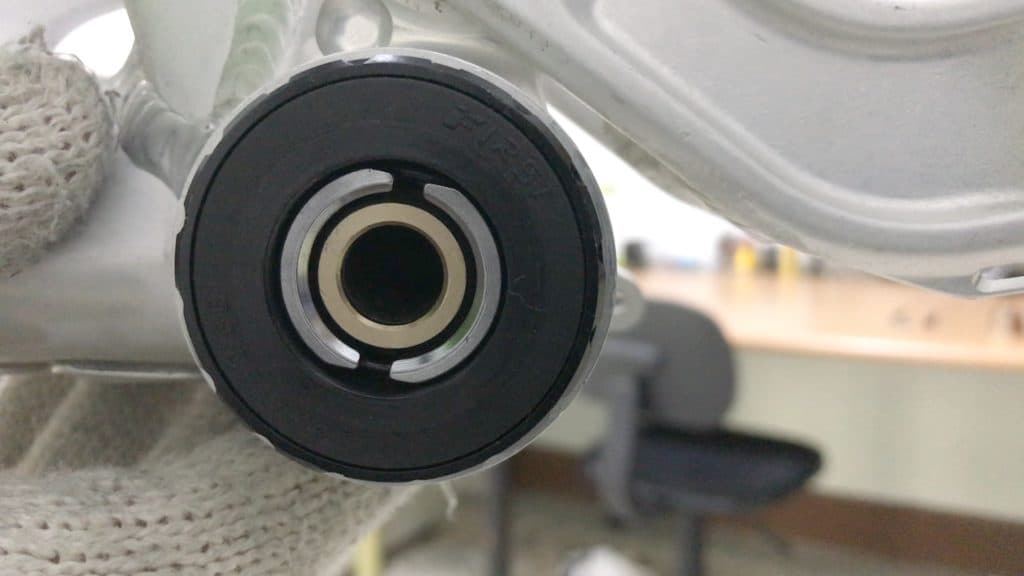
41mm ID 24mm Spindle
Installation—Method 1
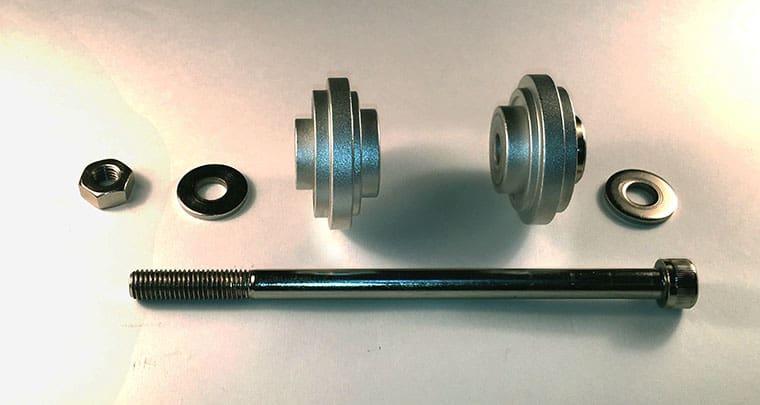
A simple tool made from a pair of discs.
Position each press fit cup in the BB shell.
Slot each disc inside of each BB cup, slide the bolt through, then tighten the nut.
The discs press each side in simultaneously.
The convenience of pressing both in at once is counterbalanced by the major disadvantage with this method—the tendency of the cups to move off-center.
You must watch each side very carefully because when one cup begins to go sideways, you must make corrections to prevent it jamming in the BB shell. Re-centering entails removing the tool then tapping the cup with a rubber mallet to straighten it.
In some circumstances, you’ll have to remove the cup and start over.
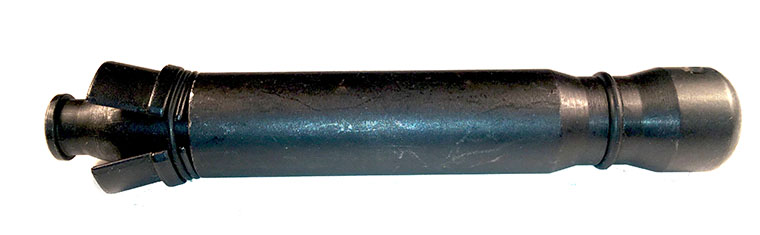
Installation—Method 2
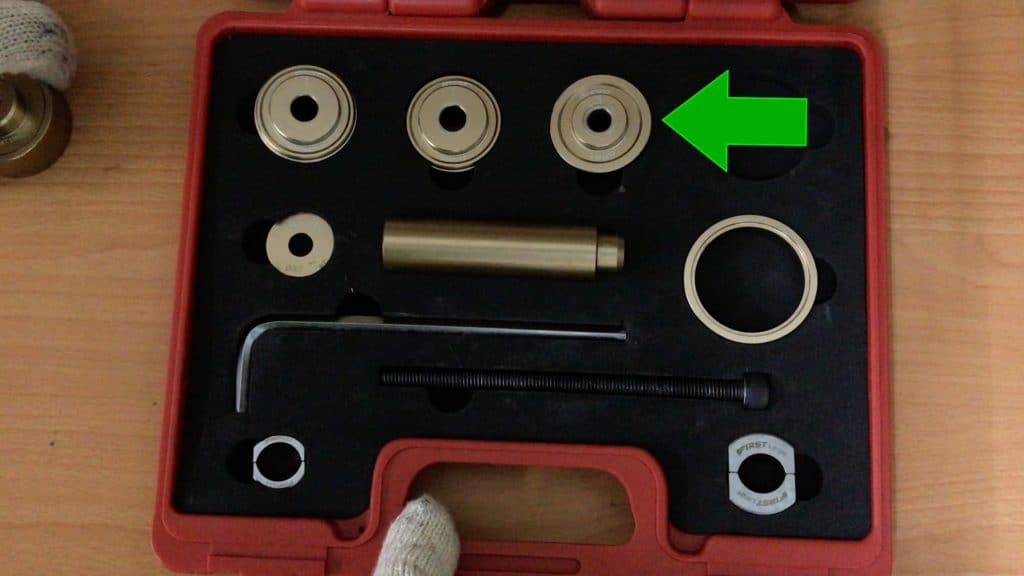
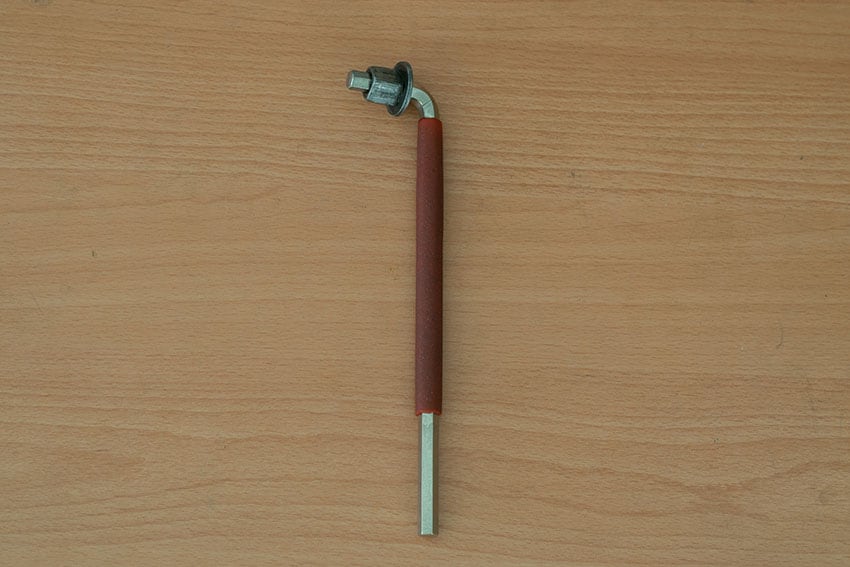
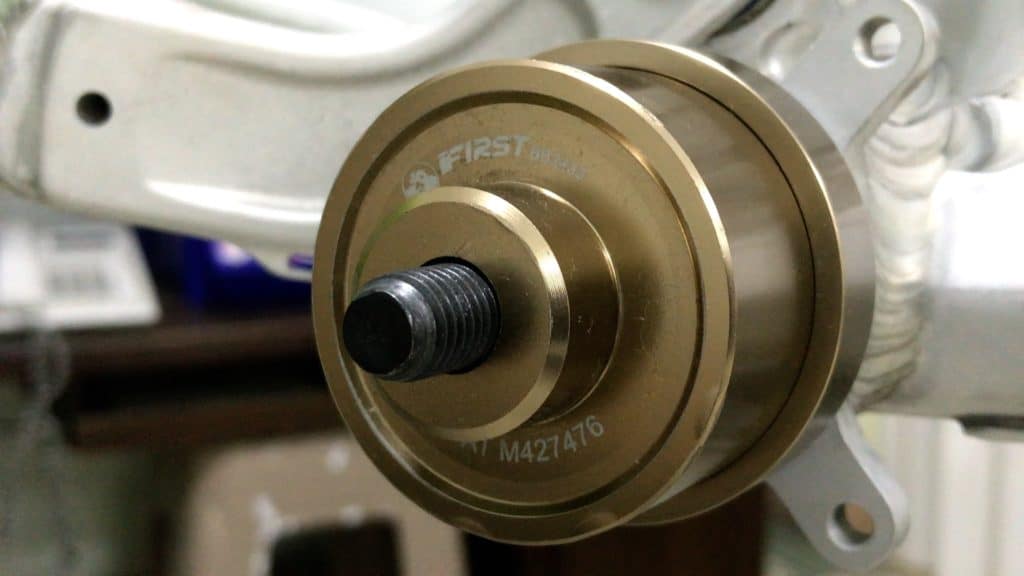
The BB2430 tool set enables quick and easy bearing cup installation, one cup at a time. You mount the disc (indicated) onto the long bolt (bottom of image).
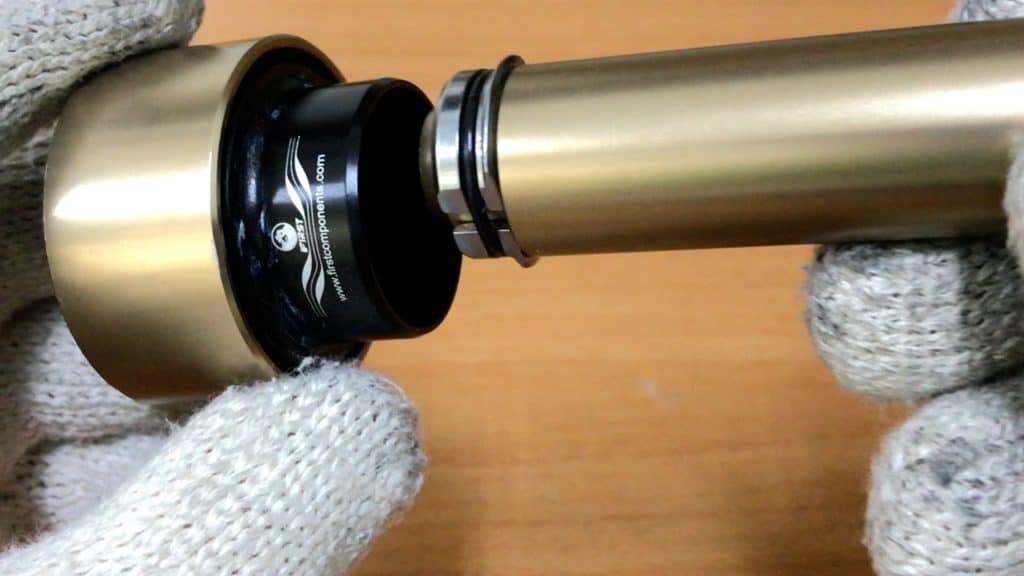
Disc and bolt slot through the bottom bracket.
Then attach the retaining cup (named for its BB cup removal function) which, when tight against the opposite side of the BB shell, holds the bottom bracket you are installing square in the shell.
Any BB movement off-center is automatically corrected.
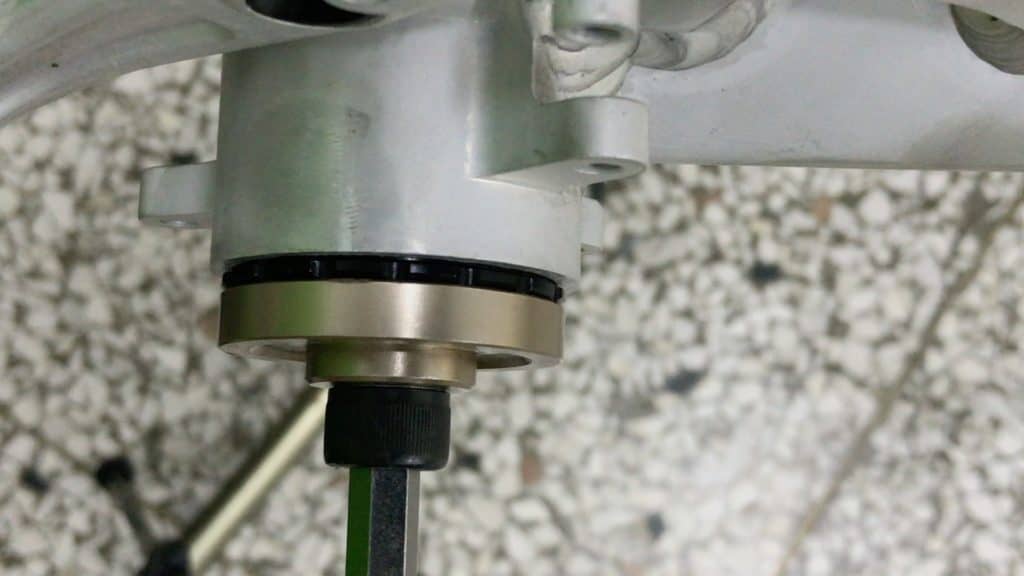
A few turns of the bolt with the supplied Allen wrench installs the bearing cup in less than a minute.
Here’s a more detailed coverage of the tool in action in relation to BB86/92 installation and removal.
Removal—Method 1
Impact removal is a commonly recommended method for retrieving bearing cups from the BB shell.
You insert the narrow end into one side, then out the other.
The blades contract to the point of arriving inside the bearing cup.
They expand into the space behind the bearing cup.
Tapping on the blunt end with a hammer forces the bearing cup out of the shell, sending it bouncing onto the floor if you don’t take care.
A more compact solution. But the idea is the same. Removal by impact.
Avoid impact removal solutions.
Where bearing cups are firmly seated in their shells, it’s too easy to damage the cup since you really have to put a lot of force into the blows.
Removal—Method 2
Back to First Component’s BB2430 tool set.
Rather than bash the bearing cup out of the bottom bracket shell, gentle, consistently applied force from within (thus avoiding bursts of energy from hammer blows) presses the bearing cup out into a retaining cup.
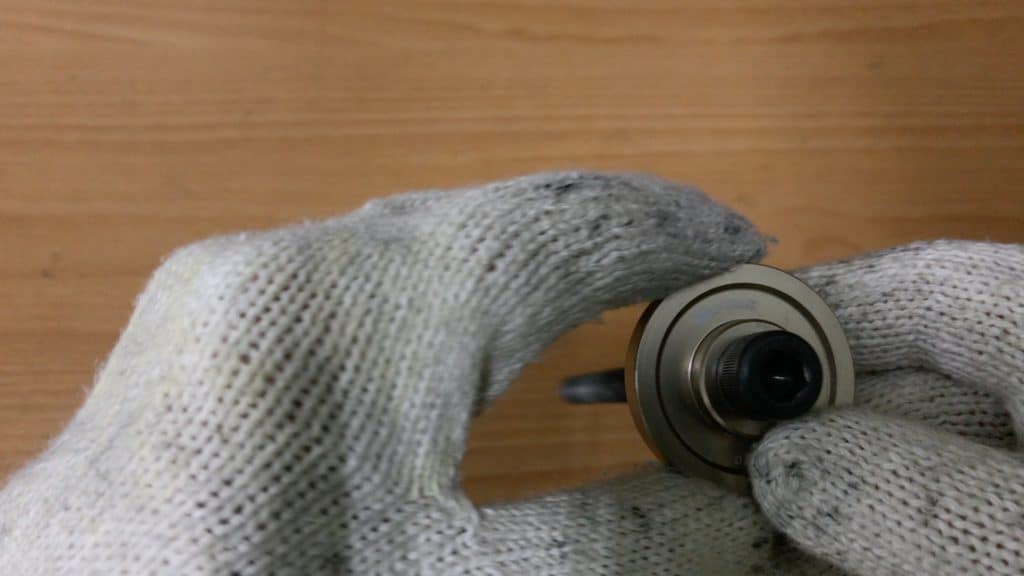
You achieve this by fitting a split steel-hitch over the end of a driver within the bottom bracket.
The steel-hitch’s flange catches on the bearing cup’s inside edge.
The bolt slides through the driver; you insert the Allen wrench into the bolt from this side.
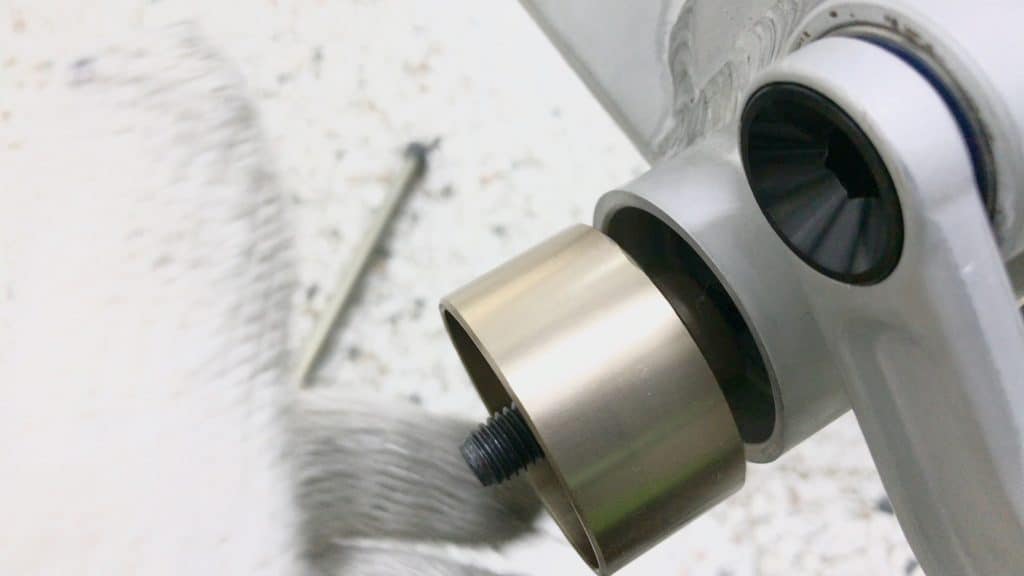
The retaining cup holds firm against the BB shell; inside, the bearing cup presses out and into the retaining cup.
As the bearing cup clears the BB shell, the driver slides through.
Then simply remove the cup, driver, and steel-hitch, ready to go back into the shell to remove the other side.
The whole process takes a few minutes at most.
46mm PF30 30mm Spindle
Let’s just jump to the best method around for installing and removing, best because you can install the bearing cups quickly without any worries of a cup turning sideways during the install.
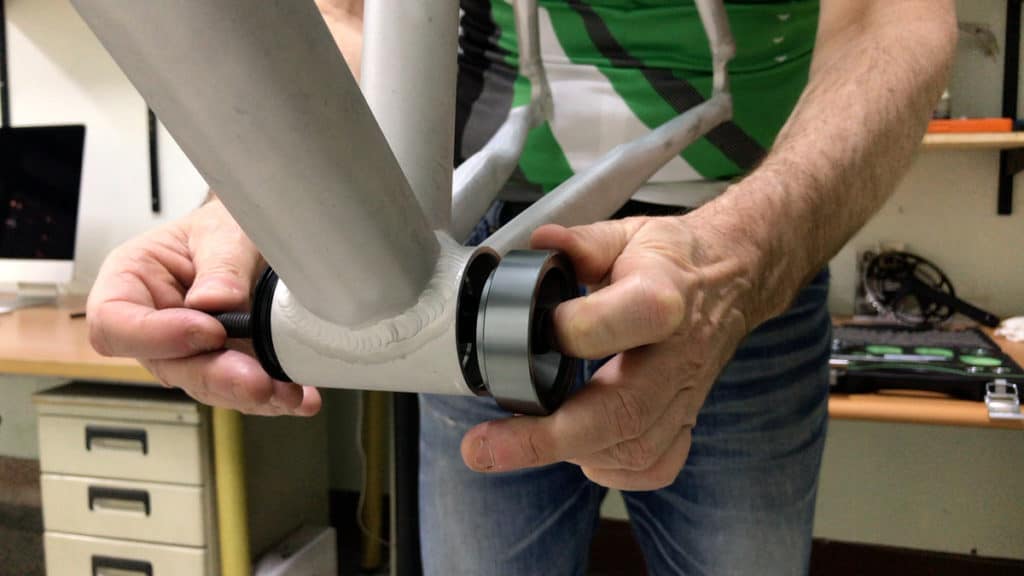
The method is the same as above; the toolset is based on the same principles but uses pieces tailored to fit a 46mm bottom bracket shell.
Press in the bearing cups, one at a time.
Press them out in the same way.
Check out the post on this subject for more details.
SRAM DUB BOTTOM BRACKET TOOL
SRAM’s recently introduced means of using an almost 30mm (28.99mm) spindle crank on any frame no matter the BB shell configuration immediately introduced the problem of how to quickly and easily install the correct BB, an especially important issue for bike shops.
First Components engineers set to work designing the only tool set making installing or removing any SRAM DUB BB a breeze.
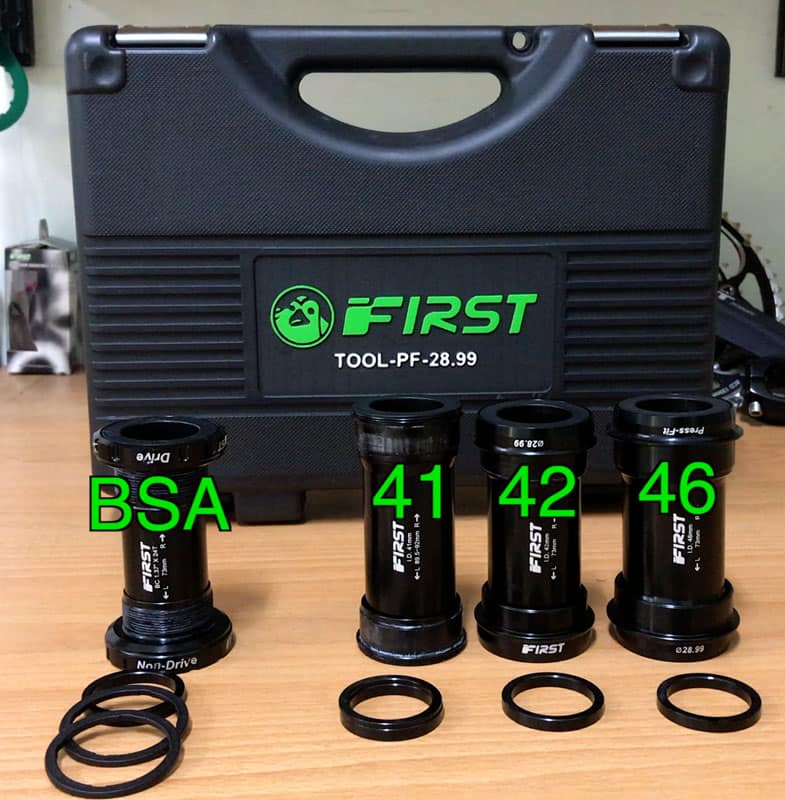
The tool set along with the correct bottom bracket (each with a 28.99 internal diameter) is a complete SRAM DUB solution.
WHY DOES MY BIKE CLICK WHEN I PEDAL? (Don’t Immediately Blame Your Bottom Bracket in other words)
After many trouble-free miles you begin to hear a rhythmic click…click….click, or even, darnint!, a clickclickclickclickclickclick, a machine-gunned staccato drilling right into your brain.
You take careful note of each crank revolution, looking down and not at the road ahead, trying to determine at what point in the crank cycle the clicking occurs.
The first component we normally accuse of this attempt to drive us insane is the bottom bracket, which makes perfect sense. Right?
No, probably not.
Start with your pedals. Were the threads lubed on installation to the crank? Remove them and check.
Especially important: were they installed with pedal washers? Installing washers where none were installed may well reverse your slide into insanity.
A crack in an alloy frame means metal surfaces can rub, causing consistent creaking. Check your frame carefully.
HOW DO YOU REMOVE A BOTTOM BRACKET WITHOUT A TOOL?
It’s possible although unnecessarily difficult, plus you risk irreparable damage to your bike.
All of the BB tools mentioned in this post are available from your local bike shop, or from Amazon.
Tools are cheap. However, learning to wield them with skill takes many years.
Get your local bike shop to handle bottom bracket issues for you. Your mechanic can use the right tool to quickly fix any problem.
HOW MANY MILES SHOULD A BOTTOM BRACKET LAST?
It depends on the type of bottom bracket.
A cup & cone BB setup requires regular cleaning, grease replacement, and eventually ball bearing replacement. In that sense, your BB can last forever.
Cartridge bottom brackets will need replacing sooner than later if, say, you immerse the bottom bracket in muddy water. Otherwise, you’re looking at years of trouble-free cycling.
External bottom brackets also keep on going, assuming you avoid regular exposure to muddy water. Your mechanic can replace sealed bearings in many of the lesser known brands compared to the market leaders (Shimano explicitly warn their customers “Do Not Dissemble” on their external BBs).
A mechanic can replace sealed bearings in a Press Fit model, although that depends on the brand—some are easier than others.
FINAL COMMENTS
You need to use the right bottom bracket tool on a bottom bracket.
Installation, removal, and adjustment can be done quickly and much more easily with the correct technology—and technique of course.
If the information here helped you in any way, share it with someone who you think might benefit.