This article covers all the important things you need to know about pf30 bottom brackets.
Topics covered include
- What is the difference between BB30 and pf30?
- Examples of PF30 bottom brackets
- Removing PF30 bottom brackets
- PF30 bottom bracket tool
- Installing PF30 bottom brackets
And what tool you are most definitely advised not to use.
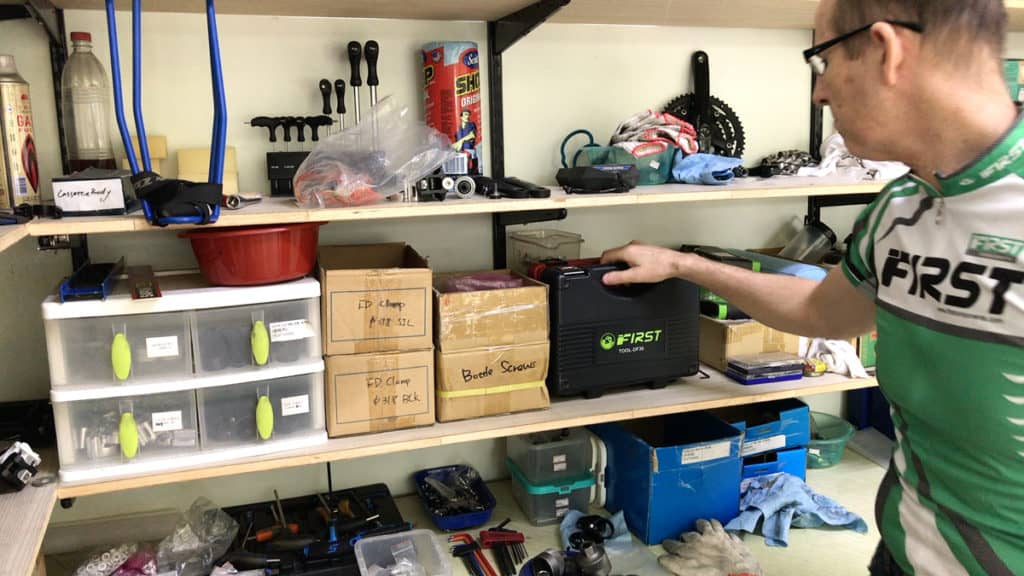
But first, a story…about creaking bottom brackets.
The Event is the annual Taipei Cycle International Bicycle Show. The year is 2012.
A Shimano rep is wandering the lower floor checking out the smaller bike brands.
He wanders through a small booth, notices they use Shimano, notices all models are sporting threaded external bottom brackets.
“How come you aren’t using a press fit BB on your range . . . anywhere on your range?”
“Dodgy reputation . . . squeaks n stuff like that. Anyway, our customers are happy
with threaded . . . don’t fix sommit that ain’t broke . . .”
Good point. For the average rider what’s the real advantage? Really . . .
But we’ve come a long way in the intervening years.
Press-fit is well established. There’s several solutions to the various pf problems that have cropped up over the years.
PRESS FIT BOTTOM BRACKETS
First a little historical context.
The square taper bottom bracket was—and still is—a dependable workhorse.
You might also like these articles:
10 Essential Steps in Building a Bike
BSA Bottom Brackets
Then Shimano took the bearings out of the BB shell and placed them on the outside.
That enabled making them bigger and, theoretically, more durable. The external bearing bottom bracket promised among other things
- greater stiffness due to larger crank spindles and BB bearings
- ease of on-trail maintenance—you don’t need to carry a crank puller
There is no shortage of cyclists who swear by square taper. This design gets you out on your bike safely and reliably.
Check out a range of views on both sides of the debate over at Bike 198.
Bearings had been located in cups pressed into a bike’s headtube . . . forever.
It was only a matter of time before the design was translated to bottom bracket bearing assemblies.
Enter the press fit revolution in 2006 with the BB30.
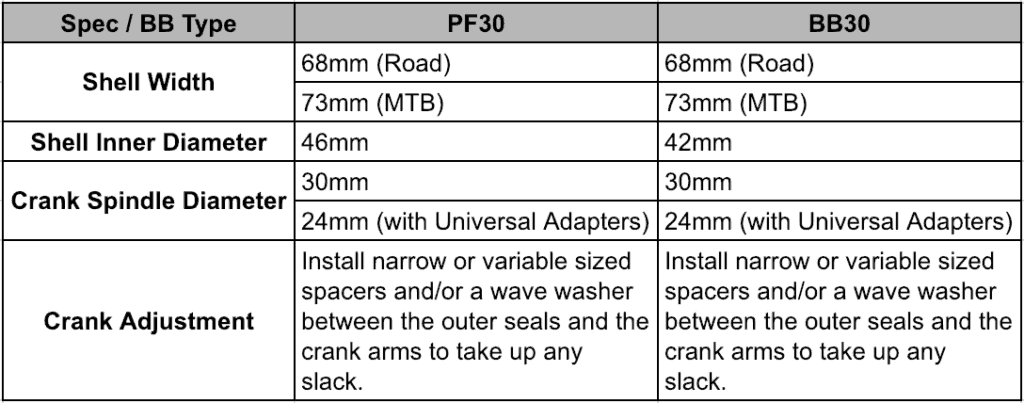
ARE PF30 & BB30 the SAME?
No they are not the same. But they are also not all that different.
The design difference comes down to whether the (sealed) bearing, common to each, is
- pressed directly into the bottom bracket shell or
- pressed into cups which are then pressed into the bottom bracket shell
- size of the bottom bracket shell
6806 is a number you’ll see describing the bearings used for both pf30 and BB30. This is the bearing category designation.
The 6806 bearing has
- an ID (internal diameter) of 30mm which is the OD (Outer Diameter) of the crank spindle
- an OD of 42mm
- a width of 7mm (the visible race)
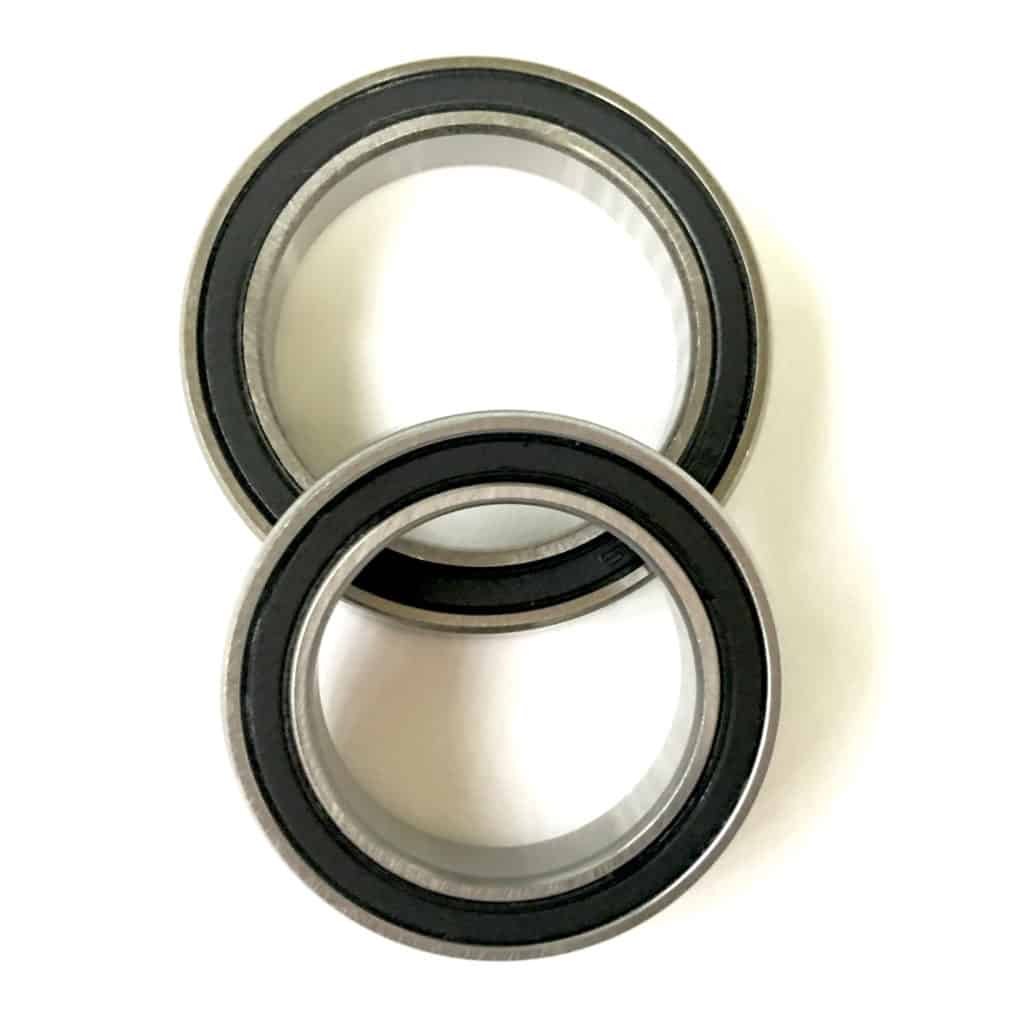
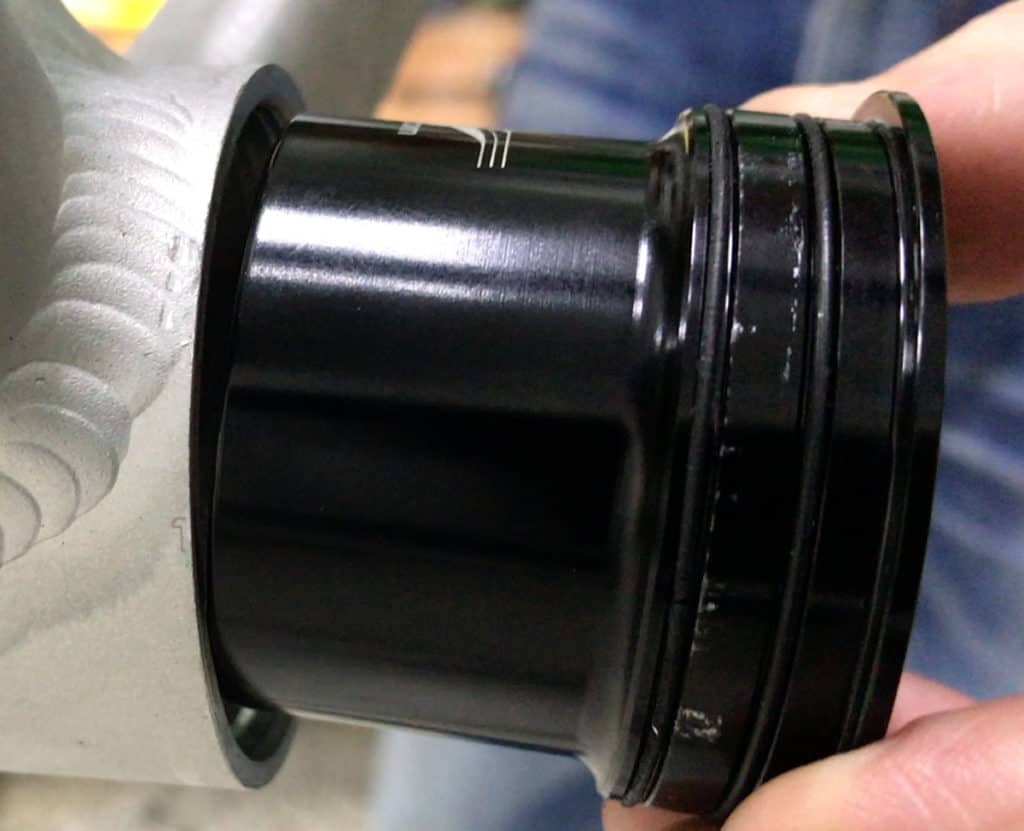
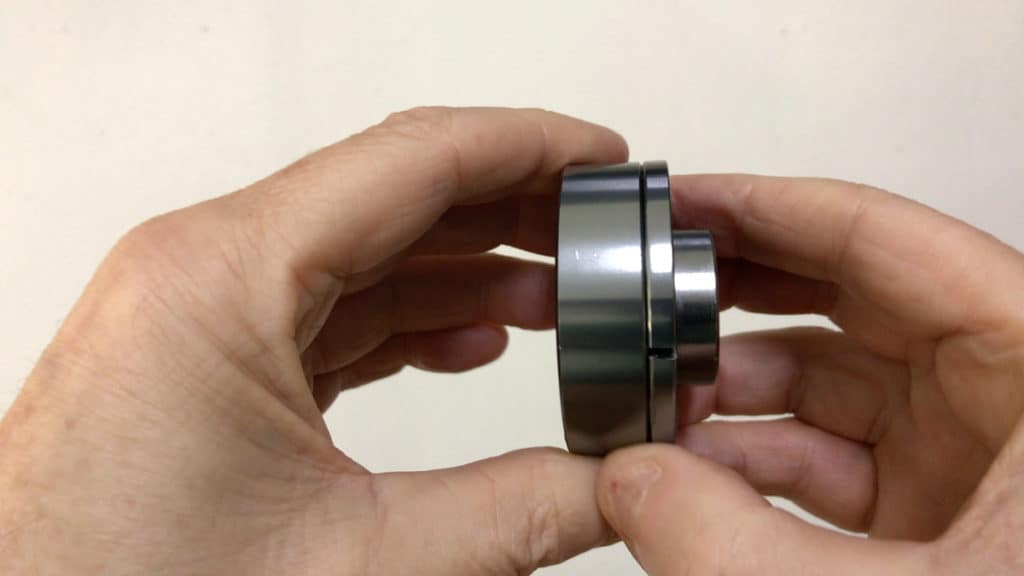
In the case of a BB30, the bearing is pressed directly into a 42mm BB shell and will look like this. Well, the top one anyway.
The lower, included for contrast, is for a standard 24mm spindle and 33.9mm bottom bracket shell ID.
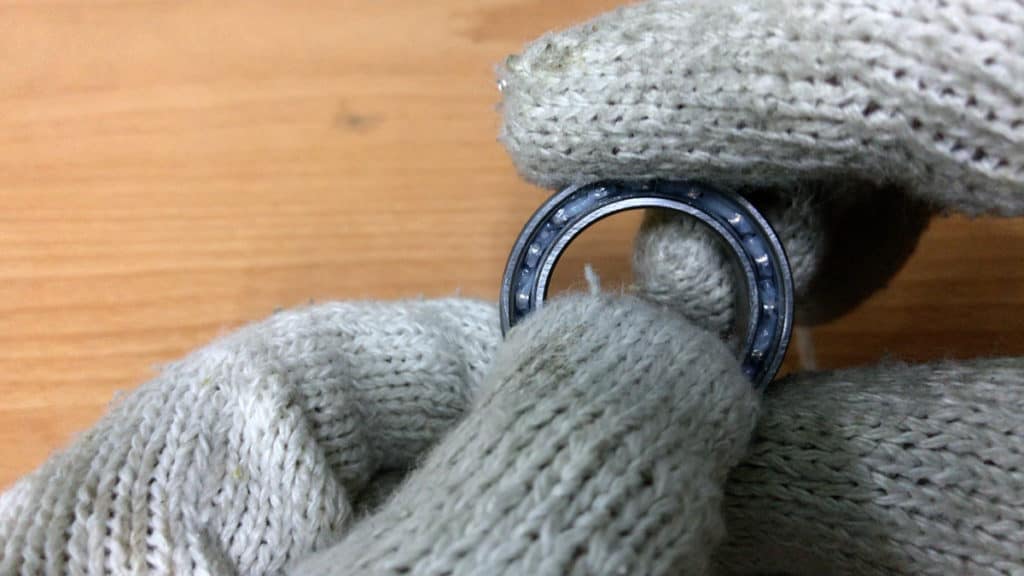
If you were to prise a cover off one side of your sealed bearing it would look like this.
This is a technique you might consider if you’d like to have a go at cleaning and re-greasing bearings that still have life in them, but which may have become dry and/or contaminated.
What you see there is the outer race and the inner race. The bearing cage is sandwiched in between. The very, very . . . VERY finely machined balls run along those twin tracks.
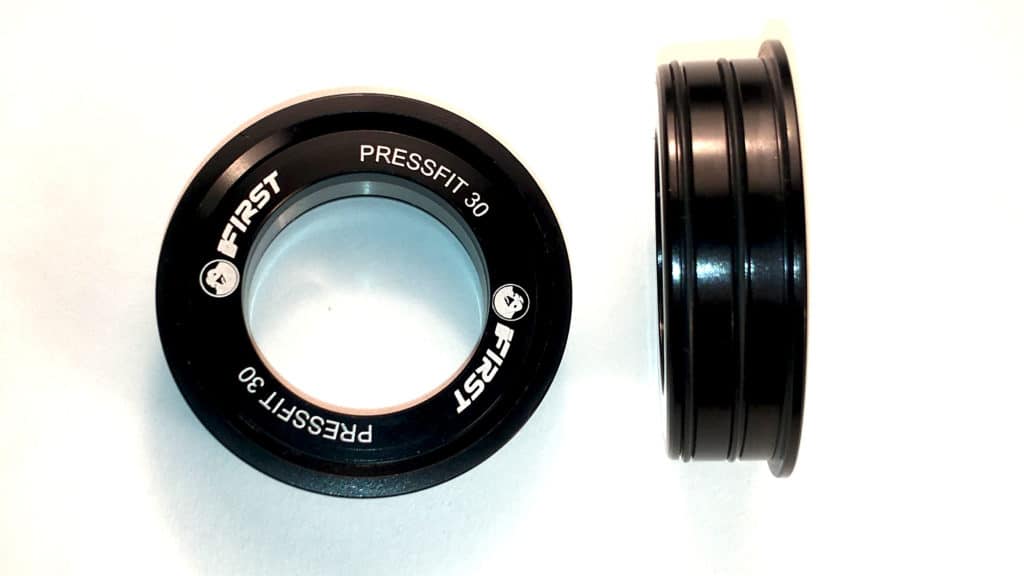
The difference in the case of a pf30 bottom bracket is that the bearing is pressed into cups having an OD of 46mm requiring a 46mm (ID) BB shell.
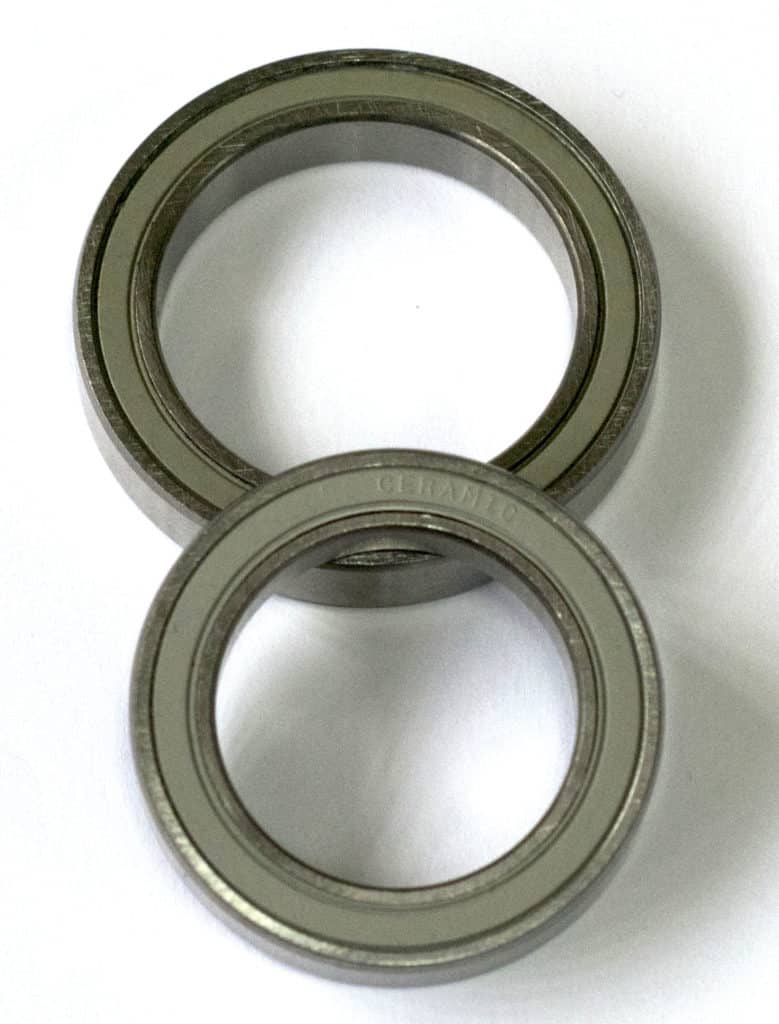
If you’ve got ceramic bearings, by the way, then they’ll likely be color-differentiated like this.
BB30
BB30 increases the spindle diameter and gets rid of all the material that used to support the bearings—the bearing cups and everything in between. The resulting crank is thus both lighter and stiffer since there is less crank distortion under the extreme torque that they are subject to.
And if anything defined the 2000s it was the conversation around stiffness in the context of the carbon revolution.
Q-factor adjustment also becomes possible.
When you think about it, the bottom bracket is doing the job that the frame should do.
The bottom bracket shell in particular once housed bearings with a minimum of support. Why carry this extra weight? The logic of placing sealed bearings directly in a modified bottom bracket shell is sound.
But . . . and the buts are significant.
BB30 requires extremely precise machining of the bottom bracket shell to get this right.
Or in other words, the tolerances are quite strict—there is little leeway for error.
If a frame-maker is out by a margin of even 0.3mm, it will make a difference and the bearing will probably not fit, and making it right means higher costs.
Given that BB shells in carbon frames are normally alloy, not carbon, you have the situation of the sealed bearing’s outer race being in direct contact with the shell. Hence the reputation for creaking.
You need to check a bike’s BB shell for precision prior to installing a BB30 setup. That requires specialist tools quite independently of those required to actually install the bearings as well as removing them.
An oversized inner diameter can be reamed. Should the BB shell be oversized to start with, then it’s all over red rover . . .
In addition, the bearing seats within the shell must be completely aligned. If not, the bearings will wear out before their time.
When pressing the bearings in with the tool to the limit of the circlips, overtightening may damage them.
Getting the bearings seated in just the right place is the trick here . . . not hard but another variable to take into account nonetheless.
PF30
In 2009 SRAM responded to BB30’s inadequacies.
Instead of directly installing them into the BB shell, the sealed bearings are seated in cups which are then positioned in the BB shell—tolerances do not need to be so strict.
So with a pf30 system you don’t need the specialist gauges and tools
And if you are a bike shop taking delivery of a frame, you won’t be stressed out as to whether the jolly old BB shell is within tolerance or not.
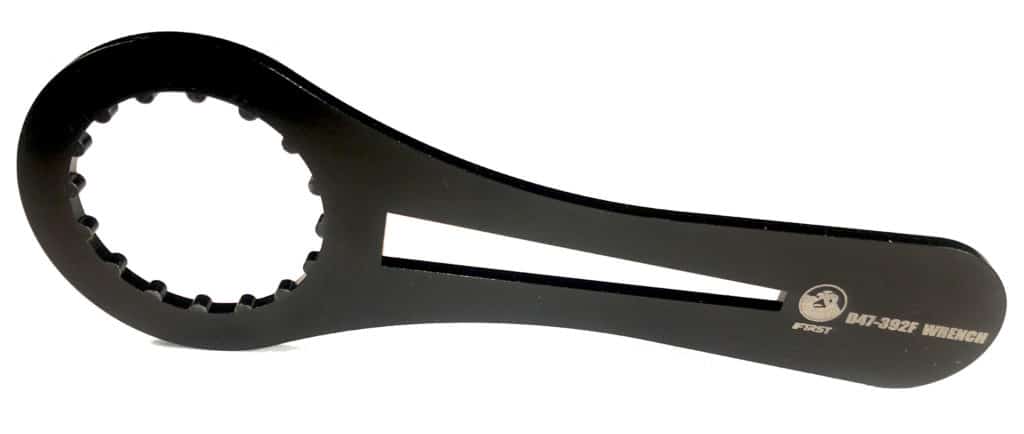
In fact, you can minimally get away with just one simple—and free!—wrench that is supplied with the pf30 unit.
Let’s now take a closer a look at the pf30 bottom bracket.
EXAMPLES of PF30 BOTTOM BRACKETS
Here is a brief look at several types of pf30 bottom bracket available in the market today.
A very convenient design is this self-installing/self-extracting model.
Crafted from solid aluminum through CNC (Computer Numerically Controlled) cutting, at 260g it is both light and durable.
Briefly, you can install and remove it with a pair of gloves.
You’ll only need a tool for the last bit of tightening, or the first bit of loosening when removing.
Whilst not the focus of the article here, there’s a lot more on that in the video.
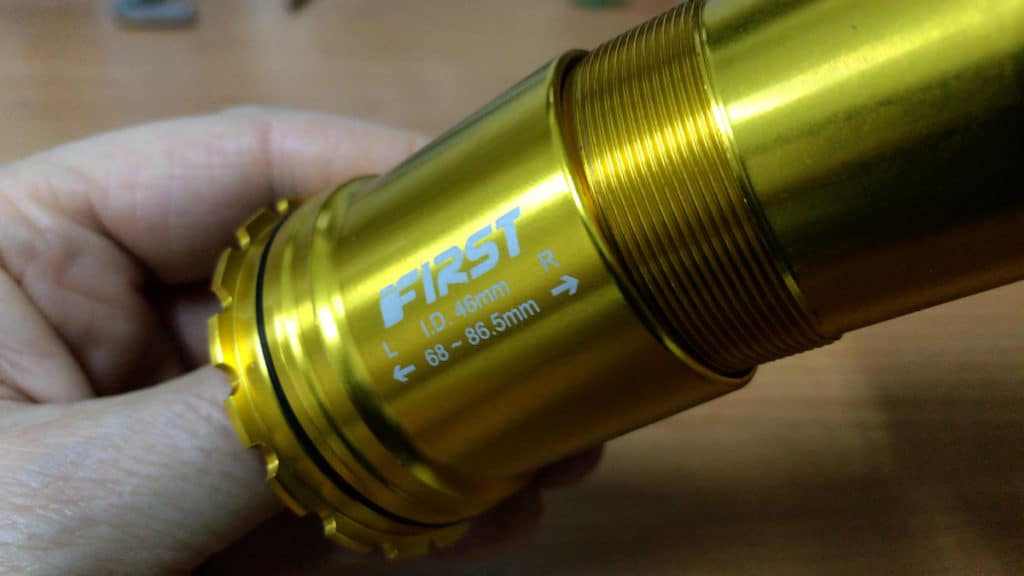
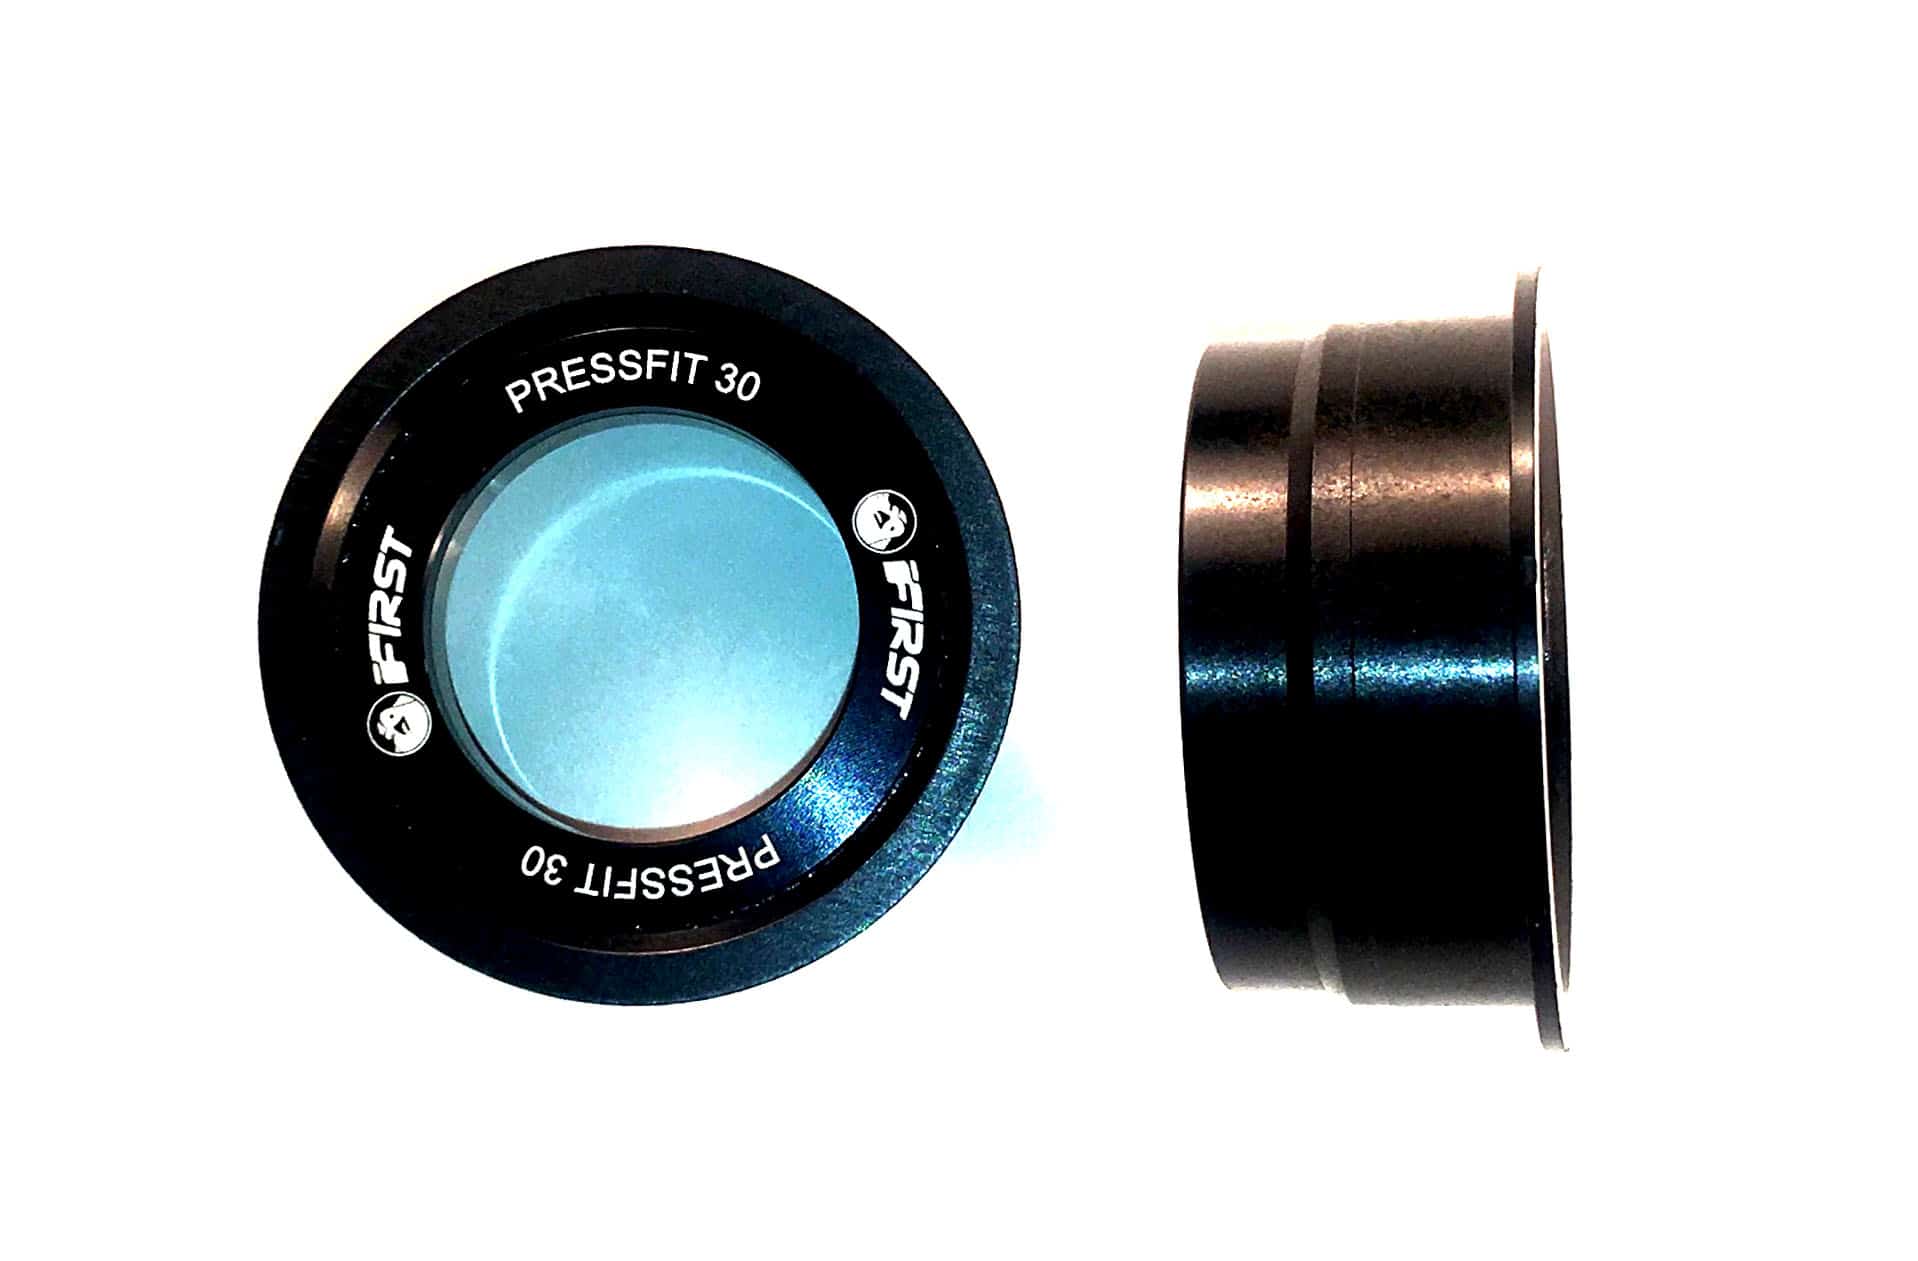
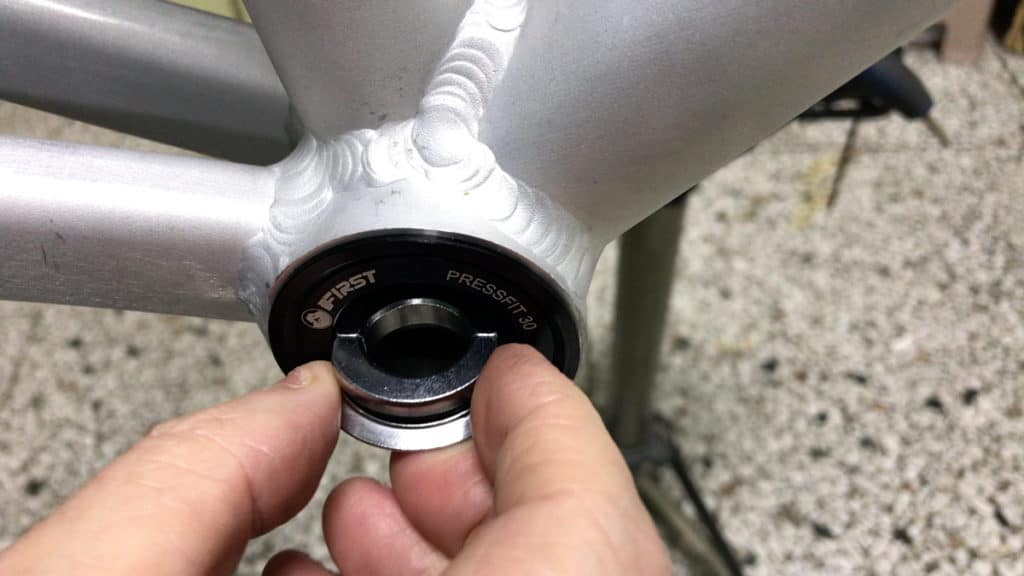
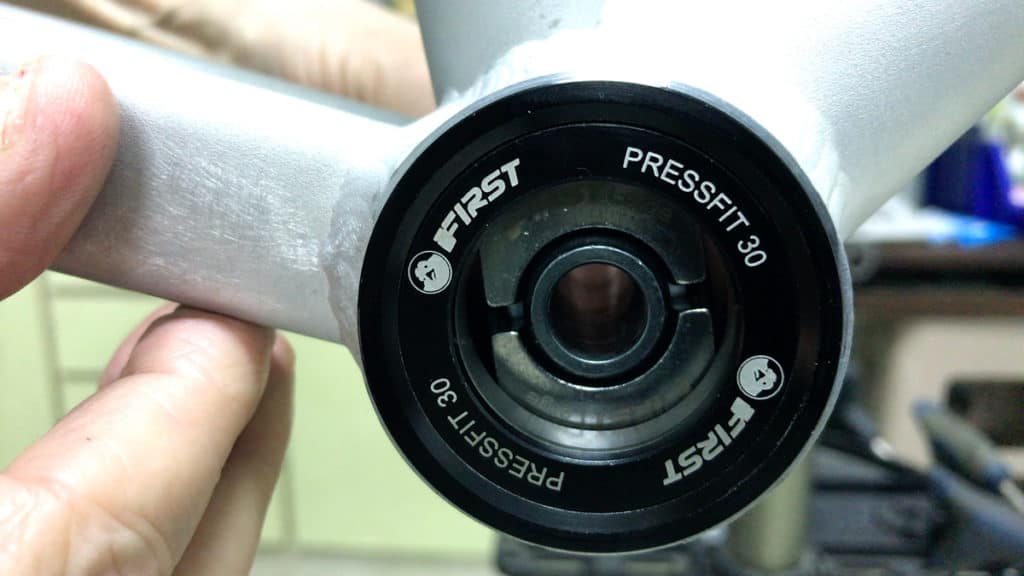
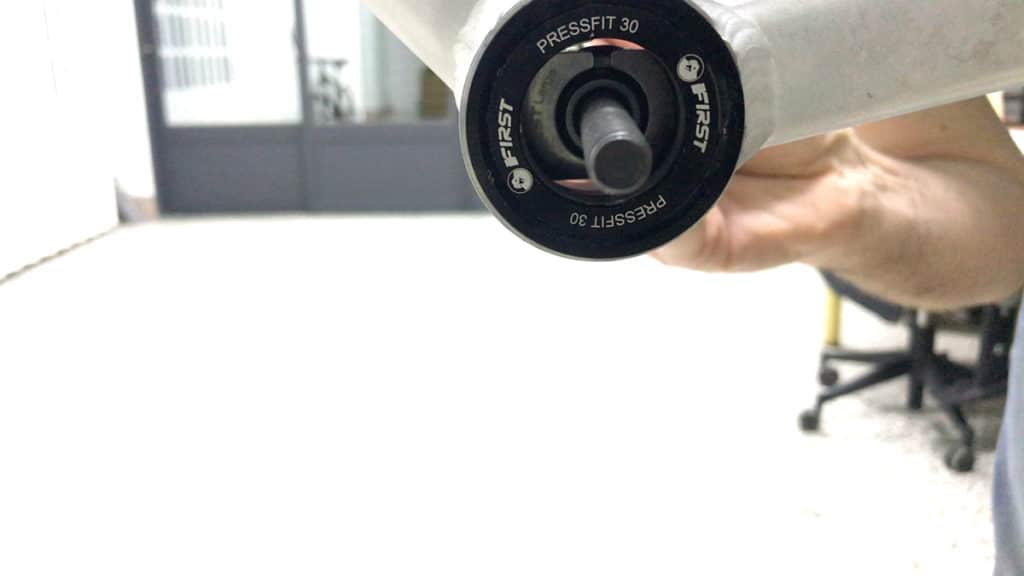
This is the press-fit type that you are most familiar with, also crafted from aluminum.
Good for bottom brackets shell widths from 68mm thru 86.5 mm. It also has the sleeve complete with a seal to keep the muck out.
The only thing, of course, is that you need a tool.
Luckily we have just the toolset, which we demonstrate in the section on installation and removal below.
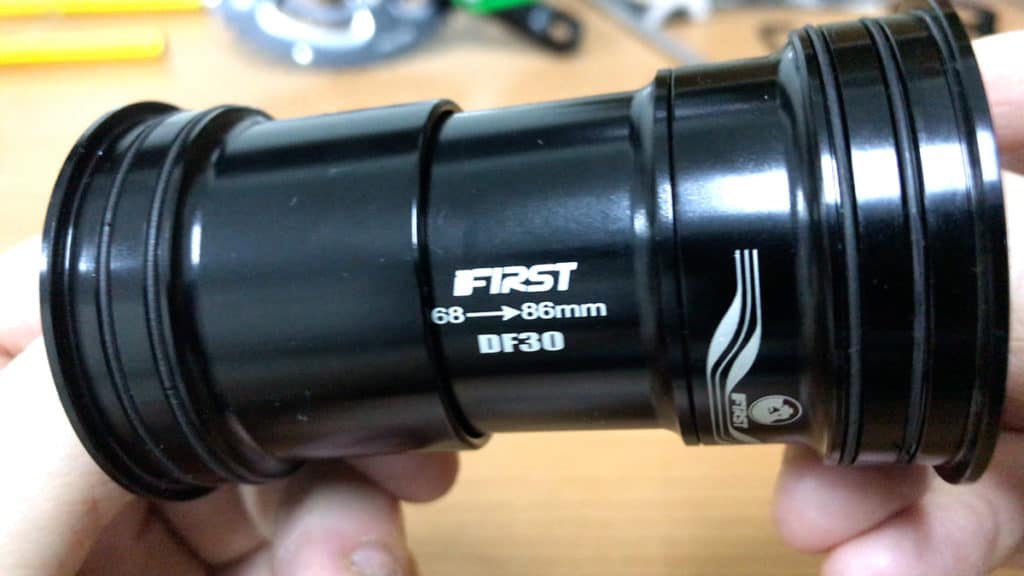
A similar design. Aluminum cups without the sleeve. Again, you need the tool to get this one installed and removed.
If you are on a budget or just don’t think you need an aluminum model, then nylon cups can do the job.
REMOVING PF30 BOTTOM BRACKETS
You are probably not using a bottom bracket such as the GP30 self-installing self-extracting model mentioned briefly earlier (covered in detail in the video).
So you need to know how to remove your particular pf30 BB quickly and easily without damaging either the BB or the BB shell in the process.
Okay, you’ll not likely damage the BB shell . . . maybe just rough it up a bit or scratch the outer surface paint job.
You can certainly mess up your bearings though.
Compared to threaded bottom brackets, there’s a much greater potential for press fit bottom brackets to move in the shell and thus creak.
You want to be able to go through the process of both removal and re-installation quickly and easily so you can diagnose the source of problems with a minimum of hassle.
Due to the greater range of tolerances with pf30 bottom brackets, getting the installation exactly right is even more important.
Or the crank-spindle connection tolerances are too lax resulting in too much movement, and therefore squeaking, at that interface.
If you are having problems there look into using loctite along with the correct number of spacers or wave spring-washer to tighten everything up. Check out the discussion on this forum.
Also make sure the noise is not coming from the pedals—did you install them with washers?
No washers is a common cause of creaking and clicks that can be misdiagnosed as coming from the bottom bracket or the frame more generally.
Don’t underestimate the ability for sound to transmit across the frame.
A click or squeak can seem like it comes from everywhere or clearly from one point. But no matter what you do you can’t eliminate it because you cannot actually pinpoint the origin of the sound.
Investing in a specialist tool, then, makes sense, especially if you are a cyclist who puts in a lot of miles on your bike.
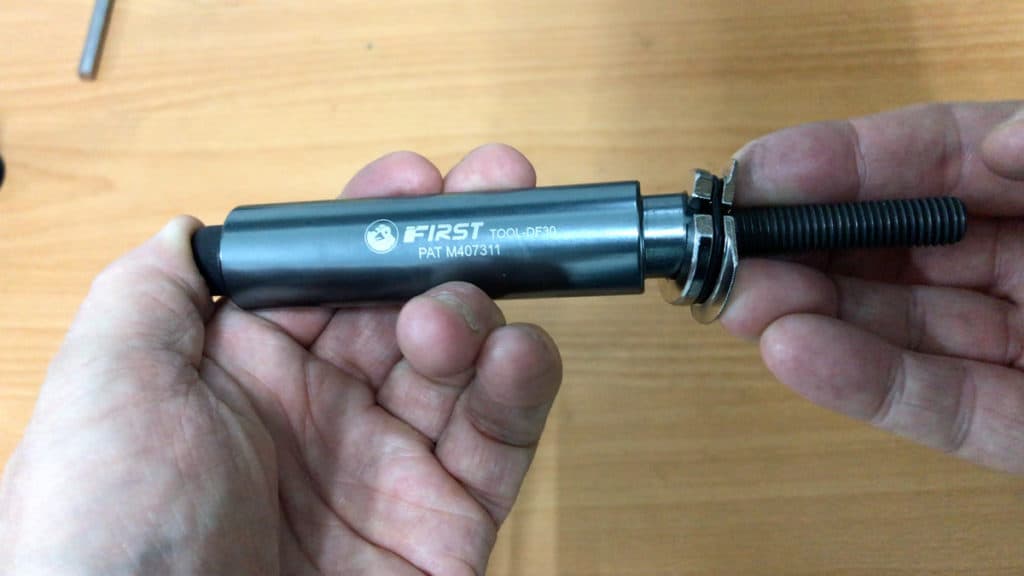
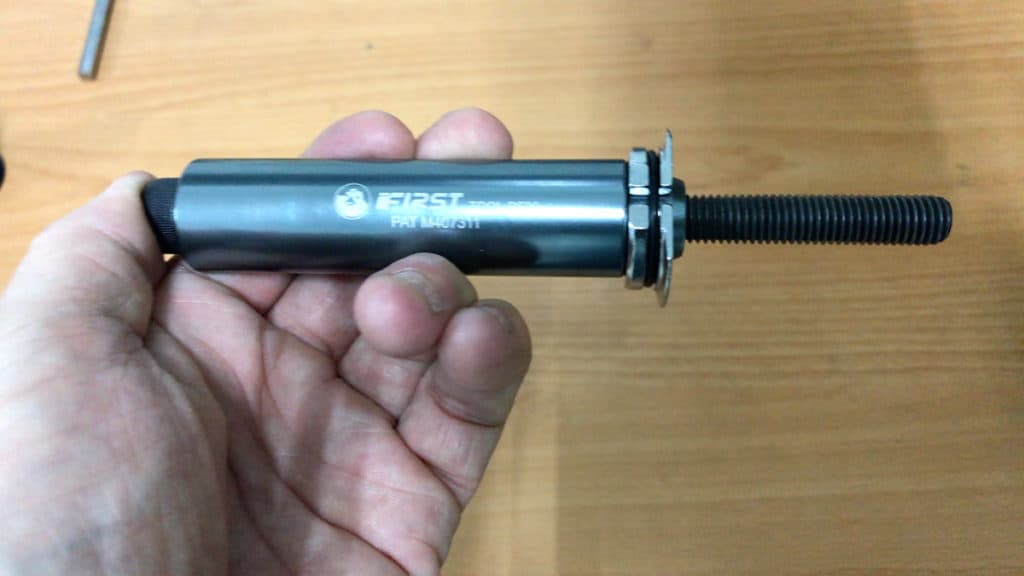
PF30 Bottom Bracket Tool
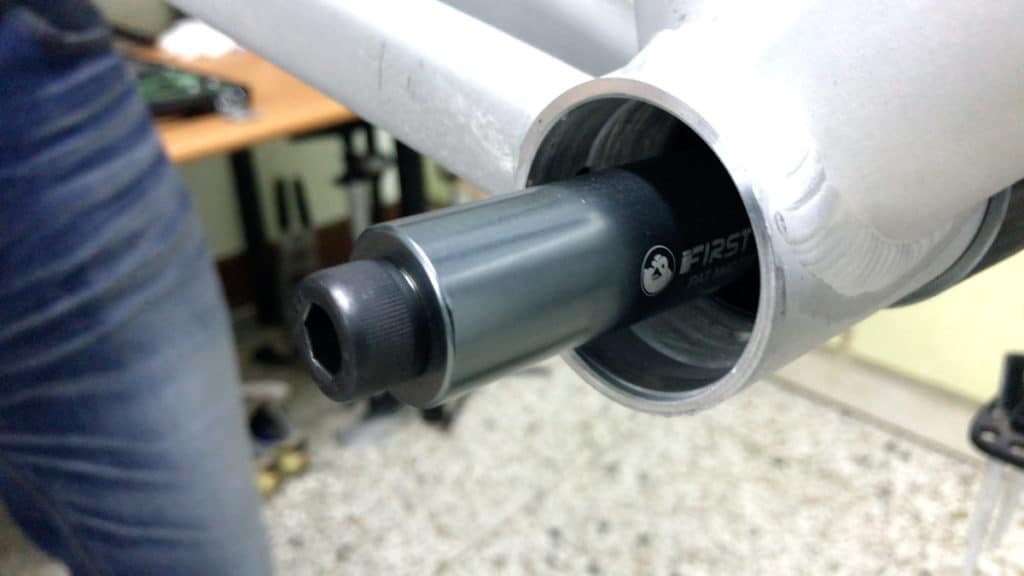
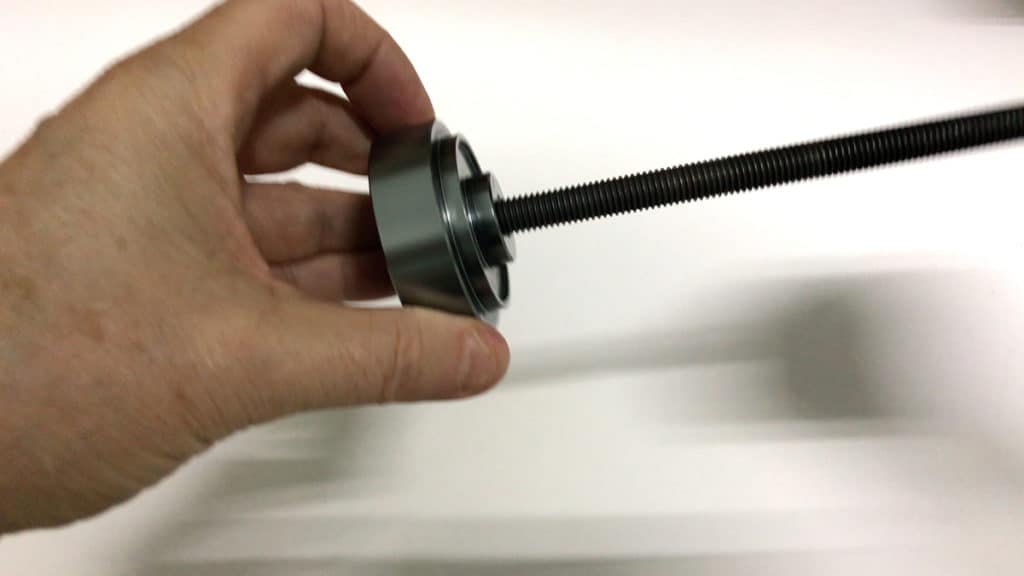
This model is a common tool for installation.
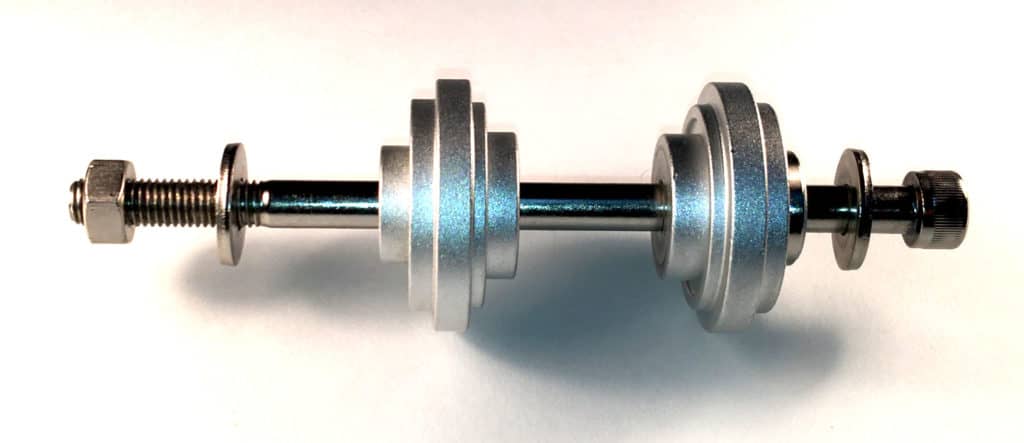
When I say common, I mean you have your standard bolt design with the 30mm-fit brackets.
A pf30 bottom bracket’s inner diameter slots inside the bearing cup. The outer face covers the BB cup.
Turn the bolt and your bottom bracket gets pressed into position.
All well and good. What happens if you want to remove your pf30? You’ll need a different tool.
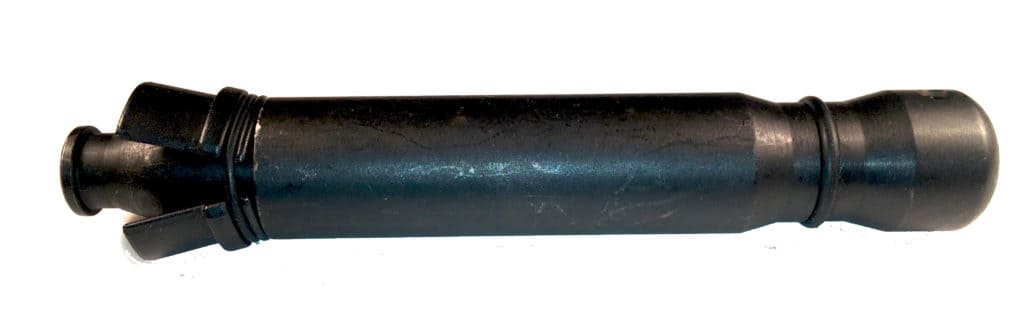
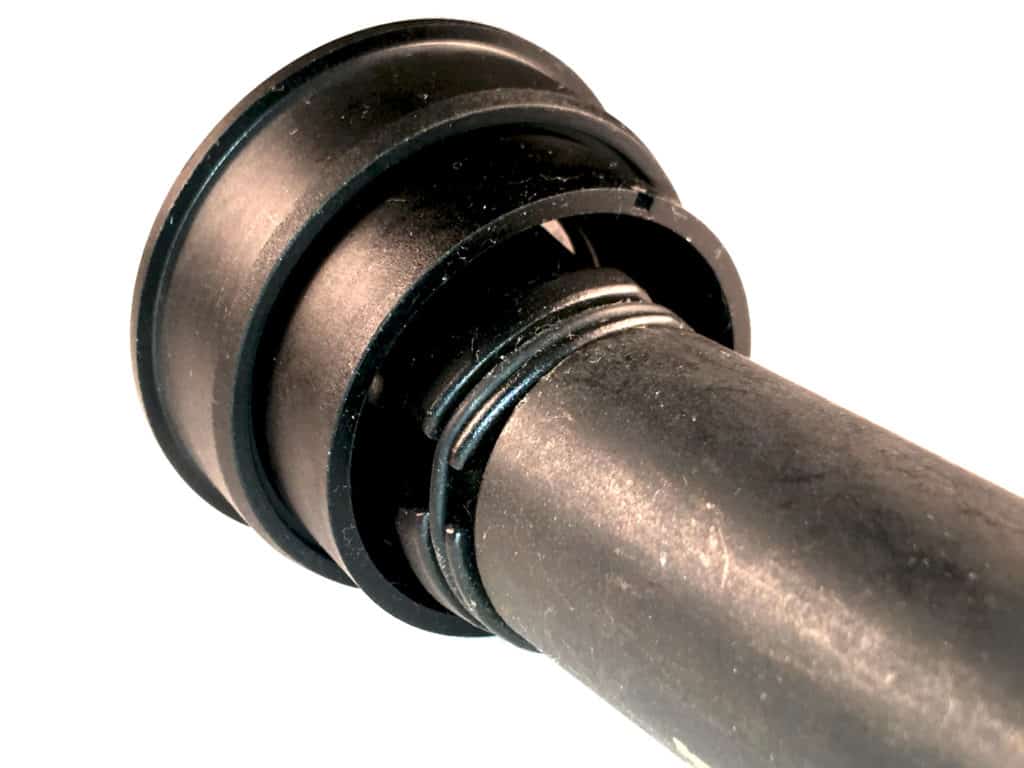
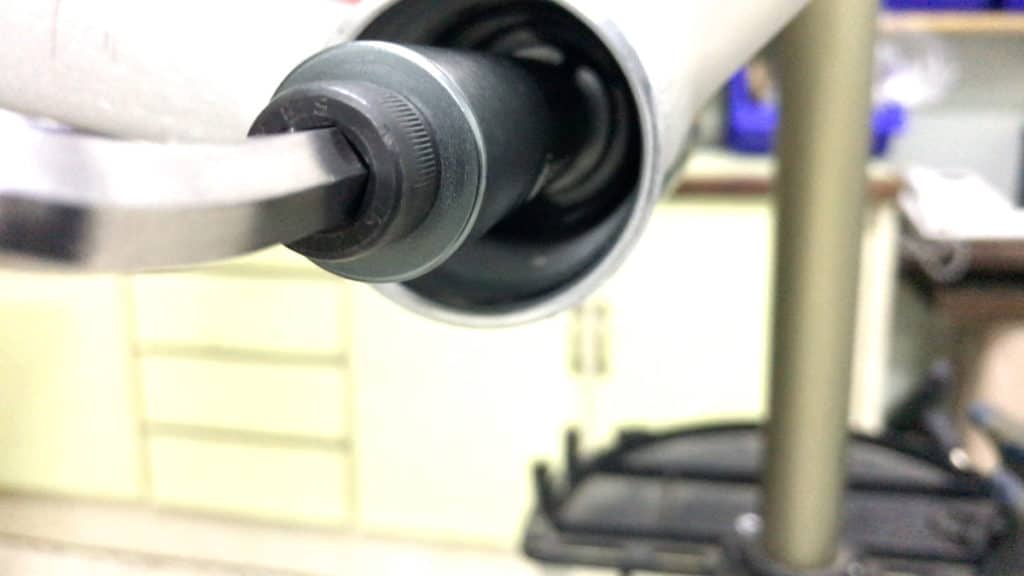
An impact design like this will get your bottom bracket out of the BB shell.
However, the chances you’ll end up with a damaged BB are high.
Damage is much more likely where nylon is involved.
The tool wedges behind the cup and you tap away until the BB is clear of the shell.
You’ll hope you can simply tap it out anyway.
If you can gently press your pf30 bottom bracket into position you should be able to remove it the same way.
So if at all possible, avoid tools that rely on impact to remove a pf30 bottom bracket.
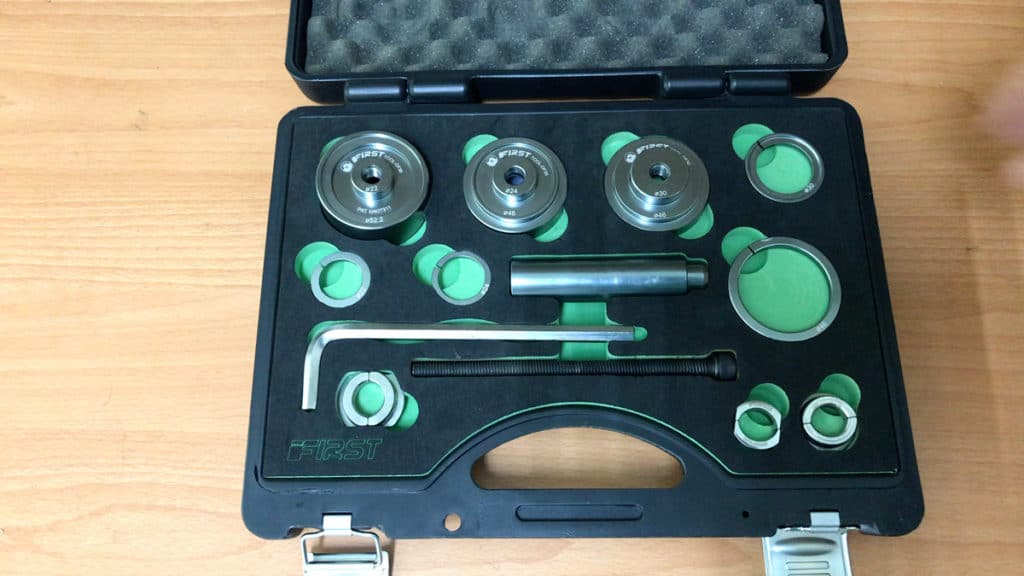
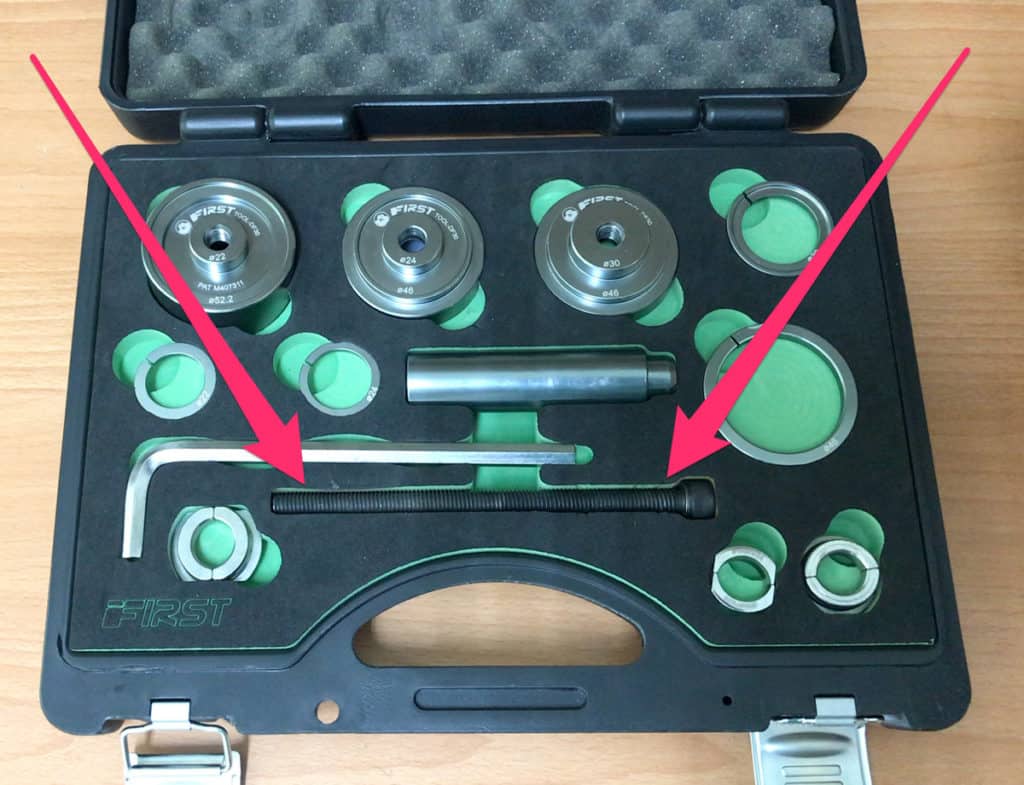
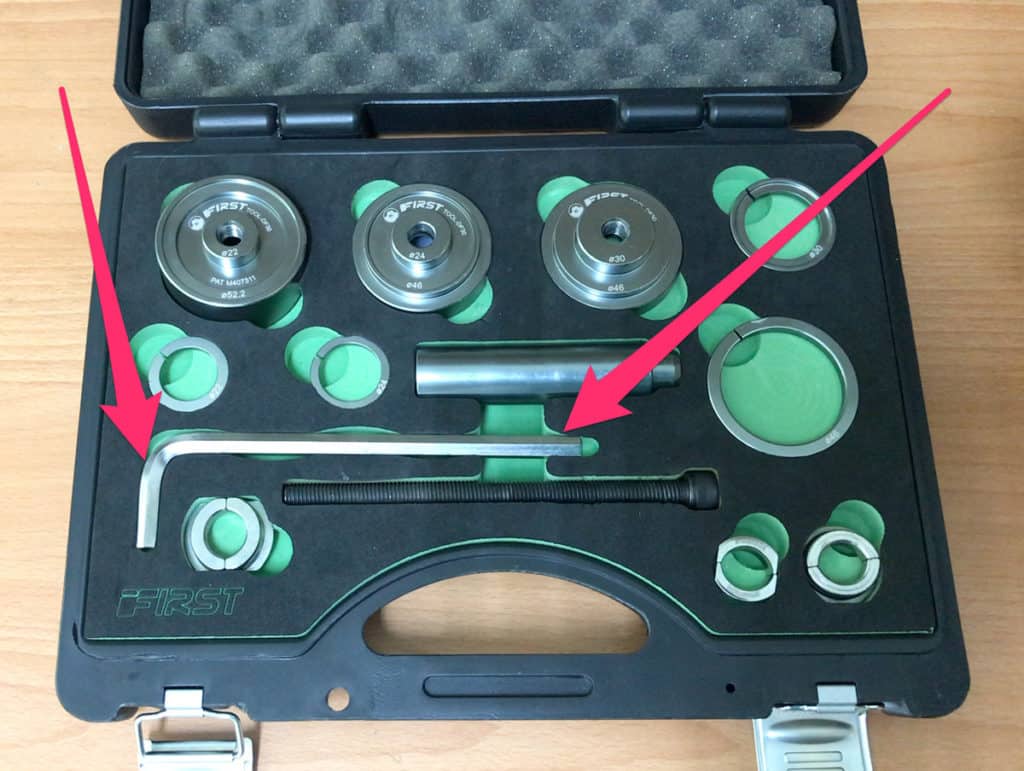
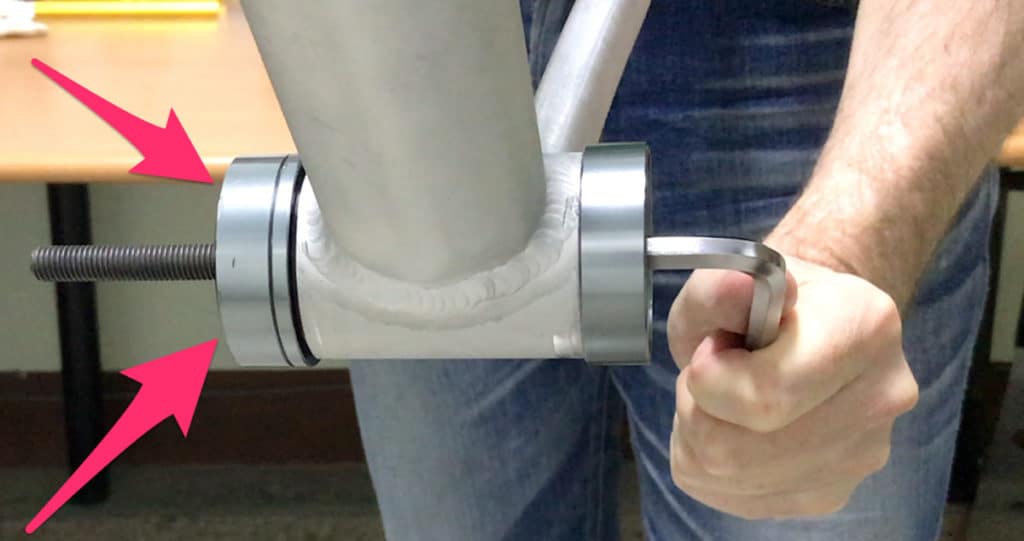
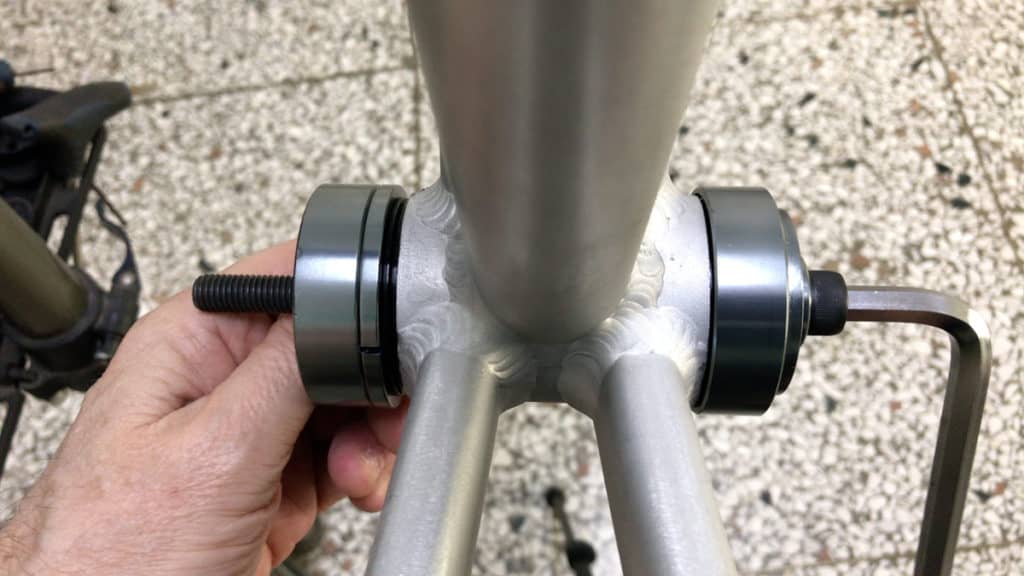
This is the toolset that we use to complete that task, a kit that
- installs your pf30 BB smoothly and easily
- won’t put any stress on the bearing as you do it
- allows you to also easily remove a bottom bracket
You are able to both install and remove your pf30 BB without taking a hammer to anything.
The Removal Process
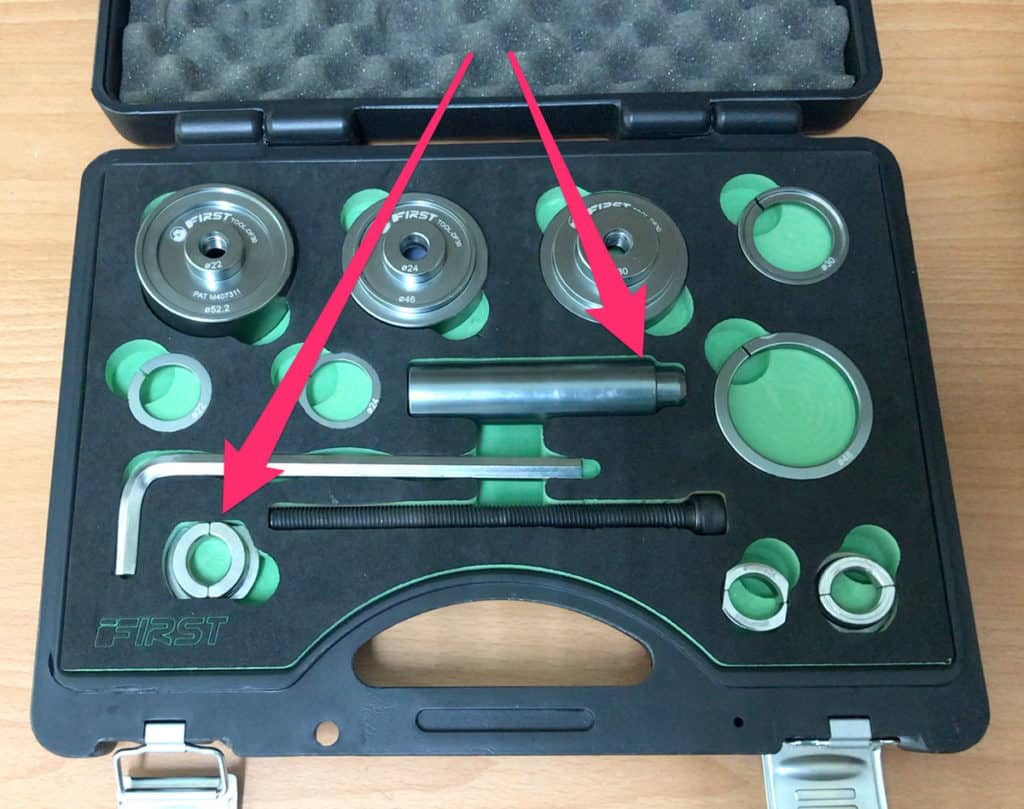
The key components we will use from the toolset are the:
- split steel-hitch
- driver
- bolt and retainer
- 8mm allen wrench
Each side is removed one after the other. You could start with the drive side or non-drive side.
In the illustration that follows we’ll start with the drive side.
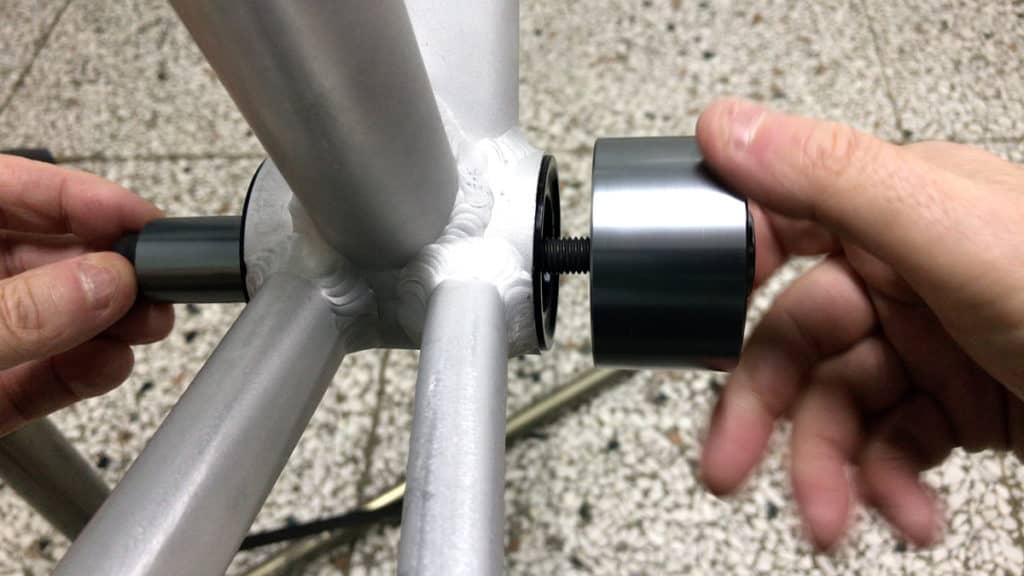
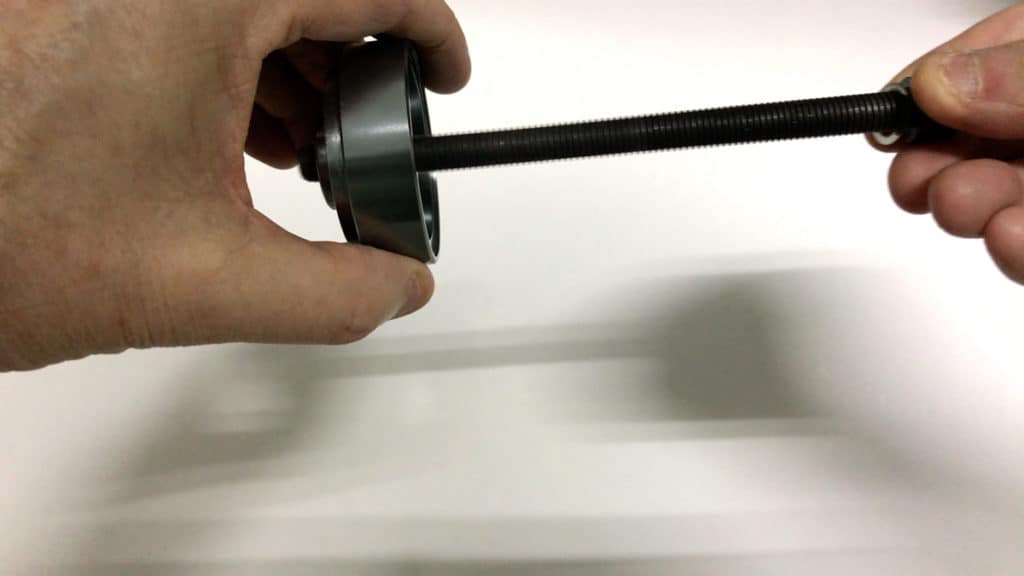
On the left there is the split steel-hitch. On the right is the driver—the hitch expands over the end and connects with the BB cup inside the BB shell.
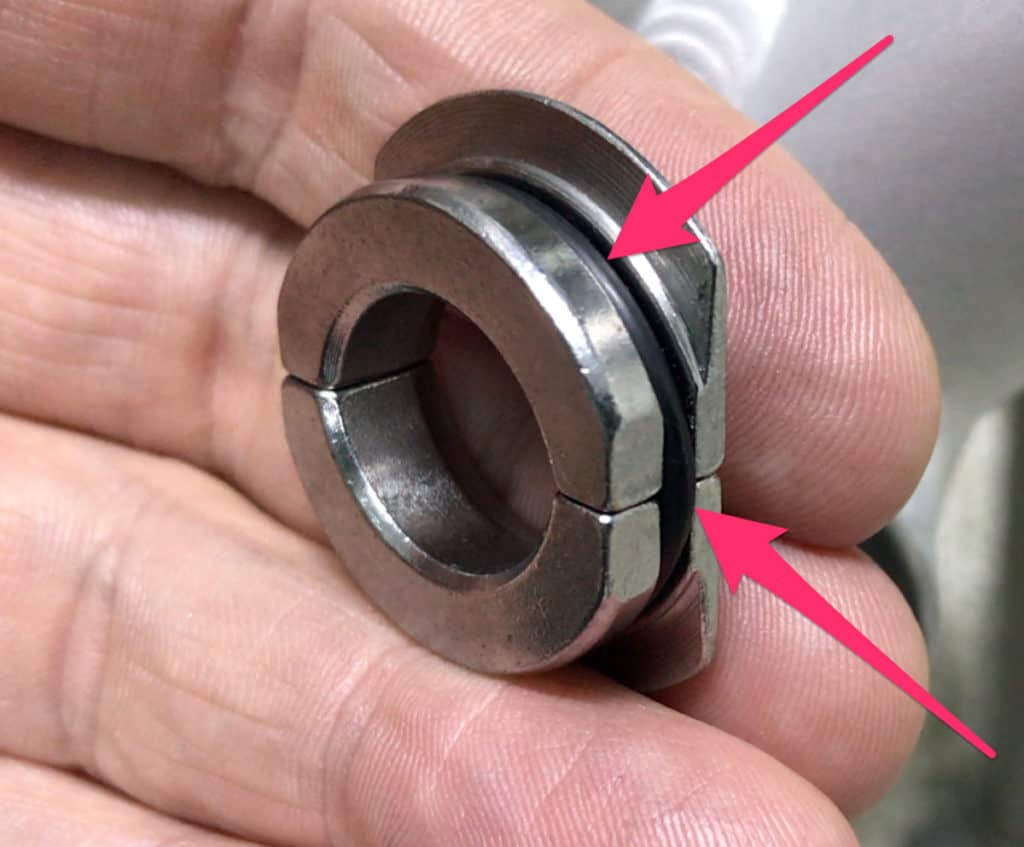
The narrow end of the driver fits the steel-hitch’s inner diameter.
The ruBBer retainer/grommet allows the hitch to expand around the driver where it sits securely, seated against the driver’s recessed face.
This is how the driver and hitch will sit inside the BB shell. The bearing-cup retainer screws onto the bolt which hold the driver and hitch square to the BB cup as you turn the bolt.

These ruBBer retainers are fairly heavy duty. But a good supply of extras comes standard with this toolset.
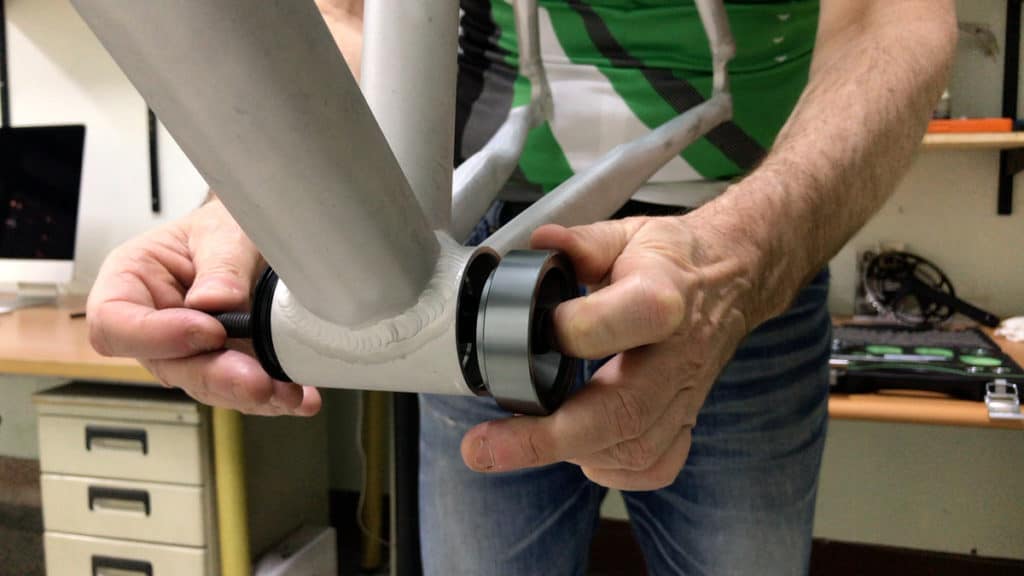
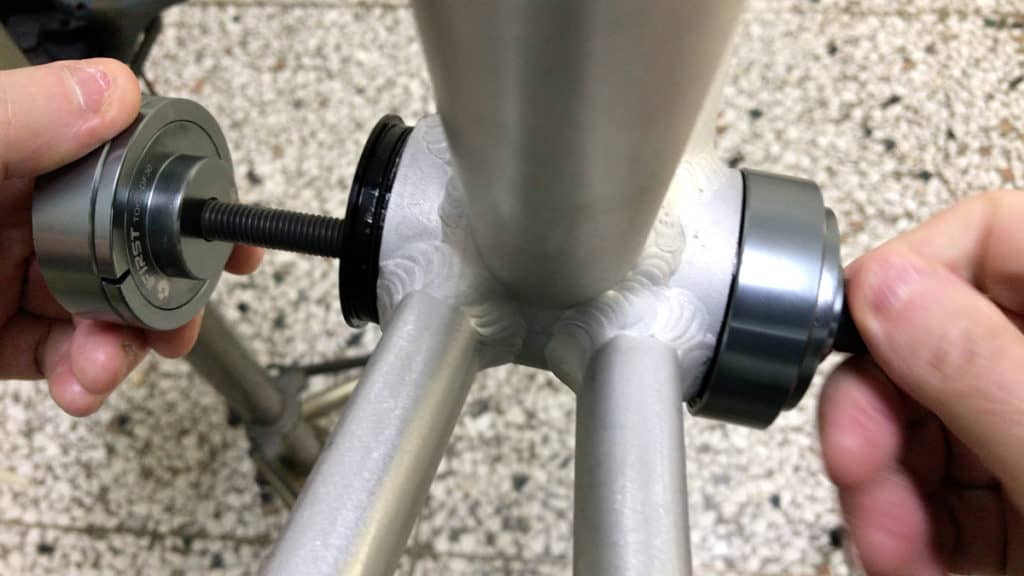
With the bottom bracket still fully installed, the split steel hitch must be first inserted in behind it.
The technique is to feed the hitch through on its side. Then rotate it forward.
The driver inserts into it from the opposite side, then pushes the hitch flush against the inside of the bottom bracket cup.
The bolt is next. It inserts straight through.
The retaining cup threads onto the bolt until it neatly connects with the bottom bracket shell’s rim.
When the retainer sits snug against the BB shell rim, it acts as a nut to the bolt. Turning the bolt pressures the driver, with the hitch evenly applying pressure to the BB cup.
All that’s needed now is the 8mm Allen wrench.
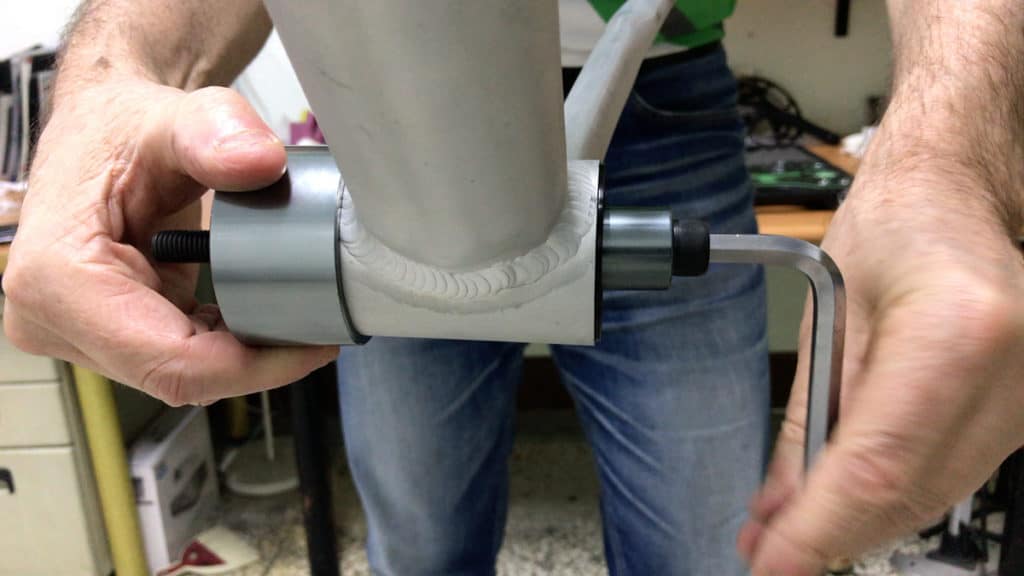
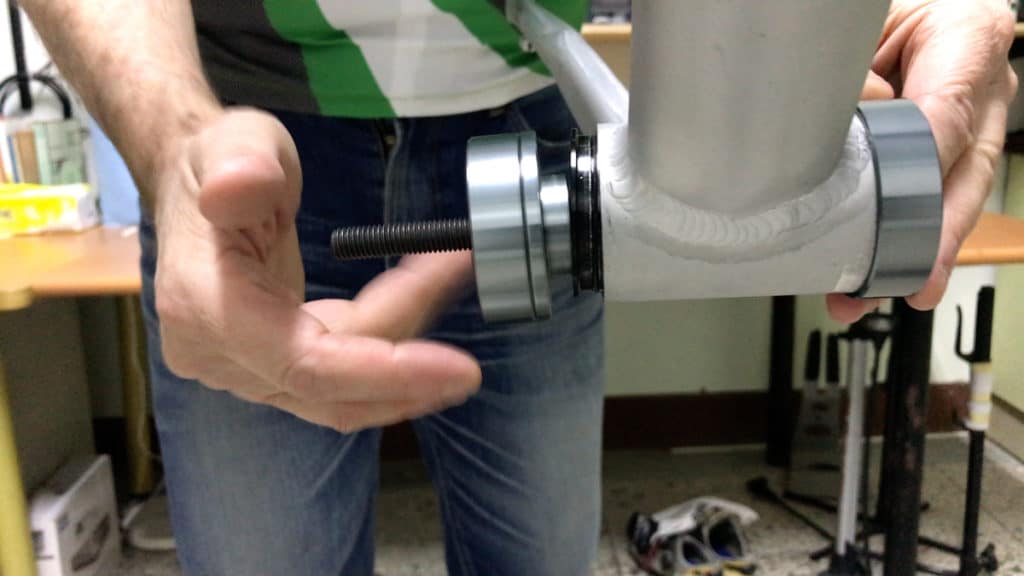
No real force is required here. With a few turns of the bolt, the BB is progressively pushed out into the retaining cup.
A great advantage here, of course, is that you need not worry about the bottom bracket as it comes out. There will no be falling to the floor with this unit.
You simply extract the driver and hitch together with the BB sitting in the retaining cup. Once you wind the retainer off the bolt, the bottom bracket is clear of everything.
Or you can slip it back over the driver.
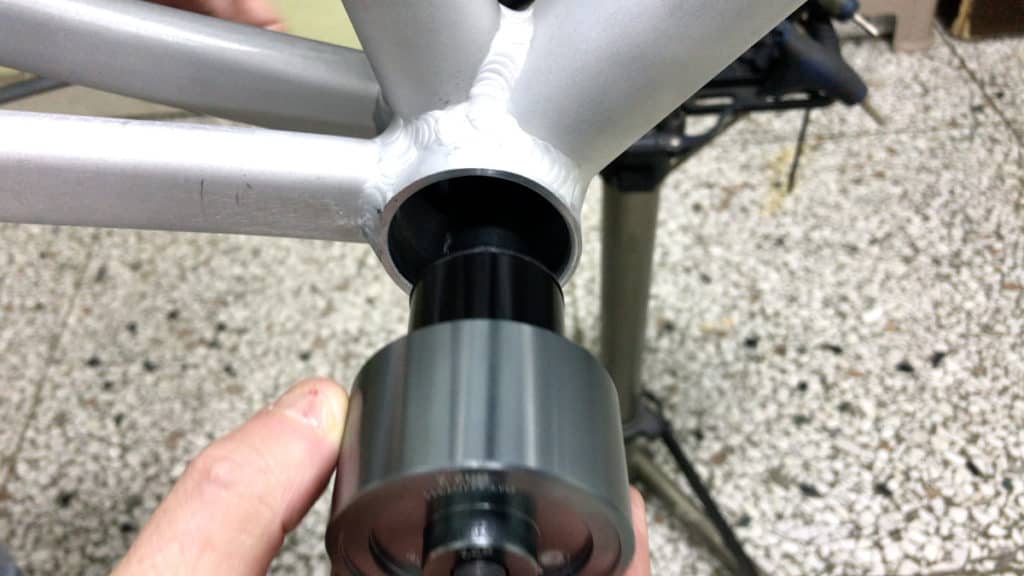
You get a clearer picture of how this works when extracting the bottom bracket from the opposite side.
Because the bottom bracket has been removed from this side, you can insert the driver with the split steel-hitch already in place.
Push the bolt through.
Once you thread the retaining cup onto the end, the driver is held perpendicular to the BB by the retainer’s pressure against the BB shell on the other side.
It’s a matter now of simply turning it until the BB releases from the BB shell into the retaining cup. Then the whole lot exits the shell from that side.
INSTALLING PF30 BOTTOM BRACKETS
If you are using a self-installing press fit BB such as the GP30, installation is a breeze.
That unit also comes with its own wrench, specific to the model.
Here’s the video on that if you didn’t catch it above. The video also demonstrates the process described here in exhaustive detail.
There is debate around whether to apply grease or loctite to the cup/shell interface due to the common complaint of creaks in press fit bottom brackets.
Applying grease makes sense where it is necessary to assist in the surfaces smoothly moving past each other.
Or, in other words, so they do not seize up because they are too tight to easily turn into the BB shell.
Whether or not you will have to deal with a creaking pf30 BB sooner or later largely comes down to tolerances.
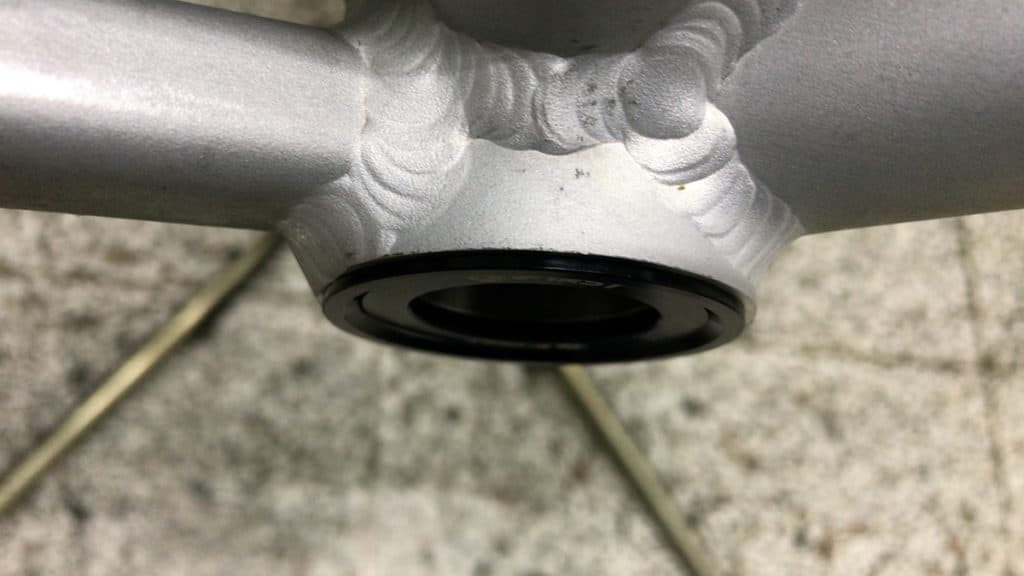
The first consideration is the BB shell.
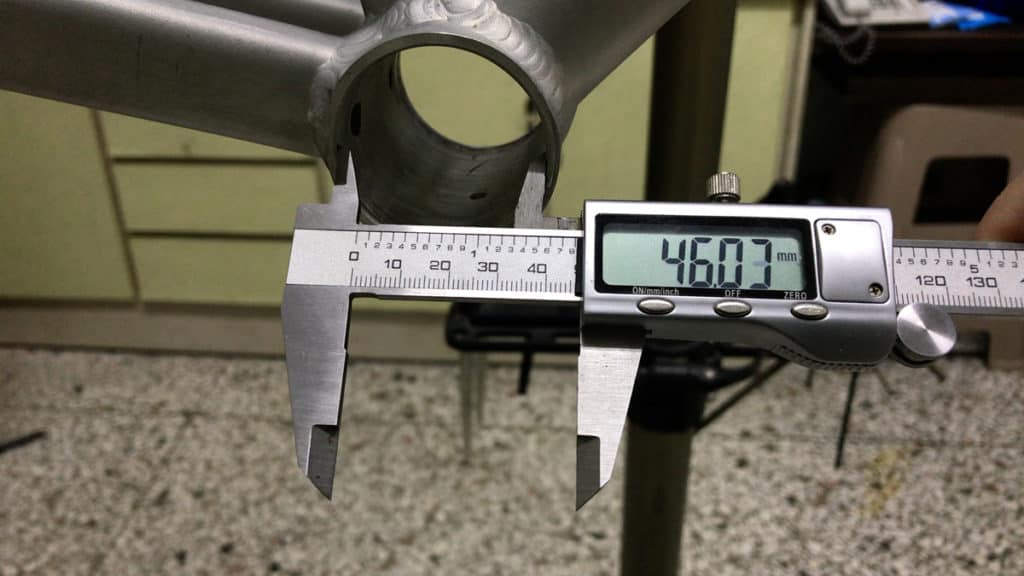
Frame manufacturers are exceedingly precise in machining the bottom bracket shell. If the specification is an ID of 46mm, you will likely find deviations of perhaps 0.1-0.2mm either side of that.
This one measures between 45.97mm – 46.03 due to vernier “error” or deviation due to its sensitivity.
That is super-precise given frame manufacturers’ unofficial acceptance of an overall frame alignment tolerance of 3-4mm. (Yes, your [alloy] frame could be out by as much as 4mm).
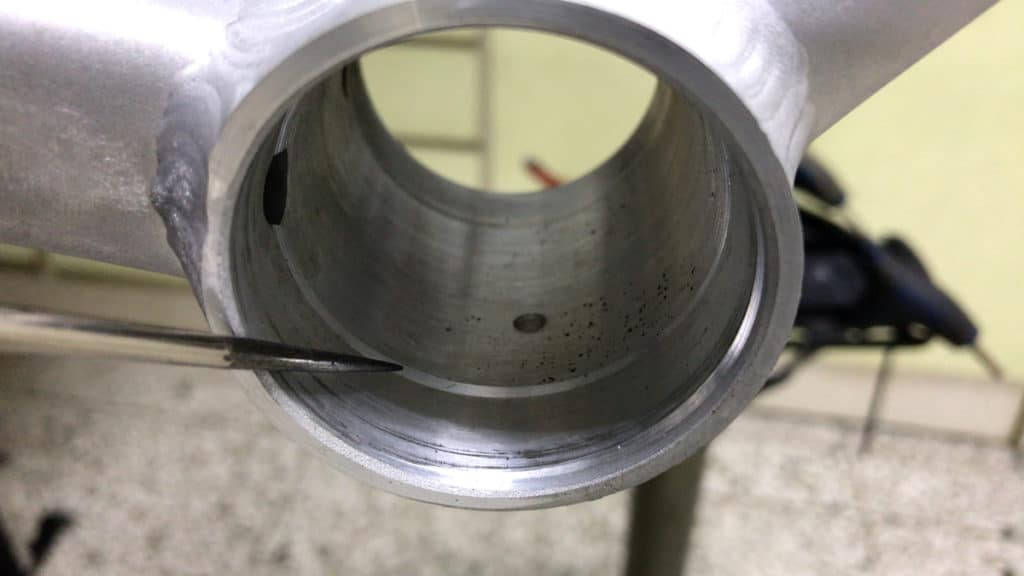
You’ll notice the inclined edge cut to fit exactly to the angled edge of the pf30 bottom bracket when it is fully pressed into the BB shell.
So you’ll find most pf30 bottom brackets you install will fit snug and firm and likely not develop creaks and groans down the track.
Nevertheless it may happen that your pf30 bottom bracket or the BB shell–or if you are really unlucky to get two outliers, both!—have greater than average deviations from the specifications.
In that case, some grease, or loctite, may be required to quieten things down. You should certainly follow manufacturers advice on what to in this situation.
Or experiment. There are many variables involved when it comes to how a bike behaves as an integrated unit.
It’s tempting to think that all you need to do is find the independent variable (the one variable that affects all the others . . . or in other words, the culprit!).
However
- what specific components you use
- what brand of components you use
- whether you are using components from different manufacturers
All come together uniquely for any particular bike build.
PF30 Bottom Bracket Installation Tool
We’ll be employing the same kit as for removing the BB.
And, as with the BB removal, we install one side at a time.
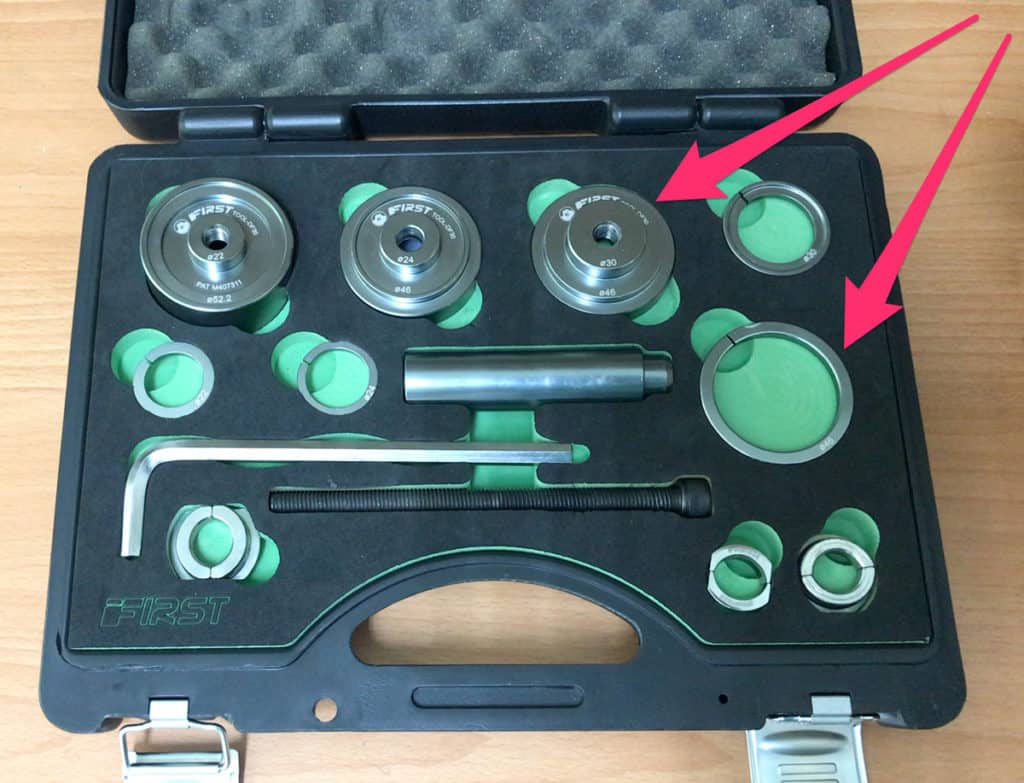
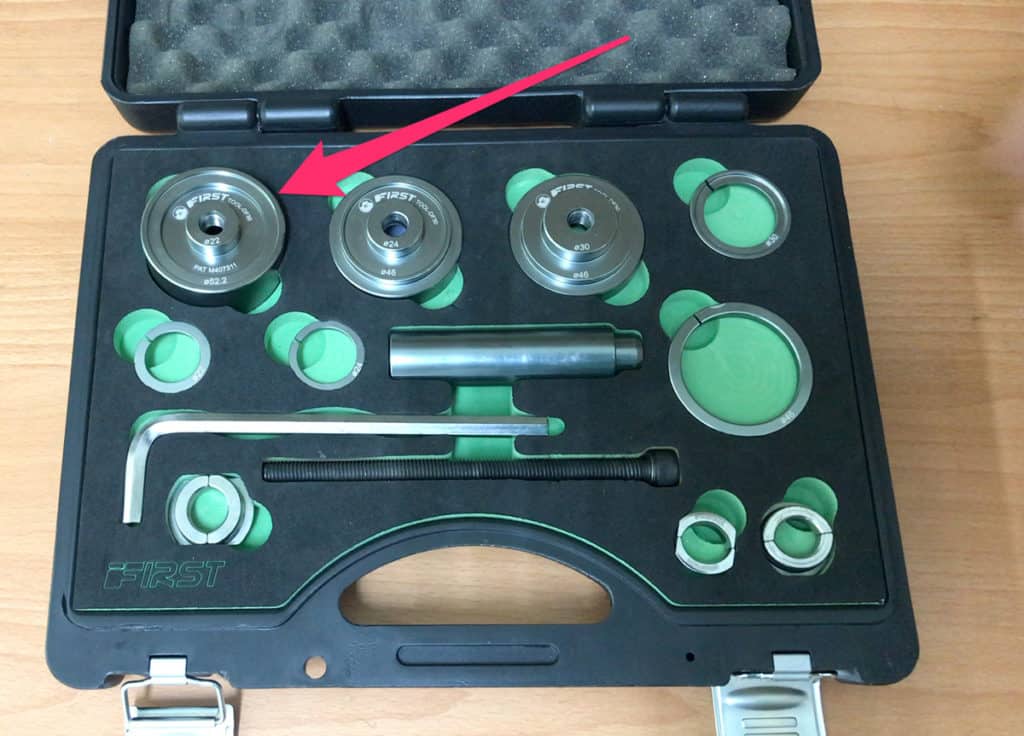
These are the two instruments we need.
The ring mounts onto the press-bracket. Because this toolset is multifunctional, that recess serves other purposes. In order for the press-bracket to fit perfectly to the pf30 bottom bracket face, we need to temporarily fill that space.
We’ll also need this piece to contain the bolt—the head of the bolt rests here.
The first action is to seat the bottom bracket cup by hand as far into the cup as it can go.
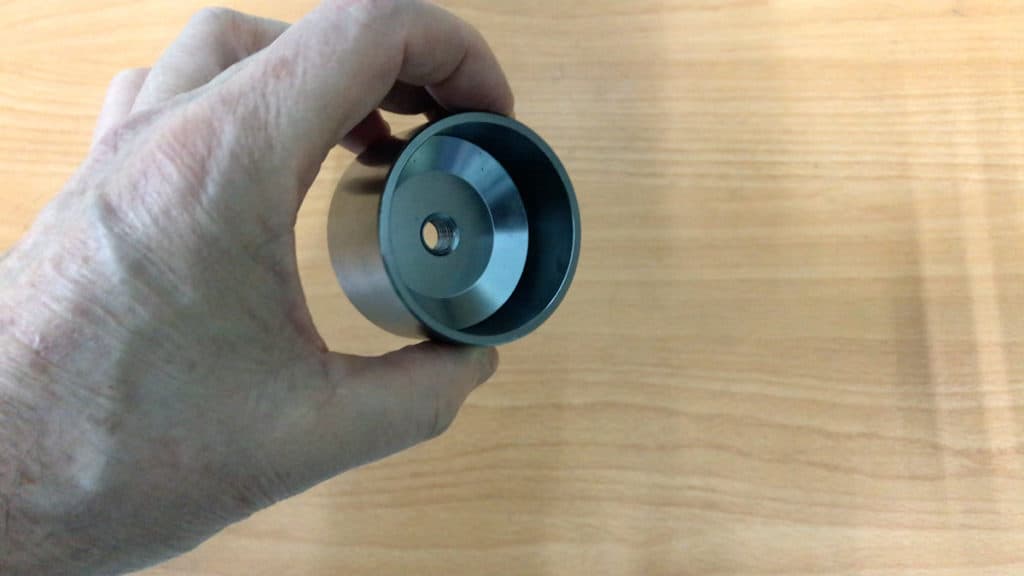
Then fit the ring to the press-bracket. On the right is the 30mm outer diameter extension that will sit where the spindle will be installed later.
This is threaded, so the bolt screws into it.
The convex side will fit perfectly into the bottom bracket shell on the opposite side.
We slot it into place and all that remains is to thread the bracket onto the bolt.
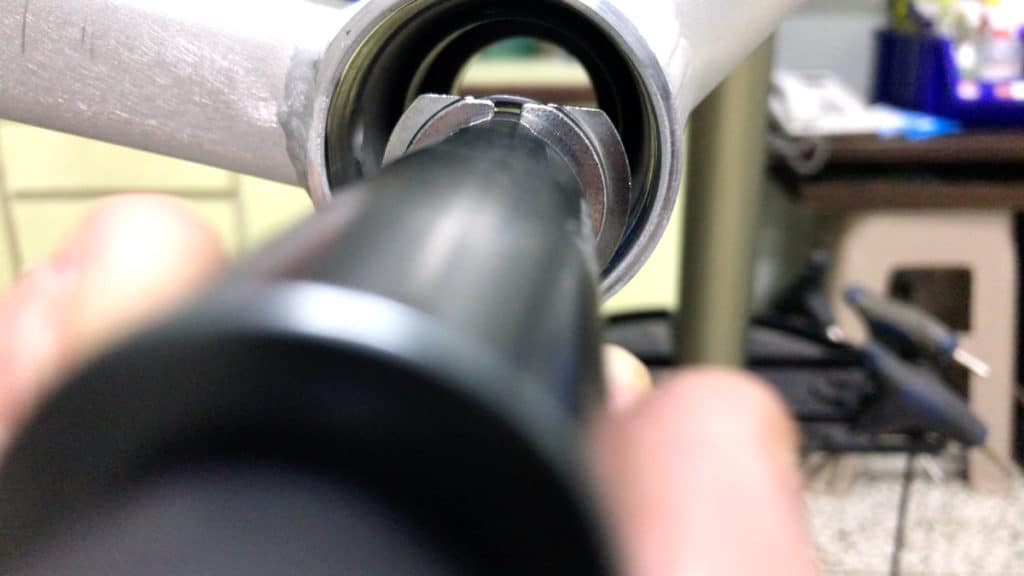
This is the view just as the 30mm extension is about to enter the bottom bracket proper.
Once it does, the whole assemblage squares up. Even though the BB cup is sitting slightly askew in the BB shell here, it will be pushed parallel to the BB shell face almost immediately.
It only takes a few turns of the bolt to pull the press-bracket in, and with it, our pf30 bottom bracket.
Snug as a bug . . .
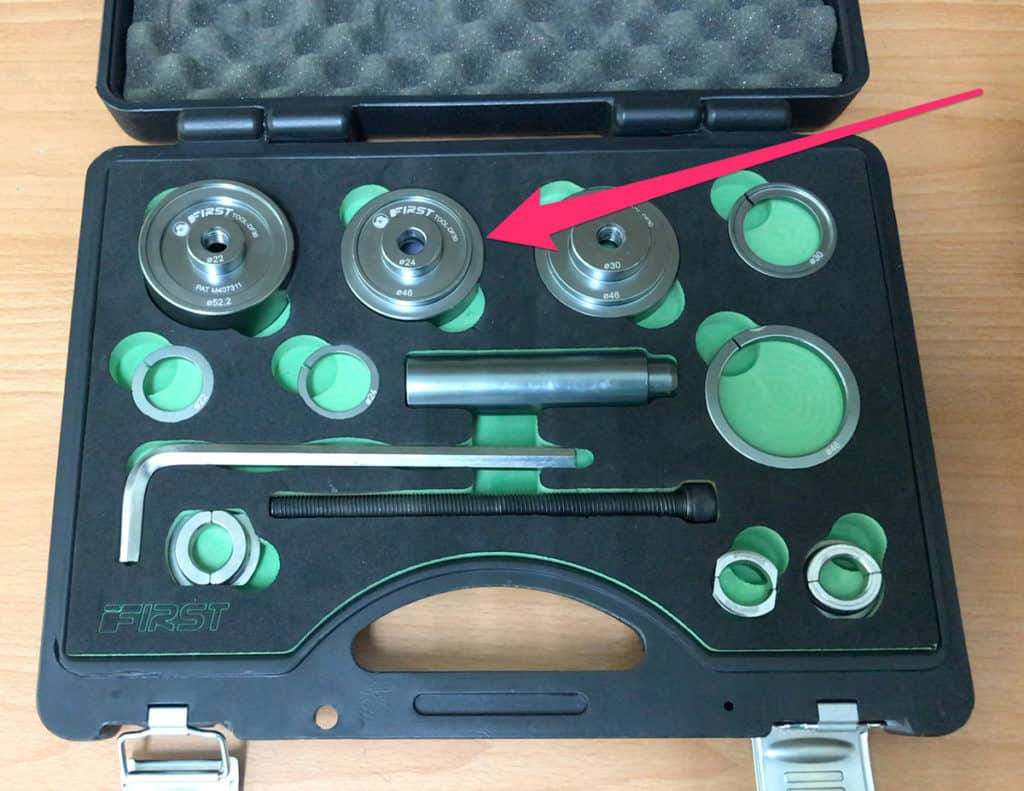
Installing the BB in the opposite side means a small change in how we use the tool.
The “driver” end of the assemblage must be reversed so that its concave surface is facing the frame.
Because we have already installed the pf30 BB into one side of the BB shell, this piece is designed to fit right over the top of it.
This way there will be no pressure exerted on the BB cup. The only pressure will be on the cup on the opposite side as it is being pressed into the BB shell.
Having seated the pf BB cup as far inside the BB shell as it will go, the press-bracket can be threaded onto the bolt. Once it is sitting snugly inside the bottom bracket cup, we simply engage the 8mm Allen wrench on the right side.
The bolt turns smoothly and independently of the cup on the right pulling the BB cup easily into the BB shell.
Unscrewing the press-bracket from the bolt and putting everything back in the case takes a jiffy.
FINAL COMMENTS
A pf30 bottom bracket was a welcome development to the BB30 standard.
If you’ve got one, it’s well worth learning how to remove and replace it, or master re-installation if you are in trouble-shooting mode.
Leaving aside the larger philosophical question of “Did Press-Fit bottom brackets practically improve our cycling lives?”, did we leave anything out here?
If you had the chance to convert your press-fit BB setup to—or back to—a threaded system, would you do it in a heartbeat?
Or is the best cycling kit decision you’ve ever made?
Is there anything we’ve missed out here?
Let us know in the comments below . . .
4 Kommentare zu „Pf30 Bottom Bracket – The Complete Guide“
Hi there, do some PF30 bottom bracket manufactures also have tolerances to the sizing of the bb cups ie kogel, cups measure 46.12mm and bb shell measures 46mm. Kogel says ok, shop says no way.
Will the cups align after going in on slight angles? How much force should be required?
Some manufactures are 46mm and thread into the other side, Kogel says oversized for best fit.
Thanks
This is a really tricky area. BB shell tolerances vary as does the shape of the shell: none are perfectly concentric and the same goes for BB manufacturers’ cups. (Check out Hambini’s videos on this subject). I think the shop has got it right. They deal with these issues all the time whereas the opinion from a BB manufacturer may be from someone who knows their stuff…or someone who doesn’t. Slight angles are ok, as in just a few degrees, when you’re starting off an install anyway. A cup ought to straighten up quickly as the install proceeds. If not, you’ve got a problem. How much force depends on the tool you’re using alongside of the compatibility of the cup you’re fitting. If the cups are square to the shell after a few millimeters and you can hardly crank the wrench or tool handles, then the cup is not going to fit. (All this is why several manufacturers have shifted to T47 btw).
If you plan to do your own bike maintenance, the greases for the bottom bracket from Park Tool are worth it. I’ve used it to repack wheel bearings on a bike that had not been maintained in a while (the wheels were not spinning freely). Once the hub and bearings were cleaned, with the fresh grease, the wheels spun smoothly and quietly. It repels water with ease and doesn’t run off when going through large puddles or encountering rain. I didn’t have to reapply once last summer, even though it was raining almost daily.
Aside from its performance quality, the product’s versatility was another massive benefit. This multi-purpose bottom bracket lube is usable and protects most metals. In other words, I can apply it to cranks, pedals, hubs, ball bearings, and many other bike-related applications.