At First Components, we spend most of our time devising unique solutions to customer problems which are the key source of our products.
Each product represents a unique response to a particular problem the customer ordering that product wanted solved.
In this post, we showcase four examples of this in action, four solutions for temporarily or permanently converting a
- press fit 42mm (BB30) or
- 46mm bottom bracket shell (PF30)
to take a threaded BSA BB and thus 24mm spindle.
The potential uses for bottom bracket conversion, or adapter, sets are many. Adapting a bottom bracket solution to a BB shell that cannot be changed is easier—and cheaper—than changing the frame.
CONTENTS
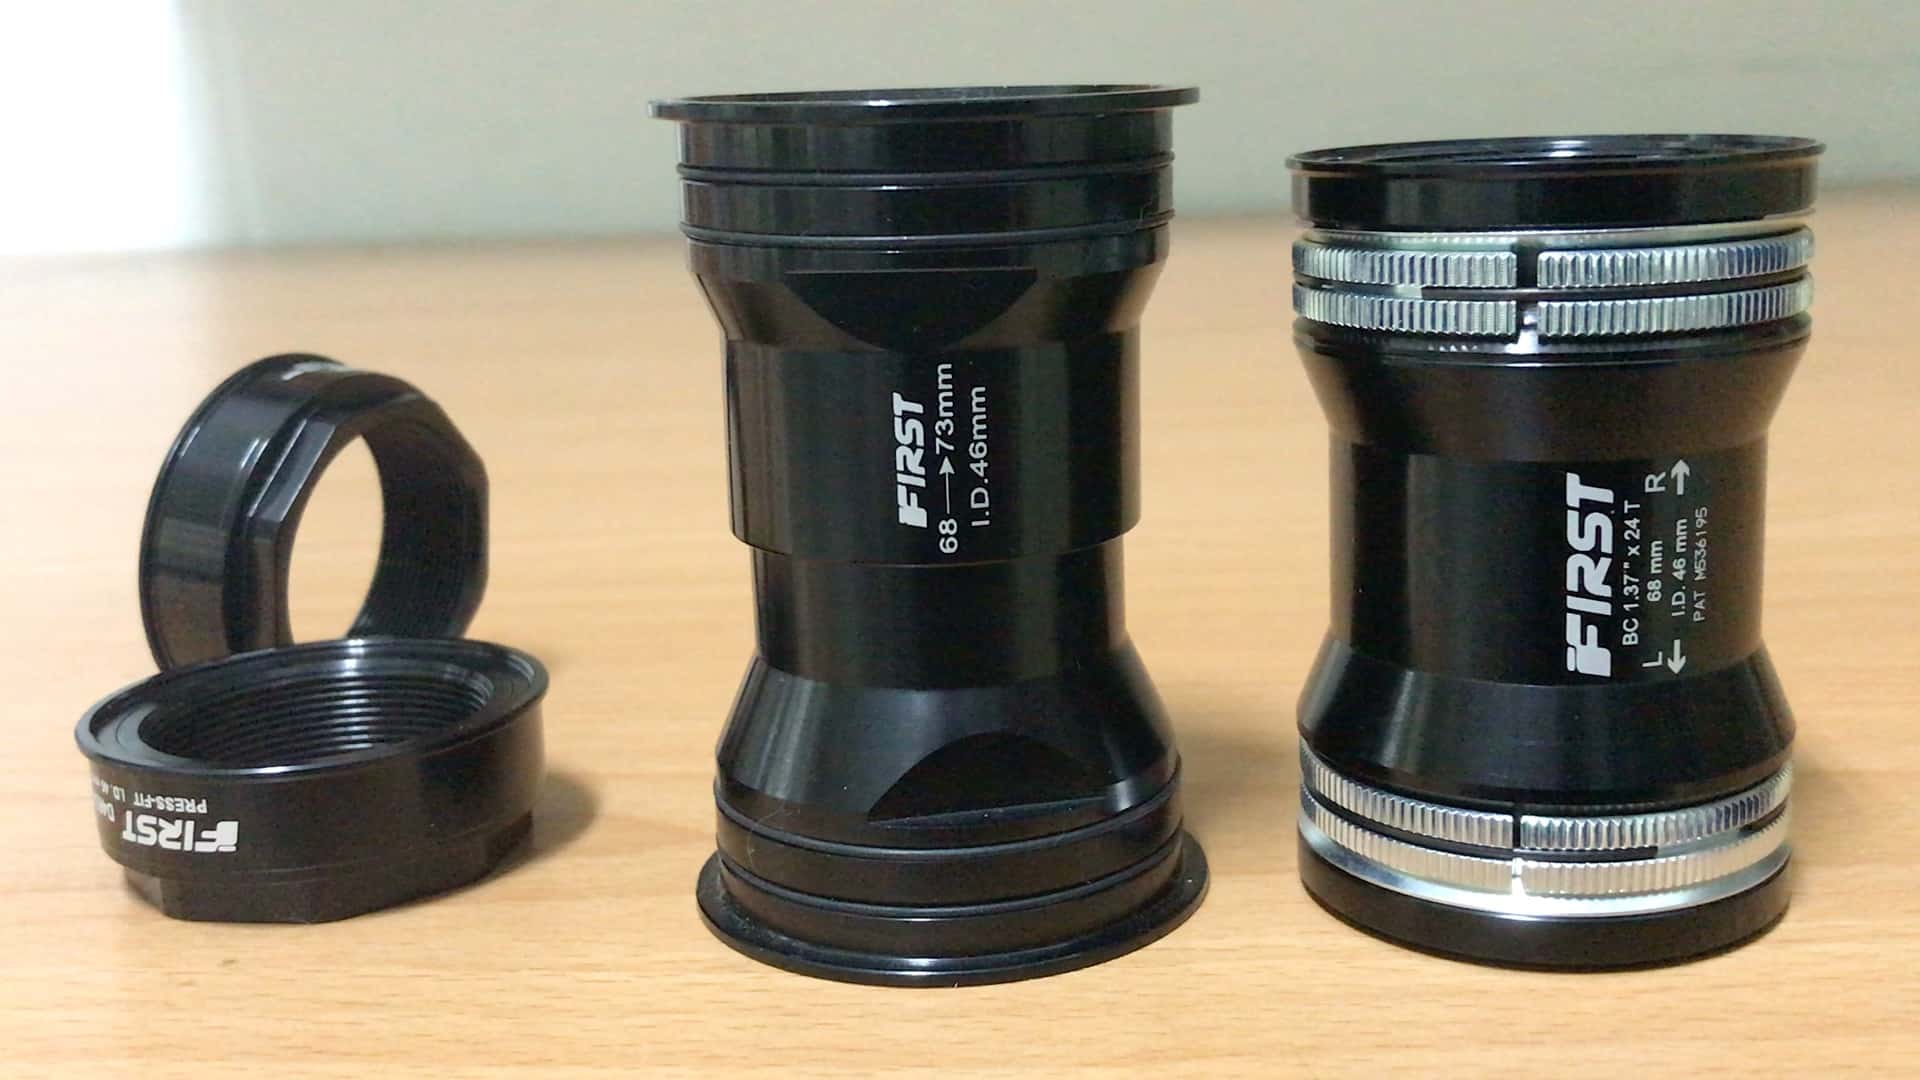
3 Bottom Bracket Converters
Bottom Bracket Converter Set Solutions
BSA “Nut” Solution
BB2430 Toolset in Action
DF30 Toolset
41mm Press Fit BB Solution
S-30 Press Fit Solution
G207A Expansion Band Solution
3 BOTTOM BRACKET CONVERTERS
Everything we cover below is in the video: the products themselves, with detailed spec, right here.
Nevertheless, we cover points below that are not mentioned in the video, so give the rest of the article a skim—you’ll find value.
If you are interested in a Bottom Bracket Tool primer, you’ll find it right here.
When you’ve decided you need a break, temporary or permanent, from a troublesome BB30 or PF30 experience, read on for suggestions on reverting to the dependable 34.9mm BSA bottom bracket, or a 41mm press-fit model.
The 3 ways to achieve this are:
- a simple press-in cup (lightest)
- press-in cups with attached sleeves
- cups and sleeve with expanding friction bands (heaviest but easiest)
Choosing which one to use is a question of weight, since you add the bottom bracket unit to the adapter after installation … 1 + 1 = 2 and all that
BB CONVERTER SET SOLUTIONS IN ACTION
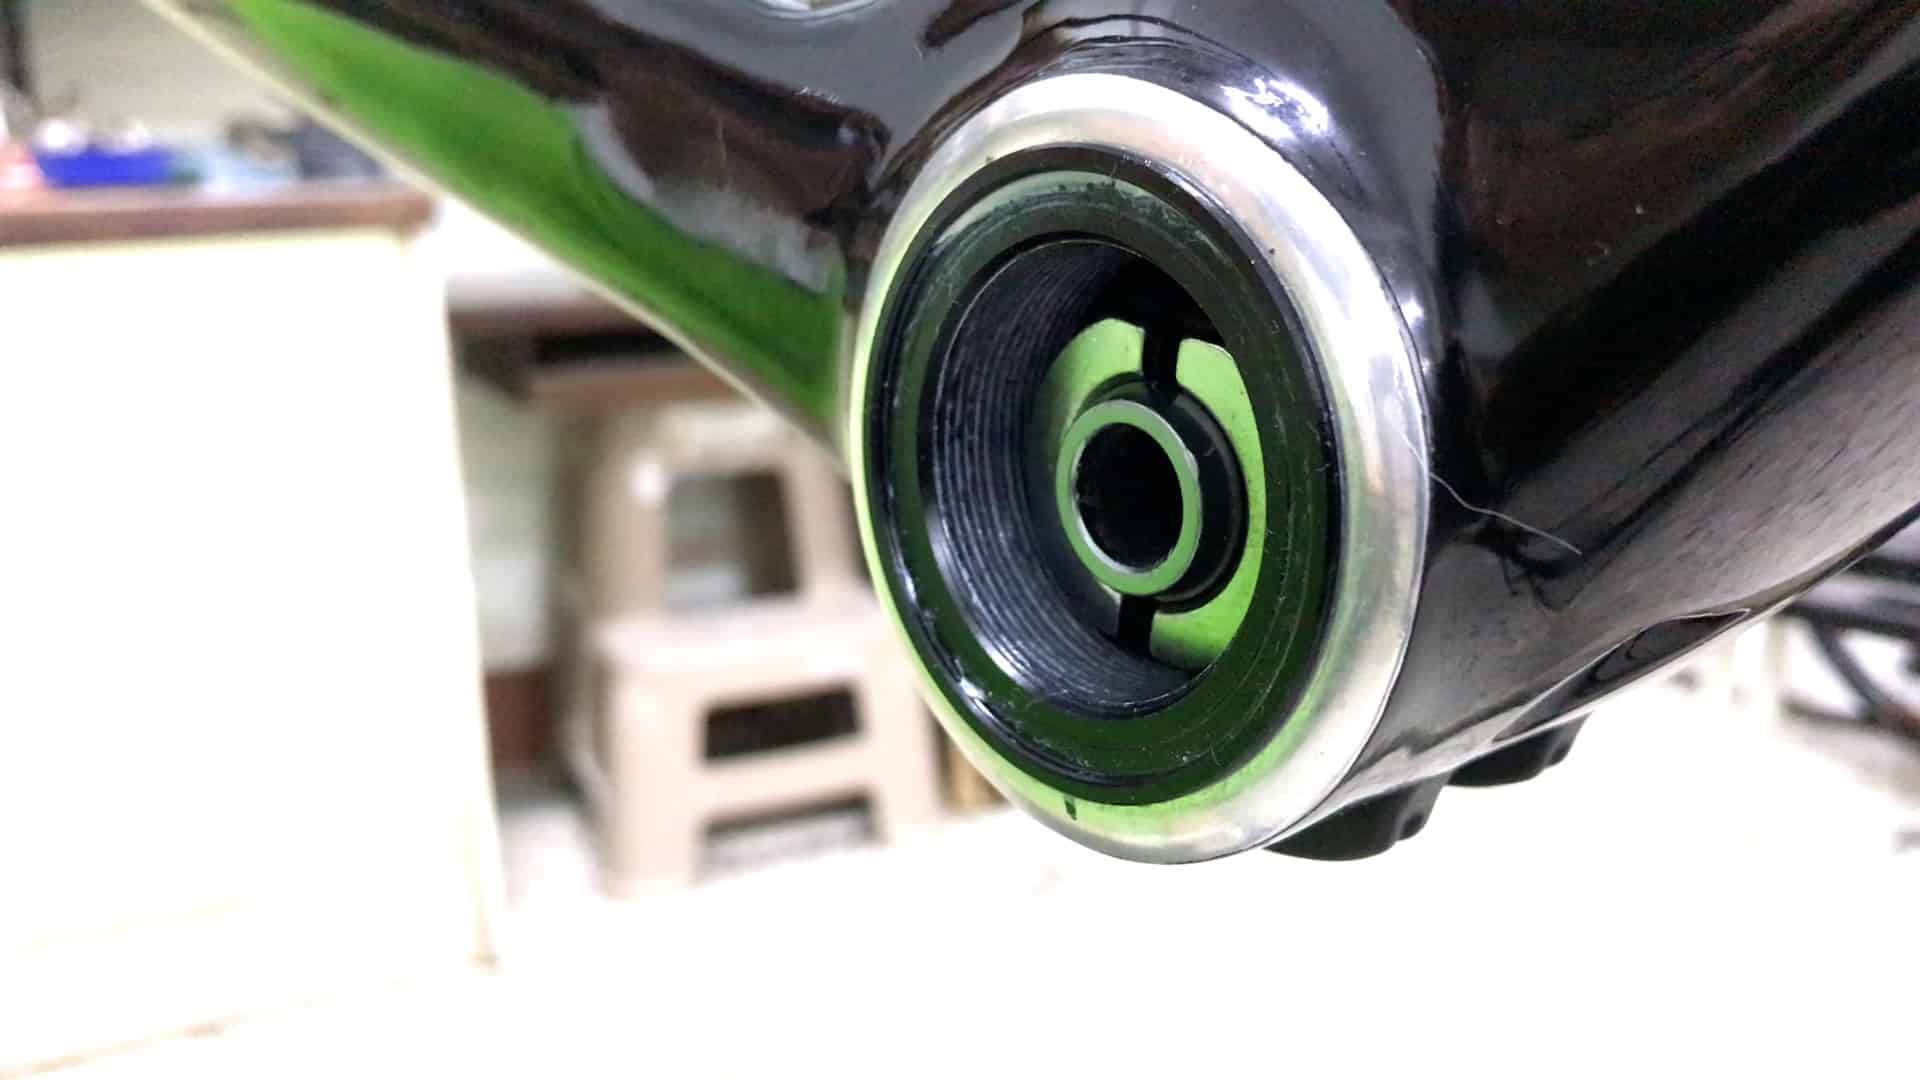
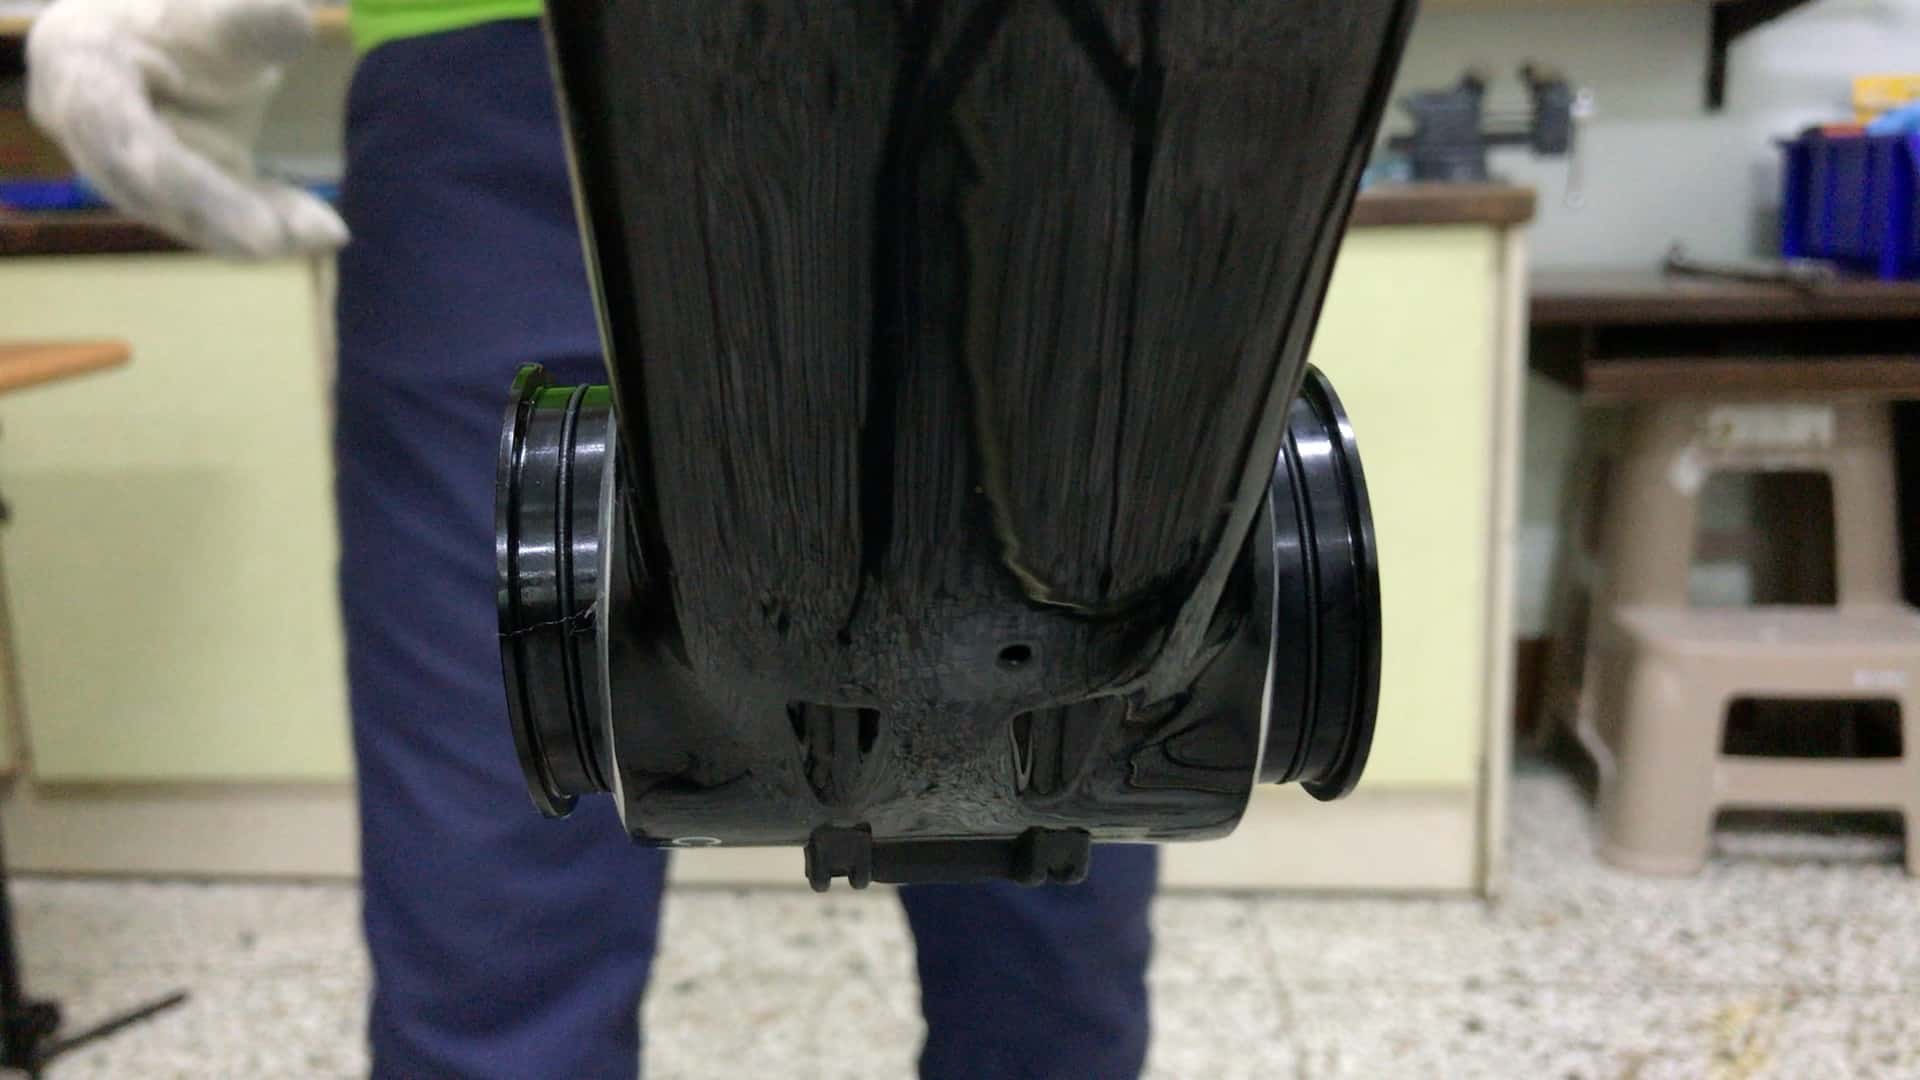
BSA “Nut” Solution
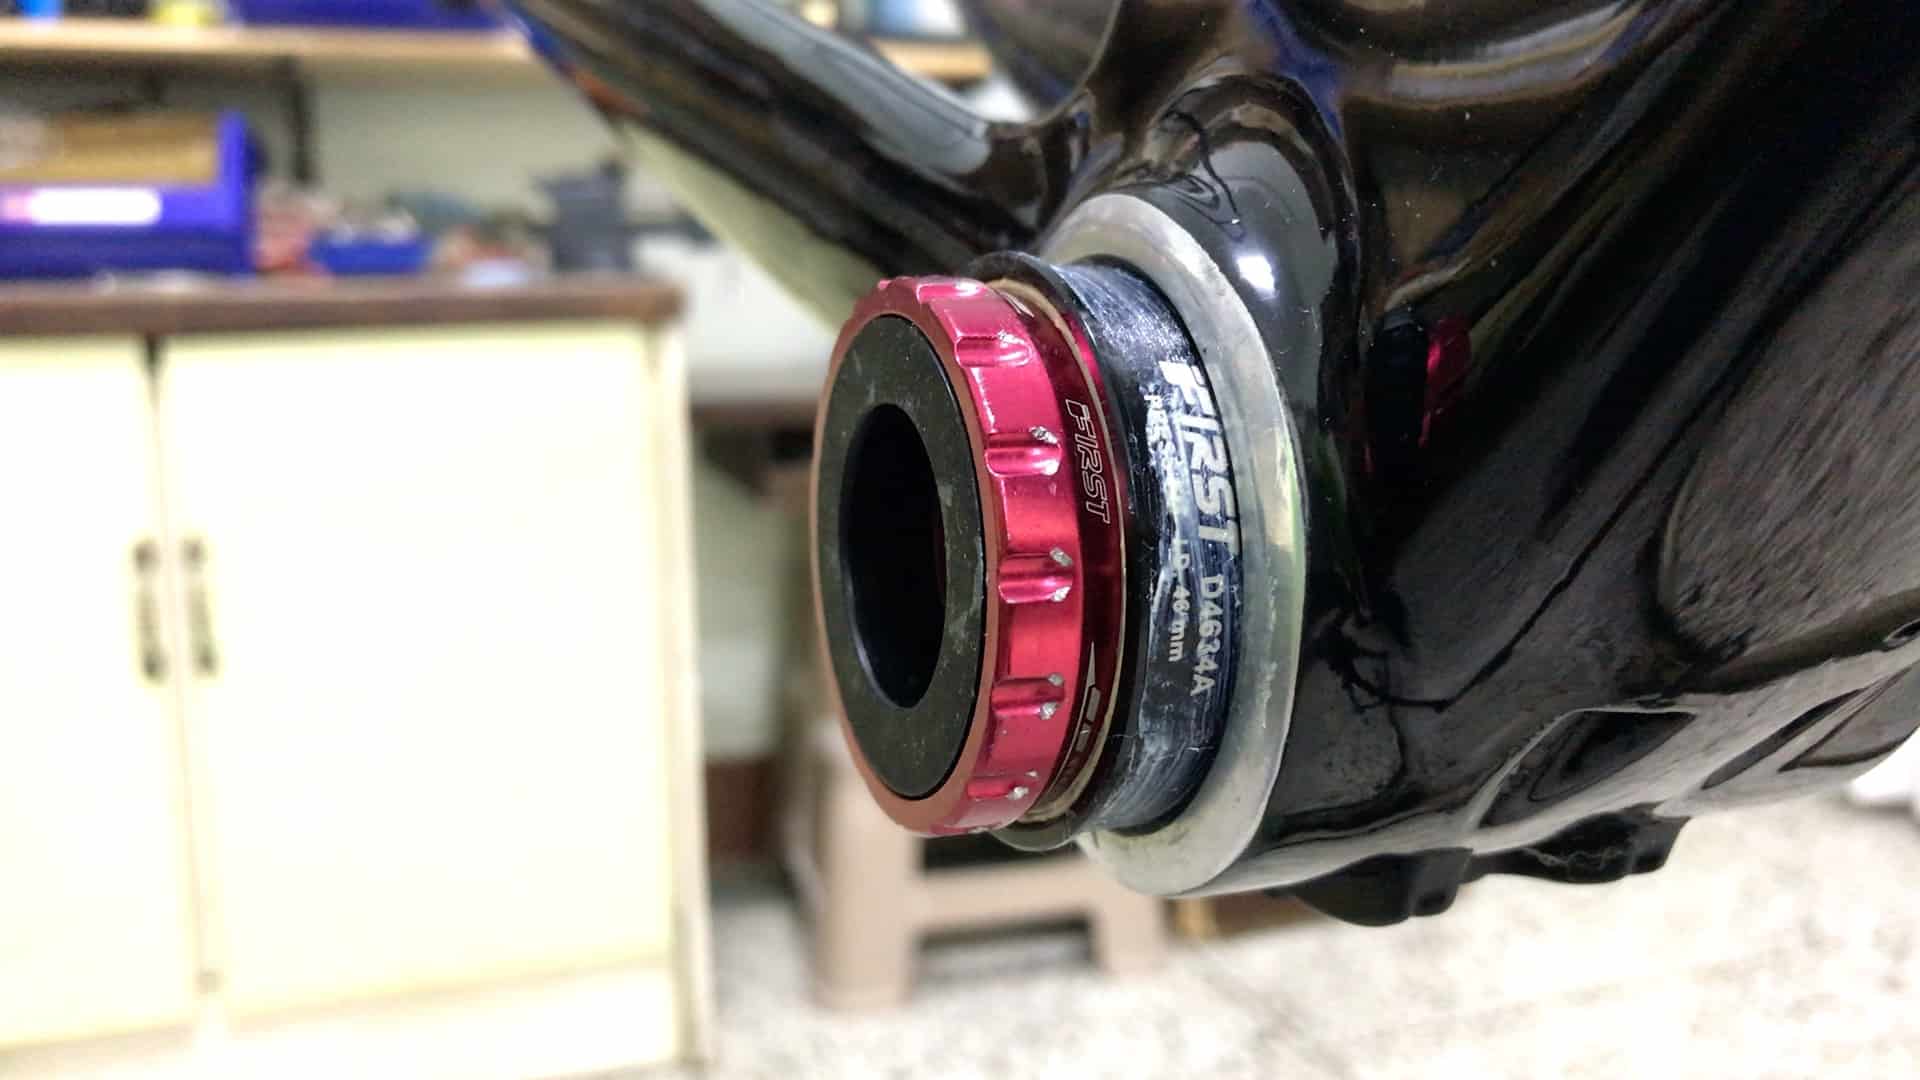
If your bike frame has a PF30/46mm BB shell, you could swap out your current setup for a DF30 or DF30E.
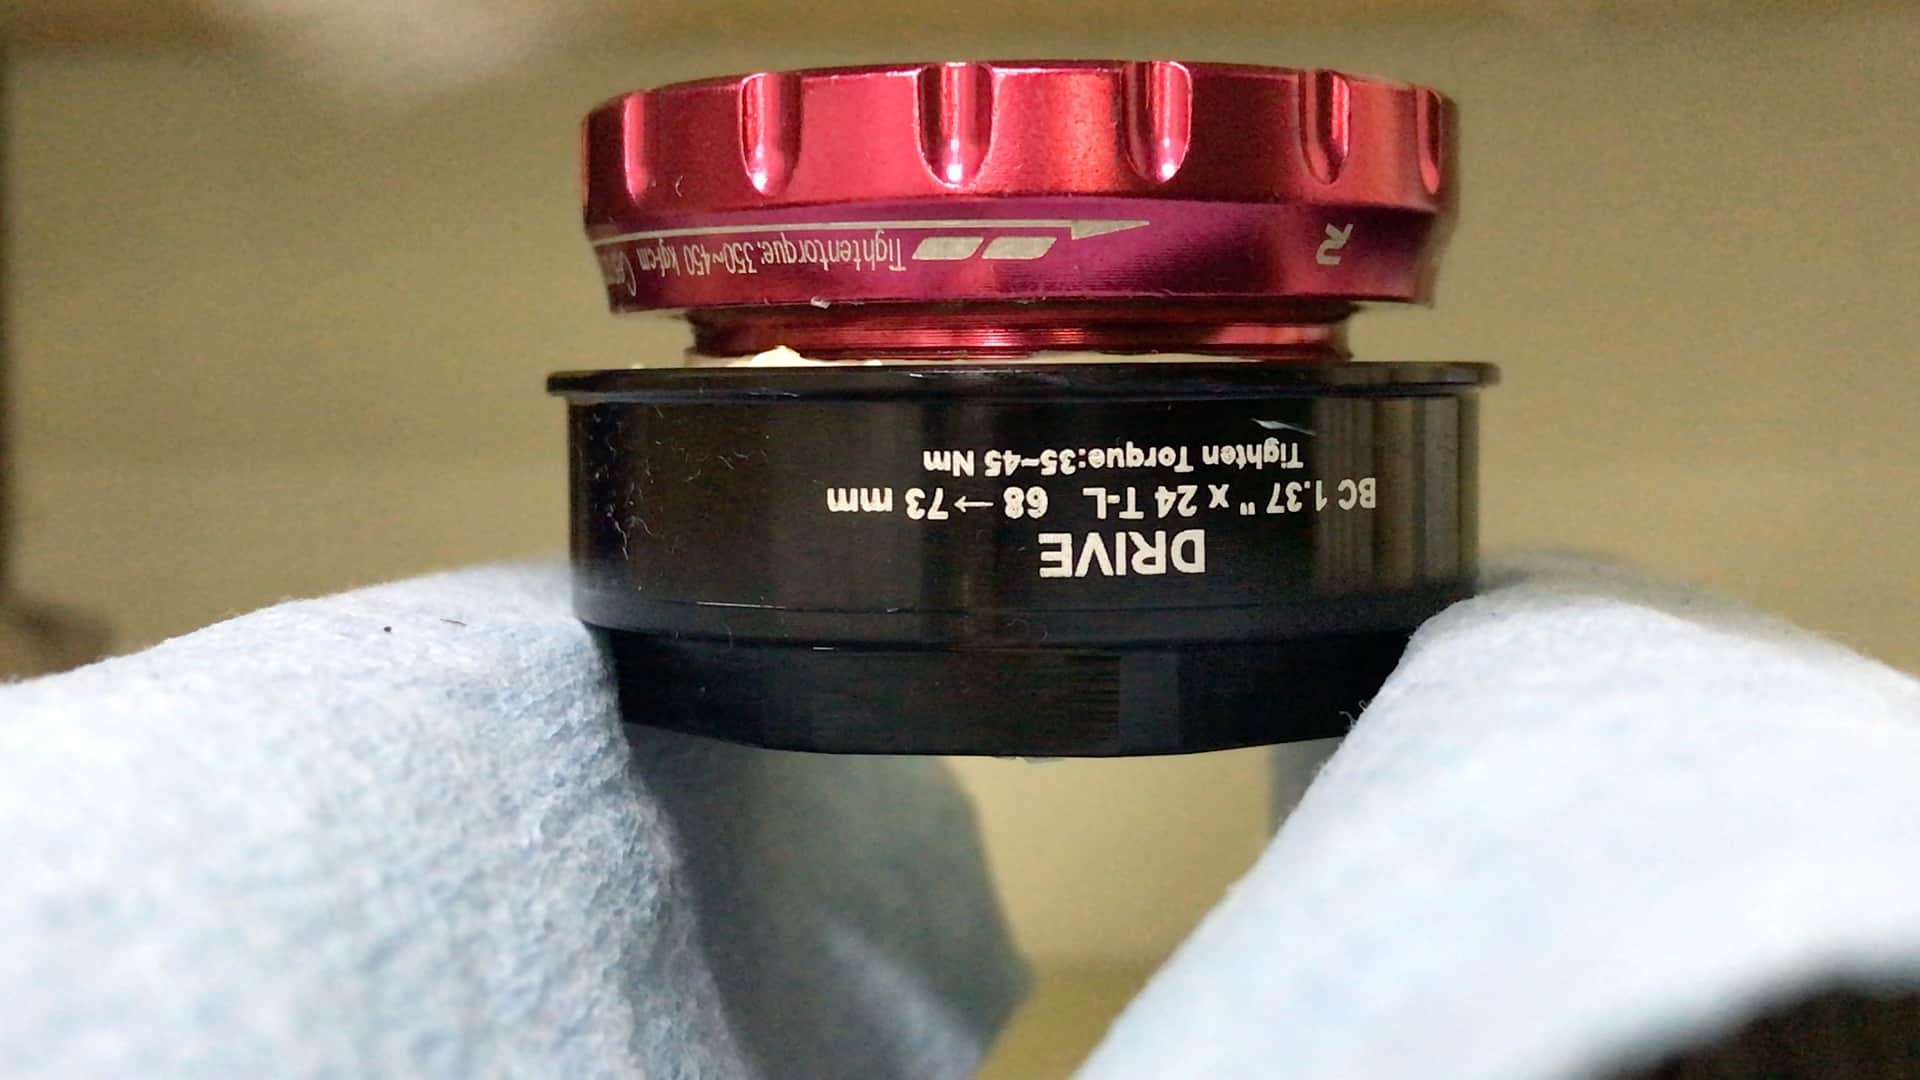
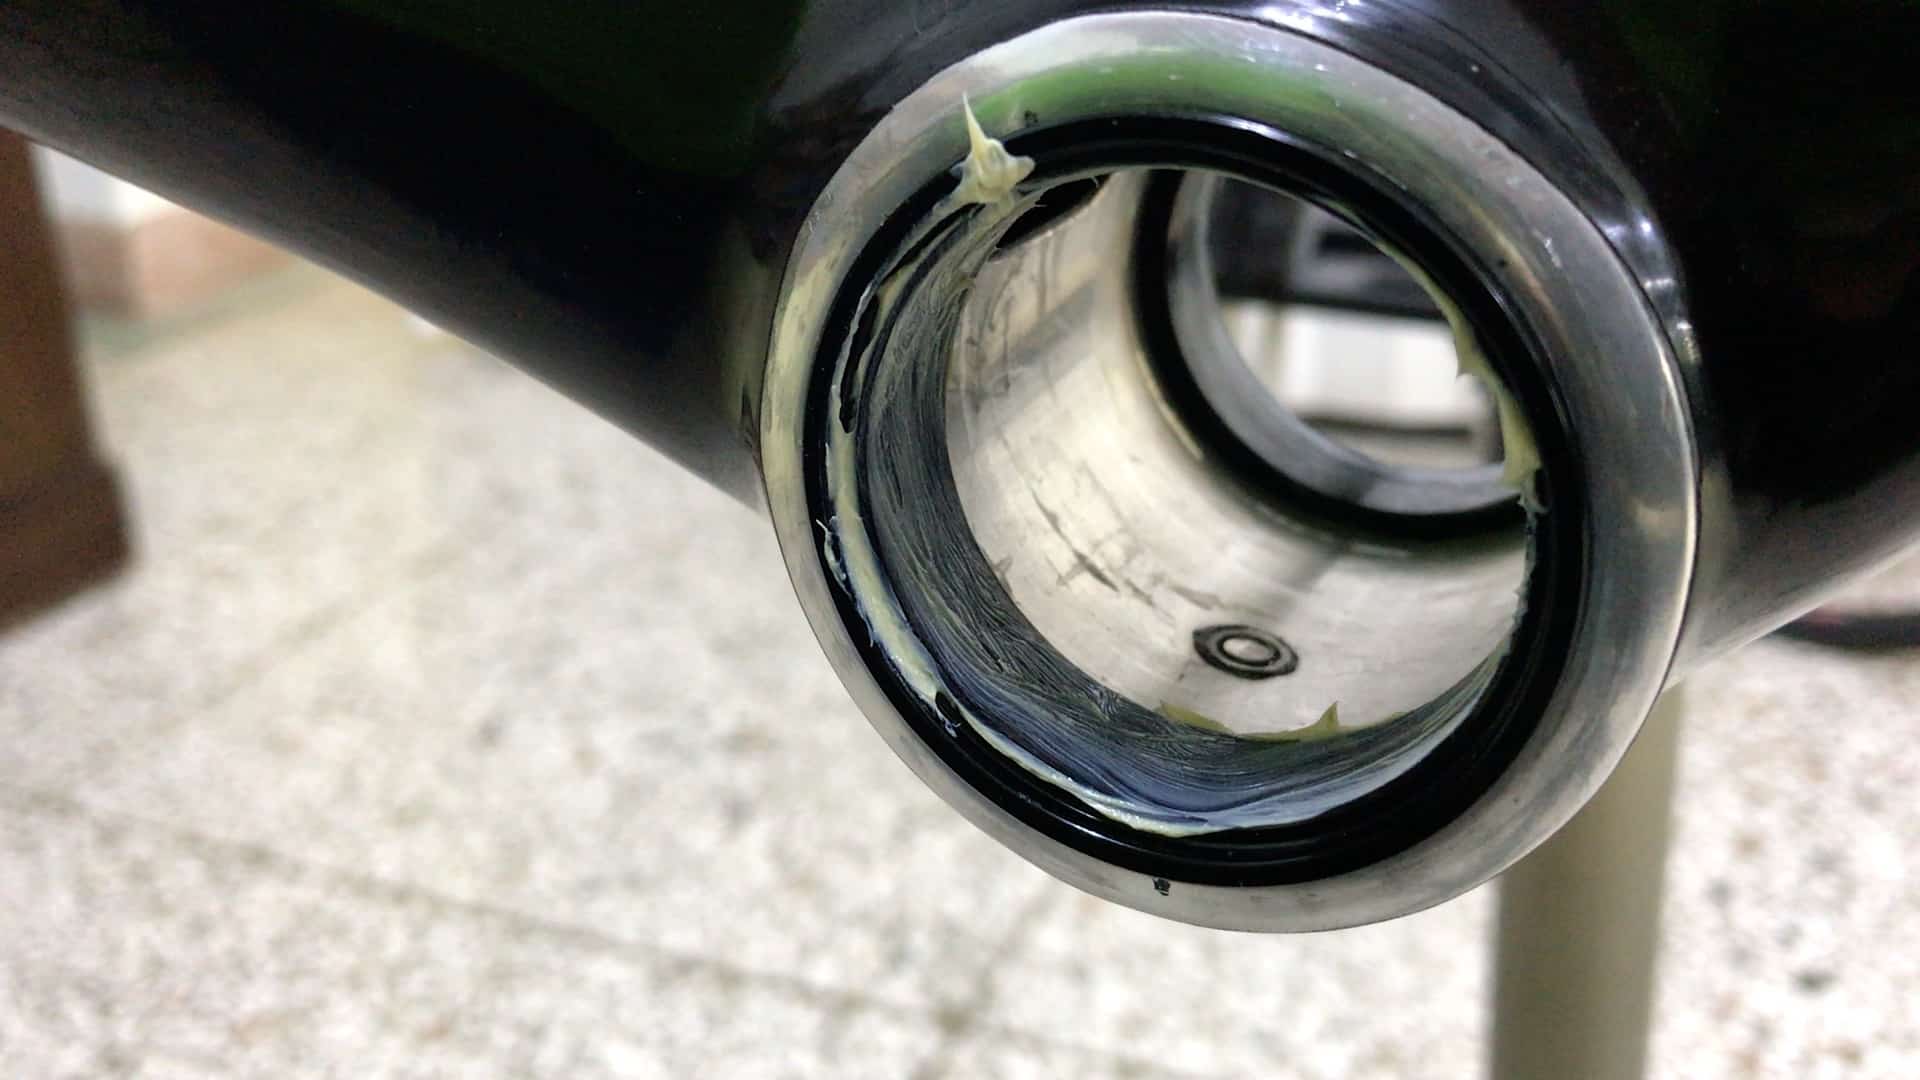
You’ve probably not seen a BB cup like the D4234A (for a 42mm BB shell) or the D4634A (for a 46mm BB shell).
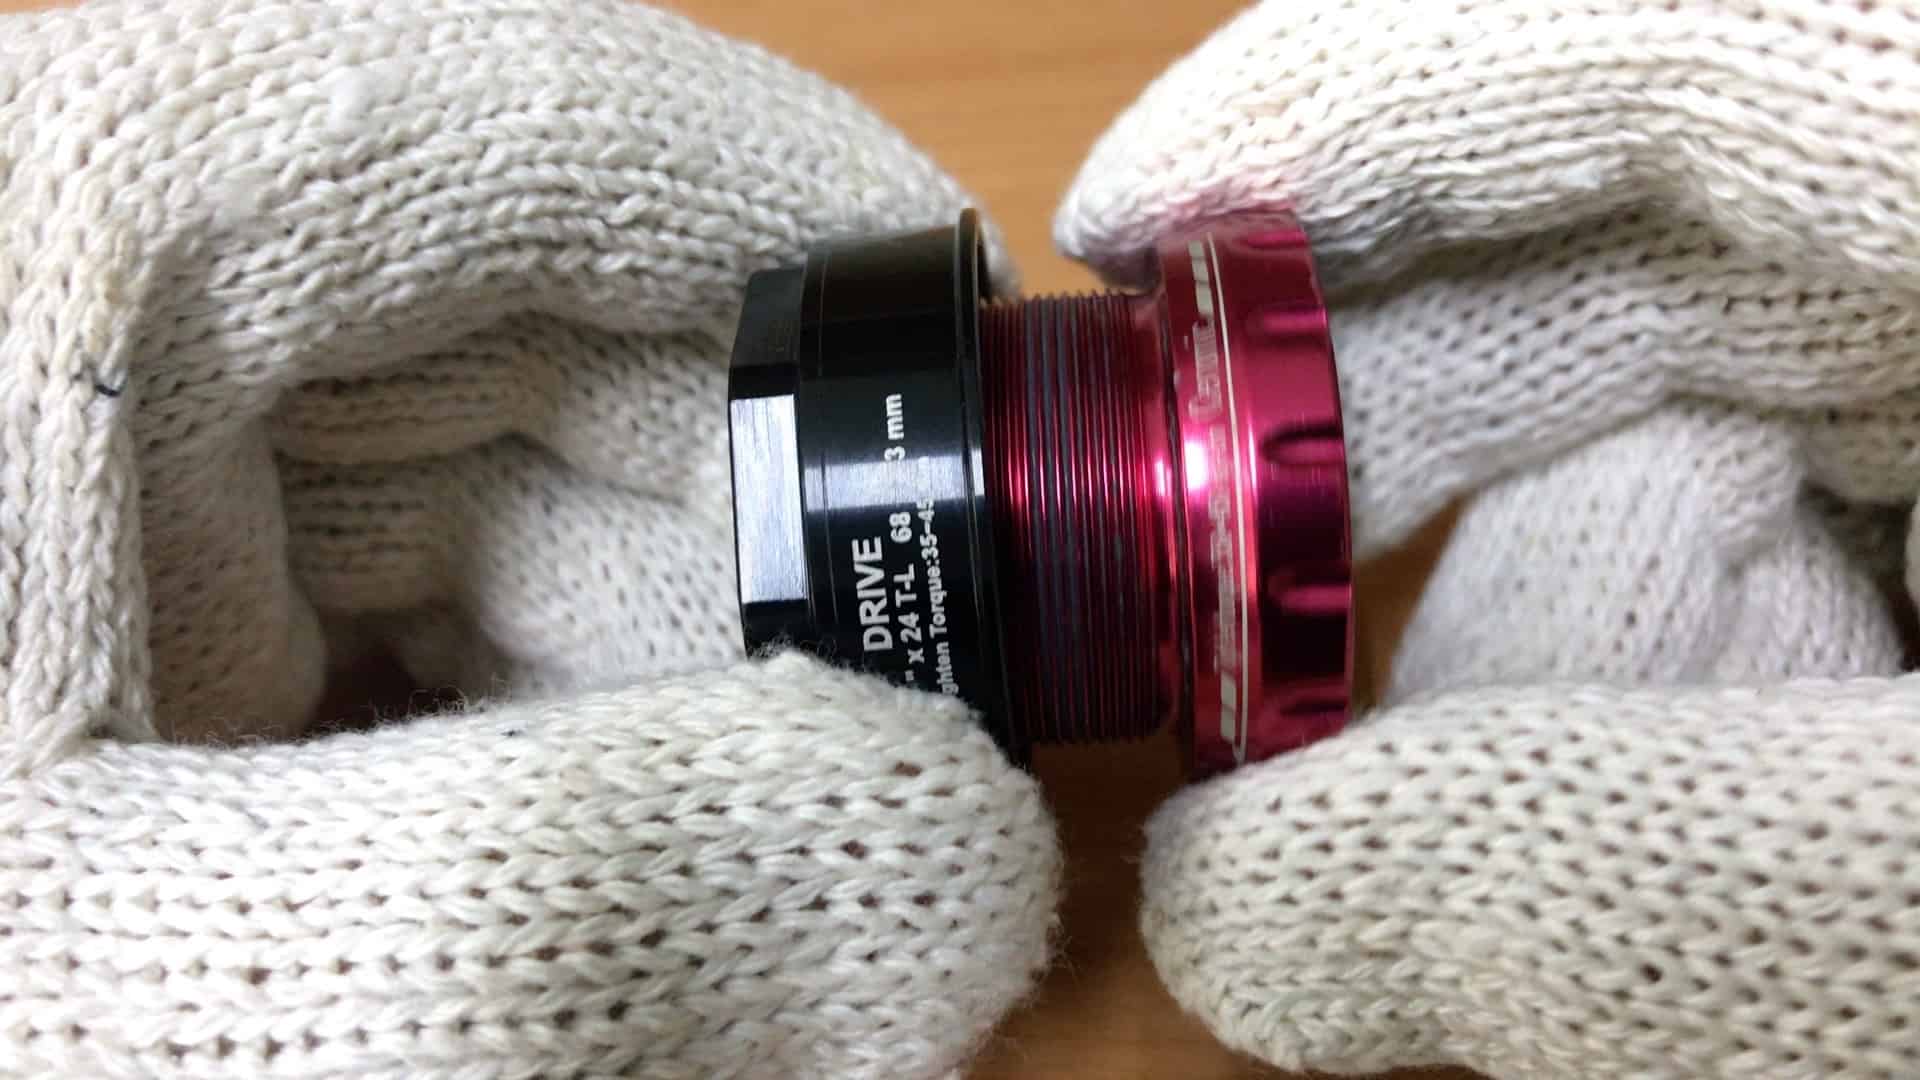
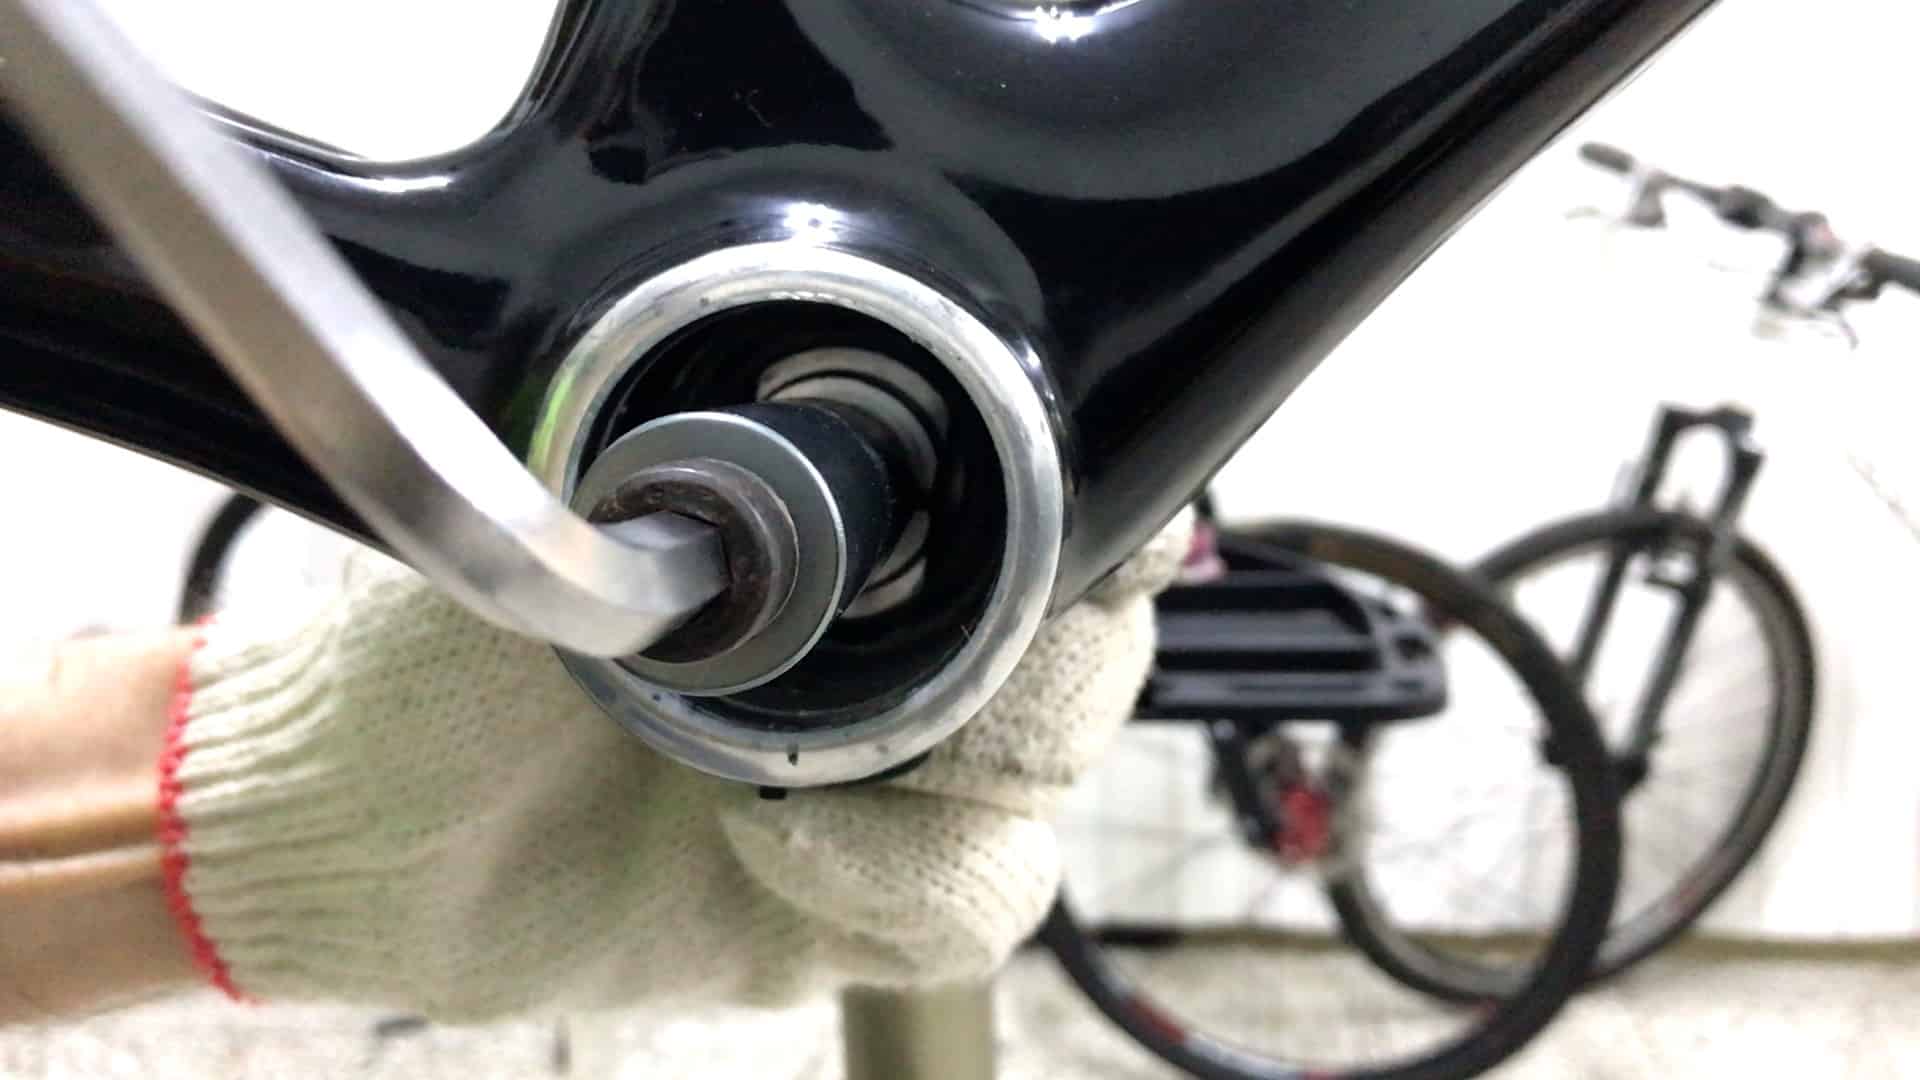
The BSA bearing cup screws into the cup as you’d expect. However, where a BSA threaded bottom bracket is secured into a press-fit cup, you have the problem of the cup slipping against the BB shell as you tighten the BSA unit into it.

Our solution to avoid slippage was to install the BSA bearing cup into the press-in cup before seating the cup in the BB shell.
We do it through machining an octagon on the cup’s inside edge, turning the BB cup into a nut.
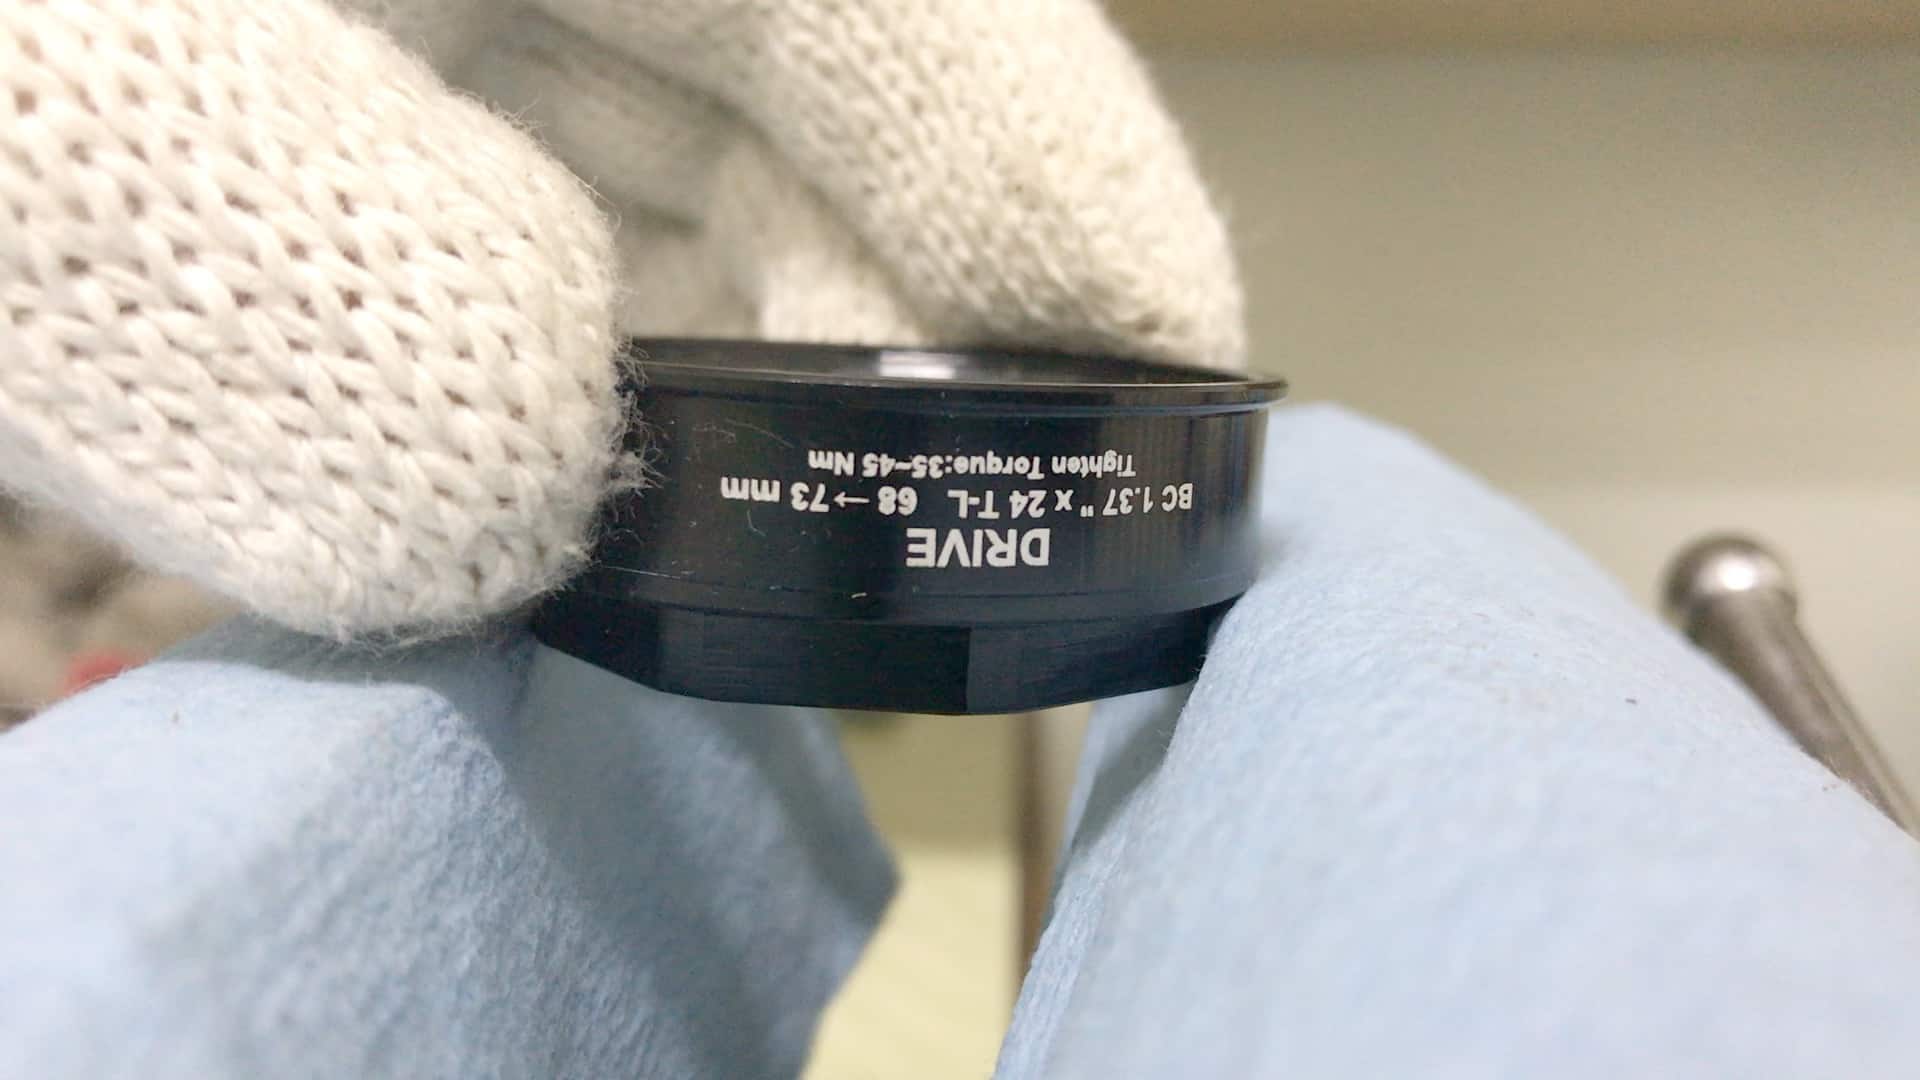
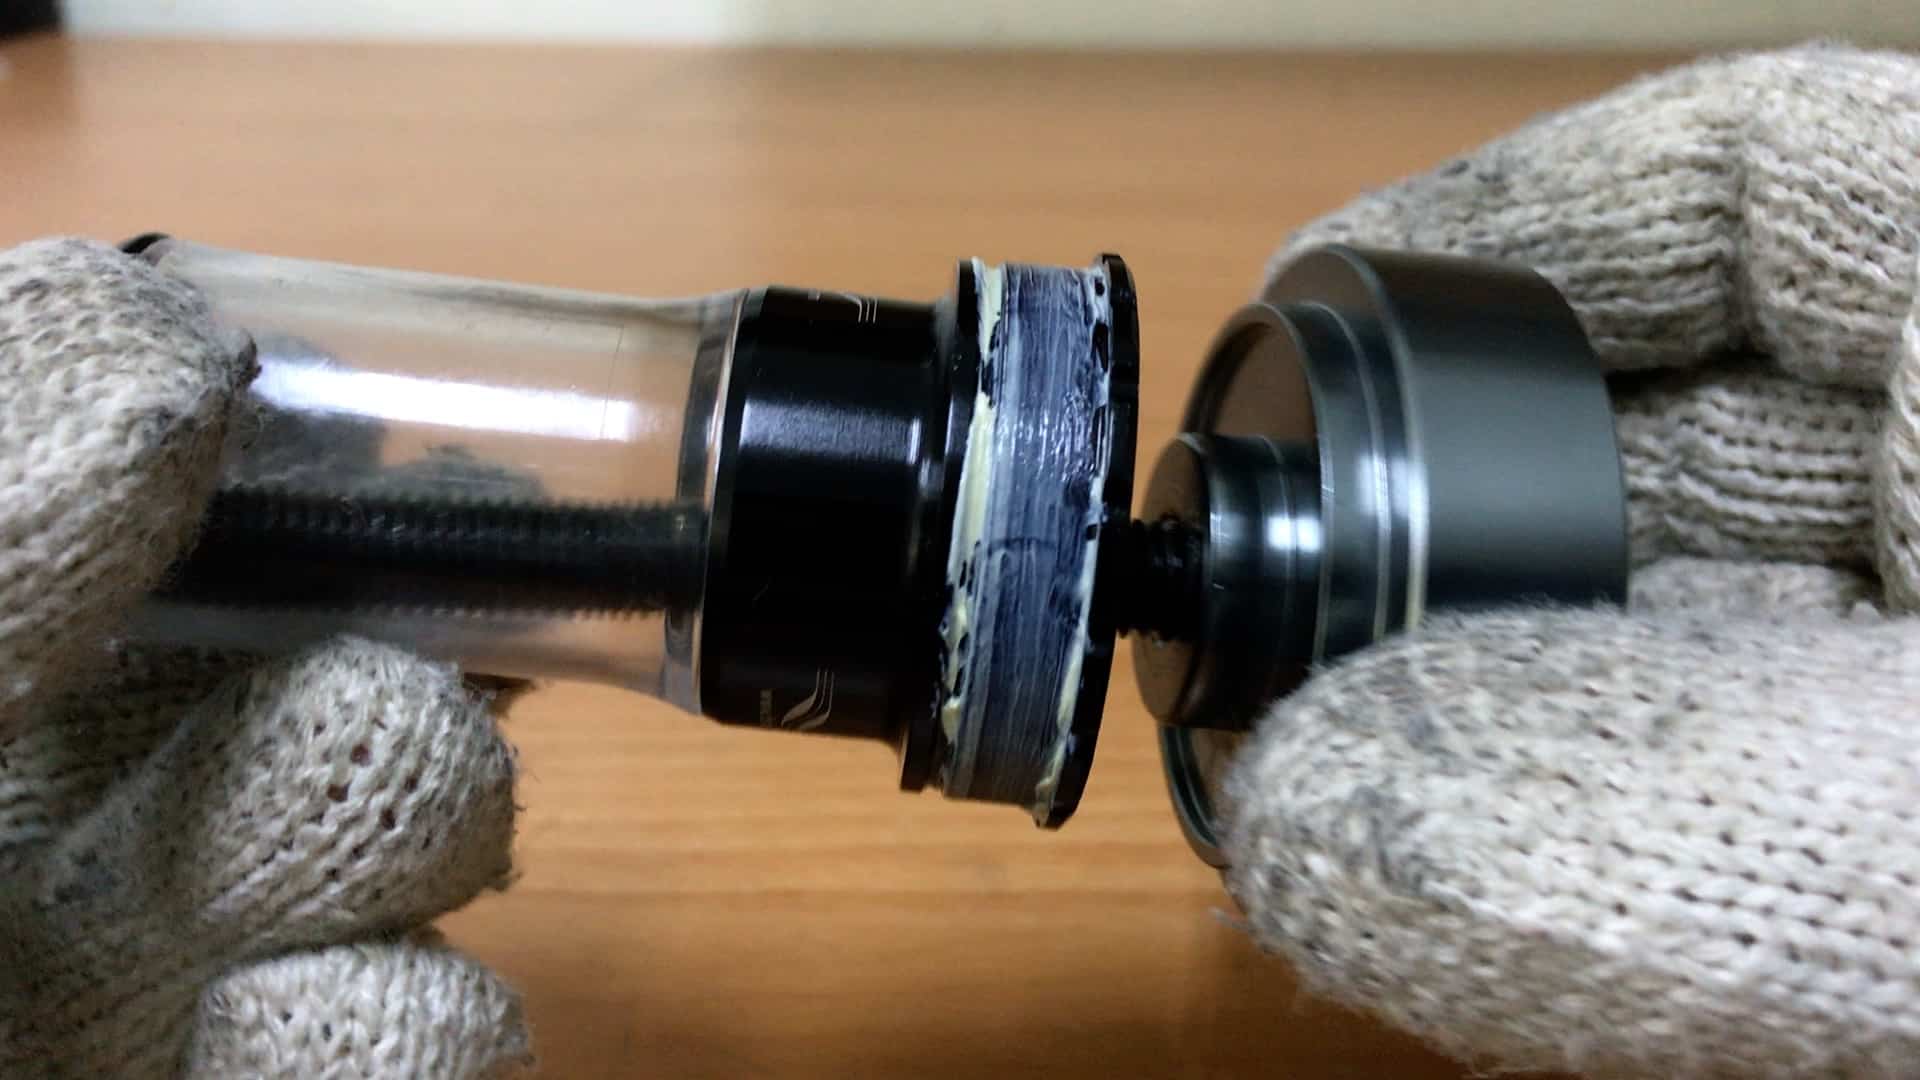
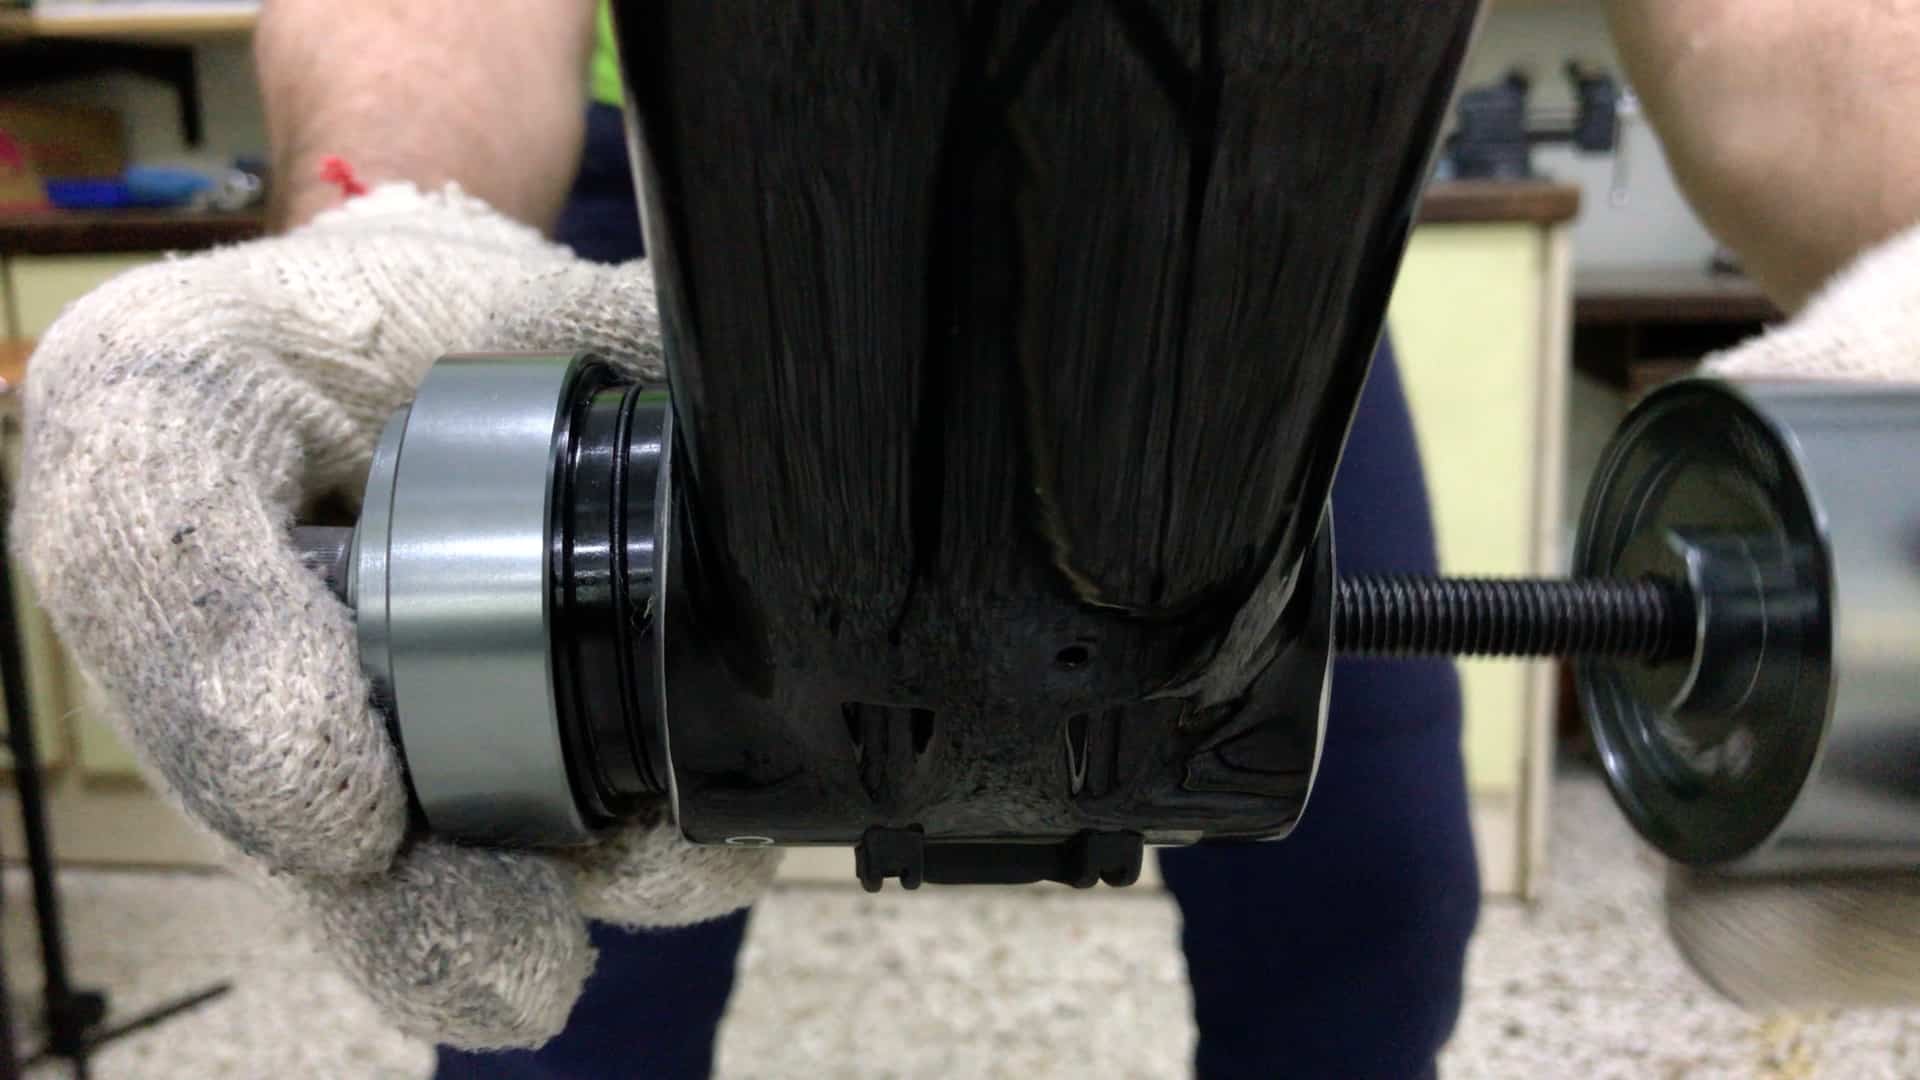
The easiest way to install a bearing cup into the bb shell cup? Use a vice.
For the demo we’ve insulated the octagonal faces from direct contact with the edges of the vice’s jaws. Whether or not you follow suit would depend on the condition of those edges on your own set.
Damage to those inside edges is inconsequential. However, professionalism demands that some care be taken.
Installing the BSA Bearing Cups into the Press-Fit Cups
Crank the vice handle, getting a tight grip on the BB cup.
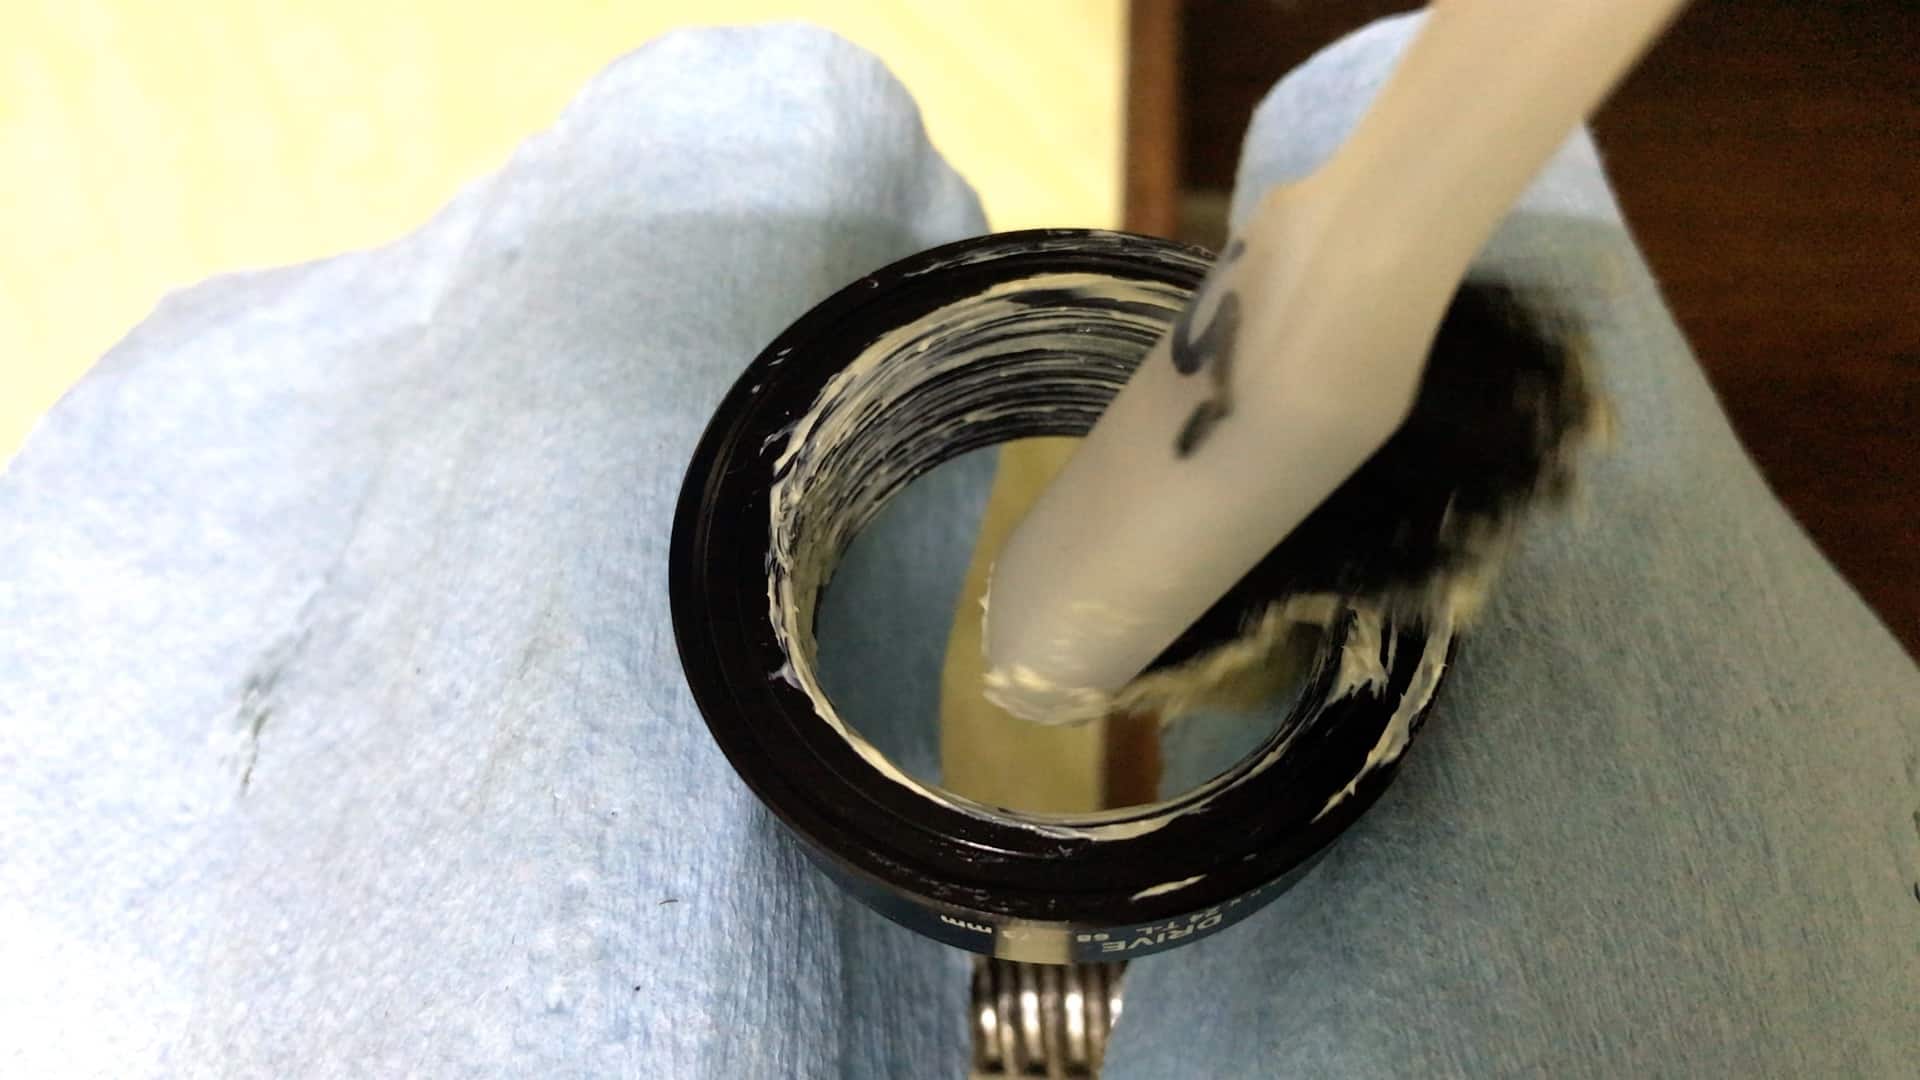
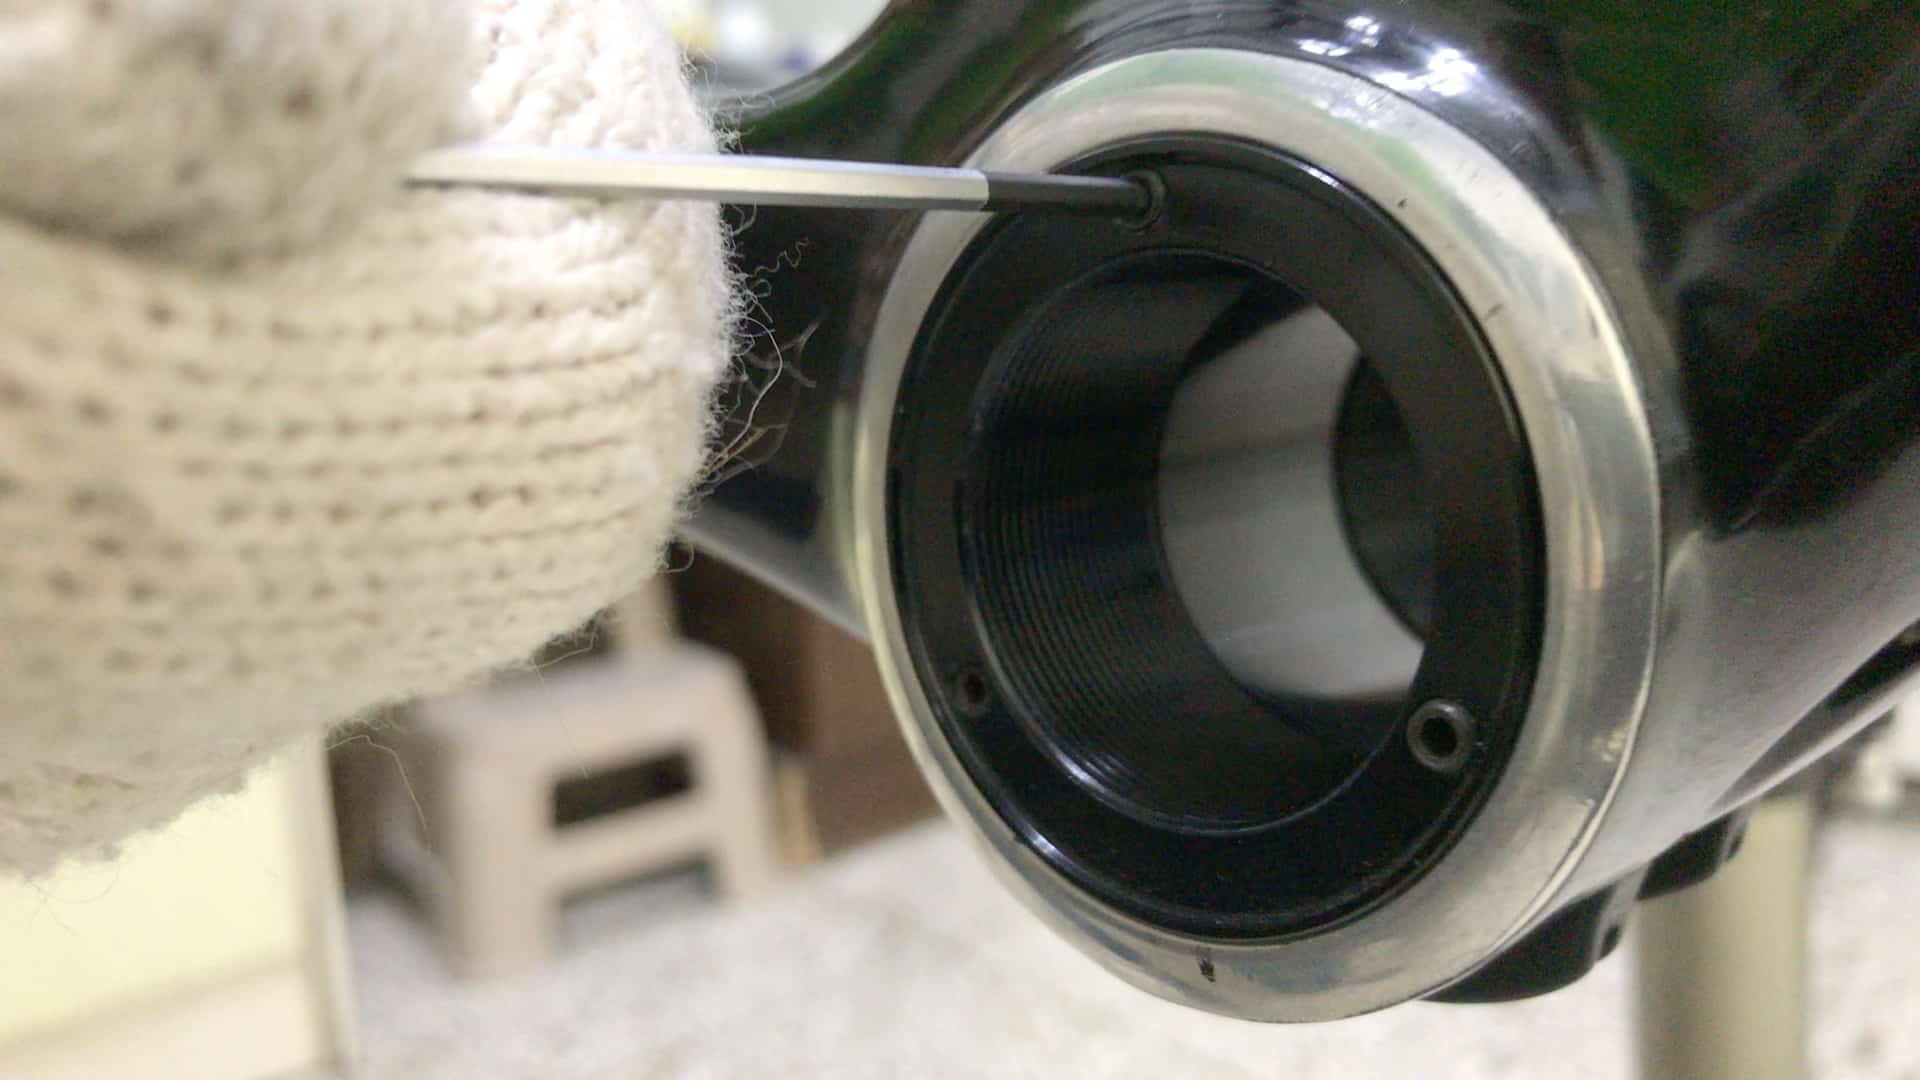
Apply a liberal amount of grease on the cup threads the same way you would a threaded BB shell.
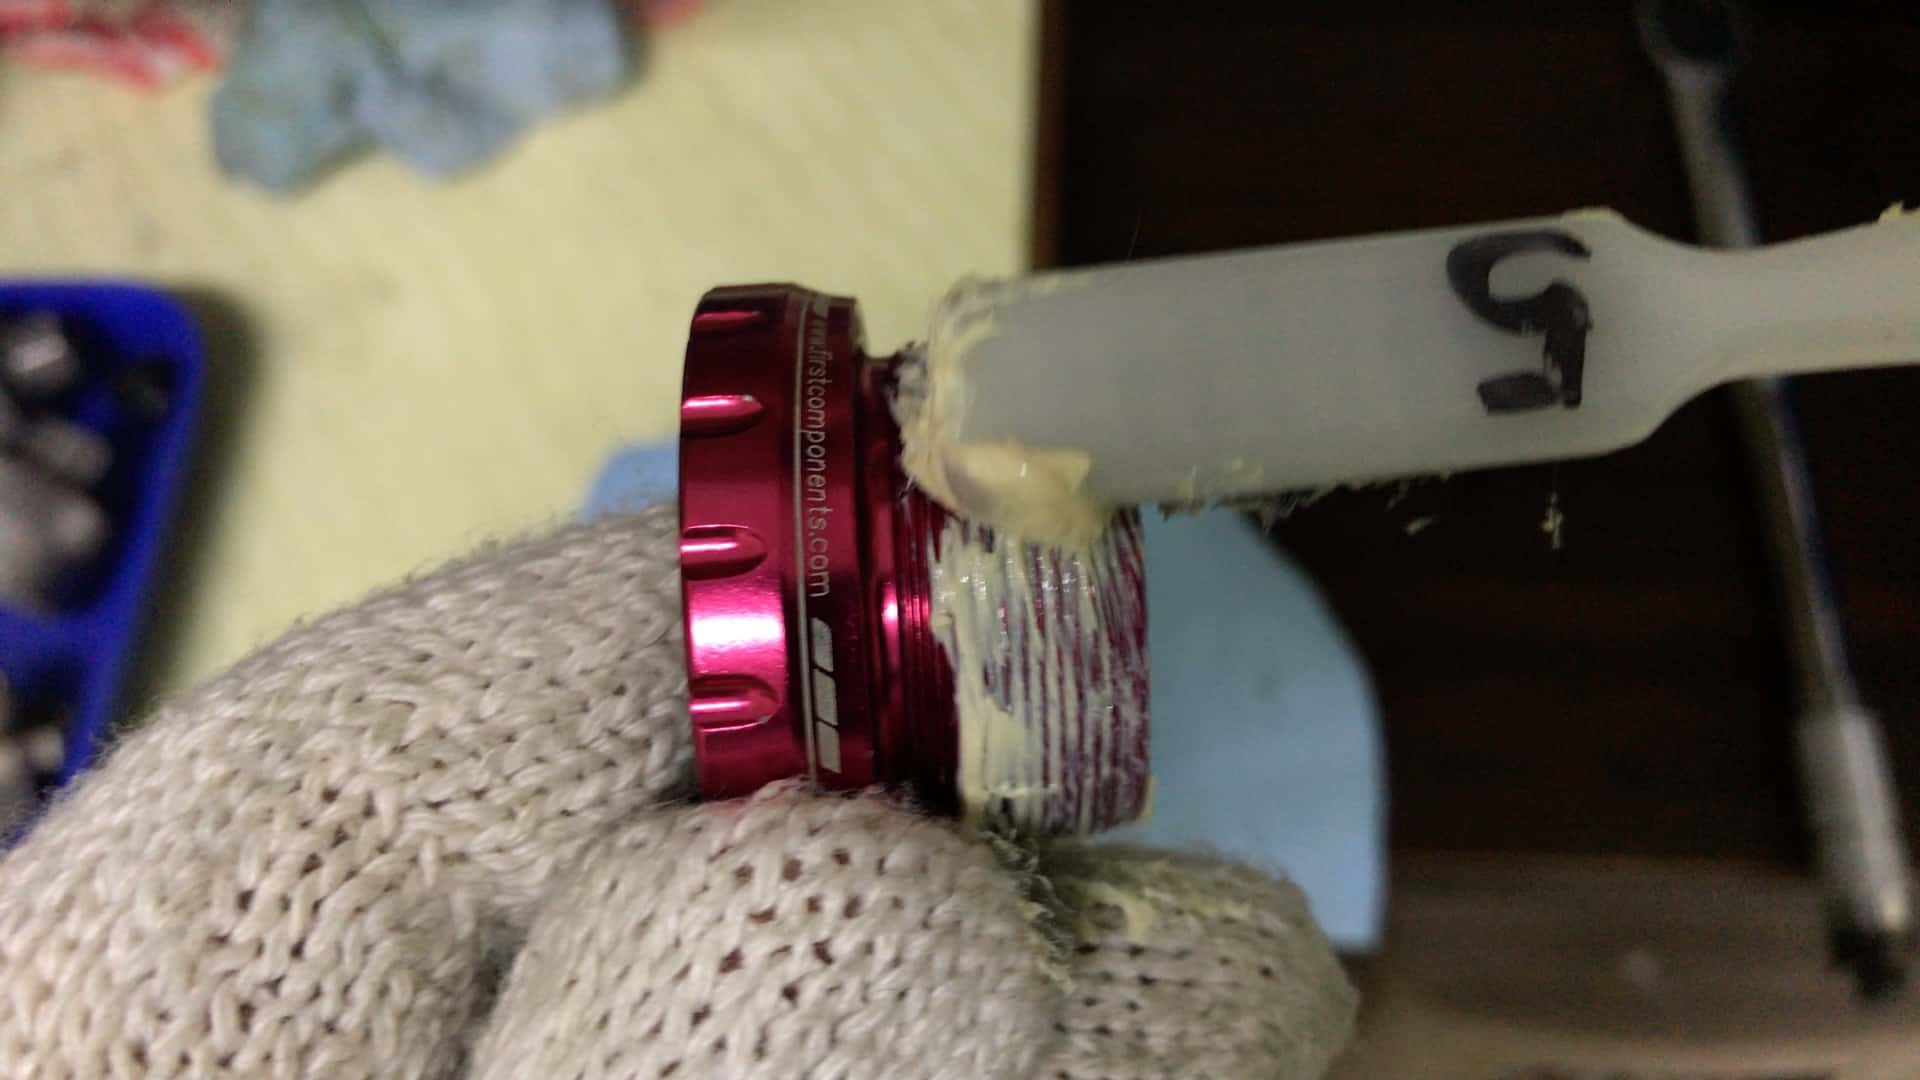
Also grease the bearing cup’s threads with plenty of grease. There’s no such thing as too much grease; you can certainly have too little though.
Sure, purists would argue excessive grease anywhere on a bike simply invites dirt into the components you are trying to protect—err on the side of excess all the same.
Screw the bearing cup into the bb shell cup as far as you can go by hand. With plenty of grease, you’ll find the bearing cup glides easily into full contact with the bearing cup.
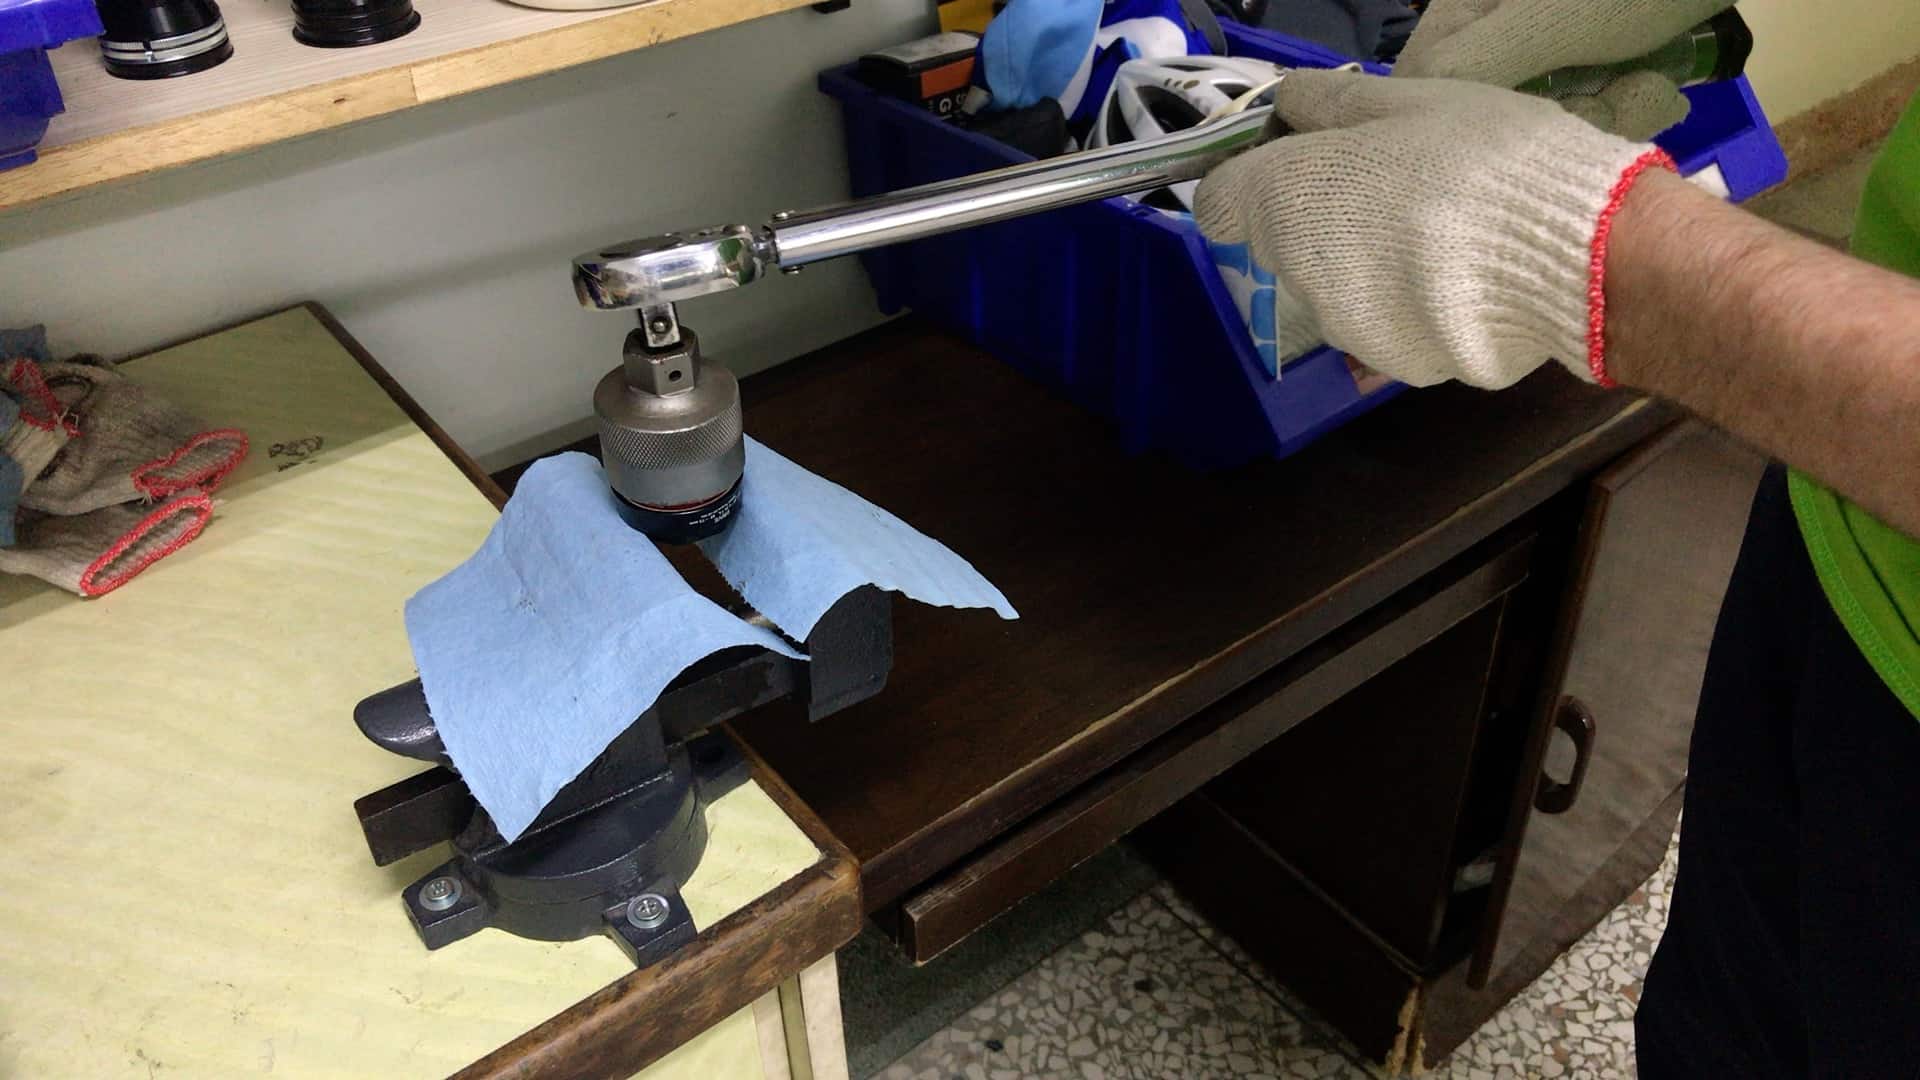
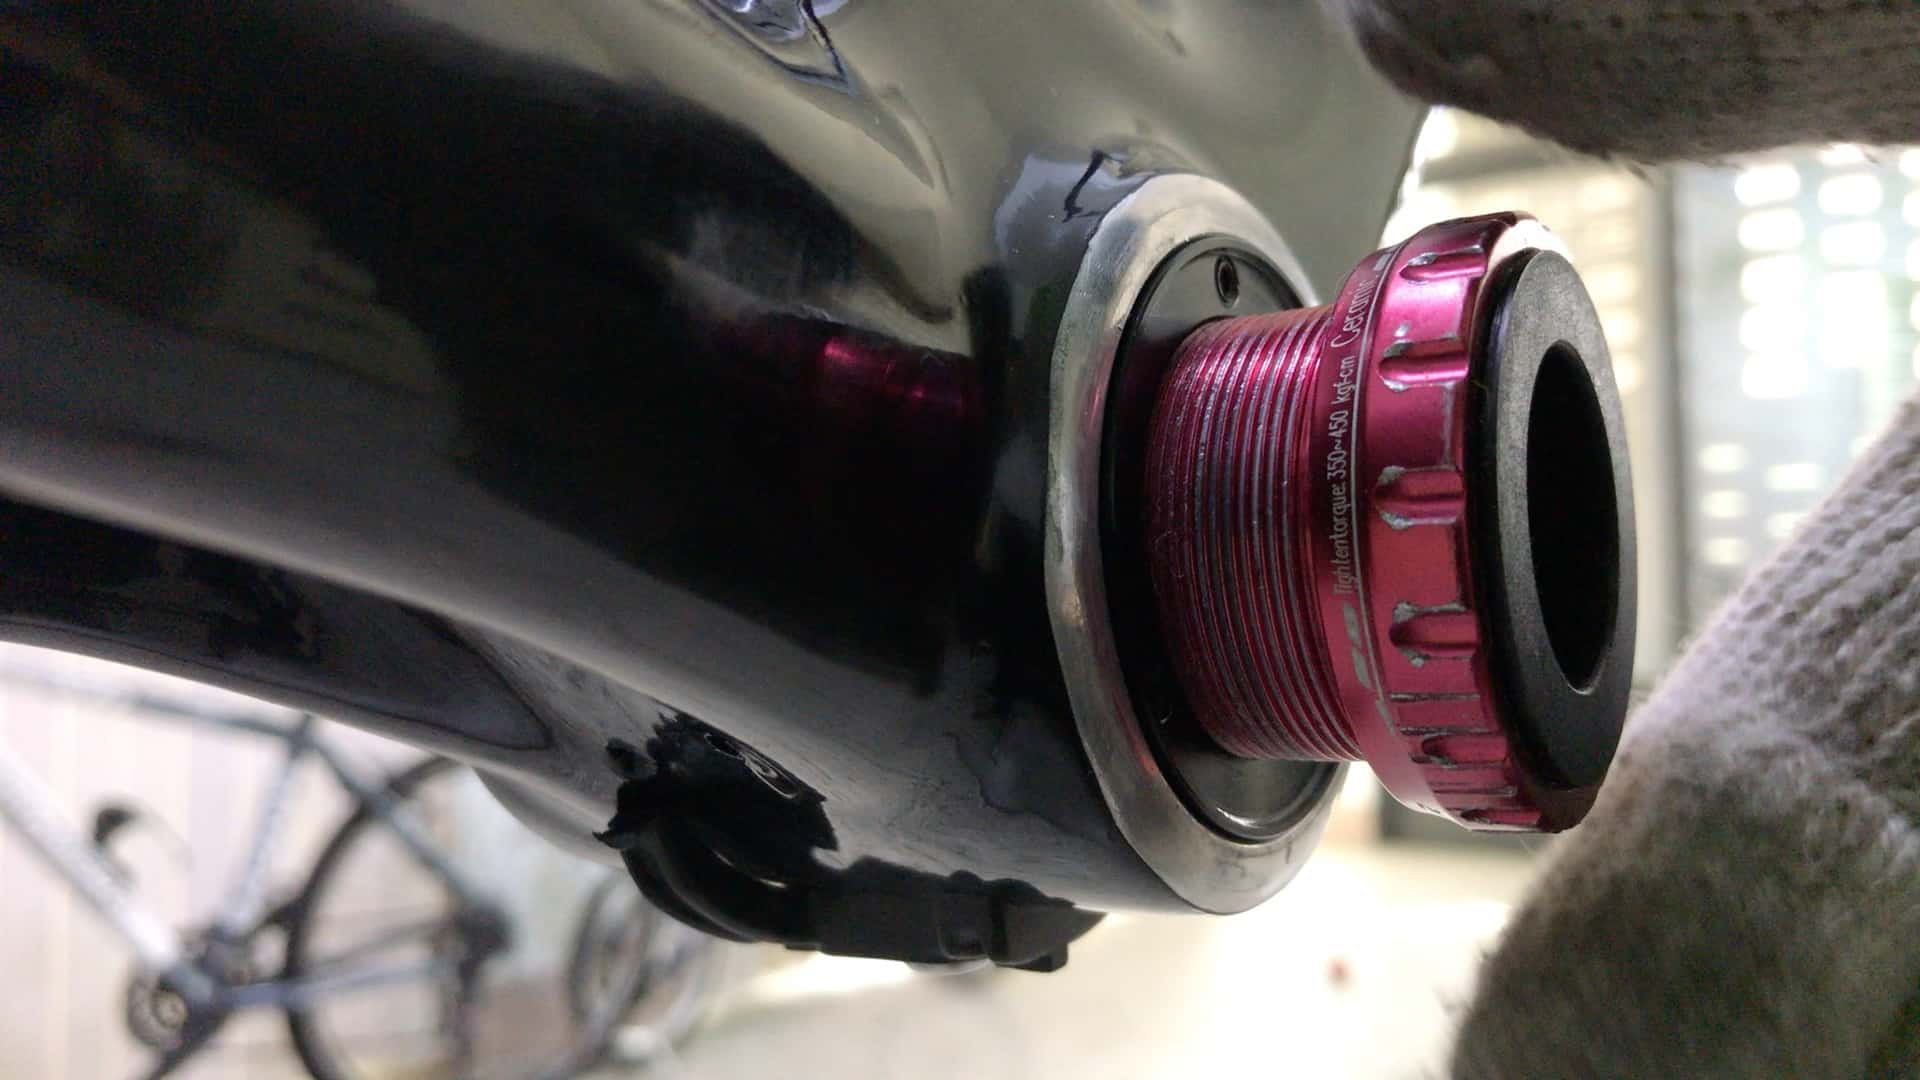
The recommended torque setting is from 35 Nm to 45 Nm, a wide range giving you plenty of latitude. No torque wrench? The longer the handle of the wrench you use, the better—you’ll get a more accurate torque estimate, or at least reach 35 Nm without exceeding 45 Nm.
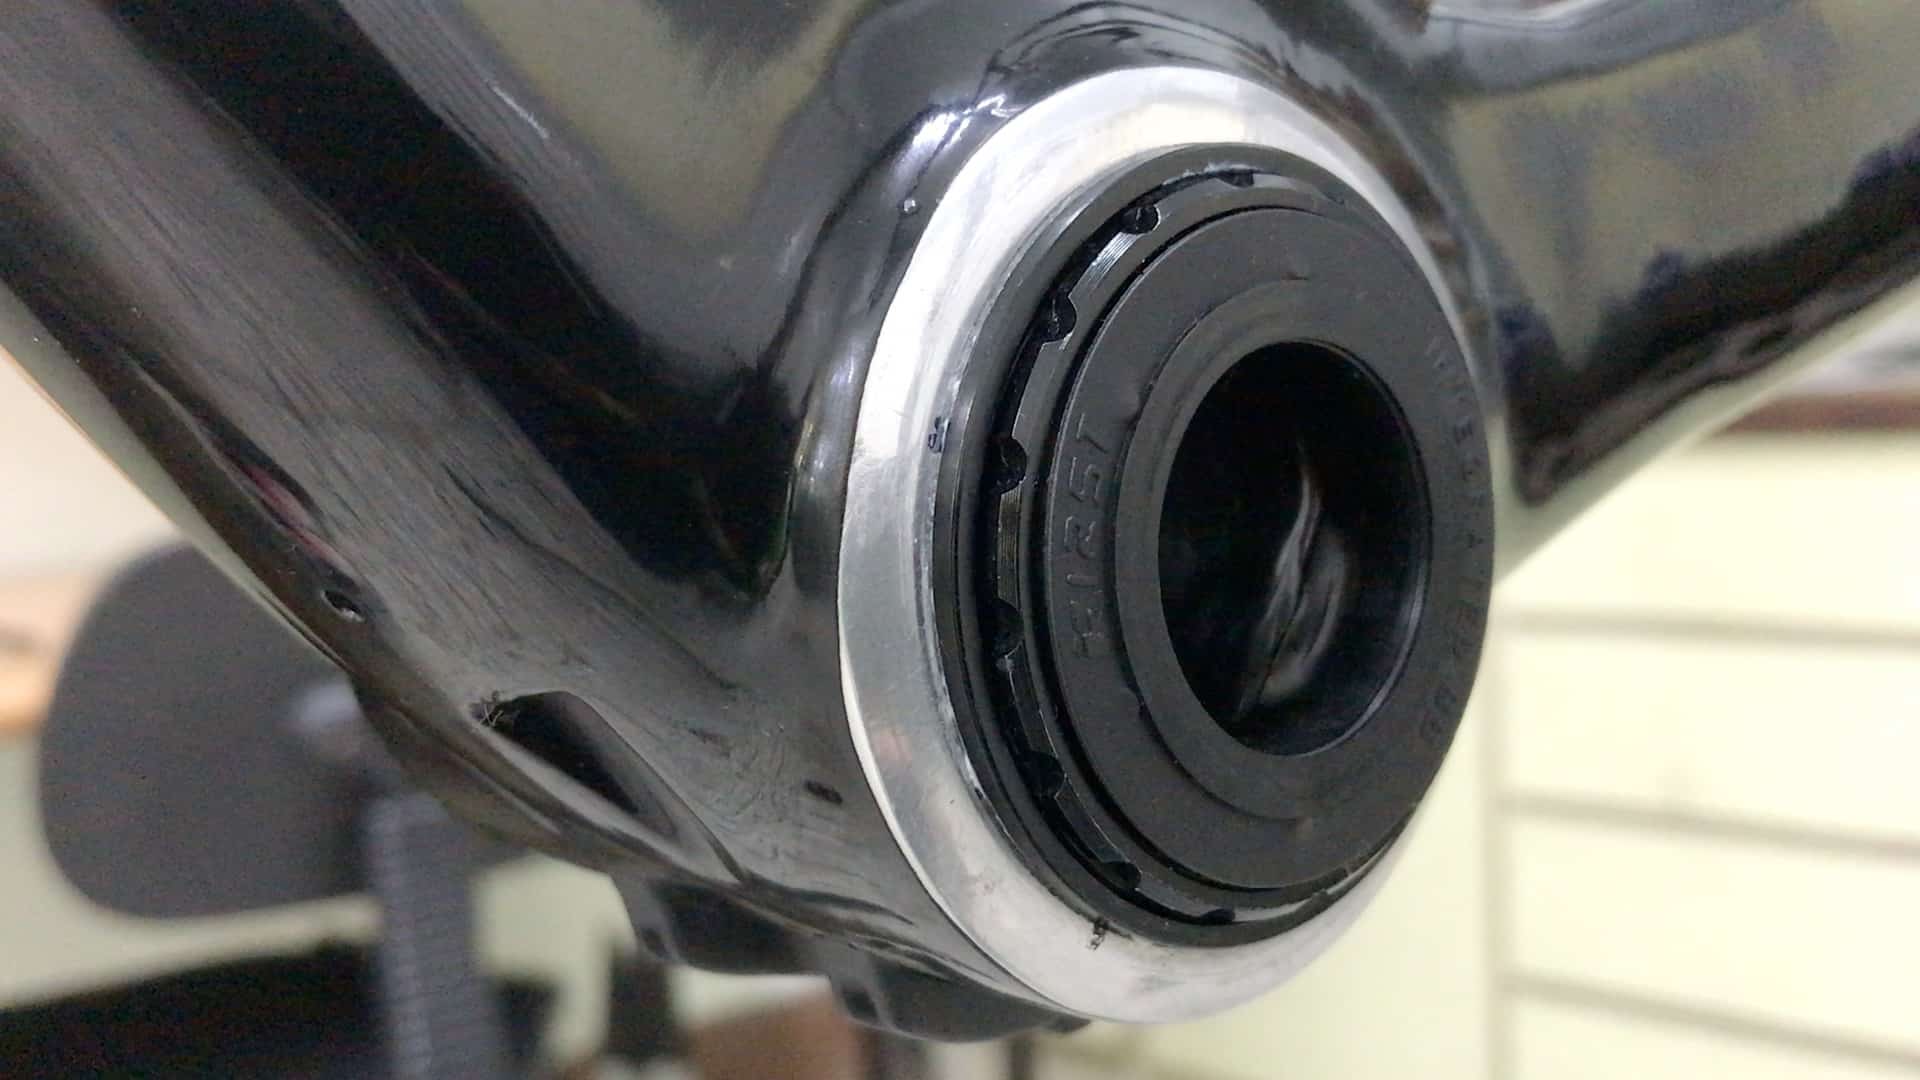
Installing Press-Fit Cups into the BB Shell

With the BSA bearing cups tightened to tolerance we now lightly grease the press-fit cups.
You should also lightly grease both the BB shell’s drive and non-drive sides.
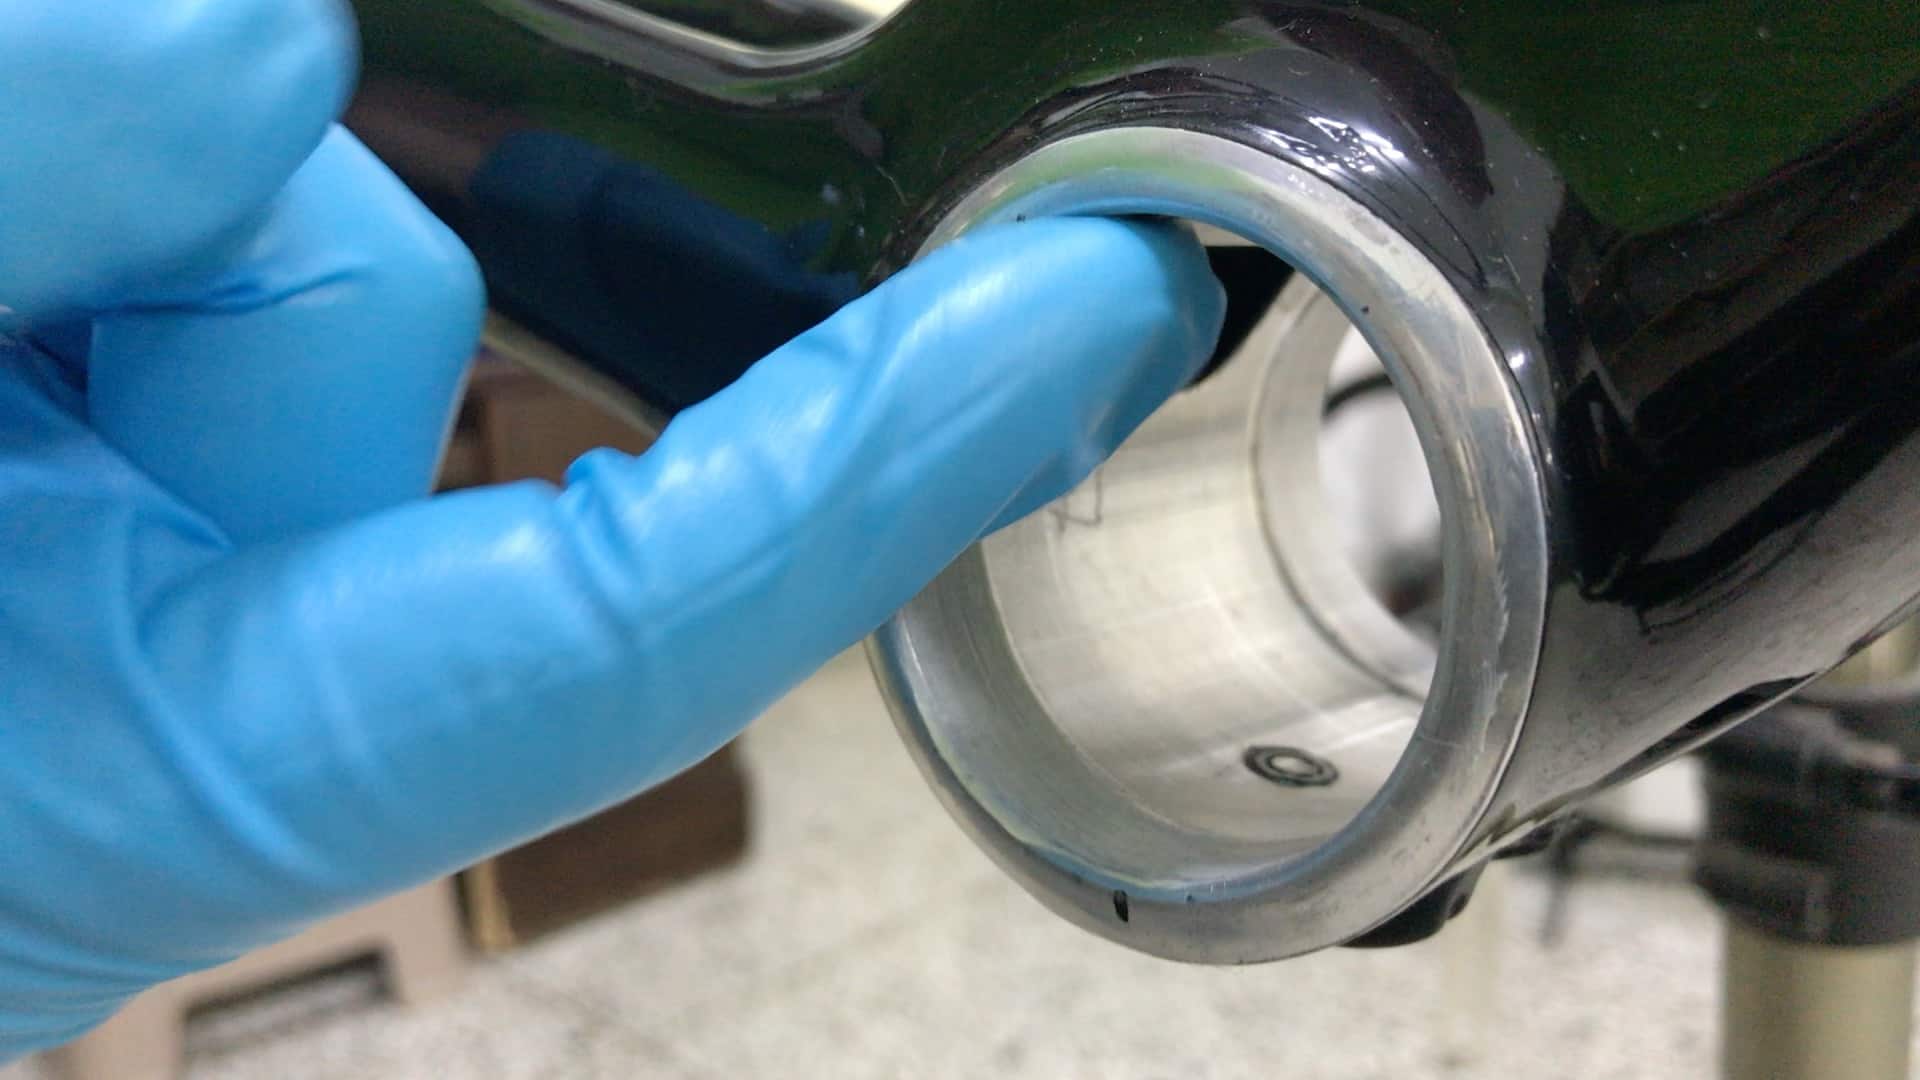
Preparation for installation firstly involves carefully seating the cups snugly into the BB shell.
The cup’s first millimeter is slightly bevelled, allowing the cup to rest slightly inside the BB shell: no need to support and reach for the tool at the same time, a hassle if you’ve not yet encountered this inconvenience.
The BB2430 Toolset in Action
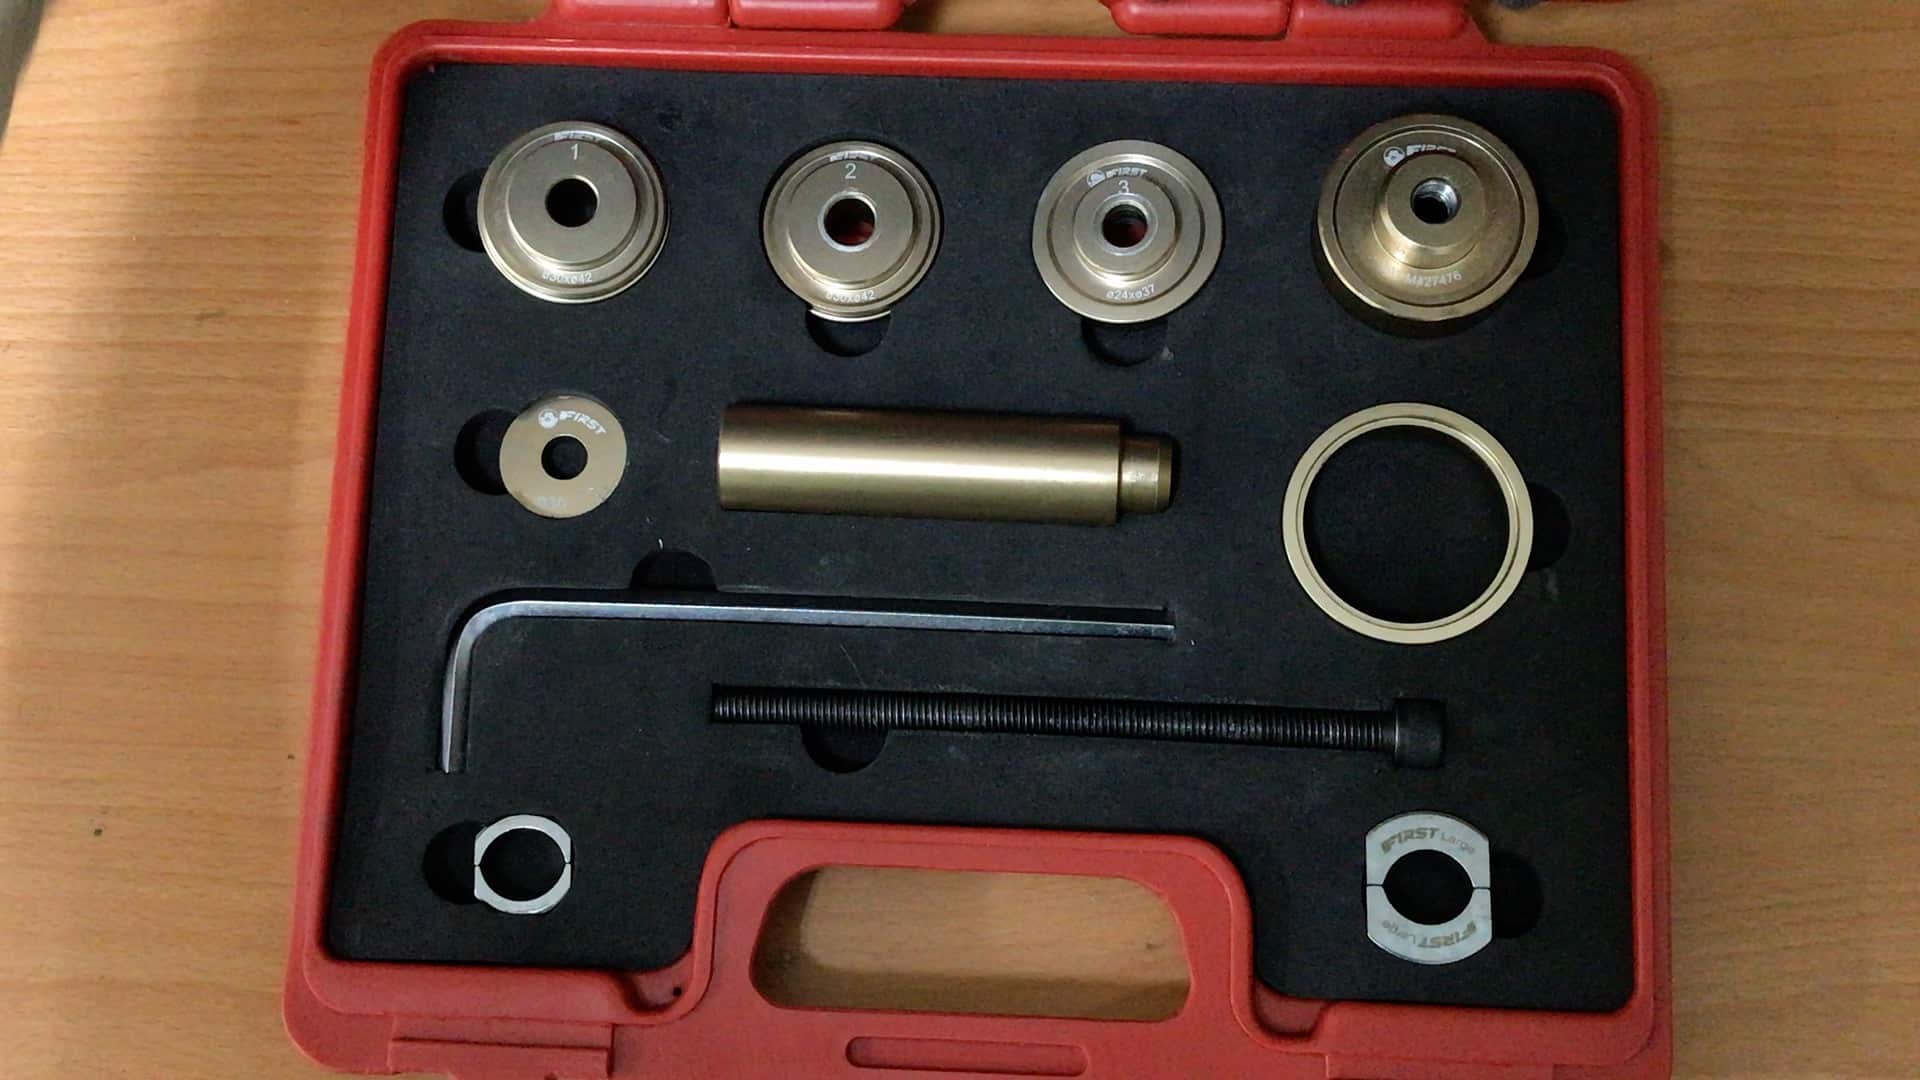
CNC machined from high-grade aluminum, the BB2430 is a unique tool kit for gently removing and installing 24- or 30mm-spindle press-fit bottom brackets/sealed bearings excluding PF30.
We created an entirely different toolset for PF30, although one which functions on the same principles (we’ll show you that in action below).
First’s BB2430 is available for direct purchase, with discounts for bulk purchase, on our purchase page.
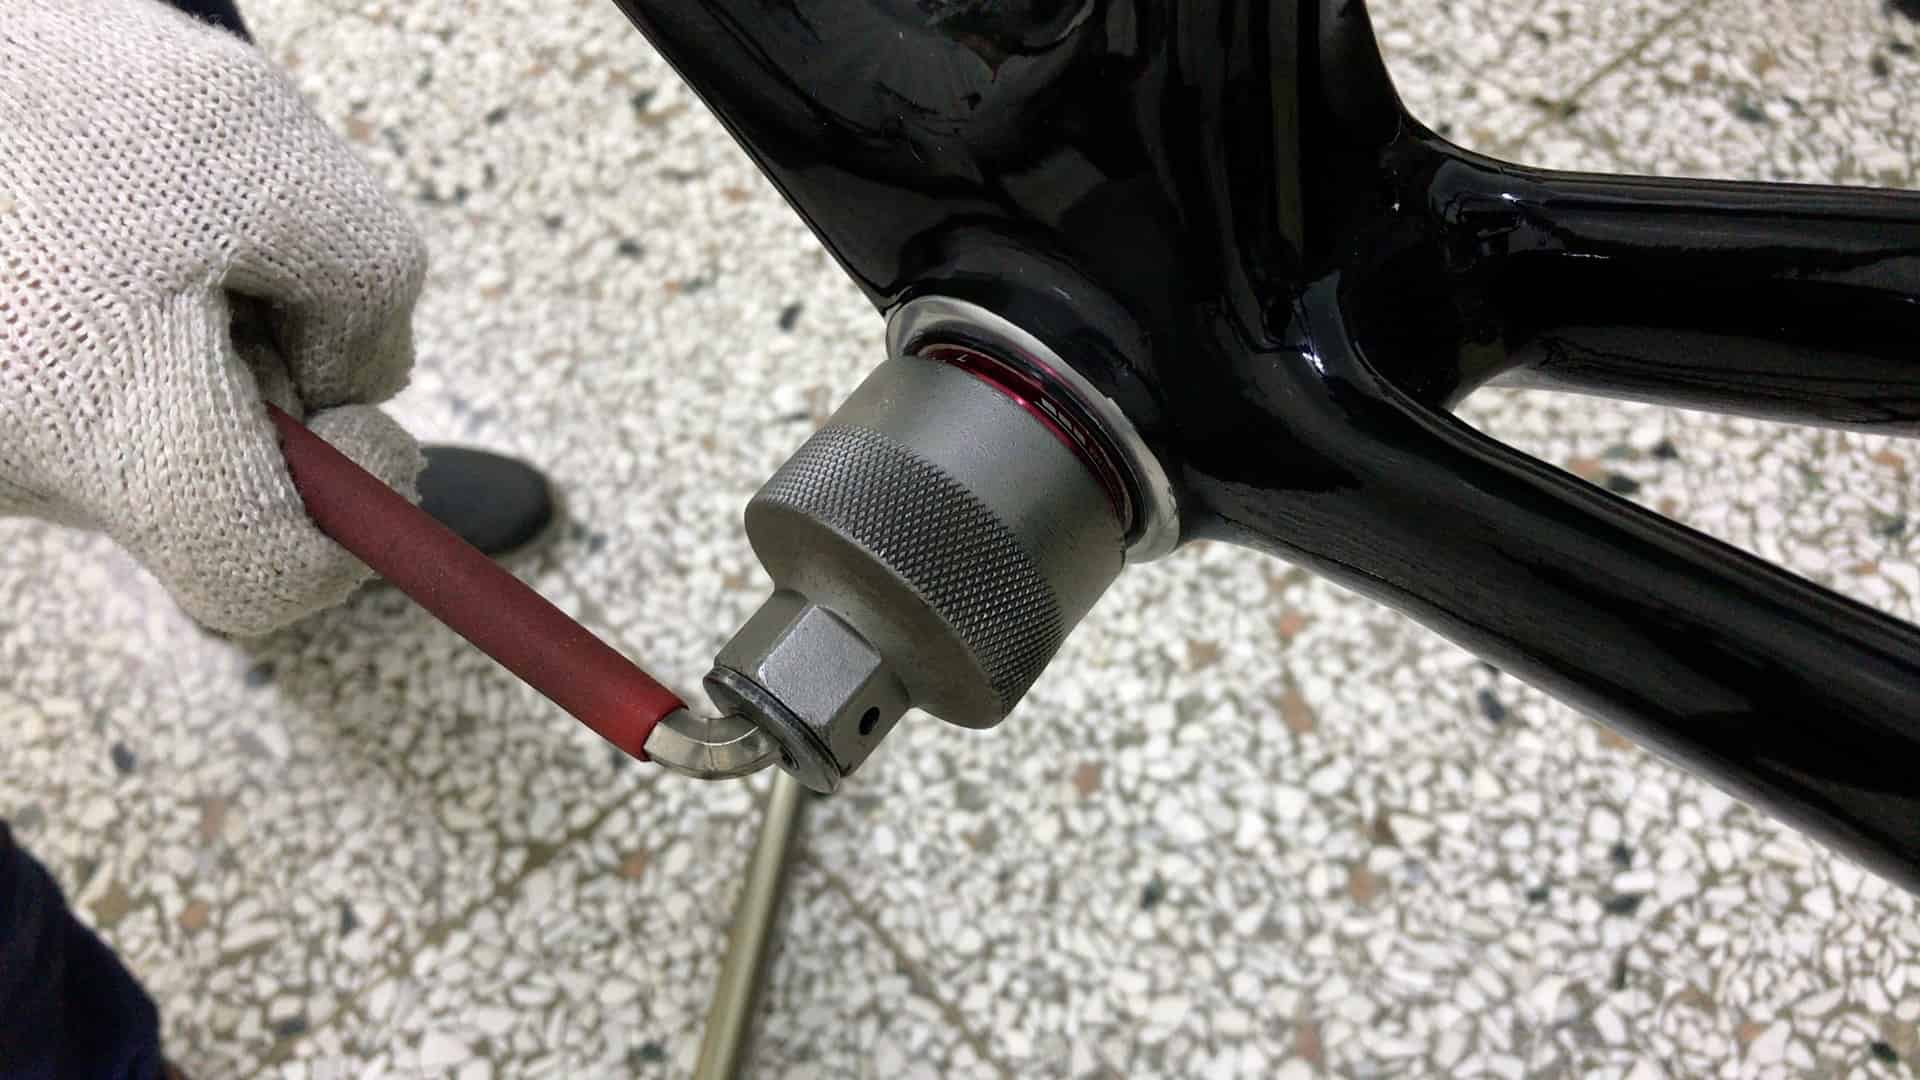
We install the drive-side and non drive-side bearing cups independently, one after the other.
You fit the appropriately sized drive “plate”, or “piece” if you like, into the bearing cup, thread the bolt through the shell into the “nut” retaining-cup which slots against the shell on the opposite side.
A few turns of the (supplied) 8mm Allen wrench presses the bearing cup into the BB shell. Repeat for the other side, except this time we reverse the “nut” so that it braces inside the newly installed drive-side bearing cup.
BB Cup Removal
Removing a BB cup containing a bearing cup presents a unique challenge.
Remember that we installed each bearing cup into its BB shell cup with a vise.
How, then, do we retrieve the cup and bearing from the shell now?
Won’t the bearing cup rotate with the BB shell cup as you attempt to break the cup free? You’d normally be breaking the bearing cup free directly from a threaded BB shell.
You’ll find that fitting the removal socket tool to the BB cup, then cranking it hard, causes the cup to rotate—stiffly—against the BB shell for a turn or two, occasionally three.
The resistance pressure exerted on the threads will be enough to break the bearing cup free of the BB shell cup. All downhill now. Remove as usual.
Ok. Fine. How, then, do we remove the BB shell cups?
DF30 Toolset (vs BB2430)
If you need to work on a bike with a 46mm bottom bracket shell, the DF30 tool is for you.
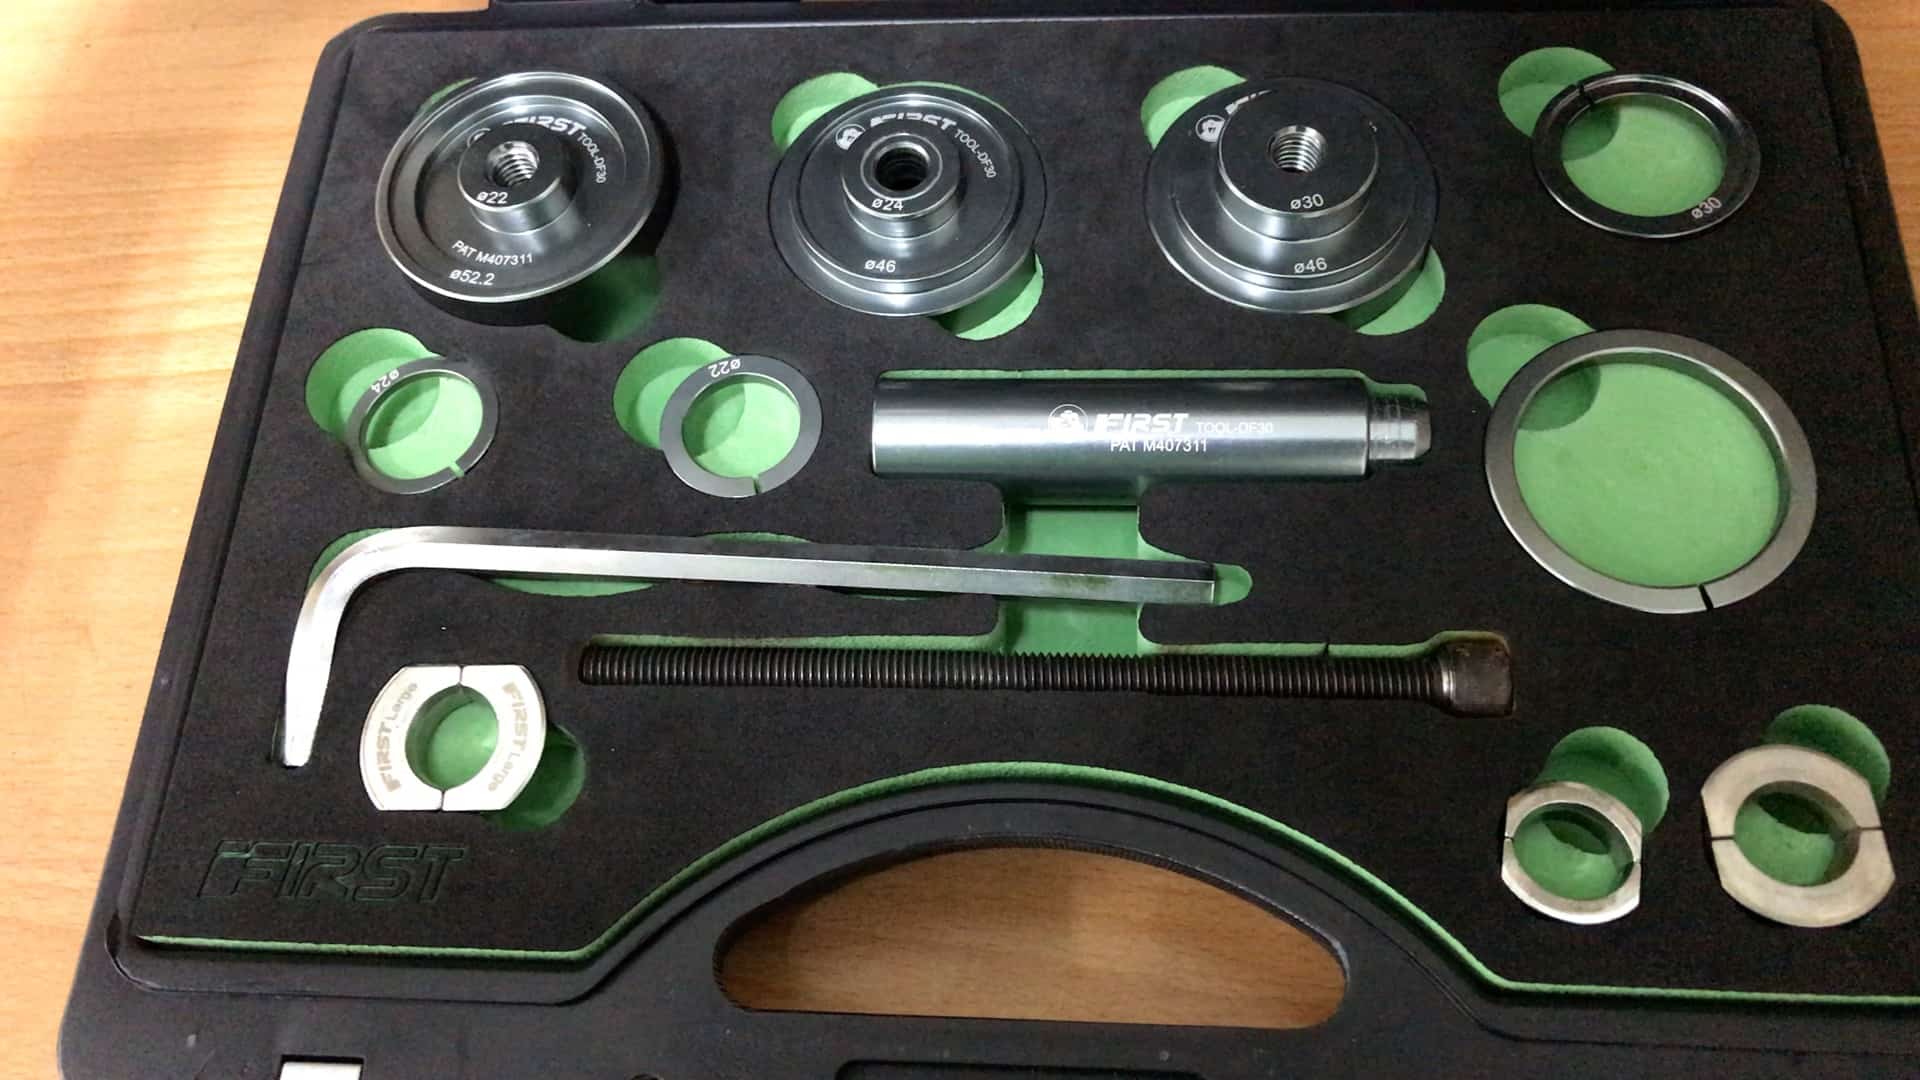
Actually, one of the DF30’s BB press-in brackets has a 24mm convex insert, so we could have used this toolset for the previous install as well, rather than the BB2430.
Since the only frame available for our demo was a 46mm, we are also not able to showcase the technique with a 42mm BB shell where only the BB2430 tool will help you.
Anyhow, back to the problem at hand.
We remove one bearing cup from one side only first up, here, the drive side.

We leave the other bearing cup in place to support the drive shaft which, in concert with the split steel-hitch, gently expels the BB shell cup as you turn the bolt .
The split steel-hitch’s rubber grommet allows expansion over the end of the driver. The hitch’s flanges brace against the BB shell cup.
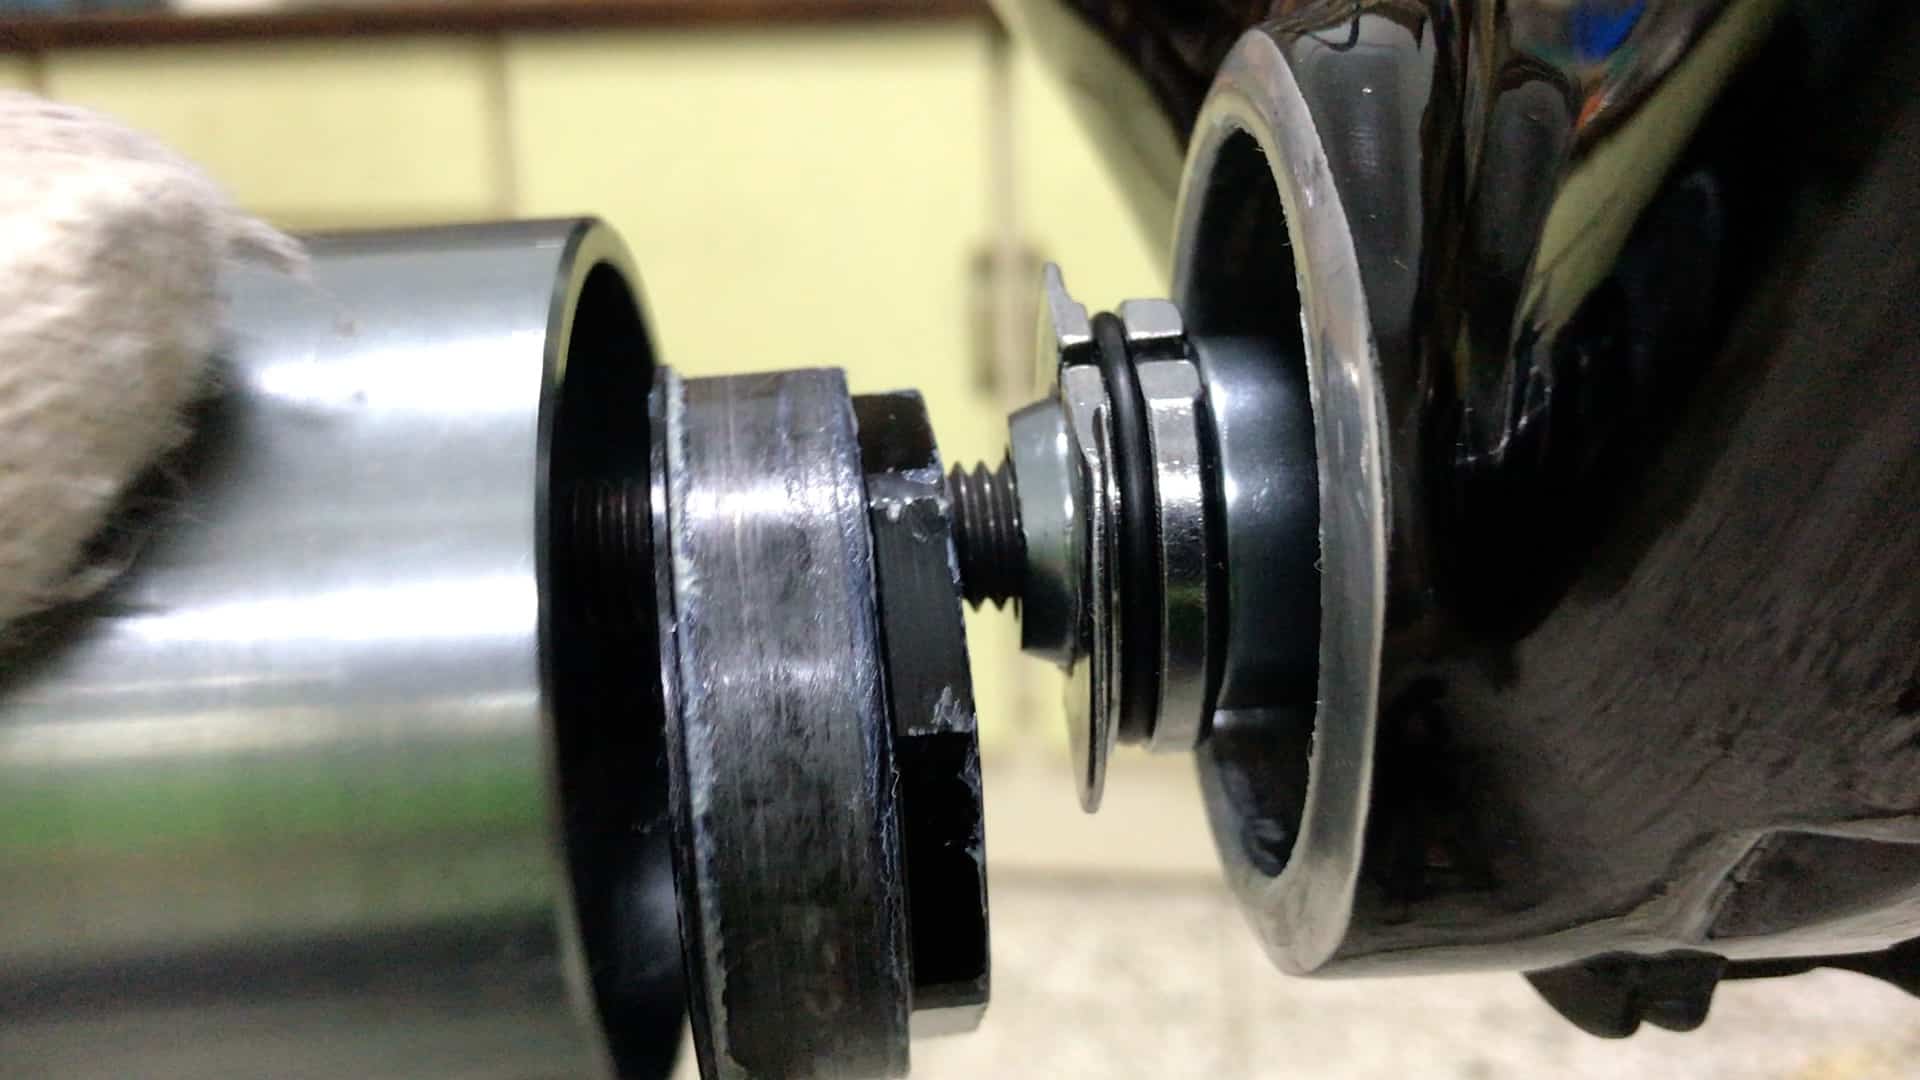
The “nut” retaining-cup screws onto the bolt, securing the cup against the BB shell. Turning the bolt pushes the BB shell cup out of the BB shell into the retaining-cup.
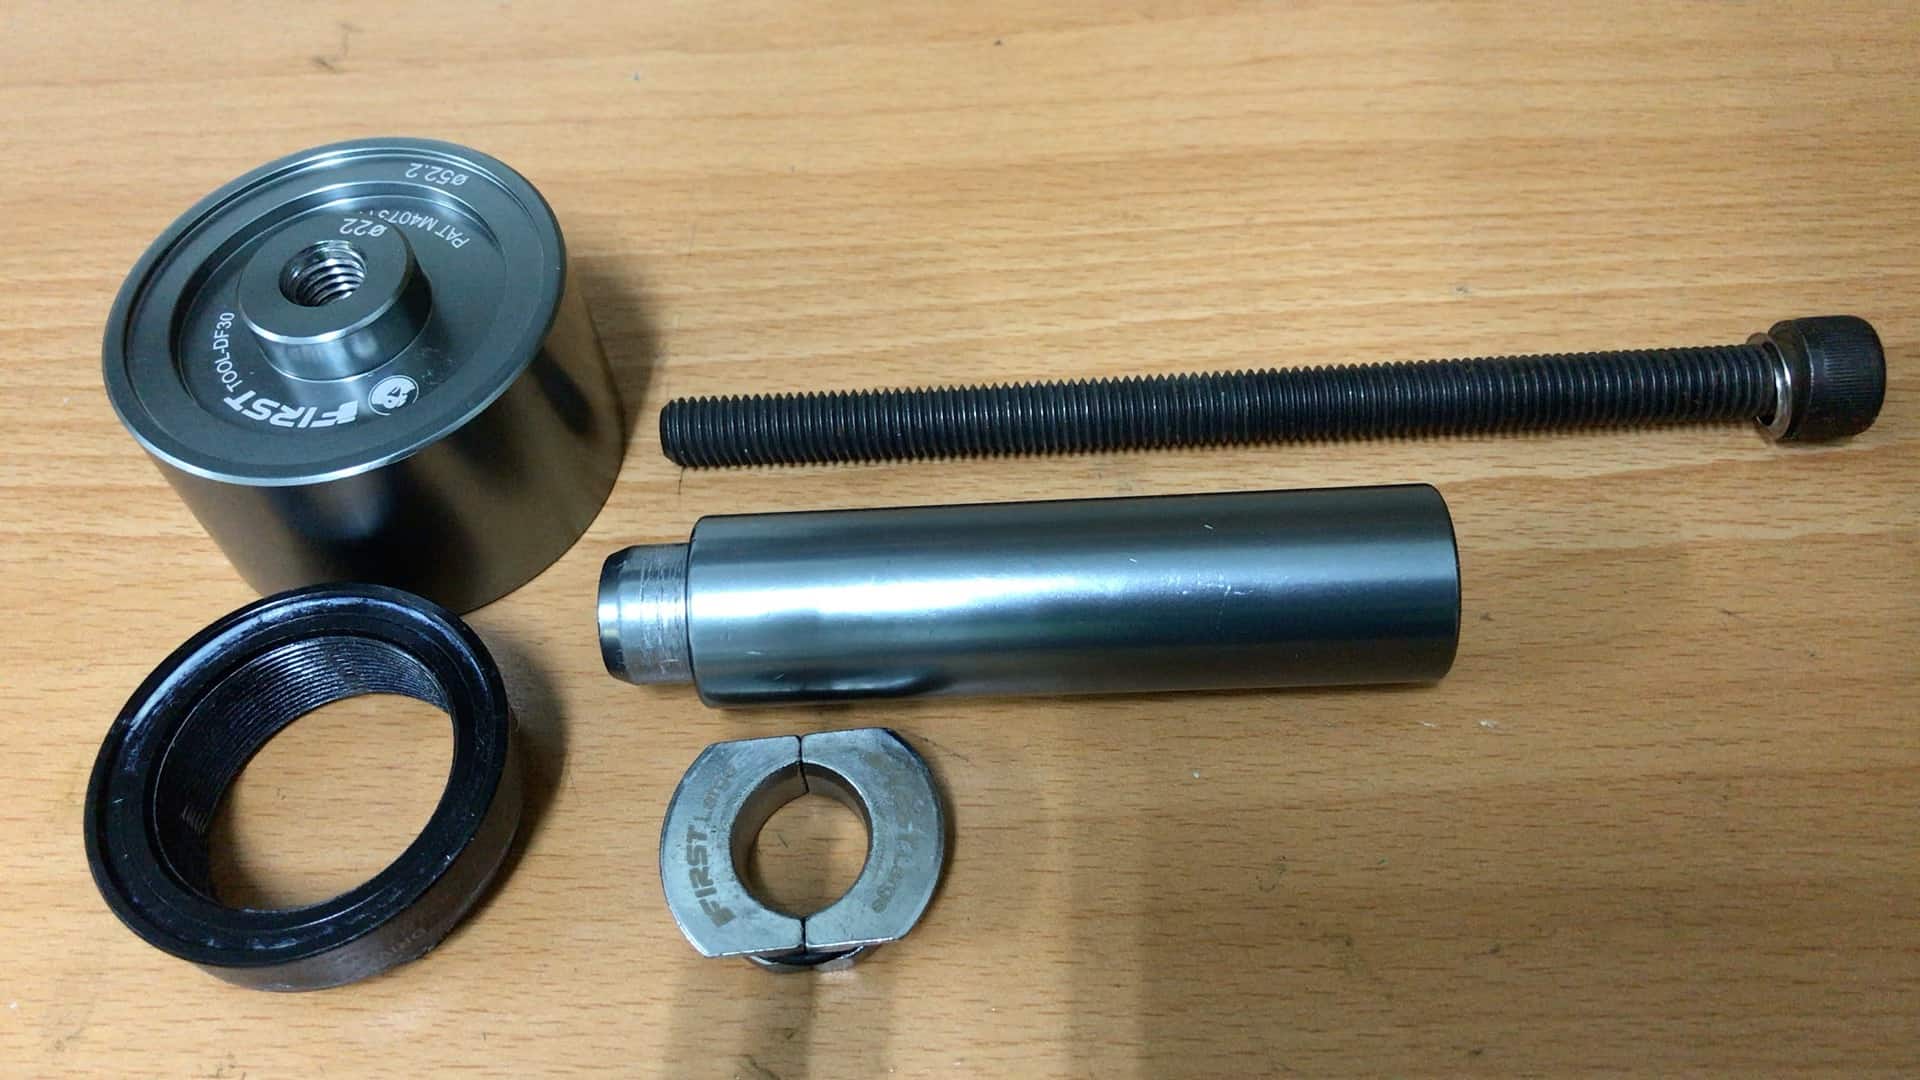
The complete ensemble of actors in the first Act of this drama: retaining cup (top left); bolt, driver and split steel-hitch (top-right to bottom-right).
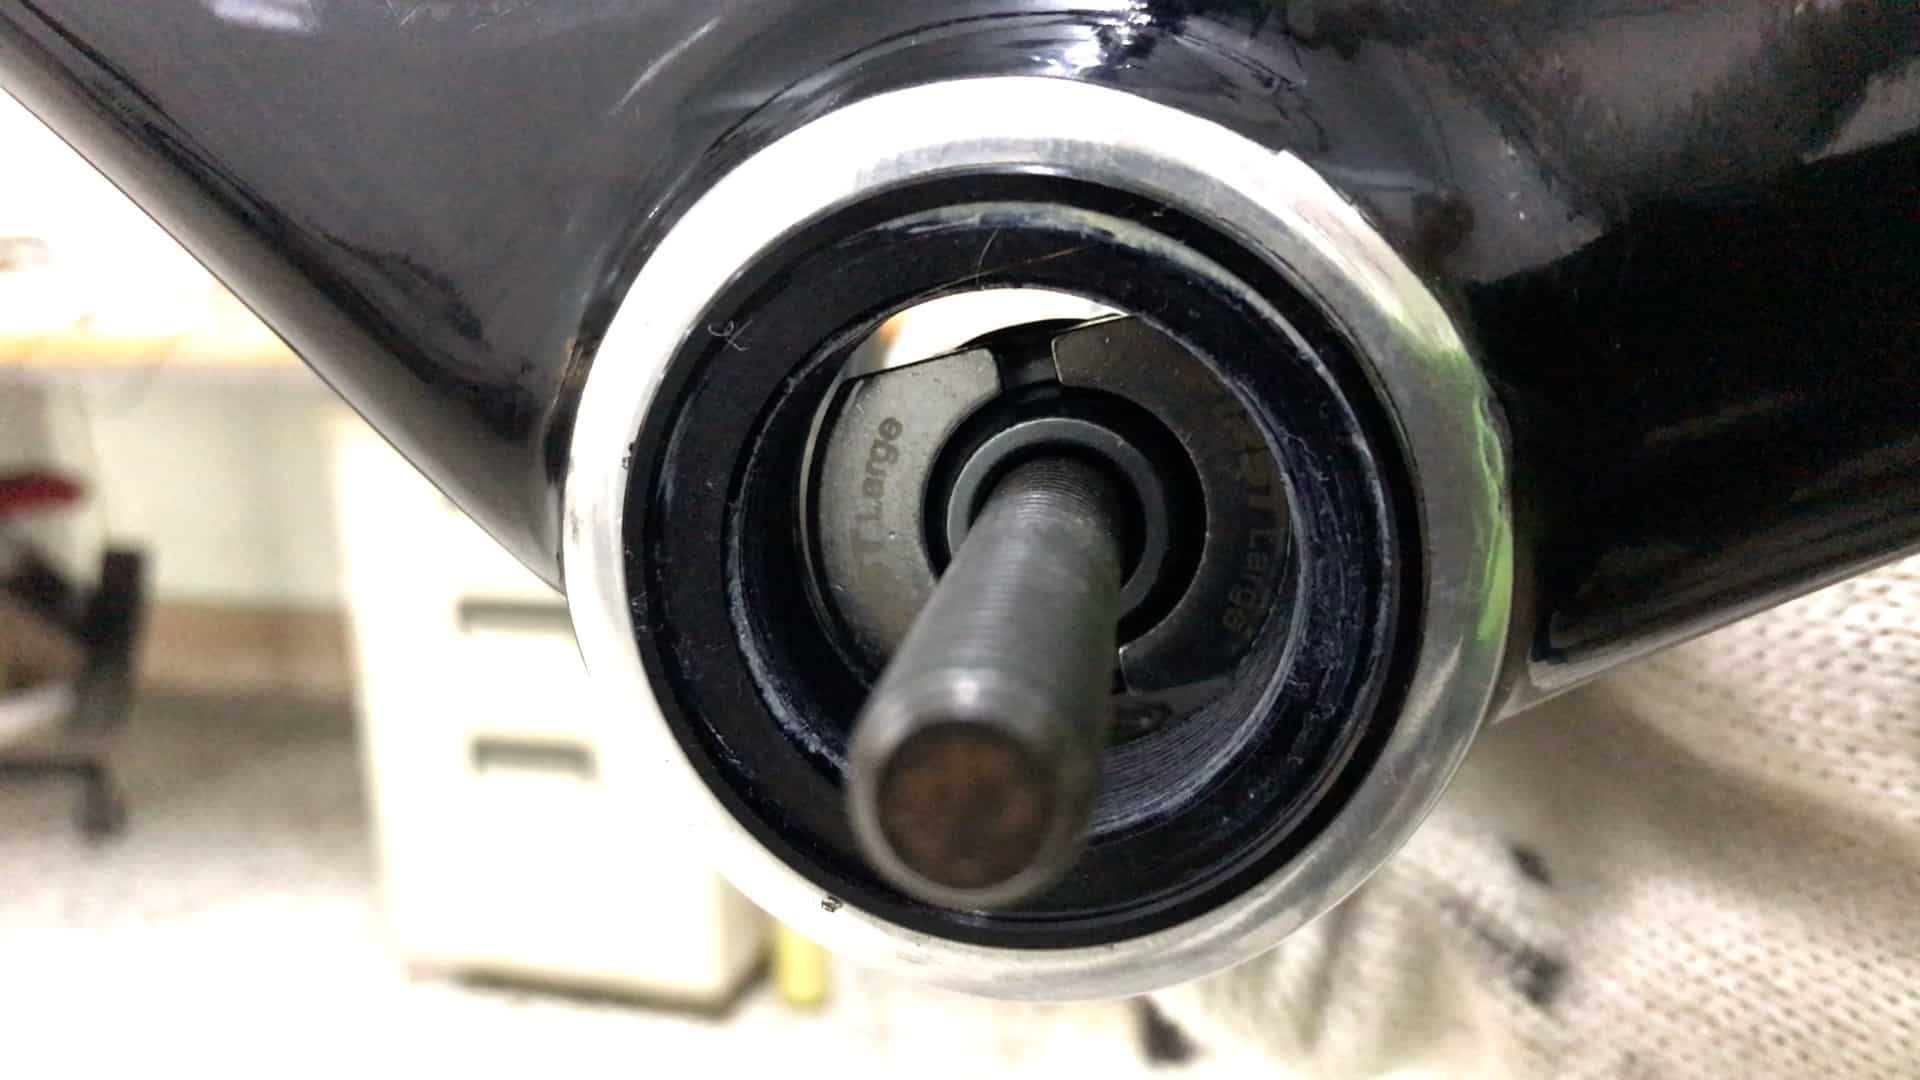
Now to finish the extraction.
We remove the second, non drive-side bearing cup, slip the split steel-hitch over the the end of the driver, then thread the bolt through into the retaining-cup.
Tightening the bolt brings the driver square against the steel-hitch and the cup we will remove.
We could have removed the bearing cup providing support for the driver in the initial extraction, since the assemblage squares up nicely under stress. Still, here we are, and with a few turns of the 8mm Allen wrench, the remaining cup slides out into the retaining cup.
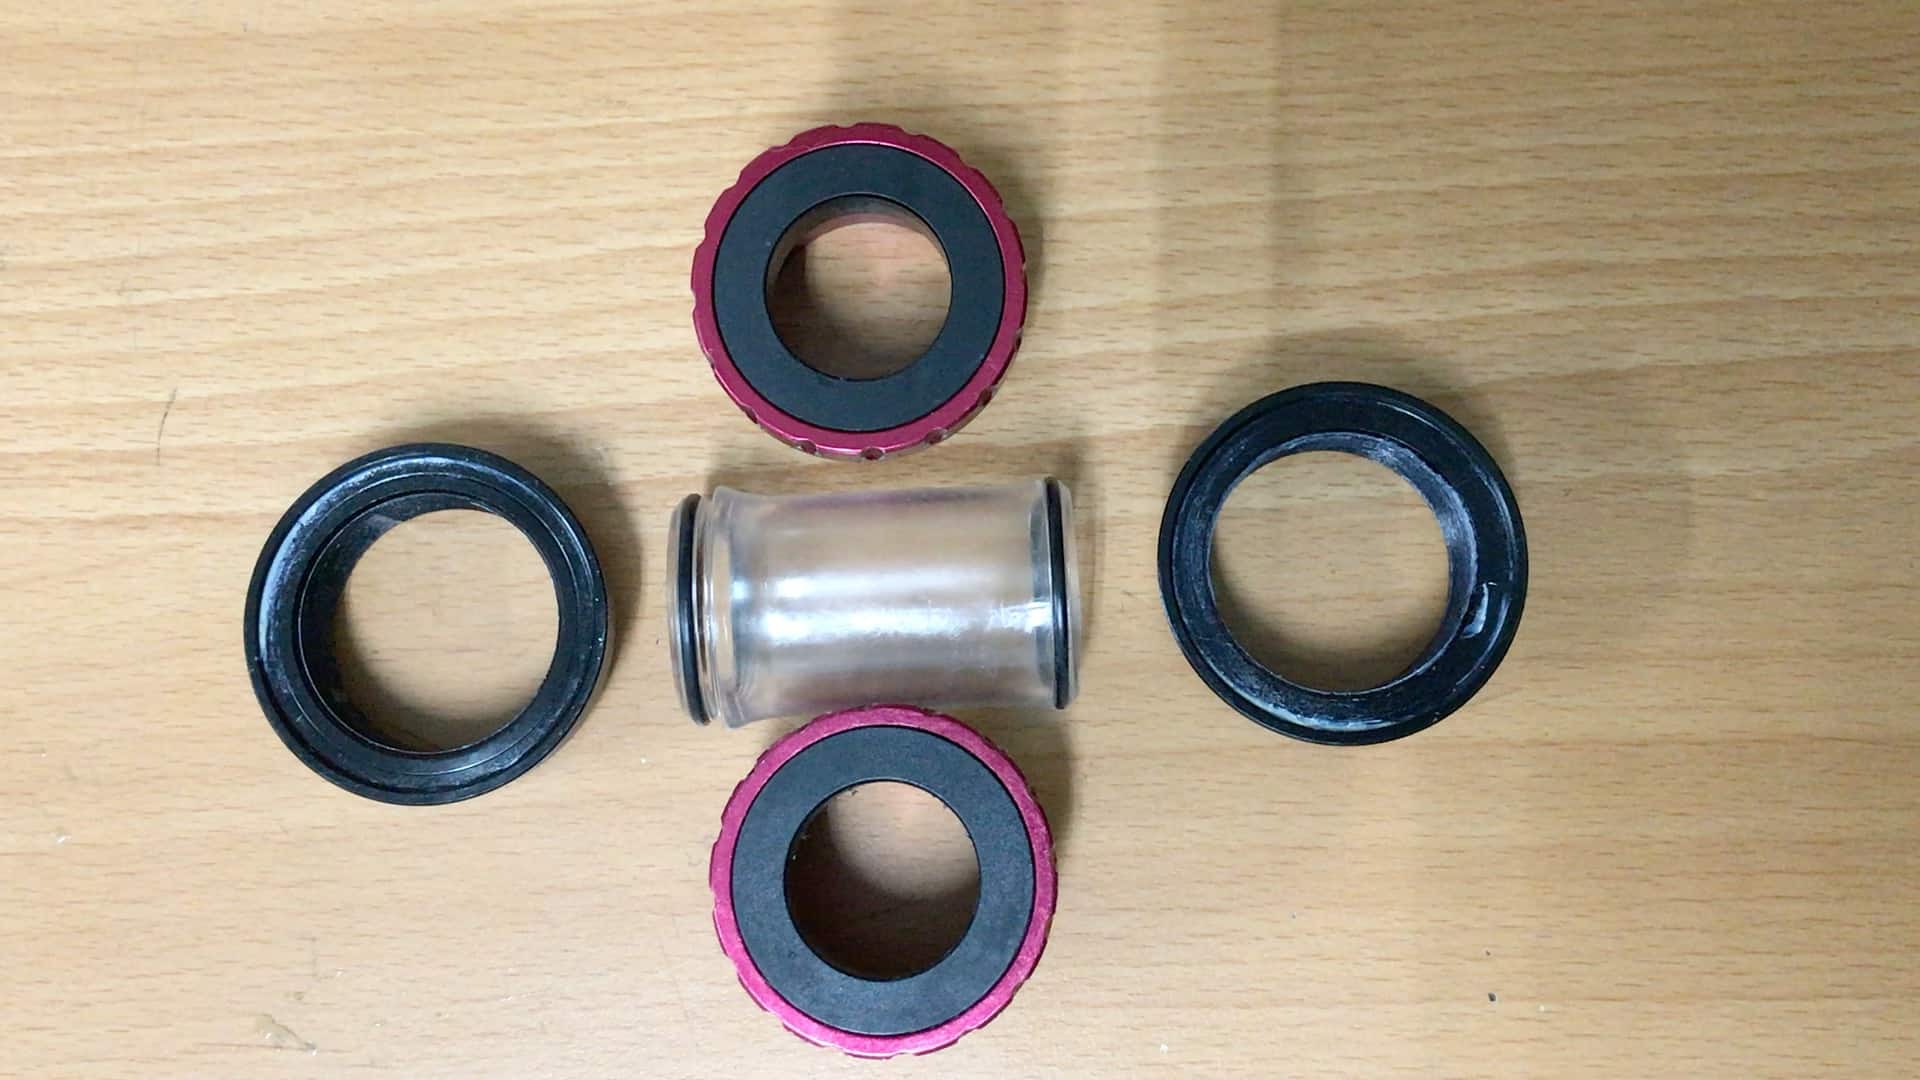
Both bottom bracket bearing cups, their sleeve and the D4634A BB shell cups, removed and accounted for.
If you are interested in purchasing the DF30 toolset, by the way—available right here.
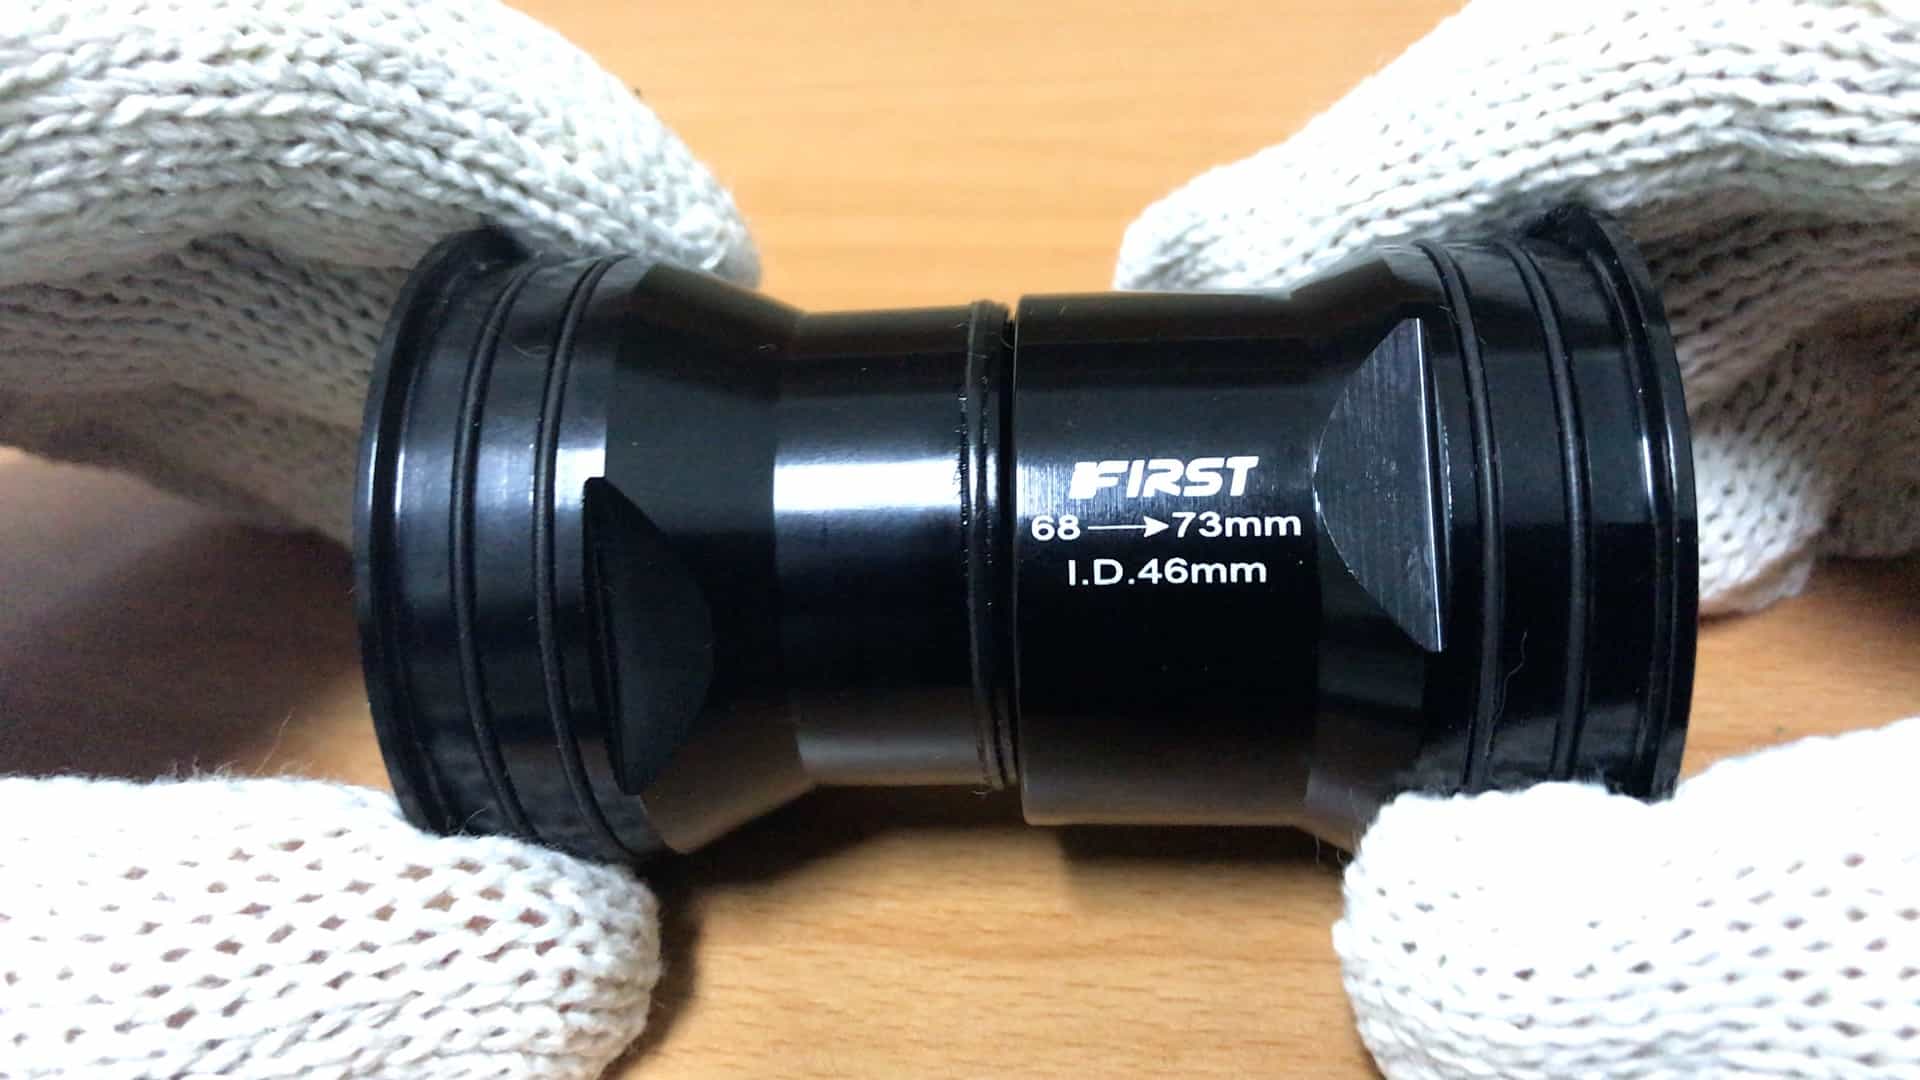
41MM PRESS FIT BOTTOM BRACKET SOLUTION
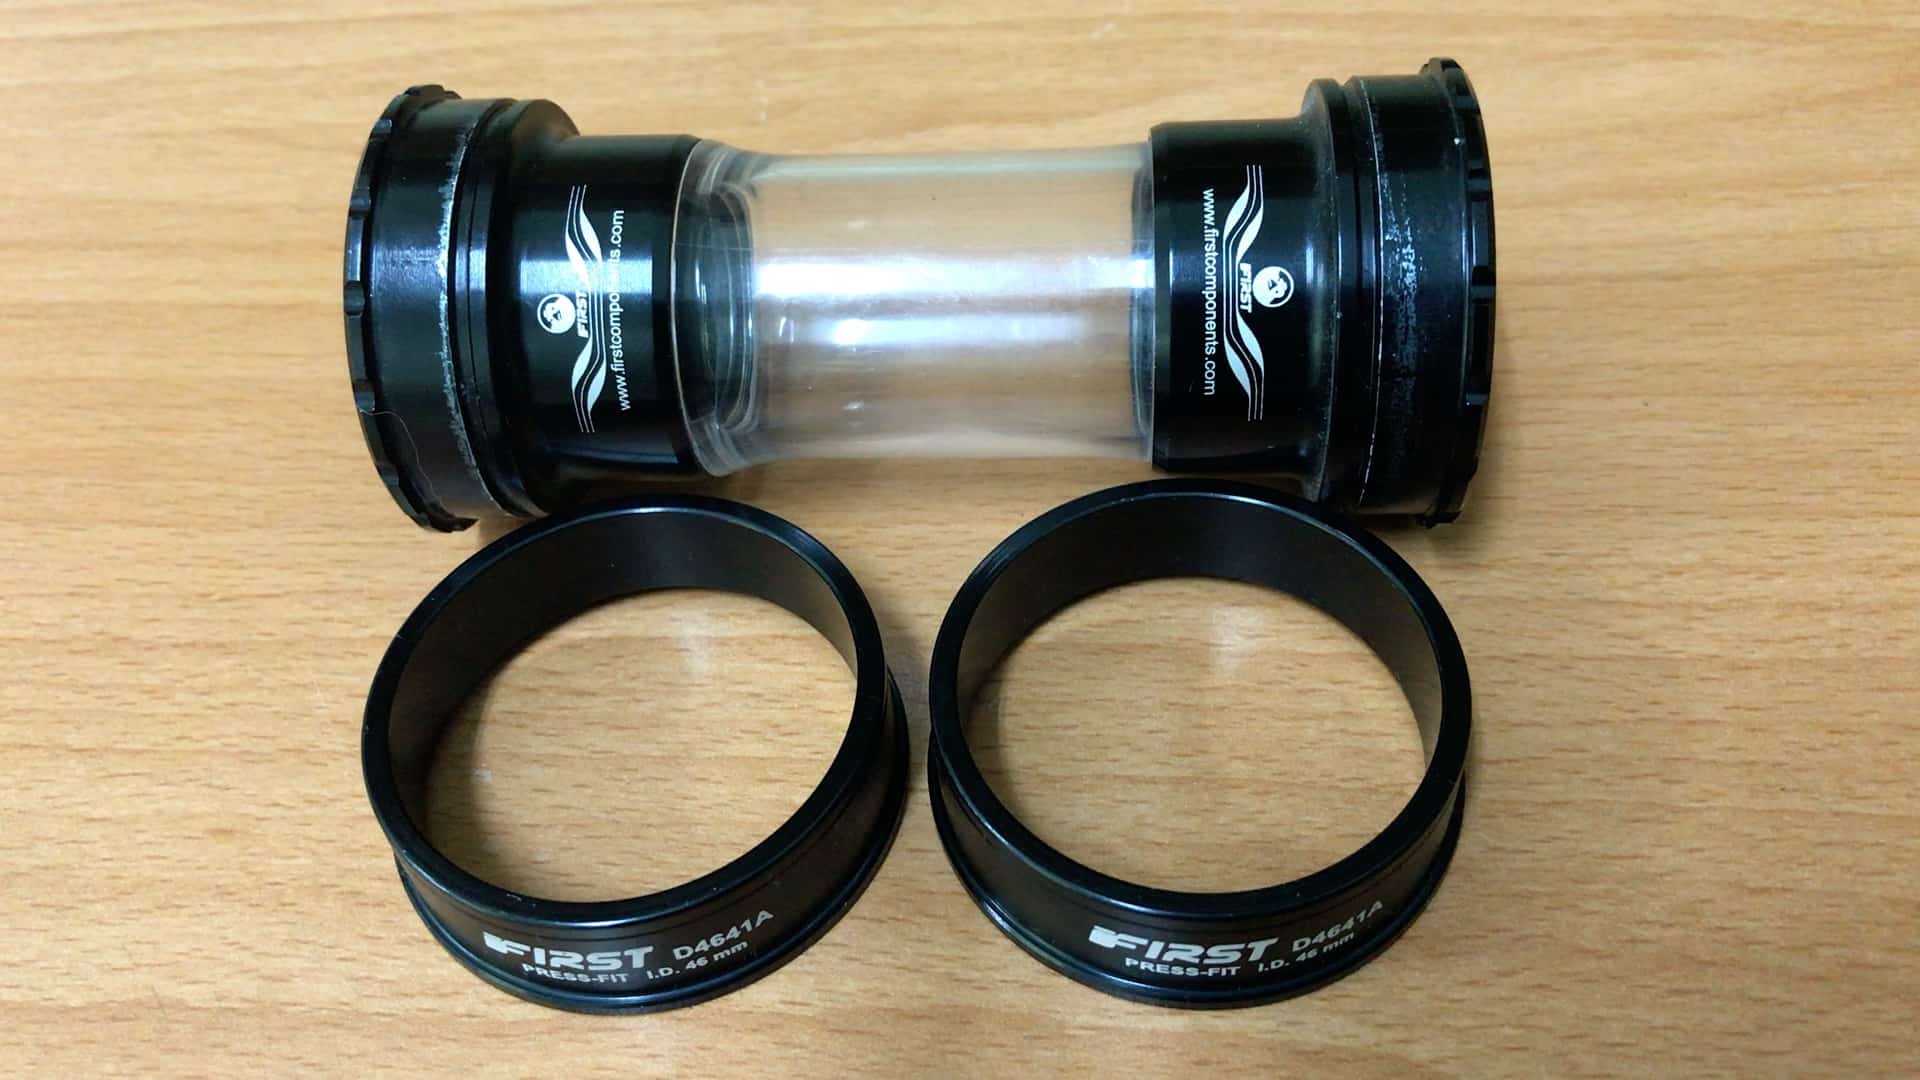
If you would like to fit a 24mm crank without going down the BSA route, the D4641A allows you to install a 41mm press-fit bottom bracket.
The easiest way to install the BB shell cups is by using the DF30 toolset. But since these adapters are not difficult to position inside the shell, you could get away with tapping them in with a rubber mallet. You’ll be able to install the adapters by applying even taps each cup’s rim in succession, right the way round.
Using the DF30 tool makes the job a breeze though. Installing the bb shell cups is done the same way as the procedure covered above. You press-in one cup at a time.
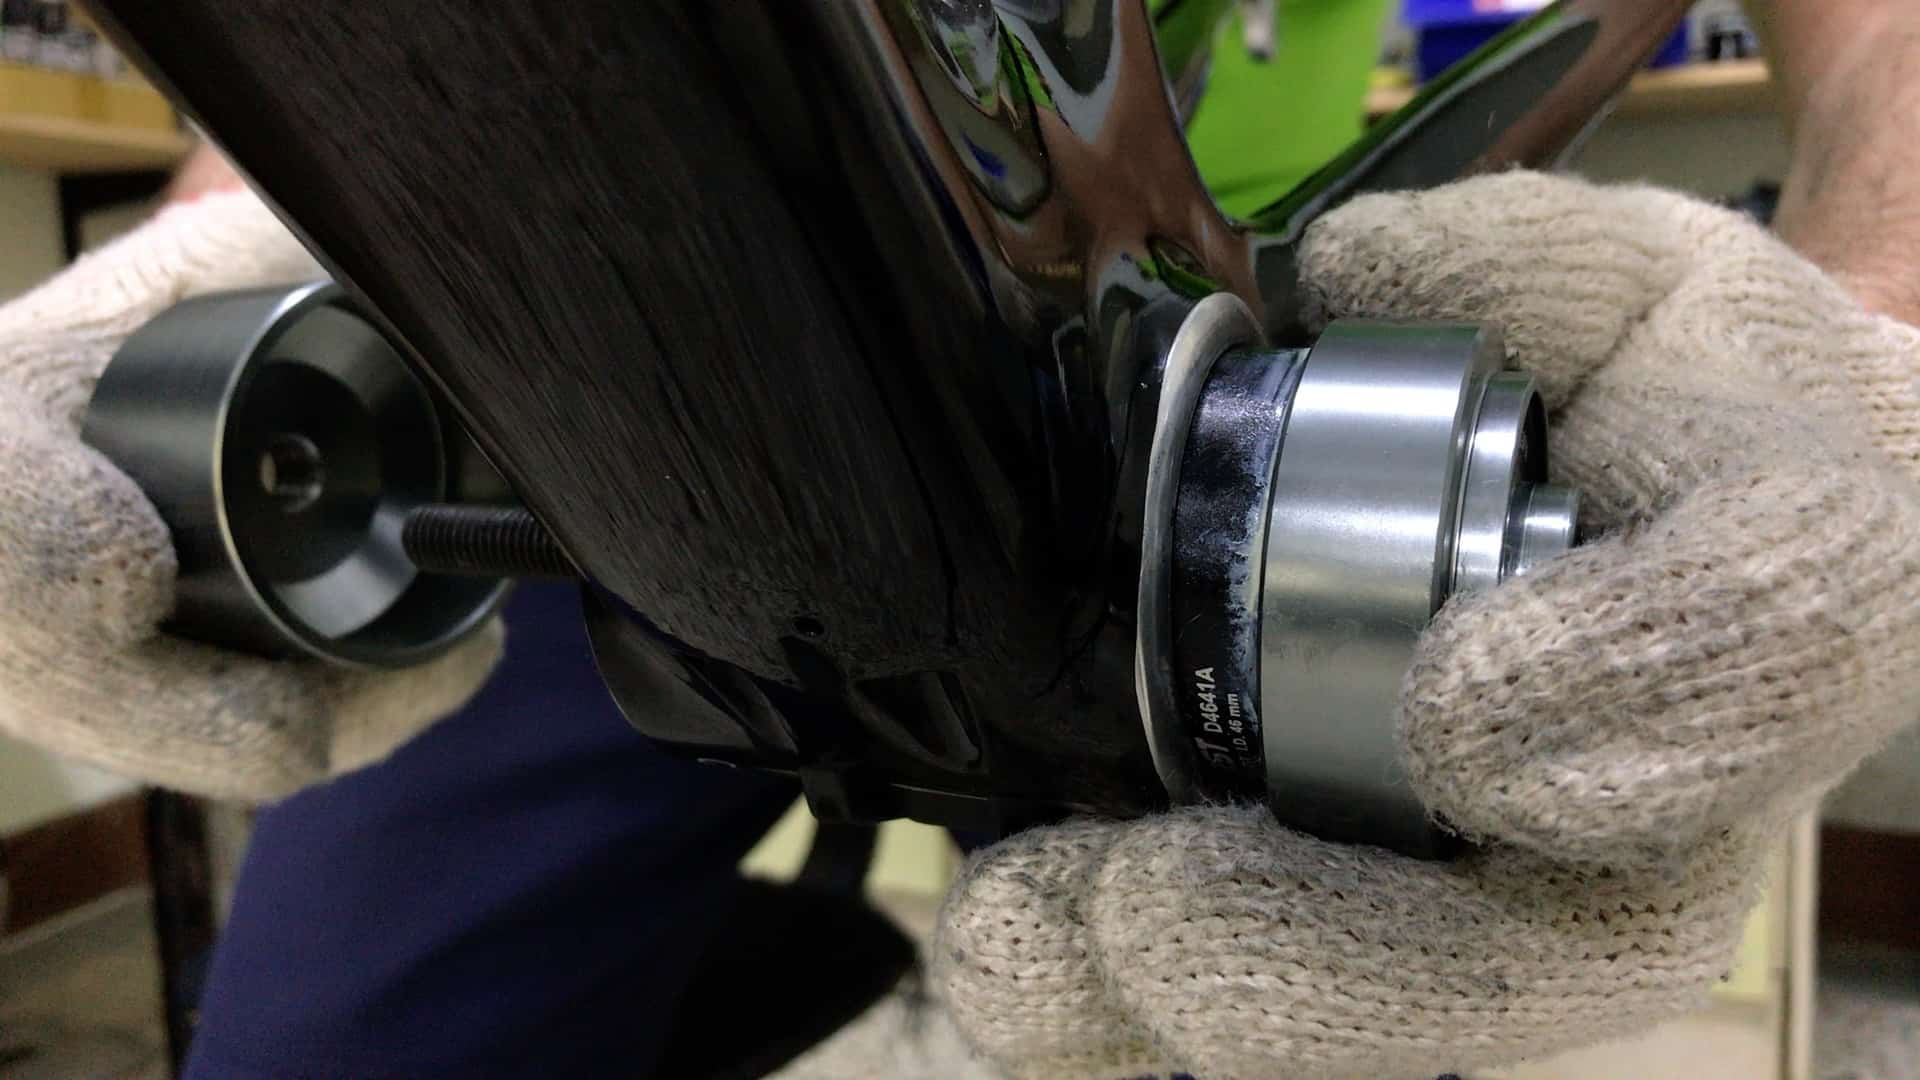
Grease the cups in preparation to receive the press-fit bottom bracket bearing cups.
The 24mm piece is shaped to fit into the bearing cup. Push the bolt through, attach, then position the retaining cup. A few turns presses the BB cup home.
The bottom bracket is now ready for your 24mm spindle integrated crank.
S-30 Press-Fit Solution
All BB converter set solutions explored in this post have sealed bearings.
Modern sealed bearings successfully deny most water and dirt entry beyond the seals.
As an aside, you can generally remove sealed bearings from their bearing cups, then prise the seal away from the bearing with an awl, then apply a generous helping of grease. Grease injected during manufacturing should be enough; packing more in, however, can ’seal the deal’, literally, keeping individual bearings clean and slick for many thousands of miles.
S-30’s attached sleeves ensure minimal water or dirt find passage to the bearings.
Rather than designing the sleeves to slot into the bearing cup at each end, we designed a centrally placed rubber o-ring seal. The non drive-side surface slides into the drive-side surface forming a water-resistant seal.
Installing the bottom bracket’s sleeve inside the S-30’s sleeve is redundant. If bearing purity is a priority, better to double-up on bearing grease than include what now becomes the ‘inner’ sleeve.
To install the S-30, a light grease and a quick press-in with a DF30 toolset does the trick.
Removing the cups is best done with the DF30: the steel-hitch fits snugly to interior flanges where the integrated sleeves projects inwards towards each other.
You could use a large, flat-bladed screwdriver, or something similar, to tap them out of the shell, but you’ll need to whack them pretty hard which is best avoided.
G207A Expansion-Band Solution

By far the most convenient solution.
No need for grease. The unit’s a bit heavier though.
Slide the unit into the bottom bracket shell.
Tighten the bolts with a 2mm Allen wrench. The serrated bands expand against the BB shell.
No need to tighten the bolts right up. The three together ensure an immovable fit and certainly won’t slip when tightening the bottom bracket to tolerance. Plus you can quickly reverse the procedure, remove the converter as need be.
Slot your BSA unit (greased of course ;-D ) in, then tighten torque to correct tolerance.
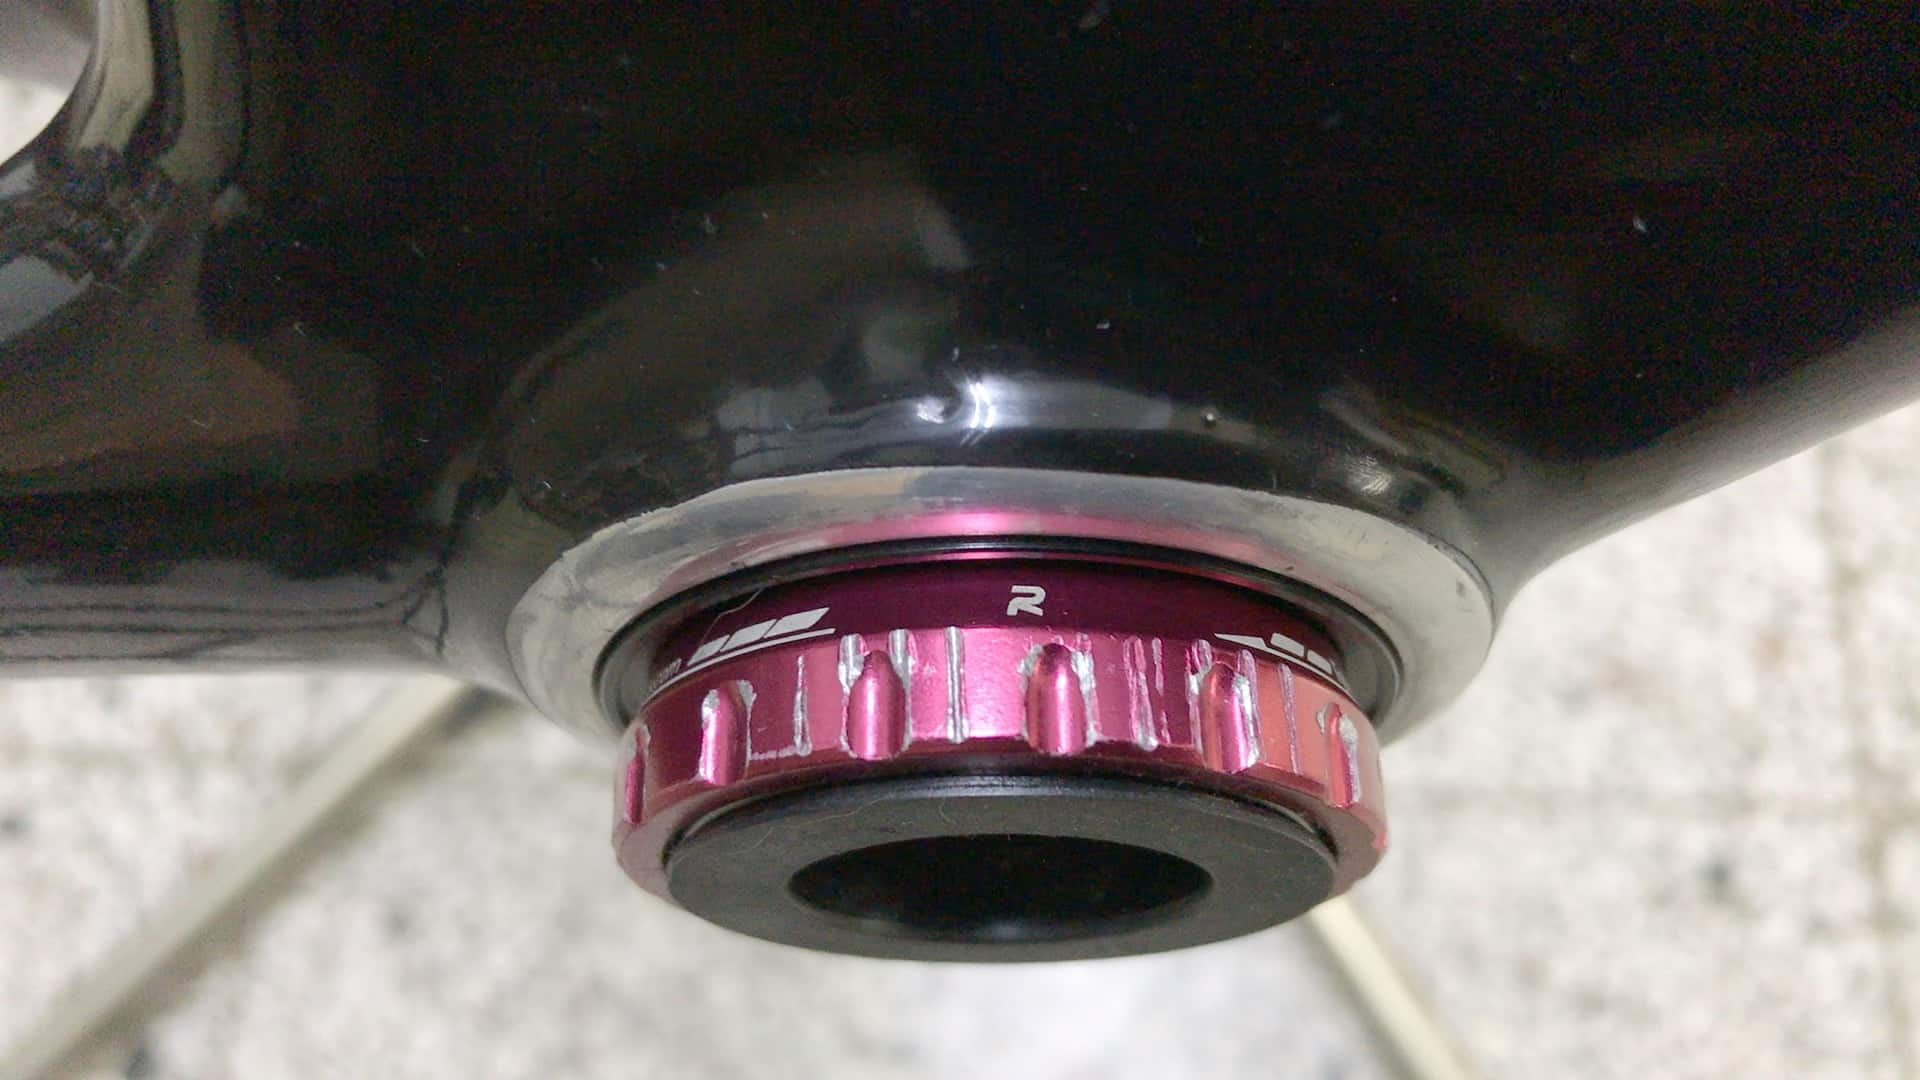
The installed BB, ready for the crank.
The pictured G207A solution works for a 46mm BB shell. We don’t have a similar adapter for a 42mm setup, simply because nobody’s asked for it. There would be more engineering challenges to work through due to the reduced circumference—46mm to 42mm is significantly less to work with. Anyway, if a 30mm spindle is your preferred spec, PF30 is the best way to go.
Final Words
The majority of our products came about through ODM partnerships with brands looking for particular solutions to a particular problems.
We are at our best when working with plans at various stages of development.
We take existing concepts and turn them into workable products.
Anything is possible—we combine precise engineering knowhow with our deep experience stemming from decades working out robust designs. That expertise is nowhere more on display than in the variety of converter bottom bracket sets we have designed over the years.