A Single Speed or Fixie’s heart and soul is in the crankset.
Well, ok, yeah . . . the whole package matters . . . no gearing, the slight upward tilt of the bars, the high profile rims . . .
But the very notion of a fixed speed is in that single chainring on your crank with no fangled derailleur complications.
In this post you’ll find all you need to know about a single speed crankset.
Chances are your single speed sports a square taper crank and cartridge bottom bracket. Thinking maybe of ditching it for something cooler?
We’ve got a comprehensive section devoted setting how you can do that. Jump to it here.
TYPES OF SINGLE SPEED CRANKSETS
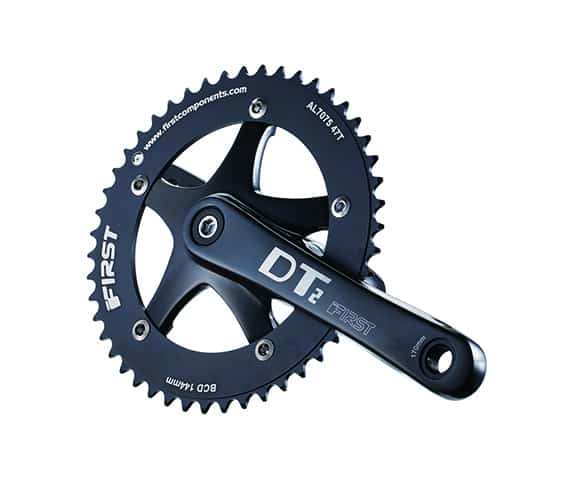
You’ve got two choices of crank type: square taper or integrated.
Square Taper
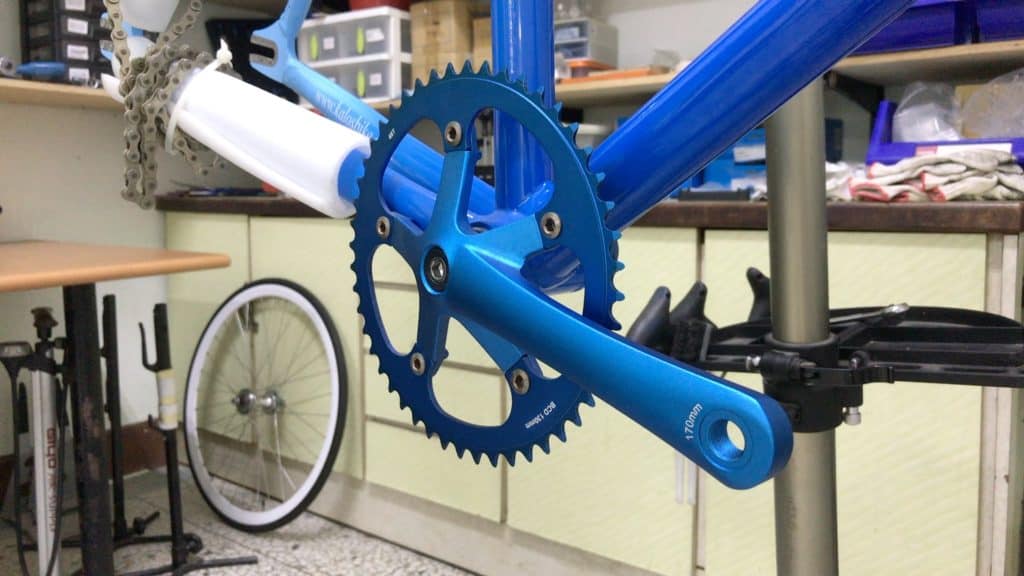
Square taper is the most common. Most fixies feature a cartridge bottom bracket and square taper crankset.
Square taper is a technically simple, functional design.
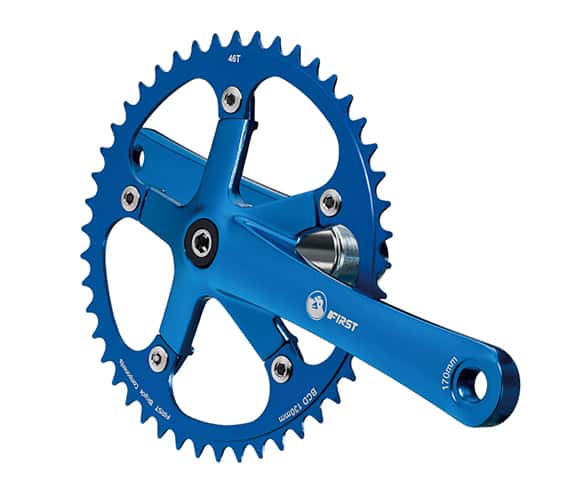
This type of crankset is easy to install, easy to maintain, but does not necessarily look all that elegant.
Having said that, though, it does depend on what brand of crank/chainring you are looking at, so feel free to take issue with me on this
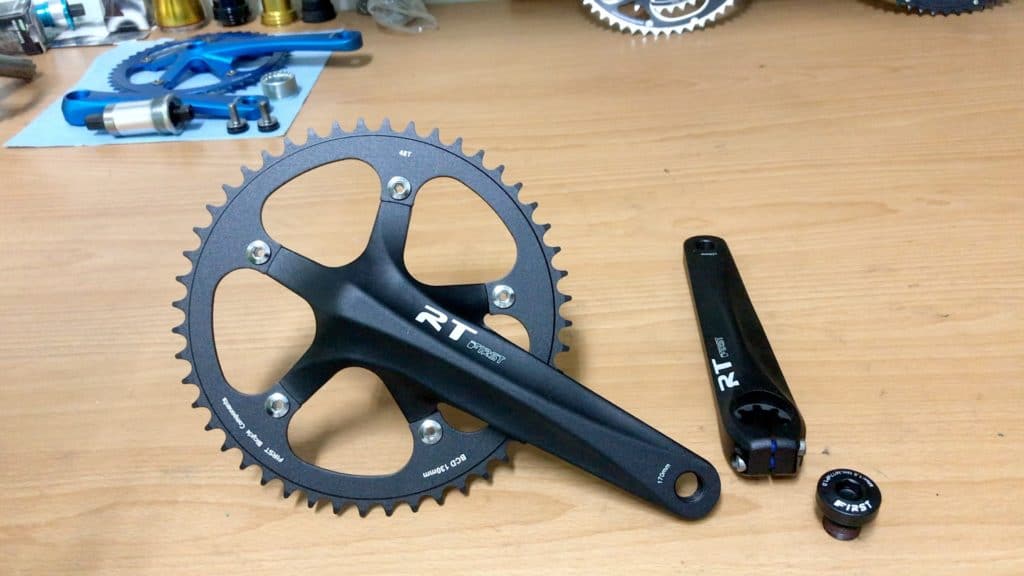
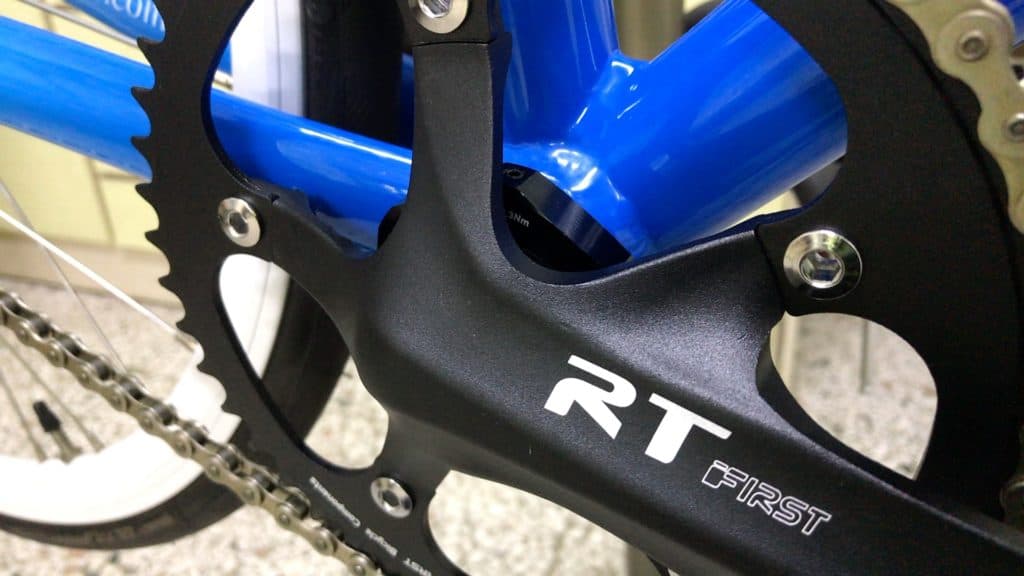
The particular unit pictured here is a popular one—we feature it below in the section on upgrading it to an integrated single speed crank.
When viewed in the context of the bike as a whole, you are hard put to declare that it’s not a good fit.
Superficially crude technology, a square taper involves a four-faced spindle that wedges into an equally tapered opening in the crank.
Tightening the crank bolts pulls the crank firmly onto the spindle. The square tapers wedge firmly into the crank.
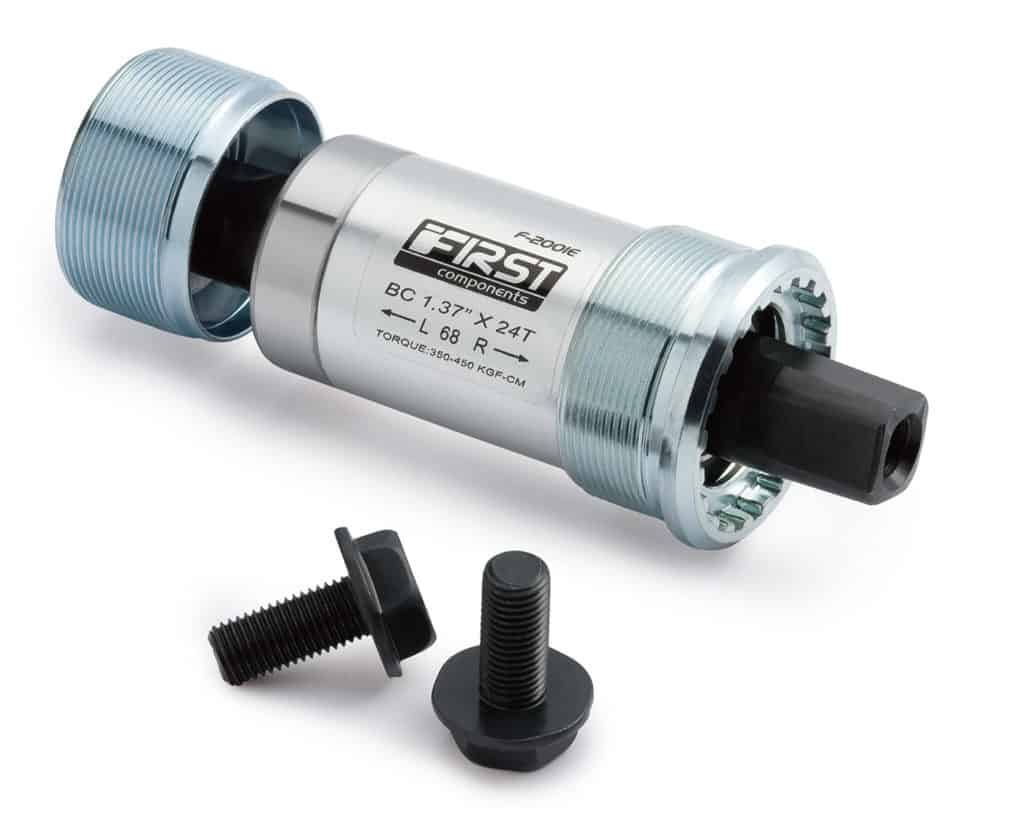
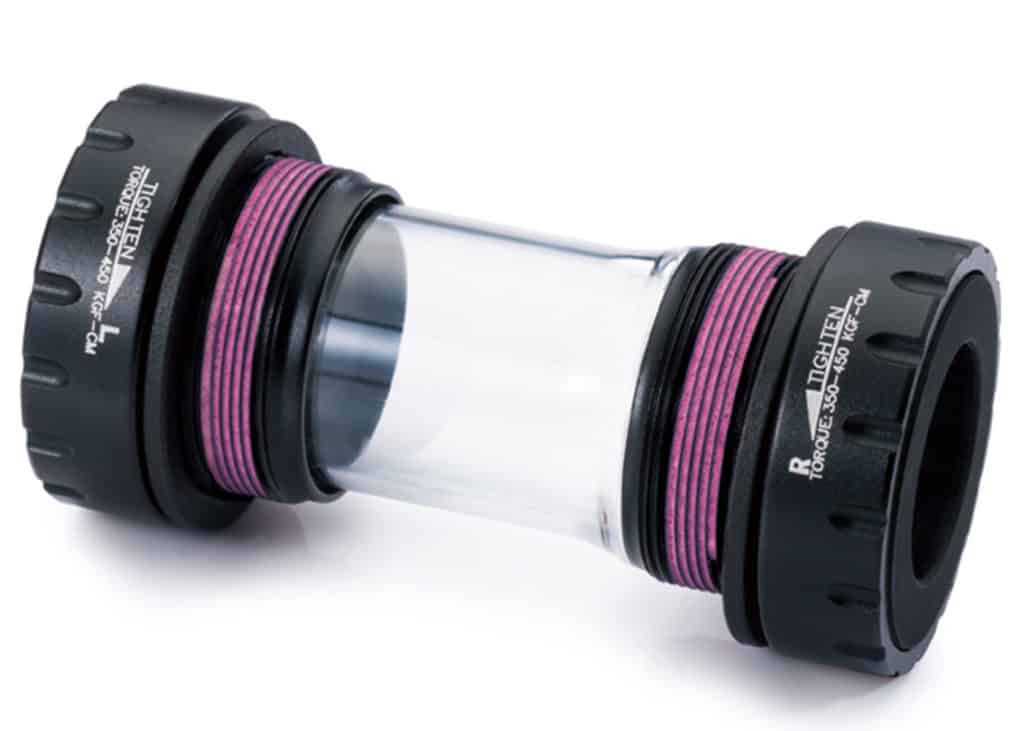
The crank is only one half of the equation: the bottom bracket is the other half.
Your standard cartridge bottom bracket houses sealed bearings, one on each side, inside an alloy or stainless steel jacket, with the spindle is fixed into position.
The whole unit is designed around replacing the cartridge as a whole rather than replacing bearings that have worn out.
Cartridges screw into the threaded bottom bracket by means of the drive-side thread.
The non-drive side is not threaded. A lockring screws into the bottom bracket shell thread on that side, securely holding the cartridge in position.
The cartridge body also protects the sealed bearings from most of the muck that enters the BB shell on the wet days.
INTEGRIERT
If you wish to look a little more slick and … what’s the right word? … well just a bit cooler overall (let me work a bit more on getting the right word here ?), an integrated crank will do that for you.
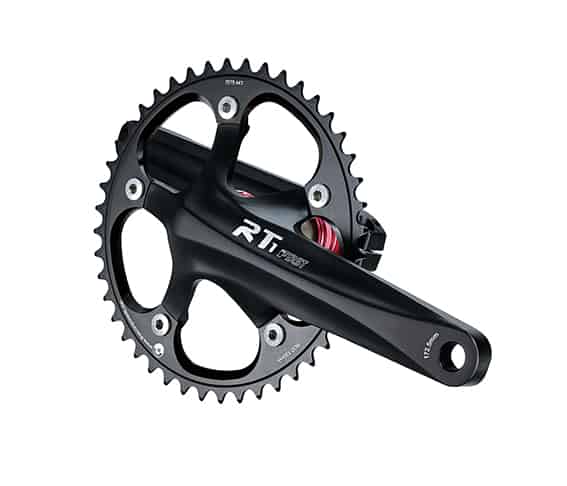
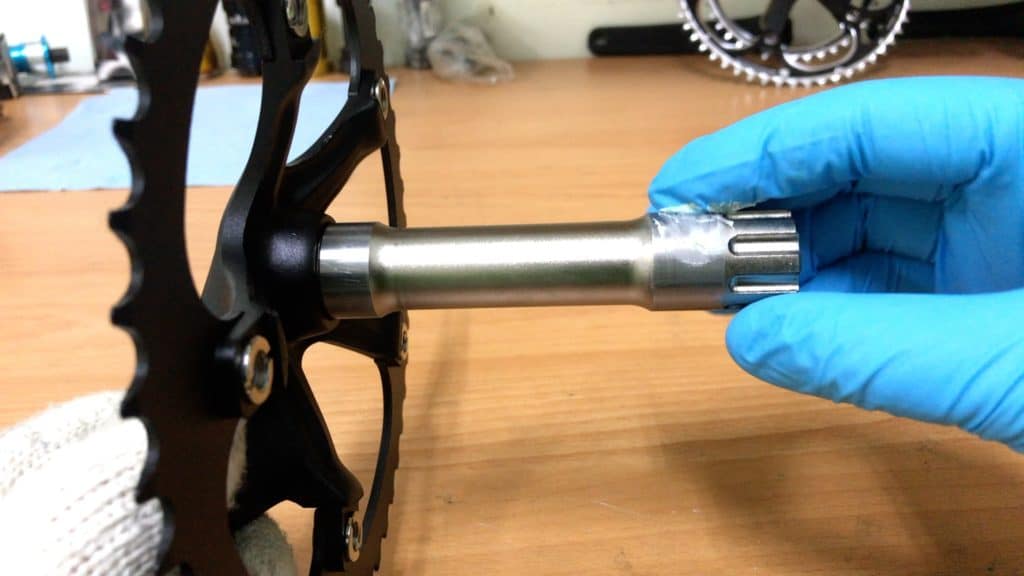
If you upgraded your square taper crank, you’d need this integrated spindle, fitting into a BB with two separate cups.
The key to this system is in the “outboard” bearings sealed from most of the muck that will wash through your bottom bracket shell by means of the internal plastic or nylon sleeve.
The sleeve replaces the heavier body of the alternative (cartridge) bottom bracket.
In fact, a great reason to upgrade from the square taper to the integrated is for the considerable weight saving.
The other thing is that the external bearings are larger and therefore more durable than the smaller sealed bearings of the cartridge BB.
If you find a persistent bottom bracket “creaking” noise, this may well be the result of worn bearings inside the cartridge.
That gives you another great reason to upgrade to the external BB/integrated crank combination, of course.
The cups fit snugly into the BB shell. Then the drive-side crank with its fixed (integrated) spindle slides on through.
Pinch bolts (or a single bolt tightened to a high torque) secure the crank to the spindle on the non-drive side.
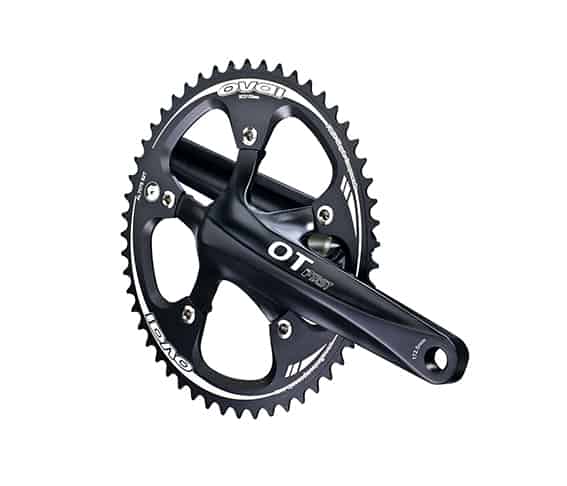
For a variation, an oval single speed crank and accompanying chainring is also a possibility.
I have covered oval chainrings in detail in another post. Check out the article and see if perhaps an oval chainring might be an option for you.
Briefly, despite taking a little getting used to, an oval chainring can deliver a higher level of comfort to your cycling experience.
You should try one out to see whether you may be one of the small group of cyclists that swear by oval chainrings and would never go back to the standard round chainring.
Track Crankset
Not all single speed cranksets are for your fixie.
Track bikes are the high-octane version, the pinnacle of single speed cycling.
You’re not really concerned with style and grace on a track bike. The object is to go as fast as you can, complete the distance in the shortest time possible.
Fixie riding is really about doing the opposite: how long your journey takes rates way below the manner of your going—look good . . . don’t look fast.
Let’s now turn to swapping out your existing (square taper) crank for one that’s a little lighter and technically superior.
Even if you have no intention of working on your bike yourself, you’ll benefit from knowing what exactly happens with this sort of procedure.
UPGRADING A SQUARE TAPER CRANK SINGLE SPEED CRANK to an INTEGRATED CRANK
If you bought your fixie off the shelf, it probably came stock with a square taper bottom bracket and crank.
You are not stuck with that forever, though. You can upgrade to a different look and performance experience.
This section is available as the following video if you prefer.
Preparation
When doing any work on a beautiful bike, you need to think ahead to each stage and how reduce the chance of damage to the frame or the components.
The first issue is how to handle the chain.
The most convenient approach is to avoid breaking the chain. By that I mean “cutting” a link. Better to keep the chain intact.
Cutting is not the right word as we merely remove some rivets and plates and replace a link with a quick release link. Not here though. The look would not be good. A QR link would look out-of-place.
Having slackened the chain by loosening the rear axle-nuts, remove the chain gently. Firstly ease the chain away from the chainring, then fold it around the rear dropout.
We removed the back wheel in the following demo. Removing the wheel is not necessary, though.
For video purposes there’s less distraction. But, of course, it’s also one less component that could be scratched or damaged if a tool slips.
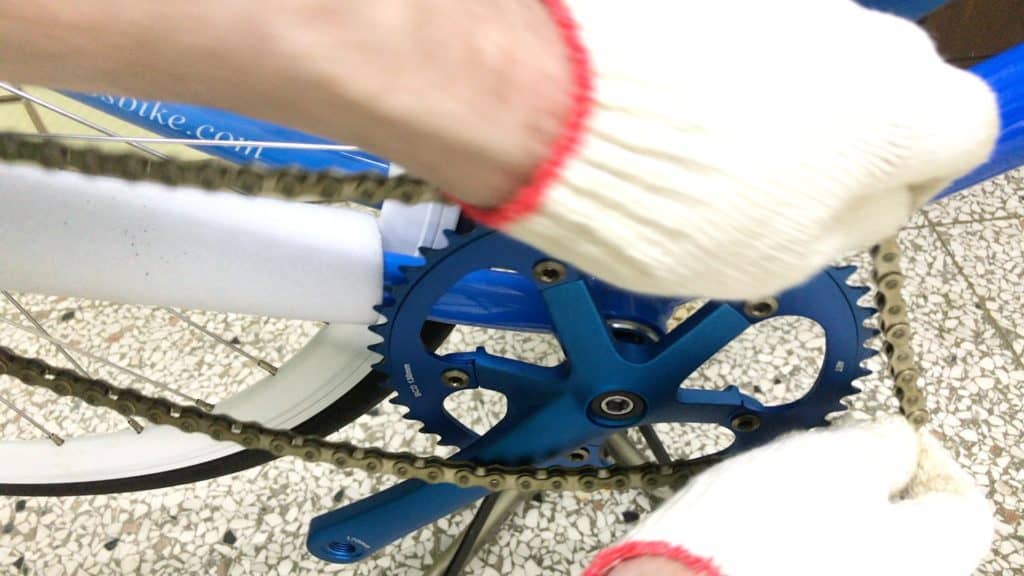
You will most likely scratch the crank arm and the chain stay if you don’t take precautions.
Wrapping newspaper, cloth or packaging material around both the chain stay, dropout, and a little way up the seat stay.
Removing a Single Speed Crank
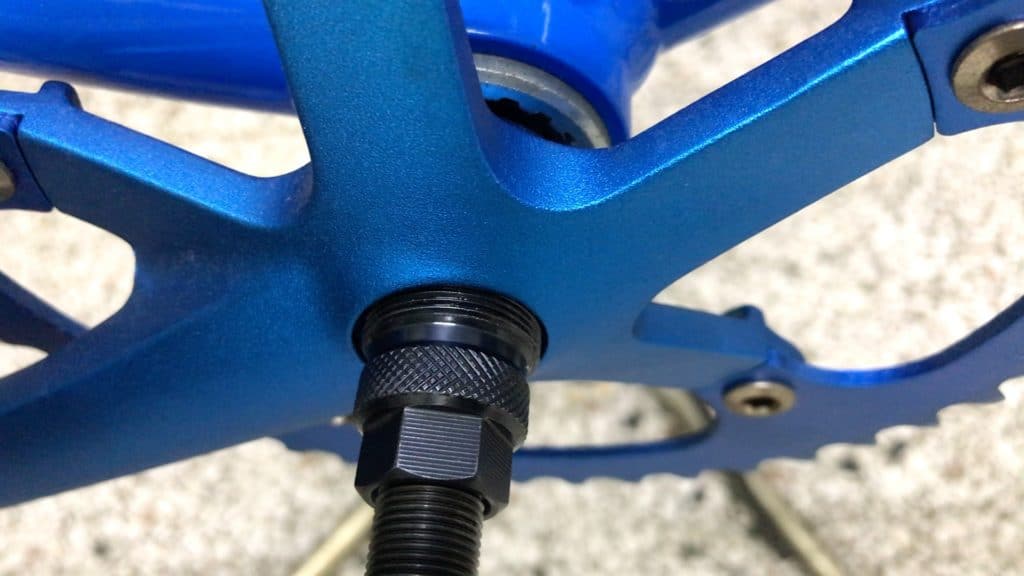
Once you’ve removed the chain, use an 8mm Allen wrench to loosen and remove the crank bolts on both sides.
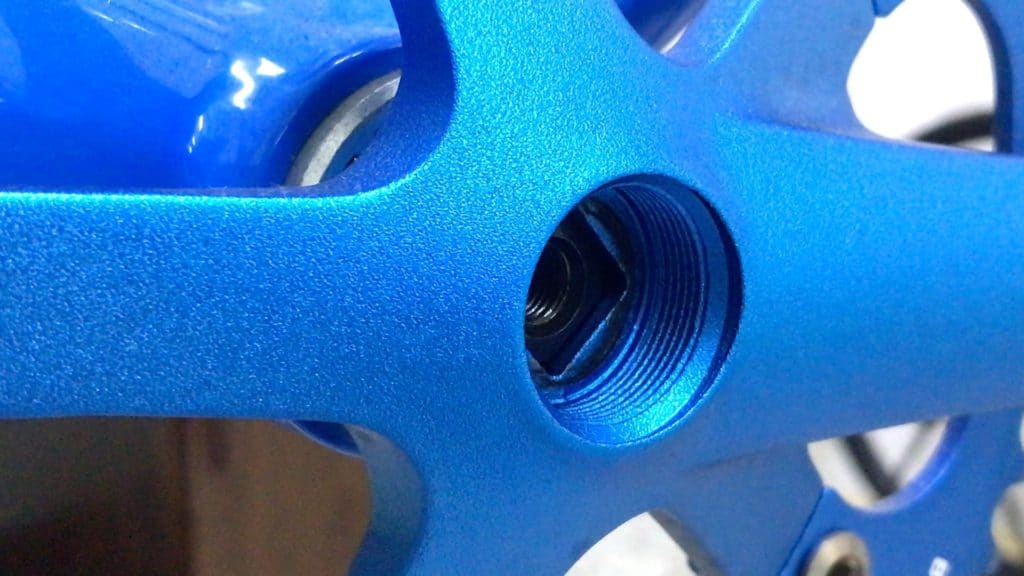
Removing the bolts reveals the crank puller threads.
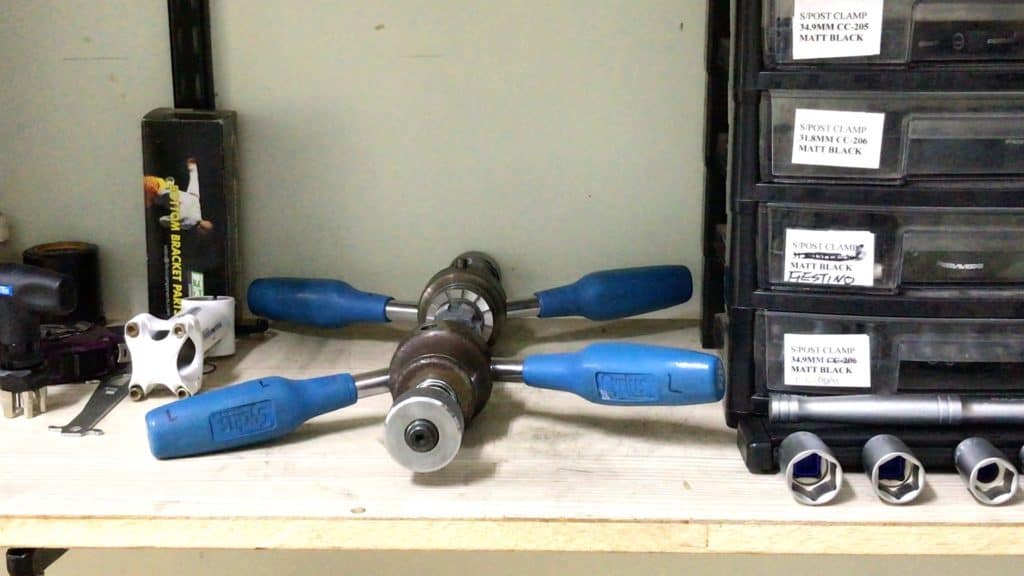
You need a crank puller for quick and easy removal the left and right cranks.
Not using one makes the process extremely difficult and greatly increases the chance you’ll damage the crank or the frame.
The crank puller works through the “foot” bracing against the spindle whilst the body grips the cranks by means of the threads.
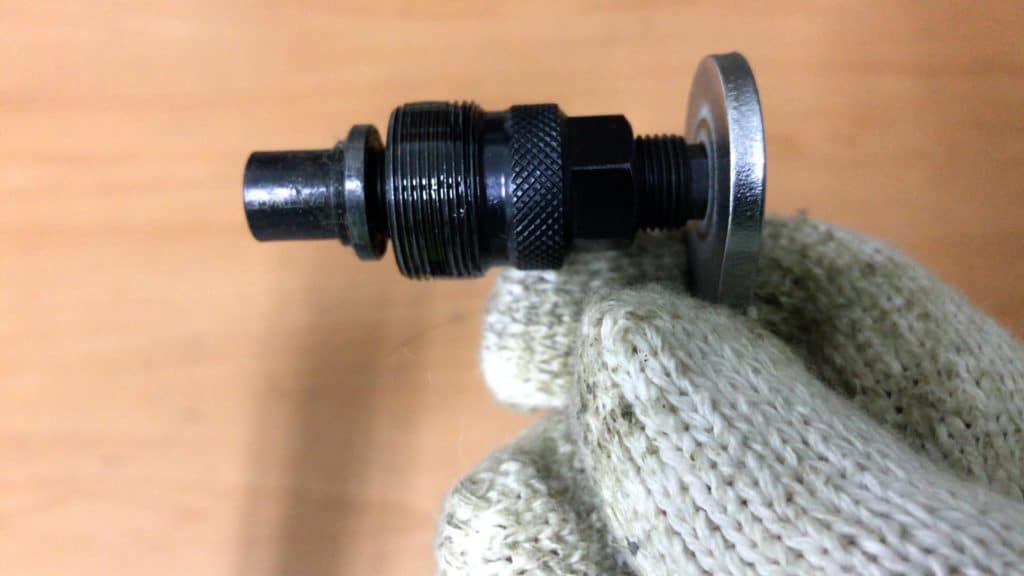
This is a crank puller that comes with a handle—the foot is the short section on the end at the far left.
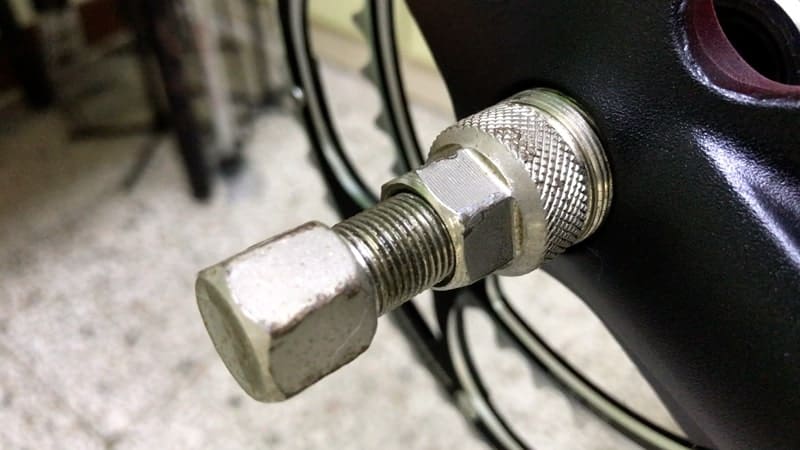
Crank pullers without handles are very common—you just need a socket or adjustable/crescent wrench for the drive.
The image above shows a crank puller without the handle. It requires a socket wrench, an open-ended wrench, or a crescent wrench to make it work.
Integrated handle models are better, since they are a little easier to use—you don’t need to concentrate on keeping the wrench in position on the tool, since it can slip.
A smear of light oil on the threads assists in screwing them in and out.
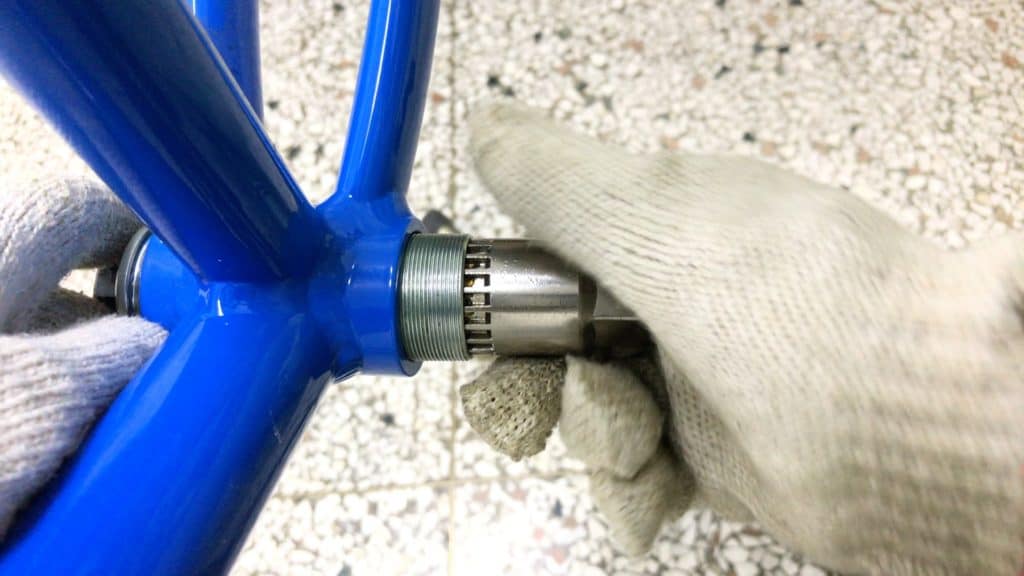
Insert the crank puller body in as far as it will go otherwise the unit may tear free of the threads ruining the crank and most probably the crank puller.
Wind off the crank, remove the crank puller, then re-insert into the opposite side and repeat.
Removing the Bottom Bracket
Then remove the bottom bracket.
This type of bottom bracket is a cartridge which inserts from the drive side. A lockring tightens into the non-drive side to secure the unit in the bottom bracket shell.
Loosen the lockring using a square taper BB socket tool, then complete its removal by hand.
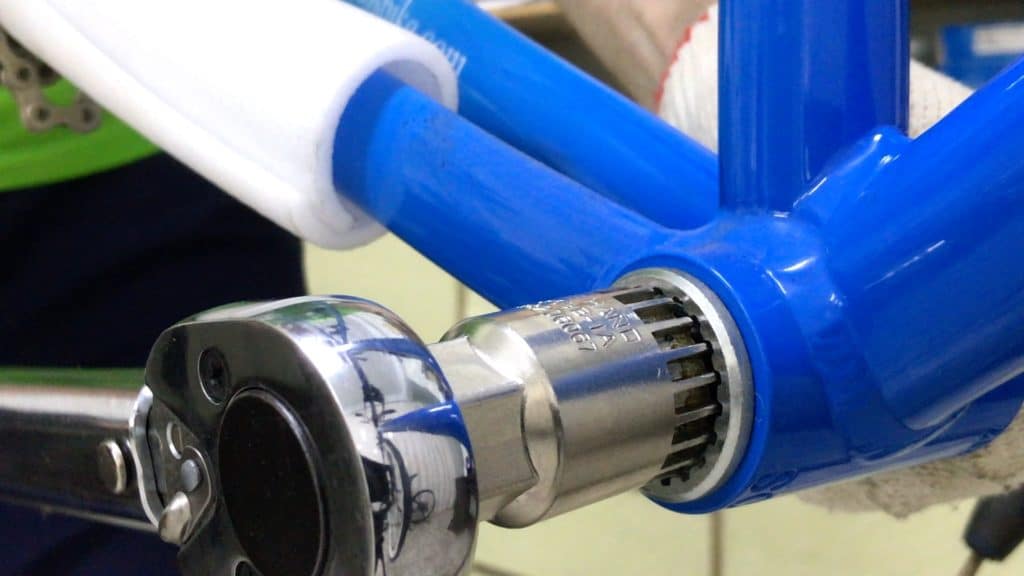
Break the drive side free and then remove by hand in the same way.
For a very tight bottom bracket, the longer the wrench handle (and therefore the length of the lever) the easier the job breaking the bottom bracket free.
Anyhow, if the BB shell was originally very precisely machined, or the BB cartridge outer diameter has been machined to the upper range of tolerance, the fit may be quite tight requiring wrench assistance all the way—again, the longer the handle, the better.
Since you’ll replace the cartridge BB with independent cups that accept an integrated crank, you should, ideally, have the BB shell faced.
If the BB shell’s exterior surface is shiny (not covered in paint and clearcoat), then the facing has been done. If not, it is a good idea to get the facing completed.
This is because the inside face of each BB cup contacts the BB shell face directly.
A clean face means the contact between cup and face is square, minimizing the possibility of movement under riding stress. Movement means noise and premature bearing wear.
Bike shops use a facing tool such as this one.
Whilst facing is not strictly necessary for your single speed bike—pretty much essential for road/racing or mtb though—this procedure is still recommended.
Let’s briefly cover the process.
The mechanic inserts the tool into each side, then applies cutting oil.
The oil is not absolutely necessary. It helps preserve the tool’s cutting edges.
This model of (tapping and) facing tool has a cutter lock button—you can see the c-clip between the handles marking the button’s underside.
When locked, the button holds the cutters back so the tapping dies may rotate freely into the BB shell during tapping.
Releasing the button allows the cutters to move against the BB shell face.
Tightening the nut against the spring increases the pressure of the cutters against the face.
You need a critical degree of pressure before the cutters begin to slice through the paint to the shell alloy.
Continuing to cut you’ll often need to tighten the nut to increase the cutter’s pressure on the BB face.
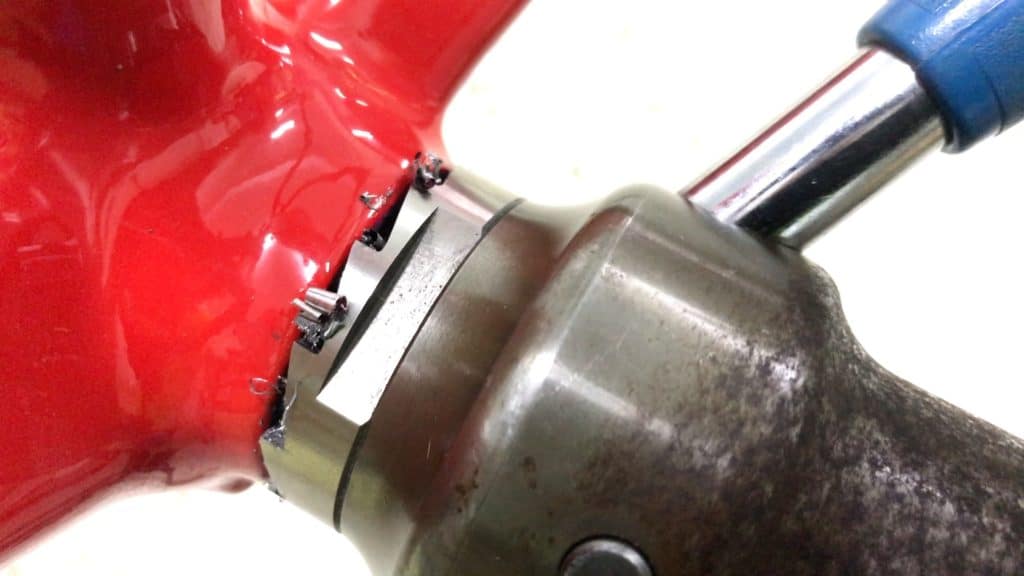
The goal is to remove the paint and a very fine layer of alloy from the surface. Doing this on each side ensures that each face is perfectly parallel to the other. That, in turn, means each BB cup and thus the cranks will also be perfectly square to each other.
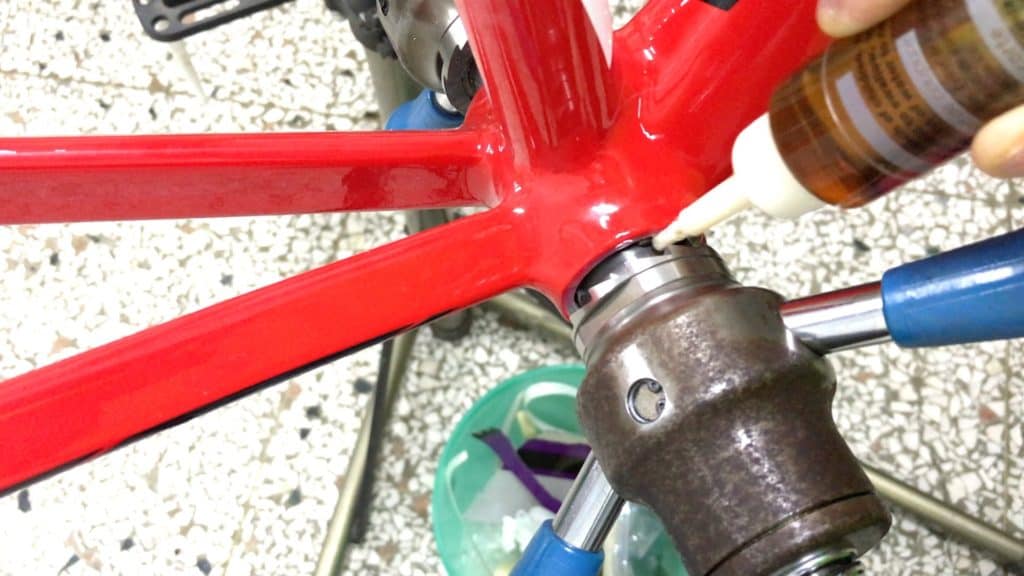
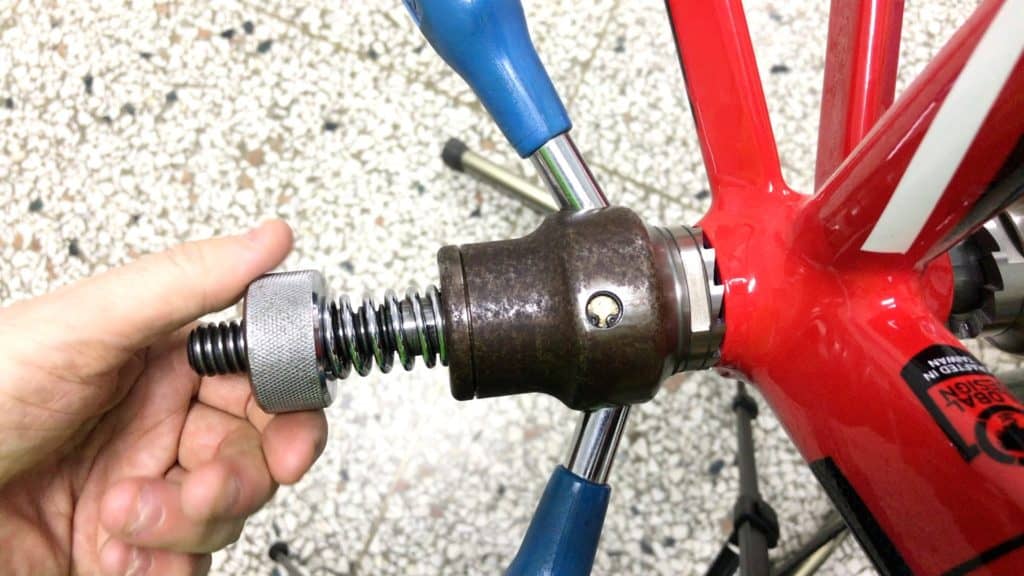
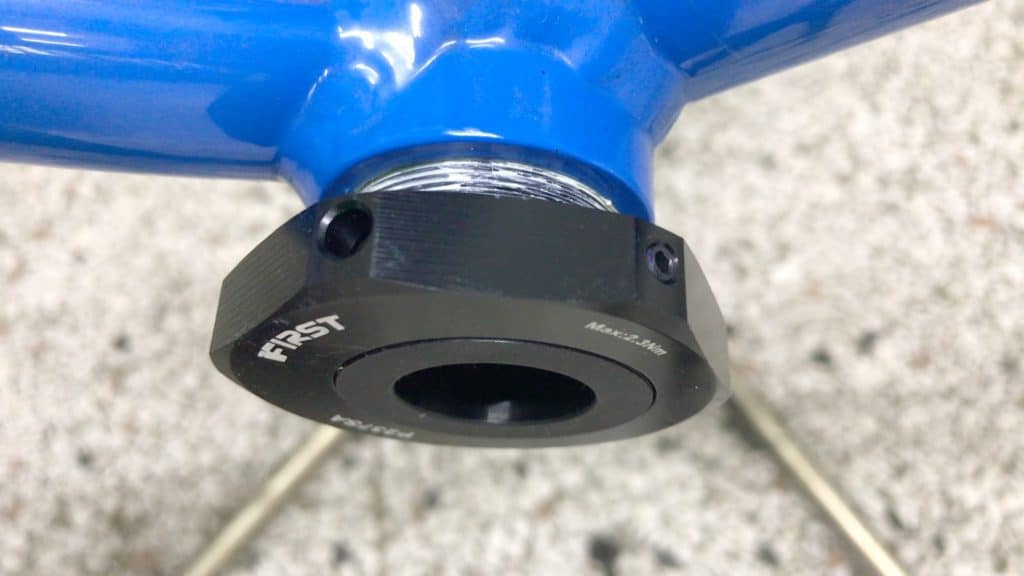
Installing the Bottom Bracket
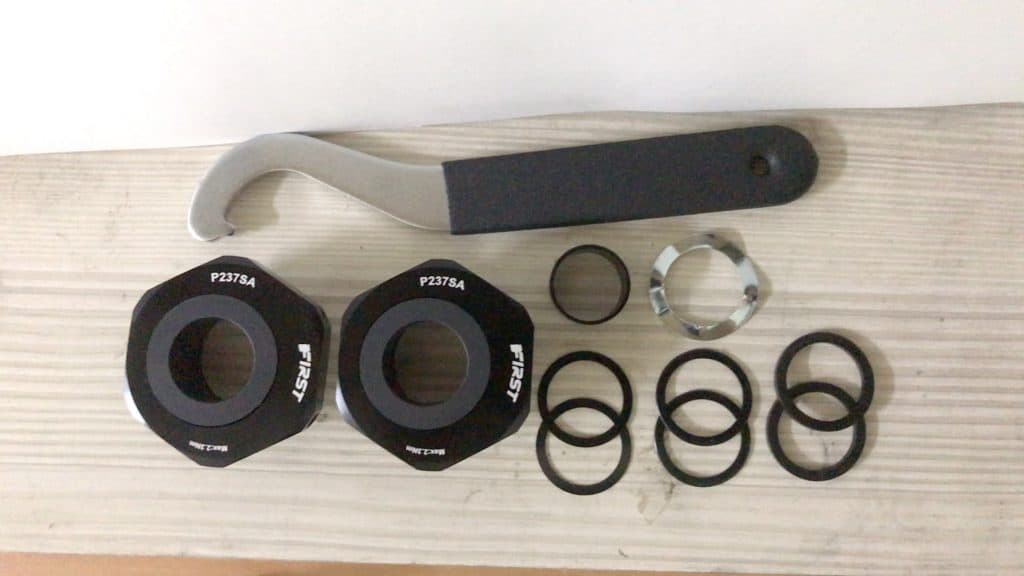
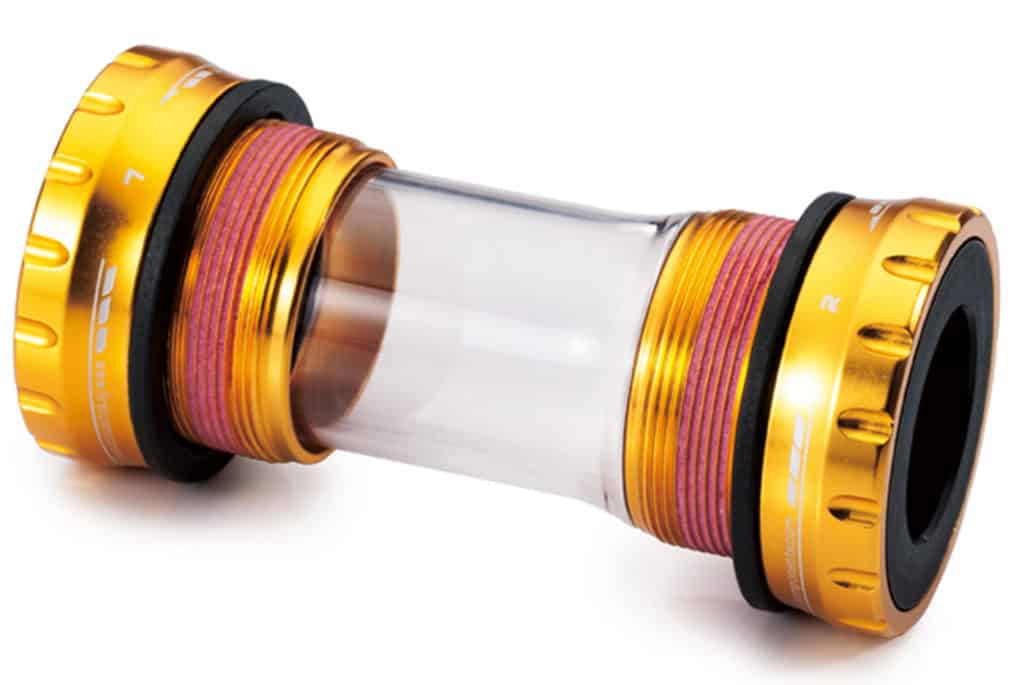
Here is the bottom bracket set we’ll be installing, for demonstration purposes.
This BB is special in that it allows a fixie’s chain to be tensioned without having to fiddle with the rear axle nuts.
You can read more about it in the Eccentric Bottom Bracket post.
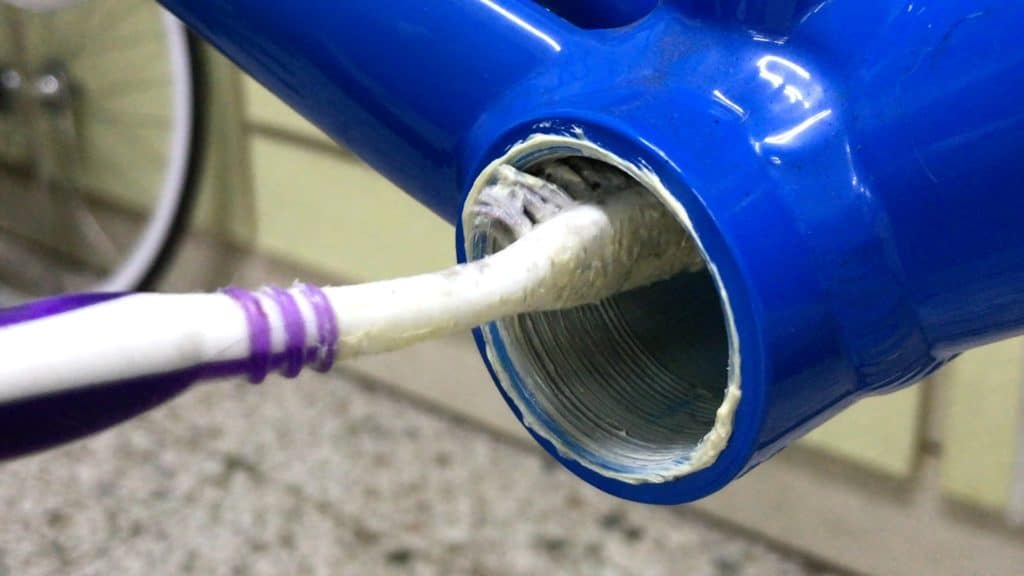
A threaded BB shell always requires a good grease on any bottom bracket install.

A good smear of grease for the bottom bracket cups as well.
When installing a bottom bracket cup, gently align the cup threads with the BB shell threads. When you are absolutely certain there is no cross-threading go ahead and tighten it up.
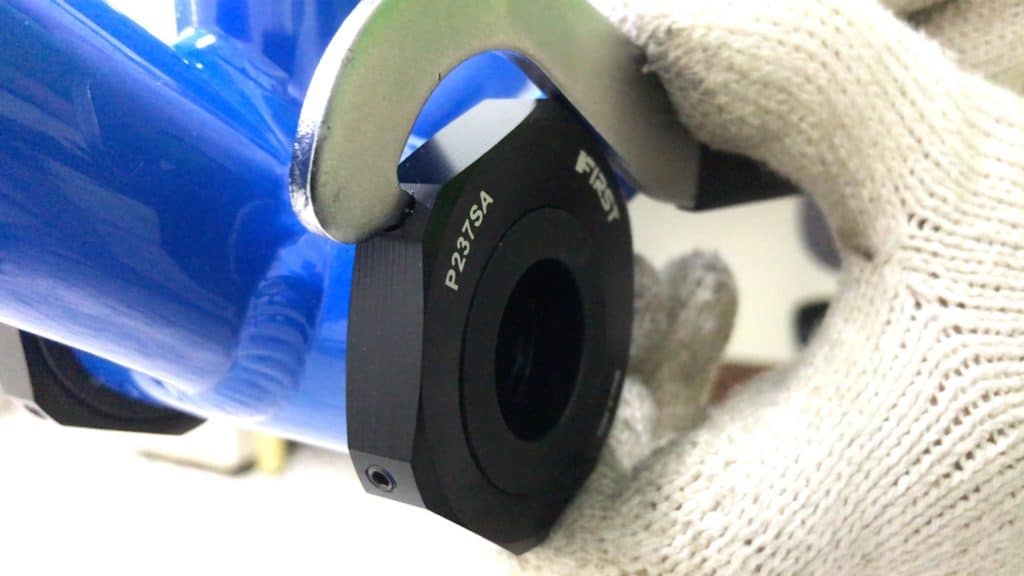
This bottom bracket has its own dedicated tool. Sufficient torque is reached by cranking the tool as far as it will go (not the best technique, but there’s no torque wrench that fits).
Installing the Crank
With the bottom bracket upgraded, this is the integrated spindle single speed crank we will install.
A smear of grease on the spindle where it contacts the bottom bracket cups inner diameter makes for a much smoother installation.
Without grease, the likelihood of the spindle sticking to the BB cup is higher. That means a more difficult installation.
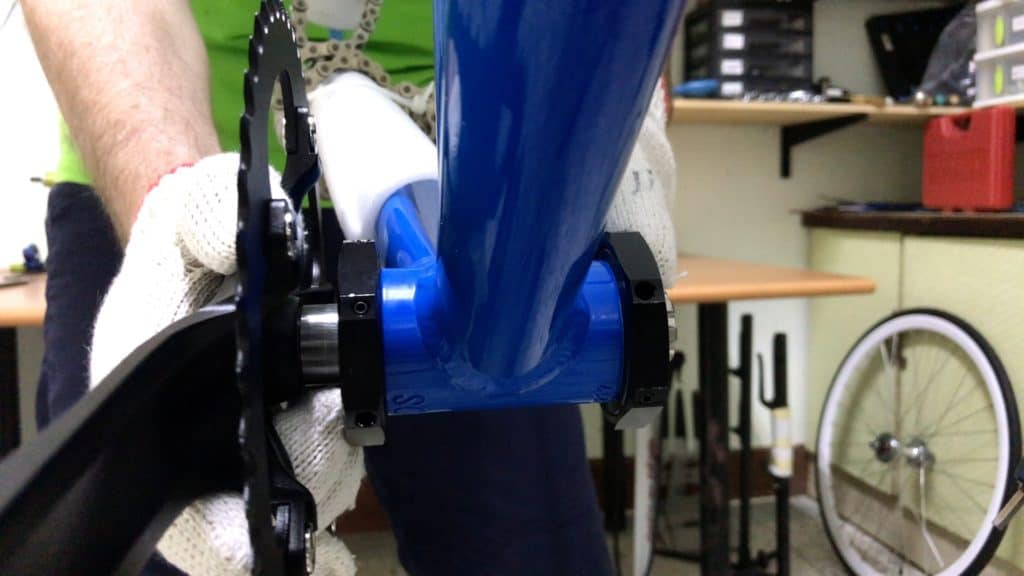
This point in the installation can be the most difficult. The spindle can “stick” against the bottom bracket cups’ inner surface.
Having greased the spindle though, a light knock slides it into position.
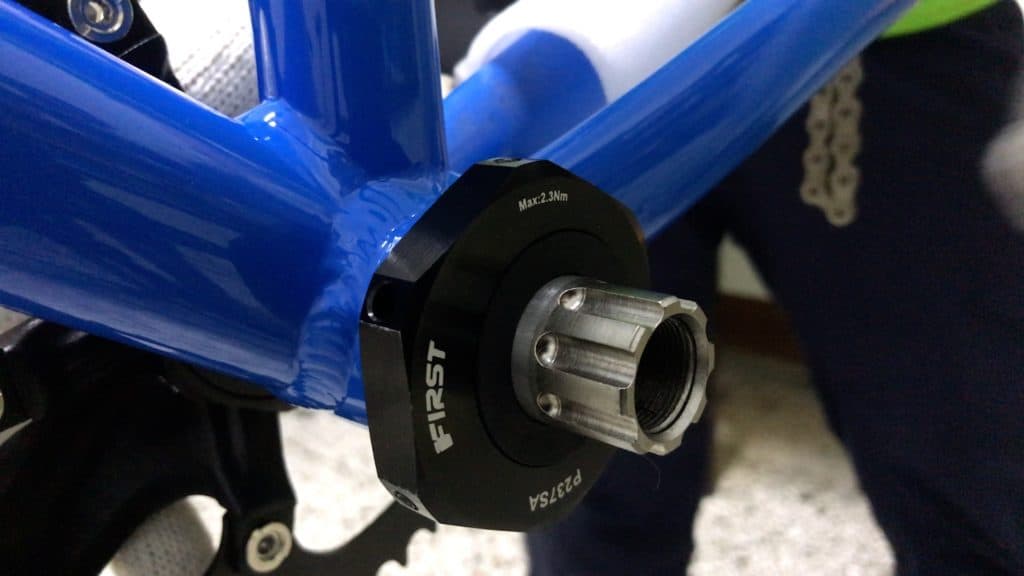
If the crank is perfectly in position, the splines protrude enough to allow you to mount the non-drive side crank arm.
A smear of grease on the splines does not hurt either.

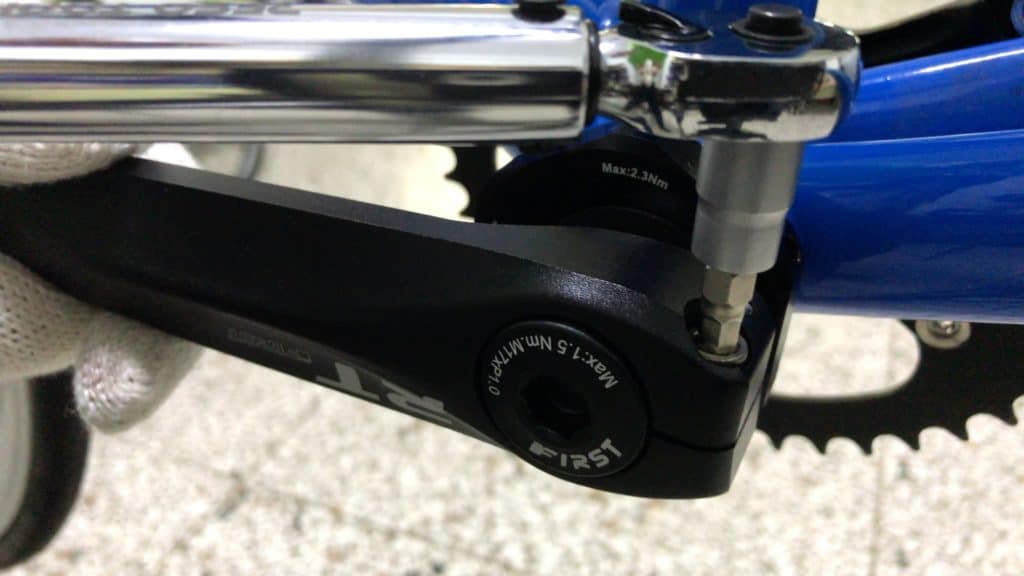
With this type of splined crank, it’s possible to install the crank crookedly. That is, make sure the left is aligned with the right at 180°.

Secure the whole assemblage with the crank bolt. Again, apply a little grease to the bolt then tighten to a maximum of 1.5Nm.
Torque Wrench & Chain Tensioning
The torque setting depends on the manufacturer’s spec for your particular brand of single speed crank. Still, most recommend from 1 Nm – 2 Nm maximum torque.
You don’t need a torque wrench to set this bolt correctly by the way. The slightest pressure from an allen wrench (don’t crank it tight) will set the bolt at around the correct tolerance.
You do need a torque wrench to achieve the correct tightness for the pinch bolts however.
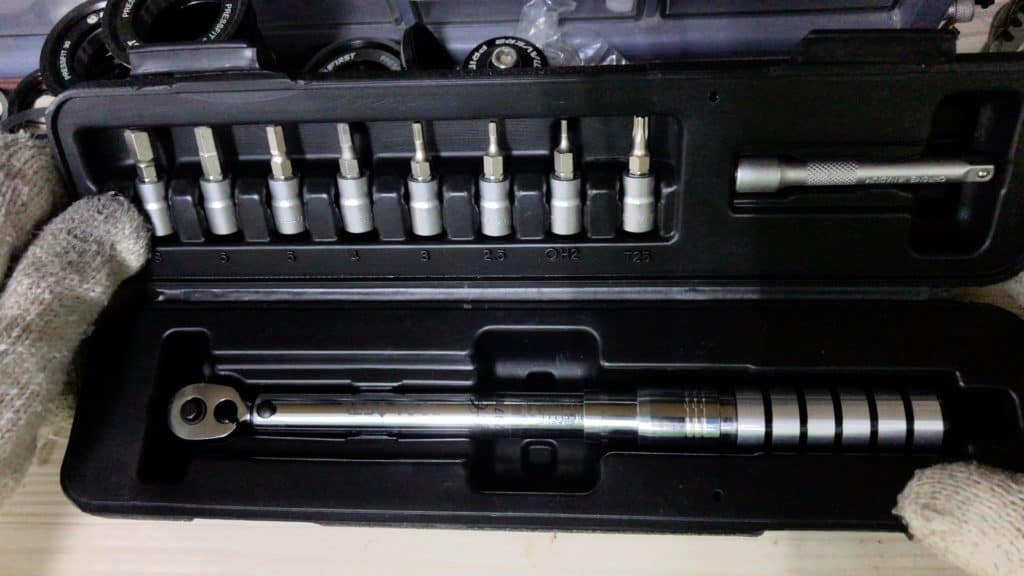
A torque set with a range of bits from 2.5mm through to 8mm is perfect for the job.
The pinch bolts of most cranks take a 5mm bit.
If you work a lot on your bike, sets similar to this one are available on Amazon.
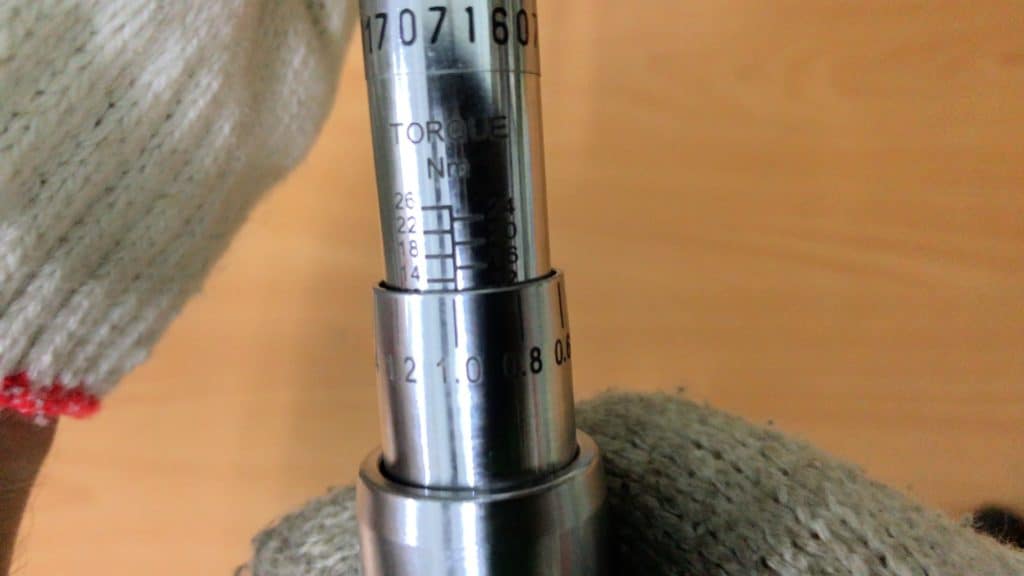
The recommended range for the pinch bolts is 12Nm at the lower limit, 14Nm at the upper limit.
This torque wrench is highly accurate, allowing incremental settings 0.2Nm apart. I’ll set it to 13nM, right in the middle.
The trick with tightening the pinch bolts is to tighten each in turn. Tighten one just a little, then the other … just a bit … then back again … back and forth.
This method ensures you tighten the pinch bolts accurately—each reaches the correct torque at the same time.
Check out the post on Integrated Headsets which goes into the technique in detail and also includes a video.
Finally, tension the rear wheel to tighten the chain, then secure the rear wheel nuts.
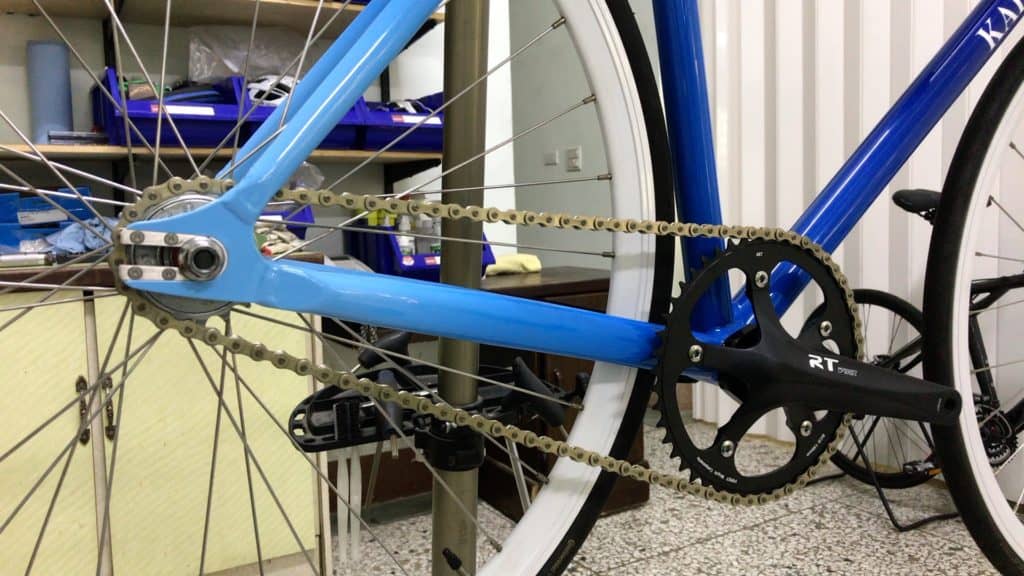
There you have it.
A snazzy new crank giving your fixie both a different feel and a different look.
What do you think?
Are you more likely to undertake this sort of upgrade having read through the post? Or is the classic square taper look and function enough?
1 Kommentare zu „Single Speed Crankset – From Square Taper to Integrated“
I think this explanation has been really well written. I feel far better informed. Thankyou