Welcome to the most detailed guide to the modern mtb headset available online—or offline.
You’ll:
- Learn how an MTB headset works
- Understand the various MTB headset parts
- Learn how to Disassemble, Assemble, and Adjust an MTB Headset
CONTENTS
How Does an MTB Headset Work?
MTB Headset Parts — What’s inside?
Remove, Replace, Install MTB Headset
Headset Tools
Why is My Headset Loose?
HOW DOES AN MTB HEADSET WORK?
It allows your front ‘end’ ie. handlebars, fork and wheel to turn to the right or left.
But, did you know that you actually turn left by first turning right?! And turn right by first turning left…
Yes. It’s due to a phenomenon we call counter steering.
A bicycle in motion is directly perpendicular to the road or trail it’s moving on.
Turning left or right is not a matter of simply cranking the handlebars to the left, to veer left, or to the right, to veer right.
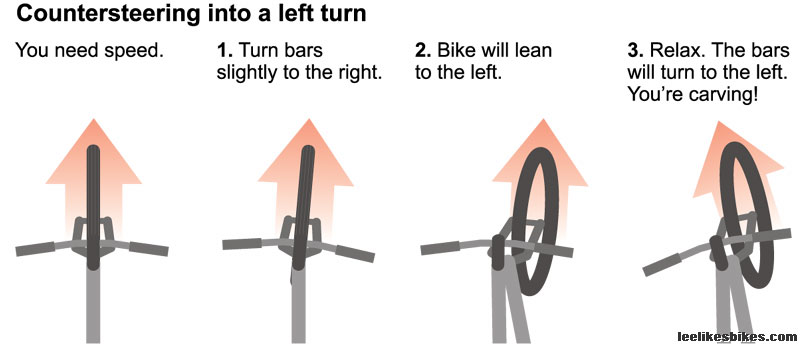
Your bike must first be knocked out of its perpendicular alignment with the road.
You do that by very slightly turning the handlebar in the opposite direction to the intended turn.
You’ll only notice you are doing this whenever you turn by paying close attention as you go through the motion—easier on the road; almost impossible on the trail.
Of course, the device that makes counter steering possible and gets you heading in the right (or left…) direction is your headset.
MTB HEADSET PARTS
Modern mtb headsets are known as integrated headsets.
Integrated means that the headset bearings sit within containers built into your mountain bike frame’s head tube.

Before integrated mtb headsets came along, we had to press cups into the head tube to hold the bearings.

And that required a specialized tool called a headset press.
Having to use this tool made a simple job into an unnecessarily complex one.
An integrated headset takes away the complexity.
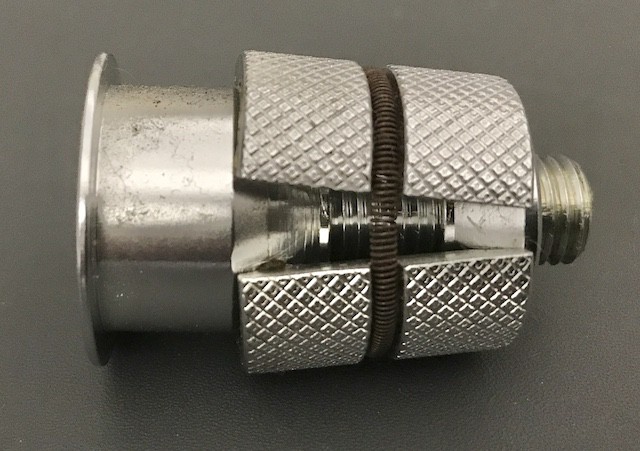
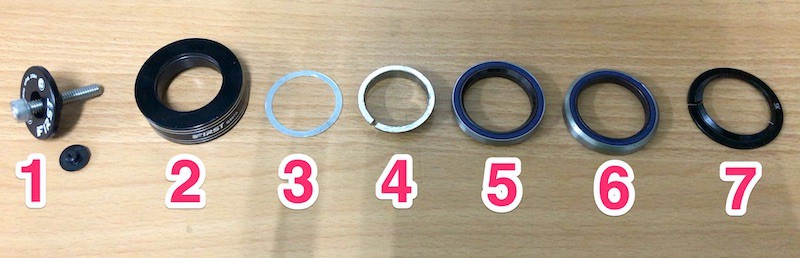
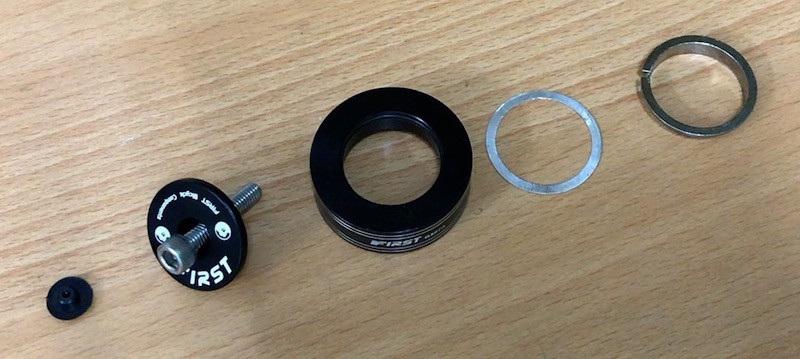
An integrated mtb headset consists of 8 parts: six pieces slide down over, around and into the fork from above; two pieces sit between the fork crown and the bottom of the head tube.
I’ll go through the list of items in the reverse order of installation (I cover installation in detail below).
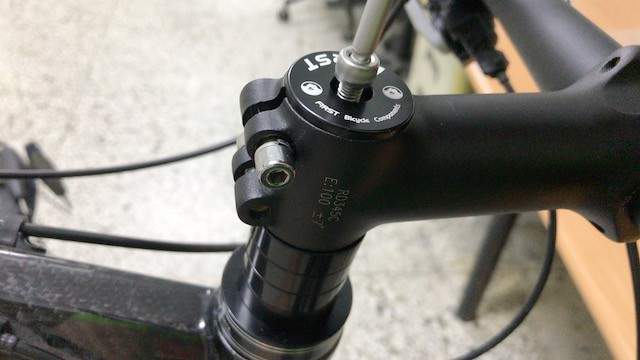
1. Top cap
An mtb headset’s top cap works together with the compression bolt that compacts the headset into a functioning unit.
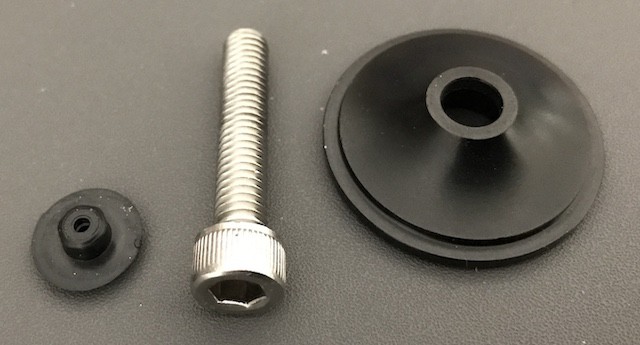
The compression bolt slides through the center to screw into the star nut or expander’s threads.
The rubber bung slots into the bolt’s hexagonal head aesthetically integrating the bolt with the top cap.
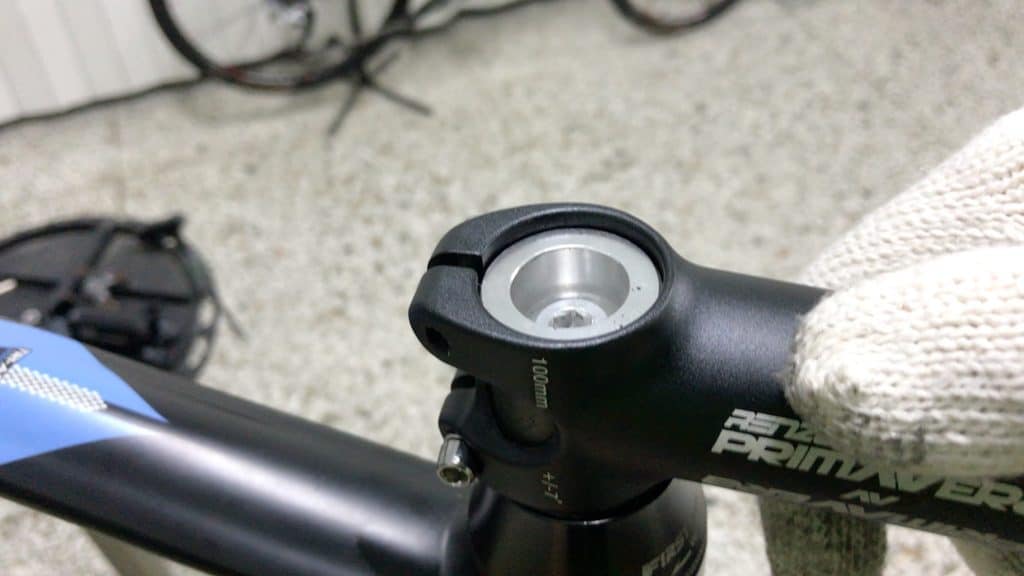
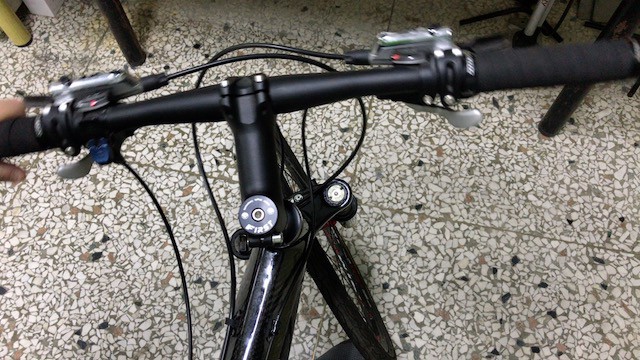
The top cap sits flush on top of the stem, the curved inside edge bracing against the top of the stem but arcing down into the steerer which is cut to within 3mm (ideally) of the top of the stem.
That 3mm allows the top cap to snug down into the stem.
If the steerer projects any higher, the top cap presses against it, preventing the required tight seal against the stem resulting in a loose headset.
The groove along the circumference fits around the top of the stem with the cone projecting down into the space between stem and steerer.
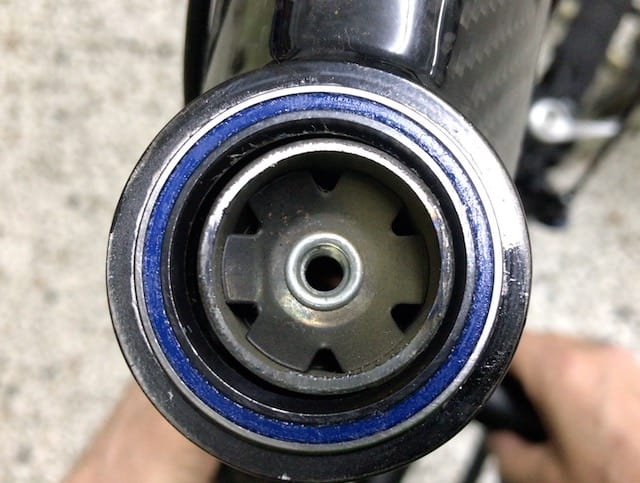
2. Star Nut or Expander
Star nuts and expanders provide the anchor for the compression bolt, enabling a headset to be tightened.
Star Nut
The star nut—also known as the star “fangled” nut—is tapped down into a steel or alloy steerer with a special tool and hammer.
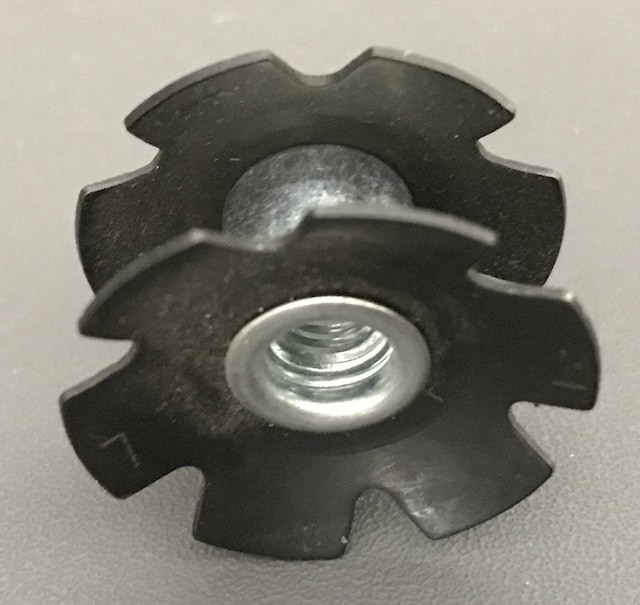
The nut’s flanges lock against the inside walls of the steerer, forming an anchor for the compression bolt.
Tightening the compression bolt into the nut’s center threads compacts the headset, pulling the fork to the stem.
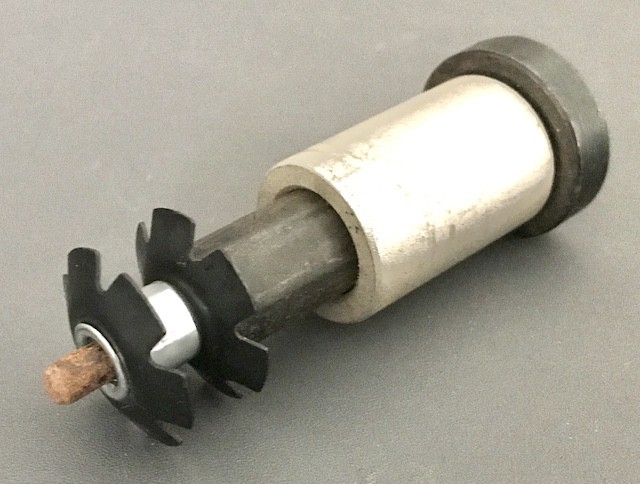
Installing the star nut to the right depth and straight inside the steerer requires a star-nut setting tool.
For the model above, the star nut slots over a guide rod. The lower part is encased in a sleeve (not pictured) which sets the depth by fitting over the steerer.
You drive a star nut into position by hammering the tool’s impact surface, which needs to be made of hardened steel for obvious reasons.
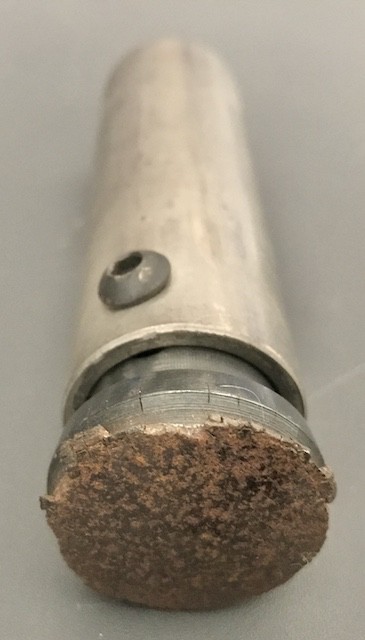
This Park Tool model has not stood up to continual use well—the impact surface is too soft and has compressed, then splintered. Not the best shop tool for this job.
Expander
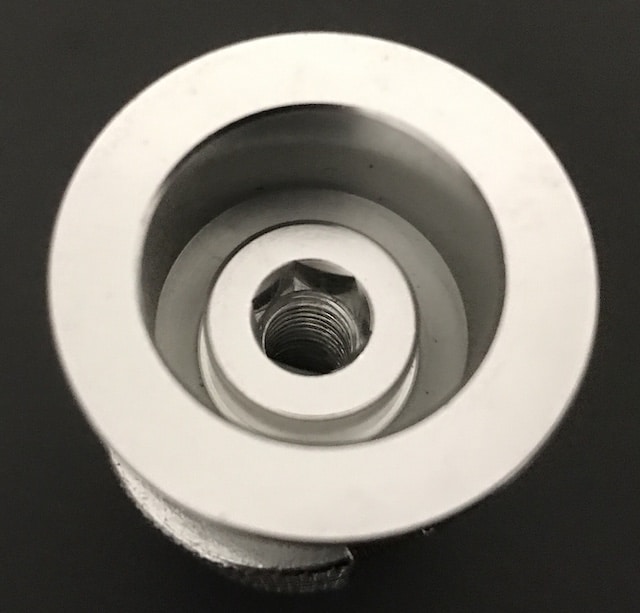
An expander is for use on a carbon fork that has a carbon steerer since a star nut would
- tear up the steerer
- force it outwards in a bulge preventing the stem from slipping into place at the top of the steerer
Expanders install by slipping inside the top of the steerer. The top of the expander projects above the steer, requiring an extra millimeter or so to be cut off compared with a steel or alloy steerer.
A 6mm Allen wrench fits into the top of the compression bolt hole.
Turning it slowly forces the cross-hatched plates into the carbon steerer. The sweet spot is just before the steerer begins to bulge under the pressure.
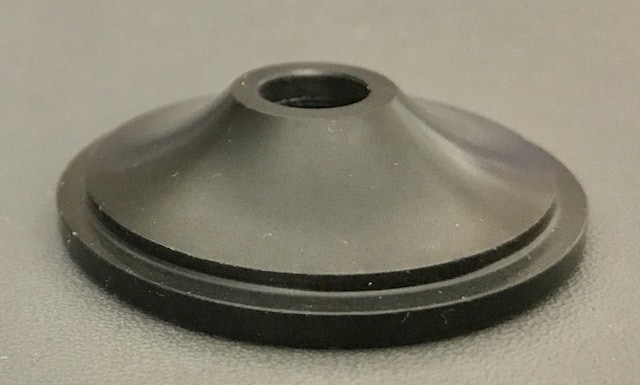
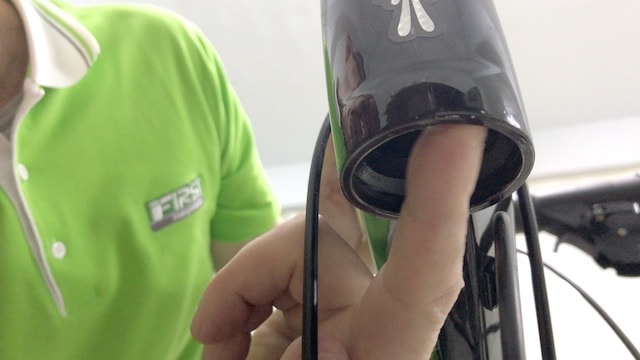
3. Dust Cap
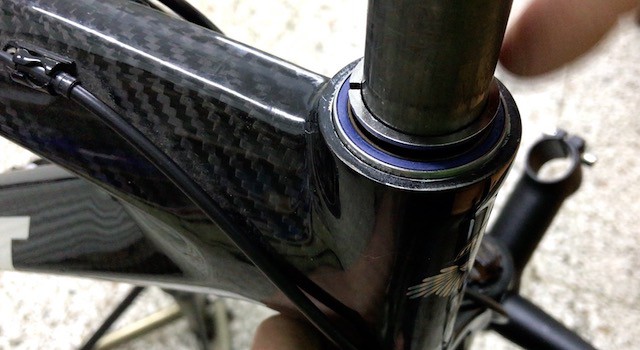
The dust cap prevents water entering the top bearing by sealing everything below it.
Top caps vary in size and shape according to the design, but all have a rubber gasket which fits over the spacer, compression ring and top bearing, an effective seal which keeps out most of the dirt.
4. & 5. Spacer and Compression Ring
0.1mm thick spacer sits on top of the compression ring.
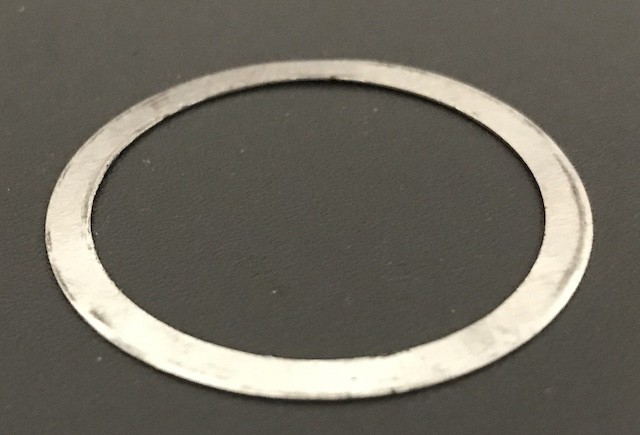
This wafer-thin spacer is easily damaged and must be handled with extra care.
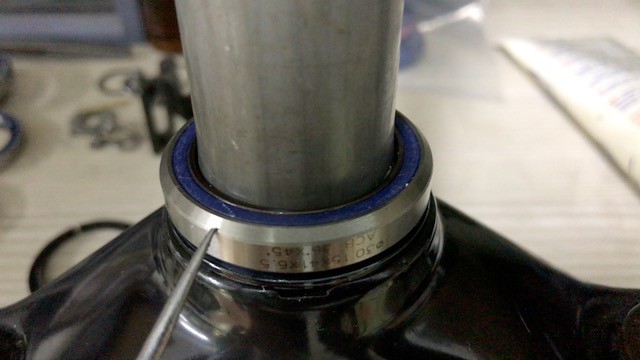
The compression ring slots into the top of the sealed bearing, the main function being to position the steerer exactly in the center.
Like a spring washer, it very slightly compresses around the stem as you seat it in the bevelled edge of the sealed bearing.
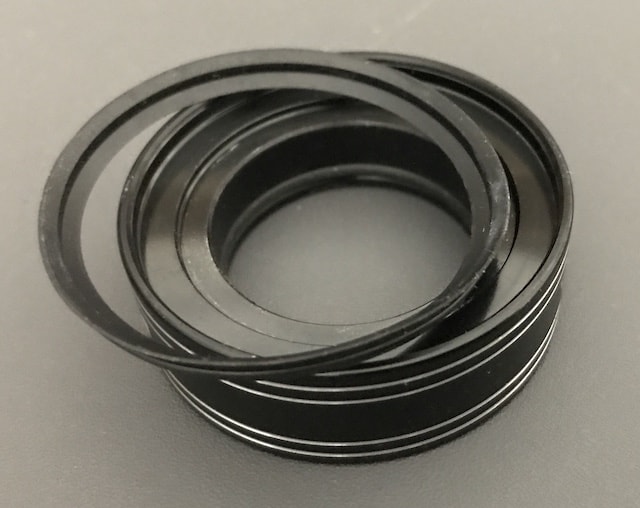
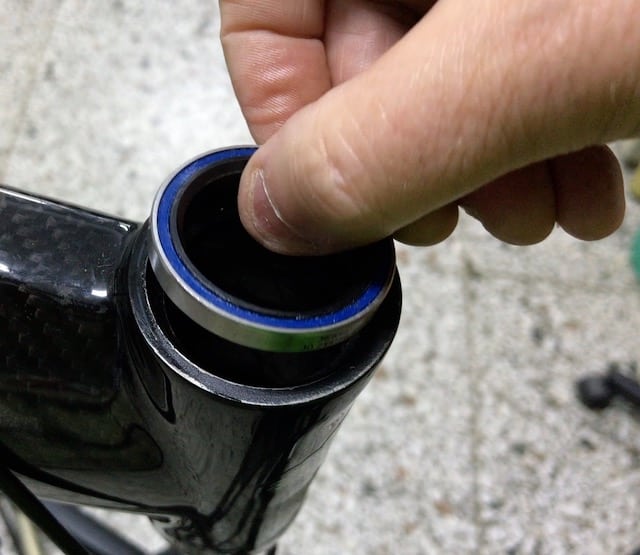
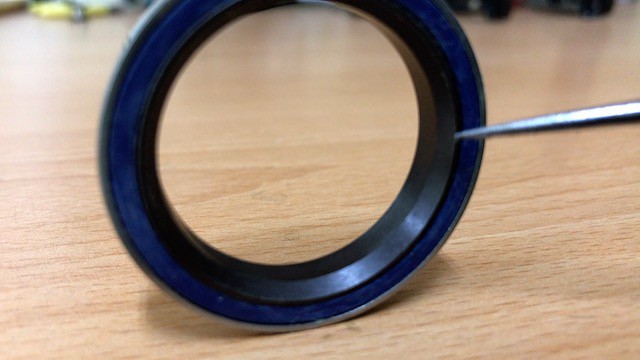
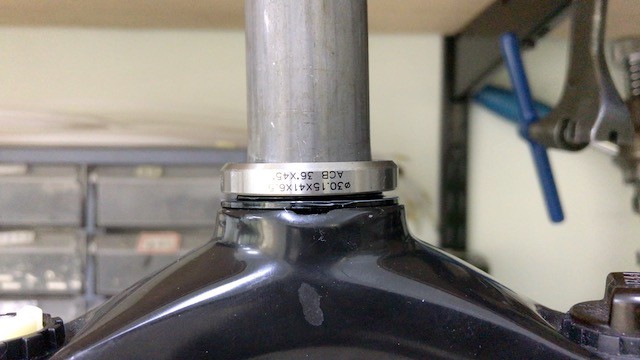
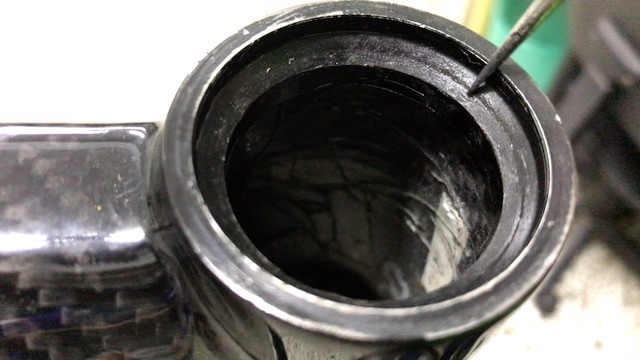
6. & 7. Upper & Lower Sealed Bearings
The sealed bearings are mirror images of each other; one sits in the top of the head tube; the other sits up inside the bottom.
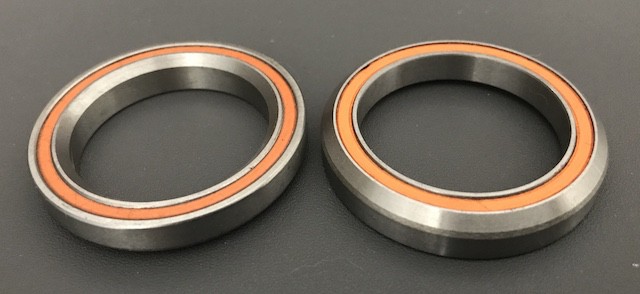
The bearing on the left shows the position the upper bearing’s position. Its lower bevelled edge sits in the head tube’s flange designed to receive it.
The lower bearing’s (right) inner bevelled edge fits against the crown race.
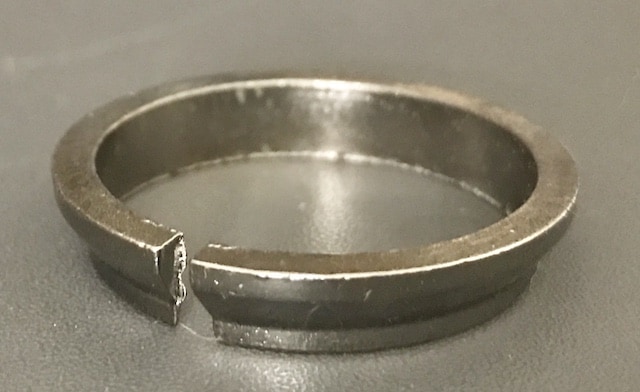
8. Crown Race
“Fork” crown race to be exact.

The race sits as illustrated in the image on the fork crown. The inside bevelled edge of the sealed bearing slots against it on top.
Opposite to the compression ring, the race expands around the section where the steerer enters the fork, as you push it down onto the fork crown.
REMOVE, REPLACE, OR INSTALL MTB HEADSET
Because mtb headsets are integrated headsets, they are easy to install and remove.
In this section I show you what tools to use along with effective techniques.
Or check out the video which covers everything in detail.
MTB Headset Tools
The only tools you need are a set of Allen wrenches and an awl or a small flat-headed screwdriver. (A torque wrench is a great investment all the same.)
Allen wrenches are the most useful tools for any bike component installation maintenance, or removal.
So you’ll use a set for much more than just your headset.
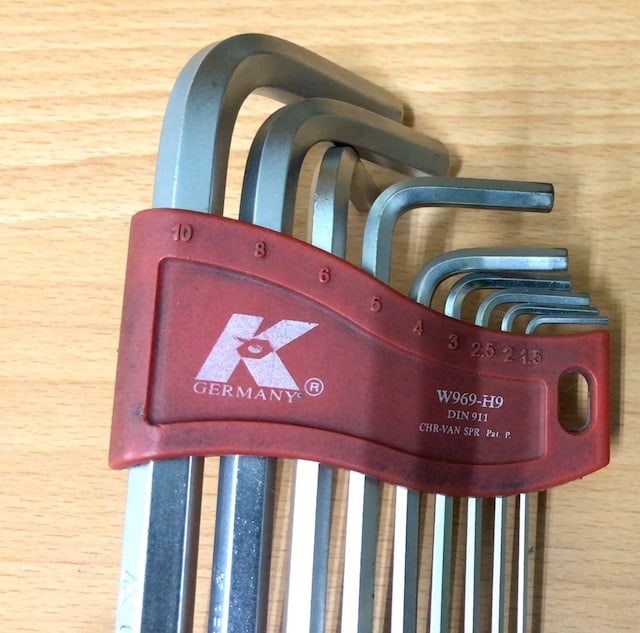
An L-shaped set ranging from 2mm to 10mm will do the job, providing good leverage and a hex head at both ends.
German or Japanese branded sets are best— they’re harder, meaning the hexagonal edges don’t blunt or ‘smear’ with use.

The best Allen wrench set has a handle which improves your grip and the amount of leverage you can bring to bear.
Although you won’t need a lot of leverage when working with headsets, those handles will come in handy when faced with more difficult bolts, and bolts that require a lot more torque.
Remove Peripherals from the MTB Fork
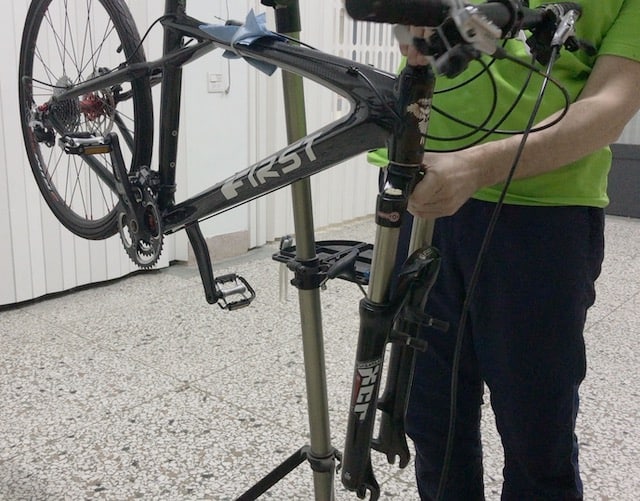
Changing a headset means the fork must be removed.
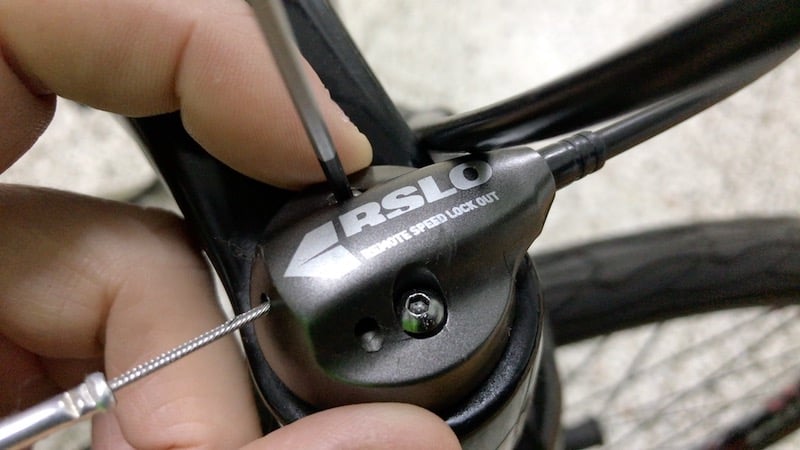
So firstly remove all attachments such as a remote speed lock out if installed.
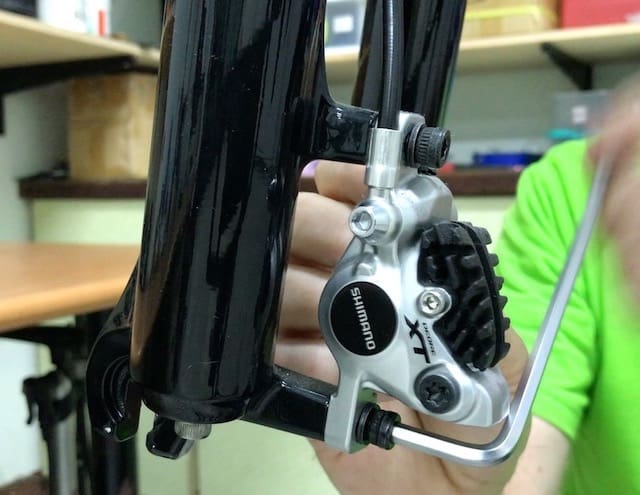
Also loosen then remove the disk brake caliper bolts with a 5mm Allen wrench.
Since they are still attached to the bike by cable or hydraulic hose, wrap these items up and even zip-tie them to the frame to prevent them swinging about and impacting the fork or the down tube (especially important if you have a carbon frame) when you are removing and re-installing the fork.
Removing the 3 Main Bolts
The three main bolts are: 1. the compression bolt 2. the left stem bolt 3. the right stem bolt.
Loosen each of the stem bolts a little in turn, taking turns. Here I’m loosening the left.
Now to loosen the right stem bolt. Screw them out a fair distance, without removing them completely.
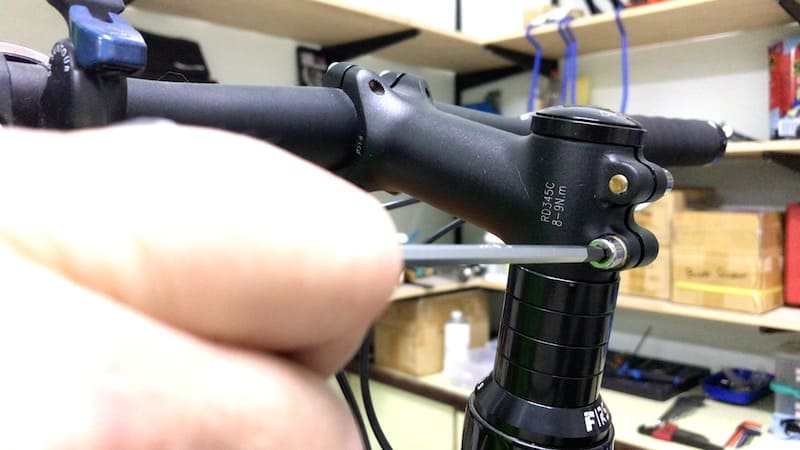
Remove the top cap rubber bung.
Then unscrew the compression bolt.
Important!—support the fork from below.
Although the stem bolts do the main job of securing the fork (via the steerer) to the stem, the compression bolt is the one that initially pulls it all together.
Note the technique: supporting the fork in the left hand and working on the rest with the right (or vice versa if you are left-handed).
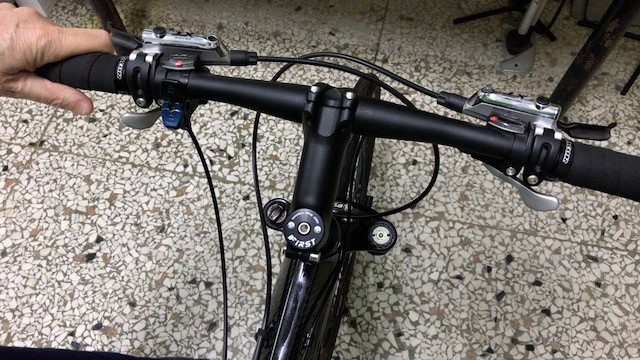
Having put the compression bolt and top cap to one side, slide the stem and handlebars off the steerer.
They are still connected to the bike through the brake and derailleur cables, but it’s perfectly ok to let the handlebars dangle next to the bike. Just ensure they don’t bang into the frame though.
Carbon or alloy stems tend to stick more to carbon steerers, but slide more easily against alloy steerers.
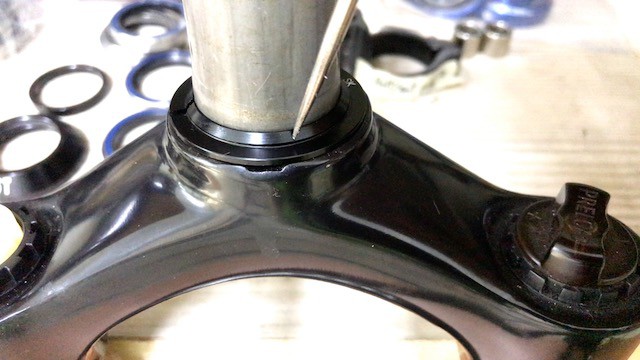
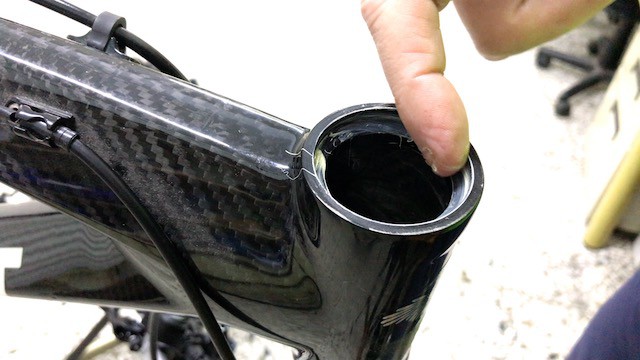
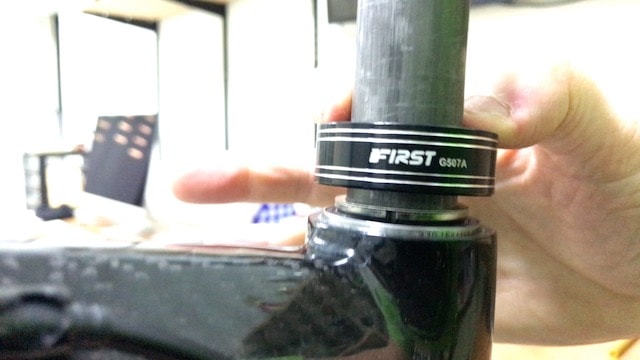
Removing Dust Cap, Spacer, & Compression Ring
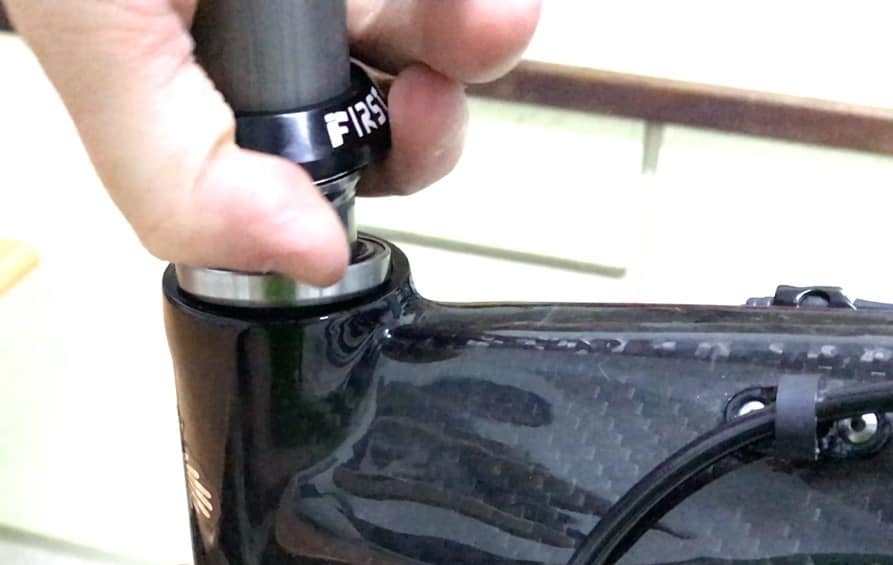
Dust caps fit snugly around steerers, so you’ll have to twist firstly one way, then the other as you work the cap up to the top of the steerer—spacer and compression ring slide off easily.
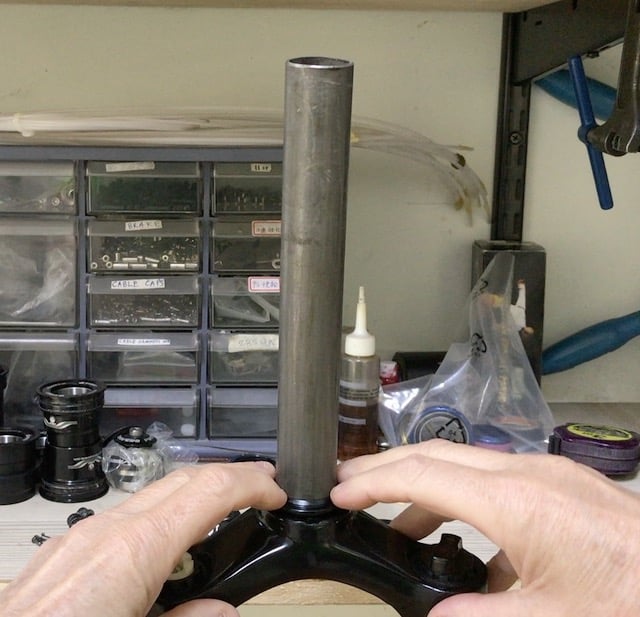
Slide the steerer out of the head tube, leaving the sealed bearing in position for now.

Continue to keep the handlebars clear of the down tube to avoid frame damage. Place the fork on your work bench.
Now lift out the sealed bearing.
New MTB Headset
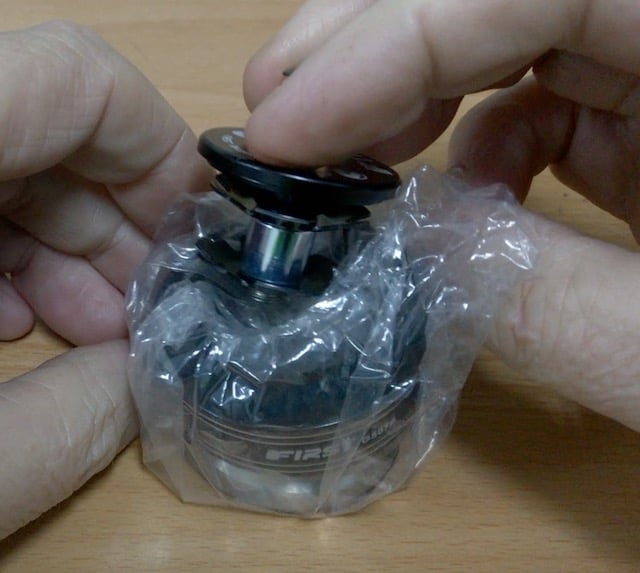
New mountain bike headsets should come wrapped in plastic to protect dust getting into the parts prior to installation.
The star nut is screwed onto the compression bolt and pushed down into the unit; unscrew it and store away, unless you are installing a new fork without the star nut installed.
Lay out all parts in the order of assembly beginning with the crown race, No. 7.
Crown Race and Bearing
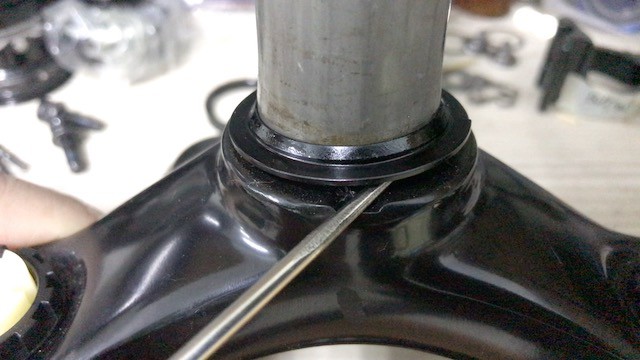
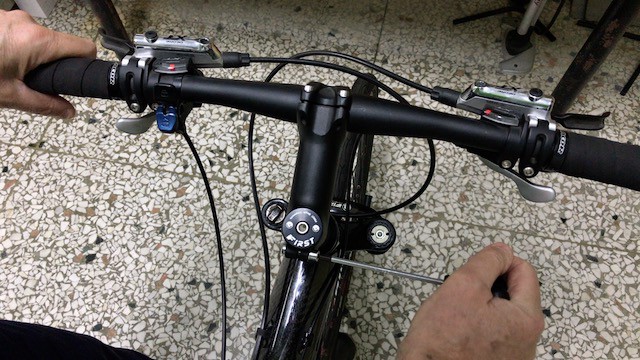
Use an awl or a small flat-headed screwdriver to prise the old crown race away from the bottom of the steerer.
Or leave it in place if it’s not corroded or otherwise in good condition.
The new crown race is easily positioned with light finger pressure—you’ll experience a little resistance as the ring expands around the steerer base.
It often “clicks” home or you’ll simply see it snug down onto the fork crown.
The inside bevelled edge of the lower sealed bearing is designed to slot exactly into the crown race’s similarly bevelled inner race.
The bearing slides down.
You’ll note a small gap between the race and the bearing as the bearing’s inner race sits against the bevelled edge of the race.
The bearing’s bevelled outer race slots into the head tube’s lower flange when the fork is re-installed into the head tube.
And the upper sealed bearing slots into the top of the head tube in the same way.
Smear grease inside the lower section to prevent direct alloy-on-alloy contact which may be the source of creaking in the future.
And inside the upper section.
Upper Assembly
You are now left with the upper assembly: compression ring, spacer, dust cap, and top cap.
Having greased the head tube and sealed bearing’s bevelled edge, drop the bearing into position, slide the fork back into the head tube, then slide the compression ring down as close as you can to the bearing.
The compression ring often won’t snap neatly into position since the steerer is still able to move from side to side. Not a problem—keep going.
Slip the spacer on top followed by the dust cap.
As you push the dust cap down into position, push up on the fork from the bottom.
The dust cap’s grip on the steerer will generally hold everything in position. But keep an eye on the fork to see whether it slowly slides back towards the floor once you have let go.
Tightening the 3 Bolts
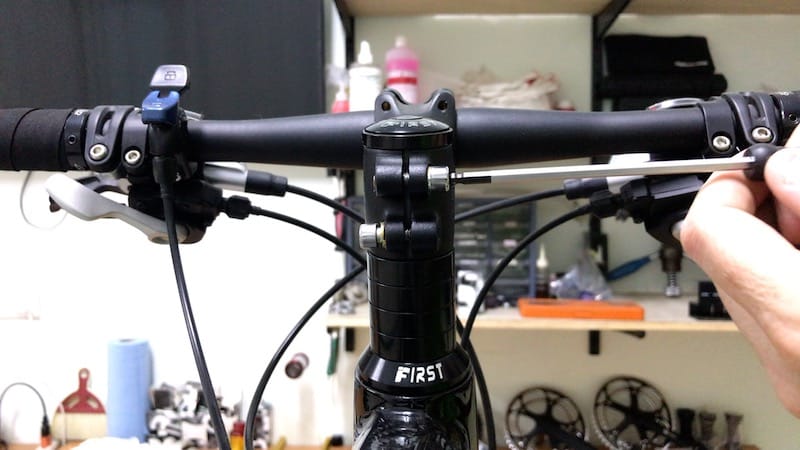
Slot the stem into position on the steerer.
Then screw the lightly greased stem bolt with the top cap all the way in.
How Tight Should an MTB Headset Be?
The function of the compression bolt is to pull each component in the headset together so there is no play or movement.
Important! Not much tension is needed to achieve this.
No more than 2Nm of tension should eliminate any play. (I’ll go into detail about what to do if there still is play, below.)
You’ll know it’s too tight if the steering is stiff. That is, the steering sticks in one position with the front wheel off the ground.
There should be:
- no play
- the forks should turn left and right with ease.
Once the tension is dialed-in, it’s time to firm up the stem bolts.
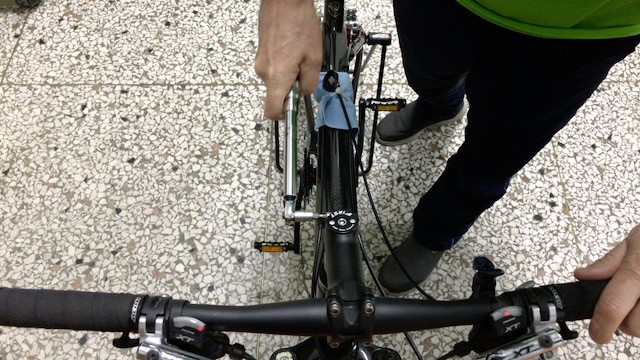
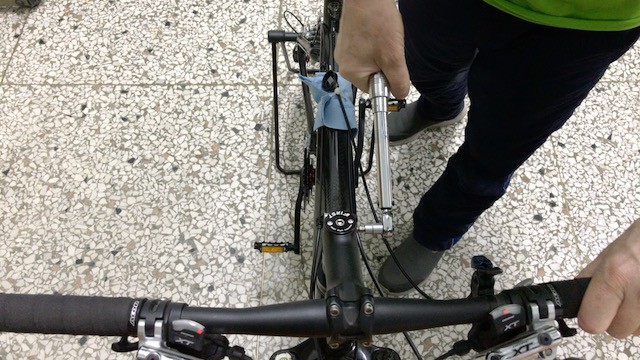
Tightening the Stem Bolts
Whenever you loosen the stem bolts, the front wheel and handlebars easily twist out of alignment.
Line up the stem with the front wheel.
There is a tool you can use to get the alignment exactly right. But aligning the stem with the front wheel to within a millimeter or two is not difficult; just takes a good eye.
Take a line of sight, then lightly tap or push the handlebars to the left or right.
Once aligned, quickly tighten the left or right stem bolt with an Allen wrench, enough to hold the alignment before you tighten any further.
Then tighten each side a little in turn, enough to get the bolts reasonably tight.
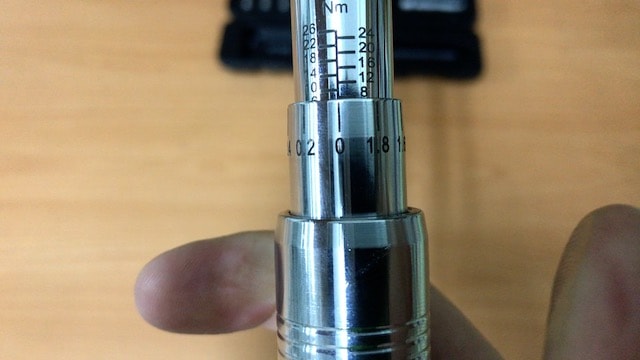
Finishing the job off properly requires tightening to the correct torque.
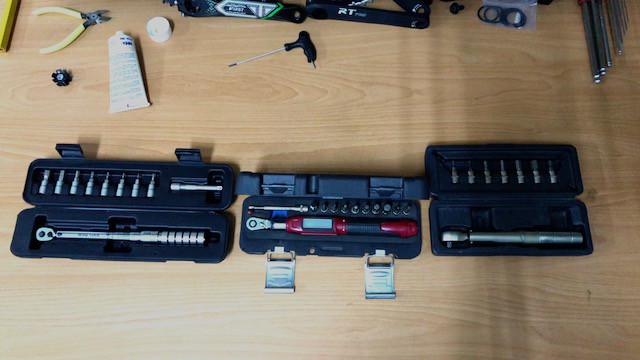
Affordable torque wrenches are available on Amazon:
- Avoid the model on the far right—the calibration scale is too hard to read.
- The center unit is electronic—it is prone to malfunction and eats batteries
The one on the left is the most practical with its pinpoint accurate calibration system.
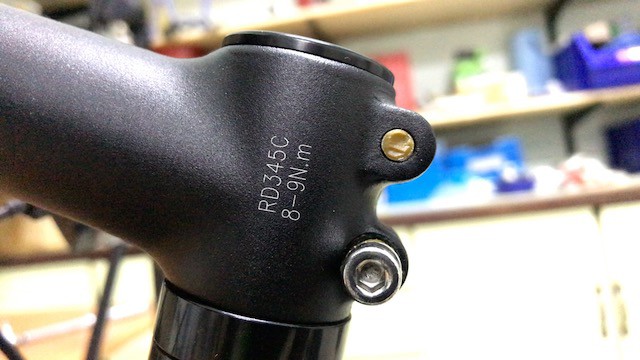
The recommended torque setting for the stem bolts is often printed on the stem.
If not, then 8-9Nm is a safe setting.
The technique for reaching correct torque is to tighten each side a little, one turn at a time.
Once the wrench “clicks”, indicating torque is reached, continue to the other side, and then double check that each side has actually reached the correct tolerance by continuing to tighten (when you tighten one side, reaching torque, the other side usually regresses a little, requiring an extra turn or two to bring it back to tolerance).

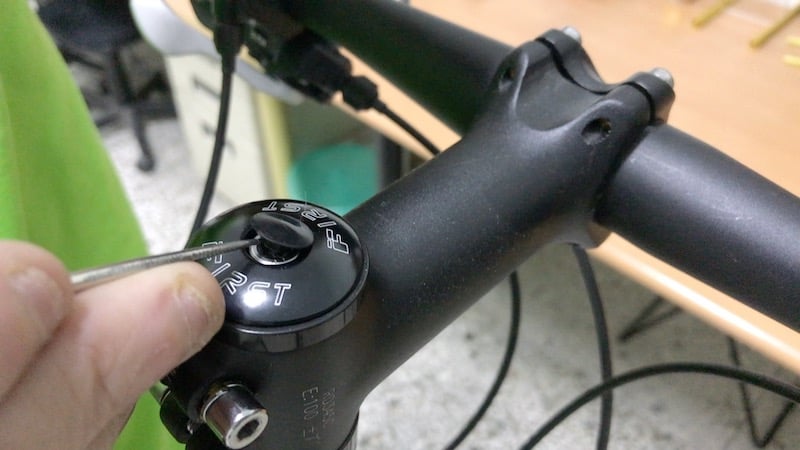
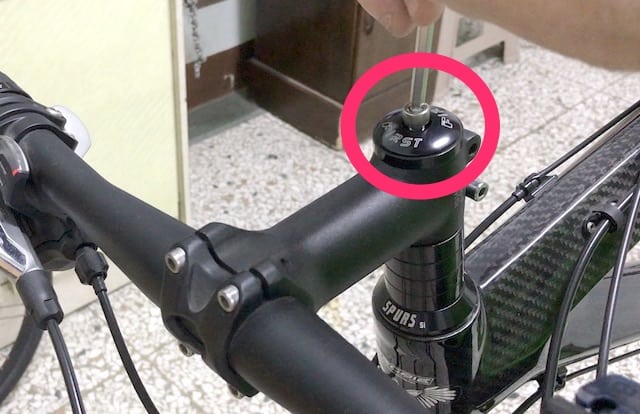
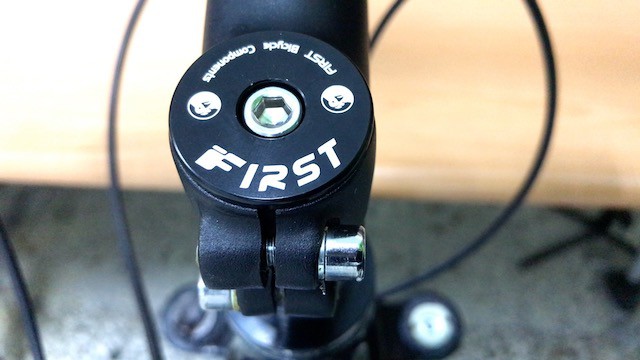
Finally press the rubber bung into place.
WHY IS MY HEADSET LOOSE?—How to Fix It
A loose headset means the compression bolt is not keeping the headset together.
The headset spacers can be easily turned with your fingers and the whole front end will feel sloppy.
Loose headsets are rare, though, and any looseness is usually due to incorrect installation.
Remember that the steerer must be cut 3-5mm clear of the top of the stem (3mm for alloy steerers, 5mm for carbon steerers as a rule of thumb) so the top cap is not prevented from tightening onto the stem.
When you tighten the compression bolt, the tension of the top cap against the top of the stem firms up the whole headset assemblage.
If that gap is 2mm or less, the steerer prevents the top cap from making a firm connection to the stem.
The tell-tale sign is when the compression does not gradually tighten, but rather suddenly seizes. A bike assembly professional worth his or her salt will notice this.
You’ll also notice that any spacers between the bottom of the stem and the dust cap can be turned to the left or right because they are not firmed up against each other or, in the case of one spacer, against the stem at the top and the dust cap at the bottom.
The fix is to remove the fork and recut an extra 1-3mm off the steerer which allows the top cap to sit snugly inside the top of the stem.
FINAL COMMENTS
Armed with the knowledge gained here, you can now make sure your mtb headset stays in perfect condition.
You now know every working component in your headset, how to get access to it and replace anything that needs replacing.
The part most likely to need replacing is one of the sealed bearings. The seals can be removed, the bearing degreased, cleaned, re-greased and the seal replaced.
Or simply swap the sealed bearing for a new one easily obtained online.
5 Kommentare zu „MTB Headset: Install, Remove, Replace (Simple, Comprehensive)“
Thank you so much! I replaced my stem (with a shorter one) and the compression ring and bearing came loose..I’ve never messed with forks. So I thought something had broken. I aligned everything up and tightened the compression bolt. I had play! So I got frustrated..Then I found this tutorial. Turned out, the stem and steer tube were far to close..So shuffled some spacers around. And this time I lifted from the bottom of the fork and tightened down the compression screw. ZERO PLAY! Thanks!!
Thank you for this excellent..simply explained tutorial. I removed and replaced an old fork for the 1st time and boy did i ever make mistakes! 1st. Got one of the top steerer parts in the wrong place(1 with the crack in it) 2nd. I cut the steerer tube too long. Once everything was bolted down I had a 1/4″ of play in the steerer tube! This tutorial showed and named each part of the steerer kit with pics..this uncomplicated things greatly. I remounted parts in the right order and then had to cut the steerer tube another 4-5mms. Final test no moving rubbers and no steerer tube movement..You saved me an embarrassing trip to the bike shop and I thank you for that. As a beginner previous tutorials siimply named the parts. I literally had no idea what they were talking about..Hope you have more tutorials..I’ll be needing them.:}
thank you for the information
Hi, I took my ti frame to local bike shop to press headset in. I saw him push it in completely wonky and that was using a proper workshop parktool. Frame seems ok, no visible cracks but could it still have future problems due to the stress caused in the head tube due to improper installation technique?
It’s not uncommon for the headset cup to go in a little off kilter. The straighten up in the final few millimeters anyway. Should be ok.