The sealed bearing headset is the most common type of headset in use on most types of bikes these days.
We examine this headset’s technical features through showing
- how to convert a headset with caged (or loose) bearings into a sealed bearing headset
- the key points to note when installing an integrated headset
The procedure is not complicated; you just need
- the right headset
- the right tools—and the right technique, which we will demonstrate.
CONTENTS
Caged Bearings
The Structure of Sealed Bearings
Threaded Sealed Bearing Headset
Bearing Removal
Bearing Installation
Integrated Sealed Bearing Headset
The Modern Sealed Bearing Headset
Other Sealed Bearing Headsets
SEALED BEARINGS VS ‘LOOSE’ BEARINGS
Sealed bearings are the latest stage in development from loose (ball) bearings to the sealed bearing used in modern sealed bearing headsets.
Since the advent of bikes in the mid 1800s, ball bearings have been the means of allowing parts to move against each other.
Pedals, wheel hubs, bottom brackets, and headsets have relied on rounded, polished steel bearings contained between races, typically a “cup” and a “cone” which form the angled surfaces against which the lubricated bearings rotate.
Caged Bearings
Many older bike models, and particularly classic bikes, still use loose bearings in a cup and cone structure.
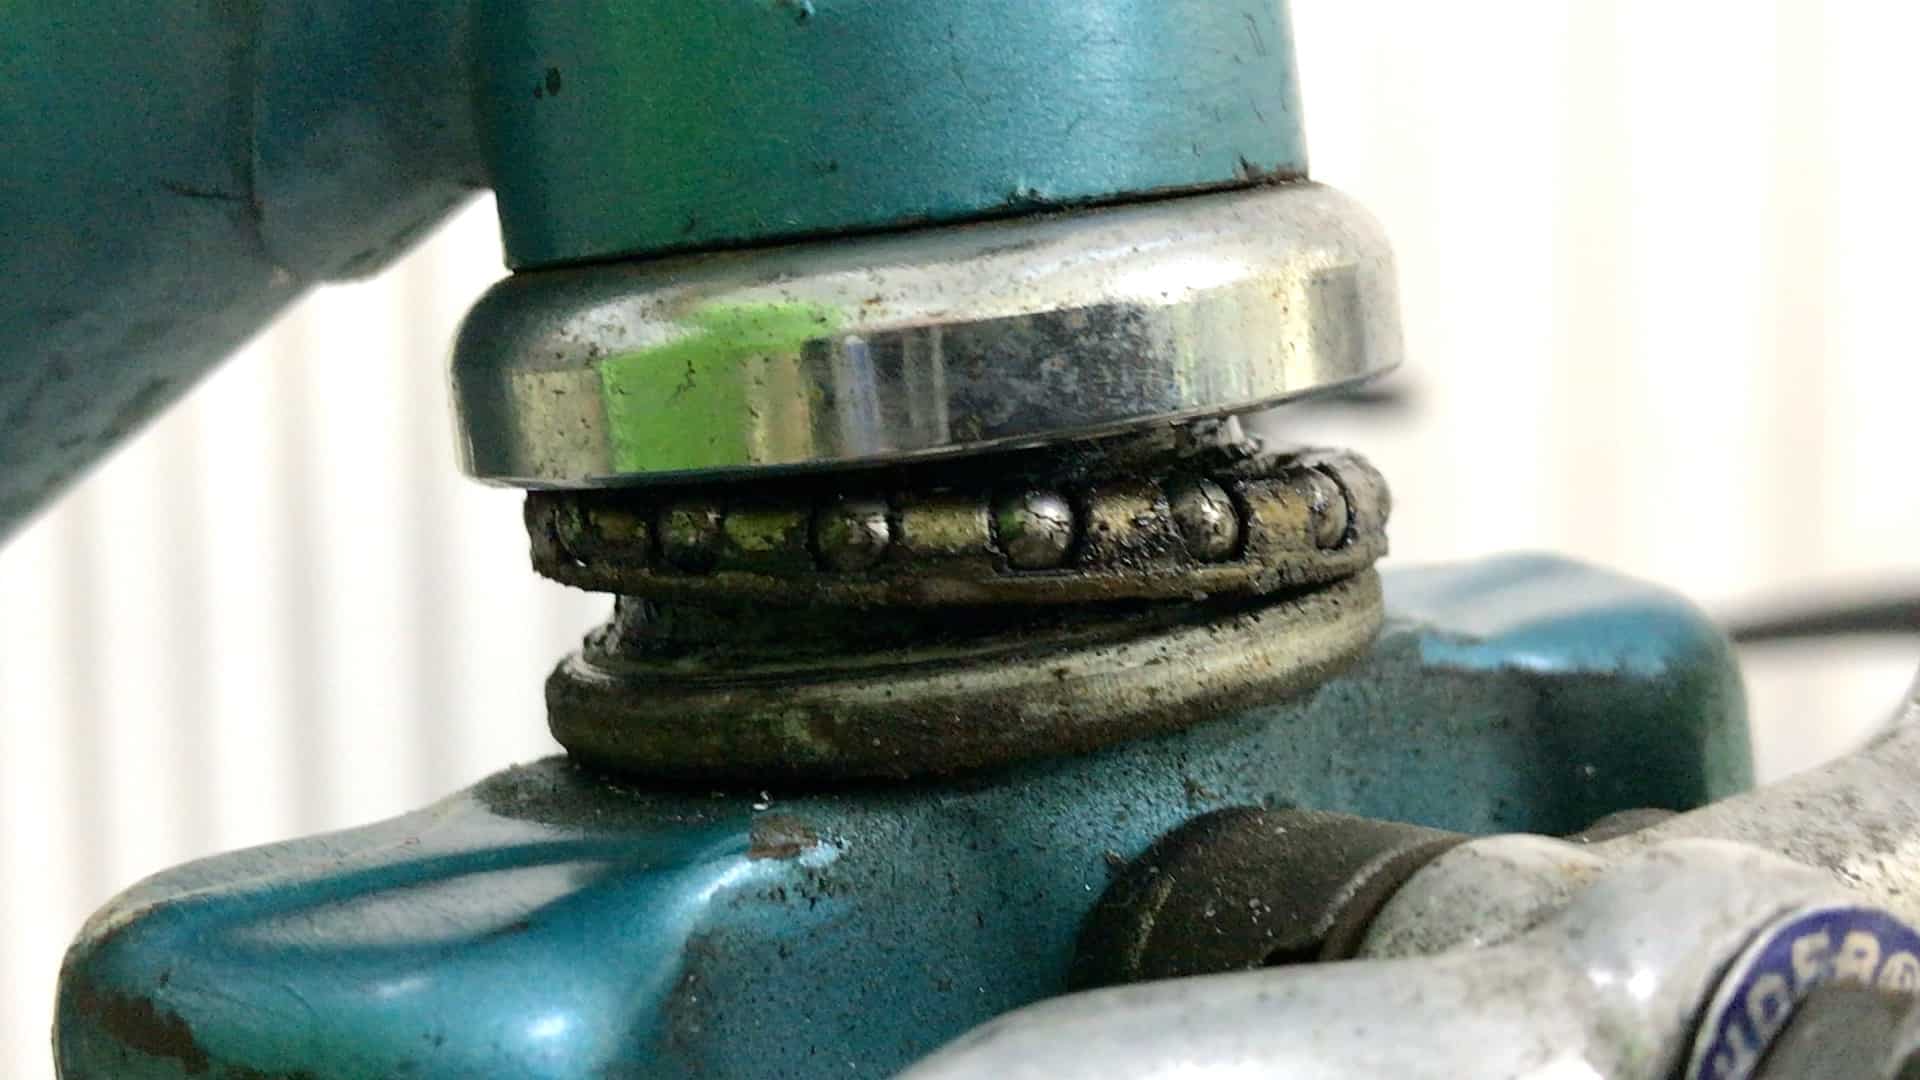
The large majority, however, use caged bearings where the balls are mounted into a frame, or the cage.
The bearings rotate with the cage as the headset rotates.
Advantages
The benefit is the ease of loosening the assemblage and re-greasing as necessary.
Without a cage, the ball bearings would drop out all over the place.
Cleaning is straightforward: soak the cage in a degreaser (kerosene is cheap and effective) as a unit; reinstall as a unit.
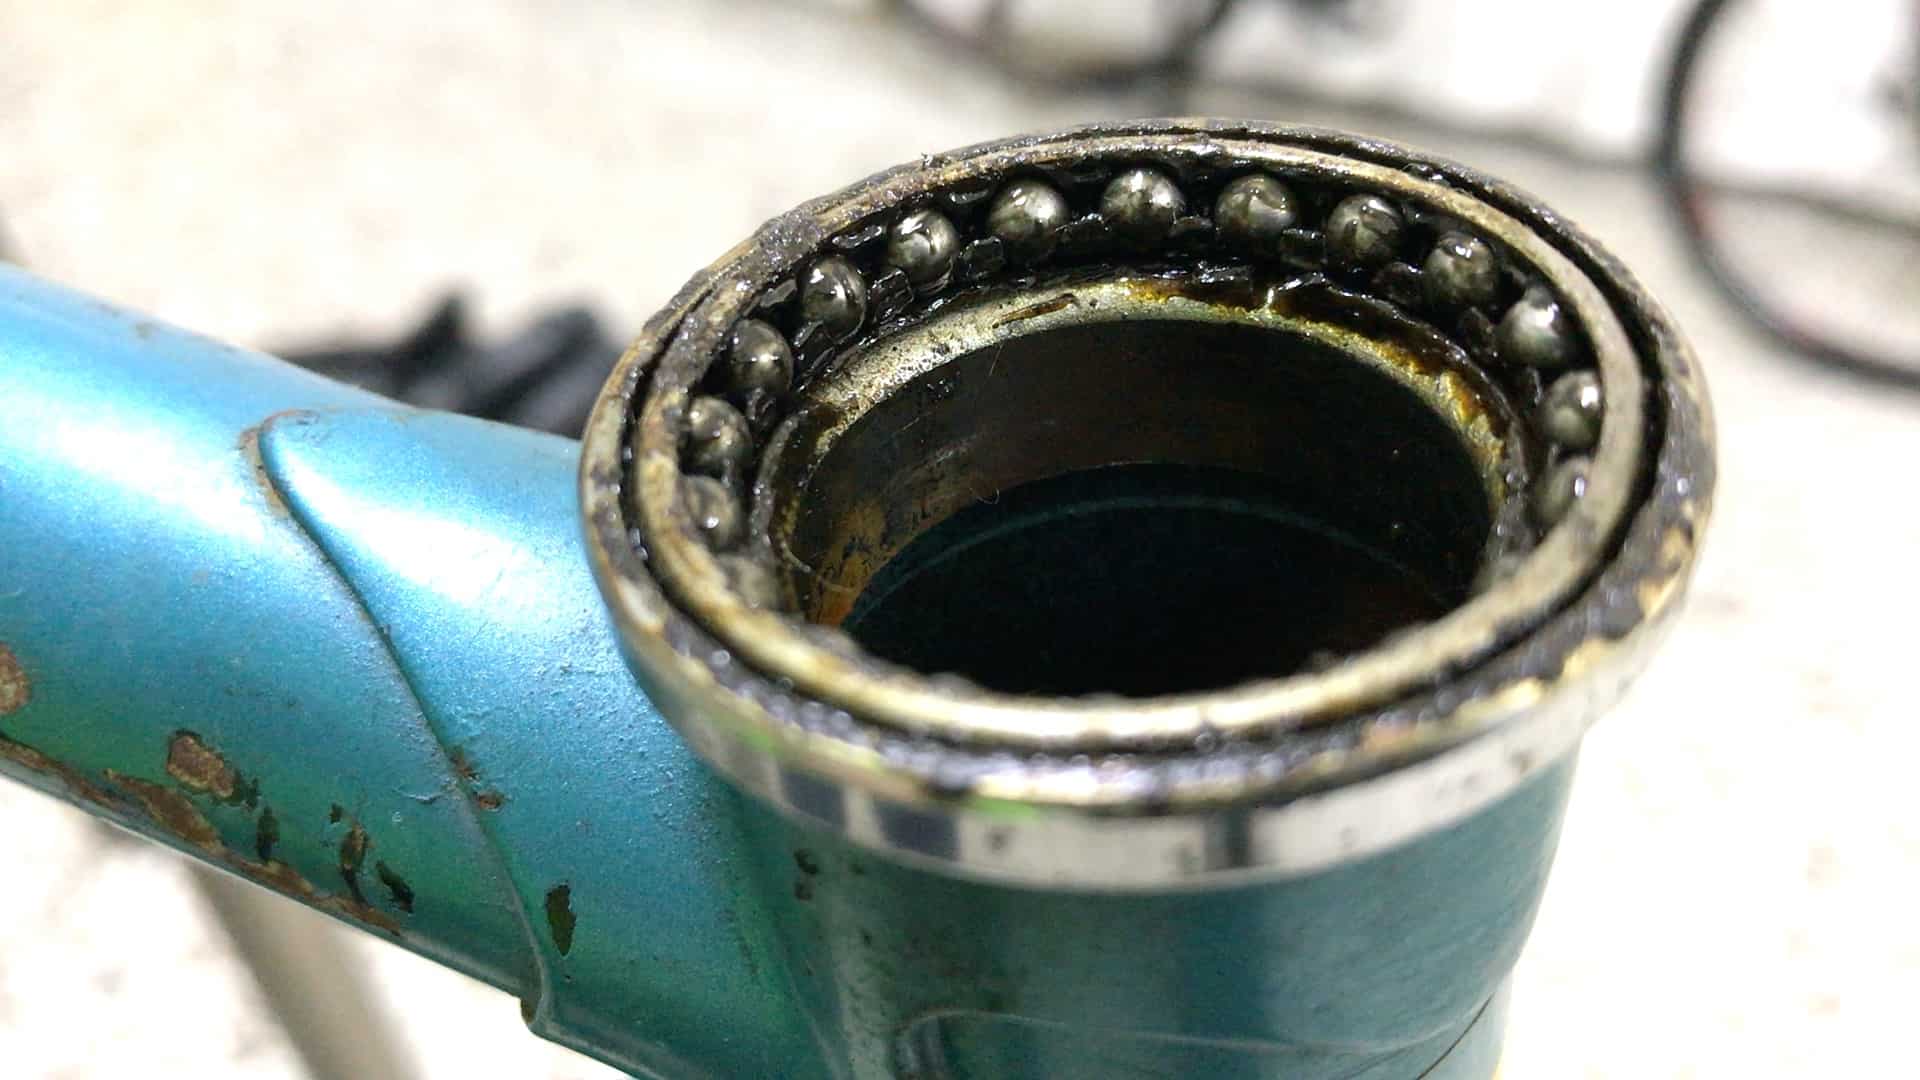
Disadvantages
You’ll see one of the main problems with this setup, though, in the buildup of dirt around the cage and in between the ball bearings and the cage where regular, routine maintenance has not been carried out.
Although you can service caged bearings as a unit, you still must disassemble the headset then remove the cage to properly clean and re-grease its bearings.
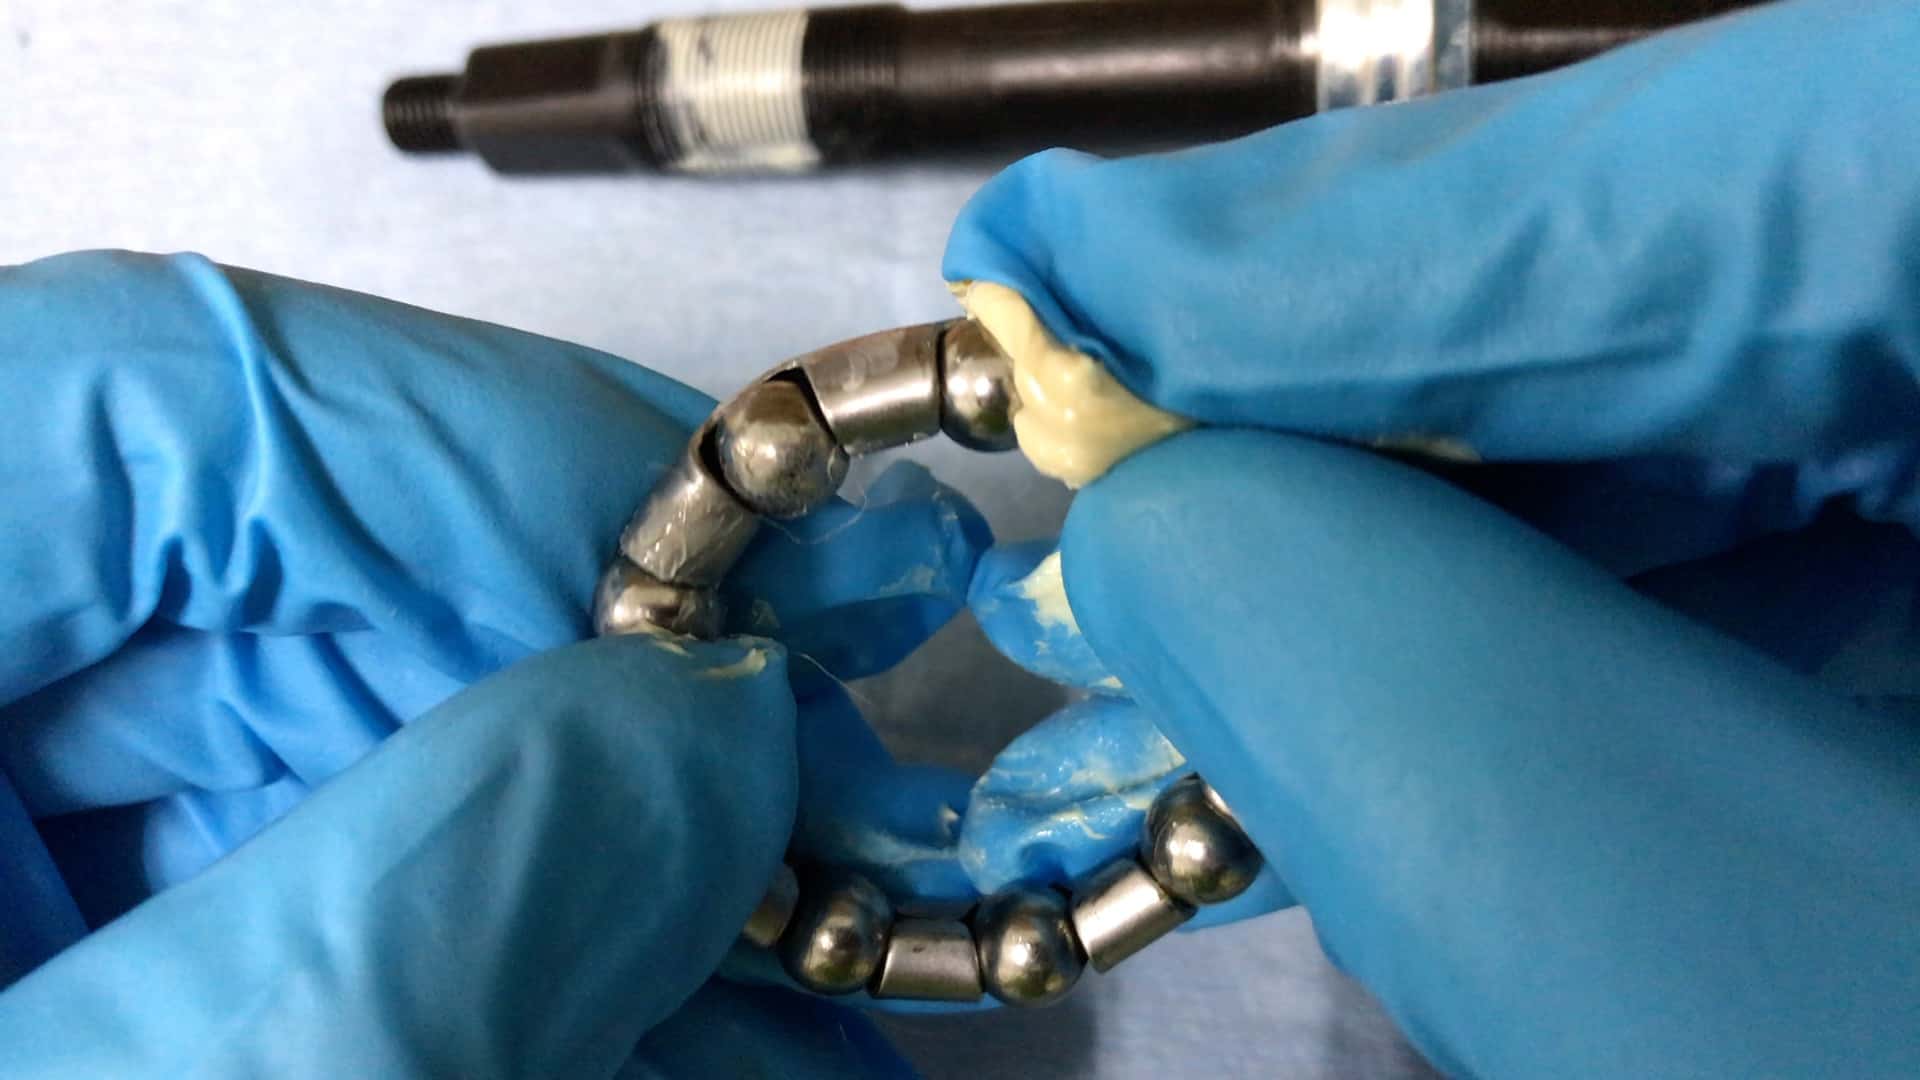
Sealed Bearing Structure
A sealed bearing headset’s sealed bearing encloses the cage on three sides.
To put it another way, the cage is inserted into a container that has a beveled edge on the closed side which is crucial in its function as a sealed bearing for a headset.
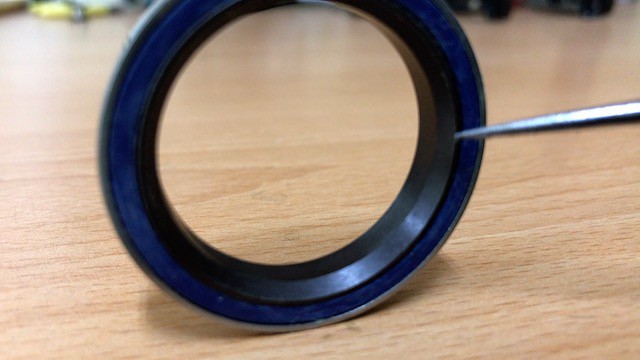
The removable cover, or seal, slots inside the container’s edge, lightly touching the outward protruding surface of each ball bearing.
The outer (top) beveled edge functions as the outer race; the lower or inside edge functions as the inner race.
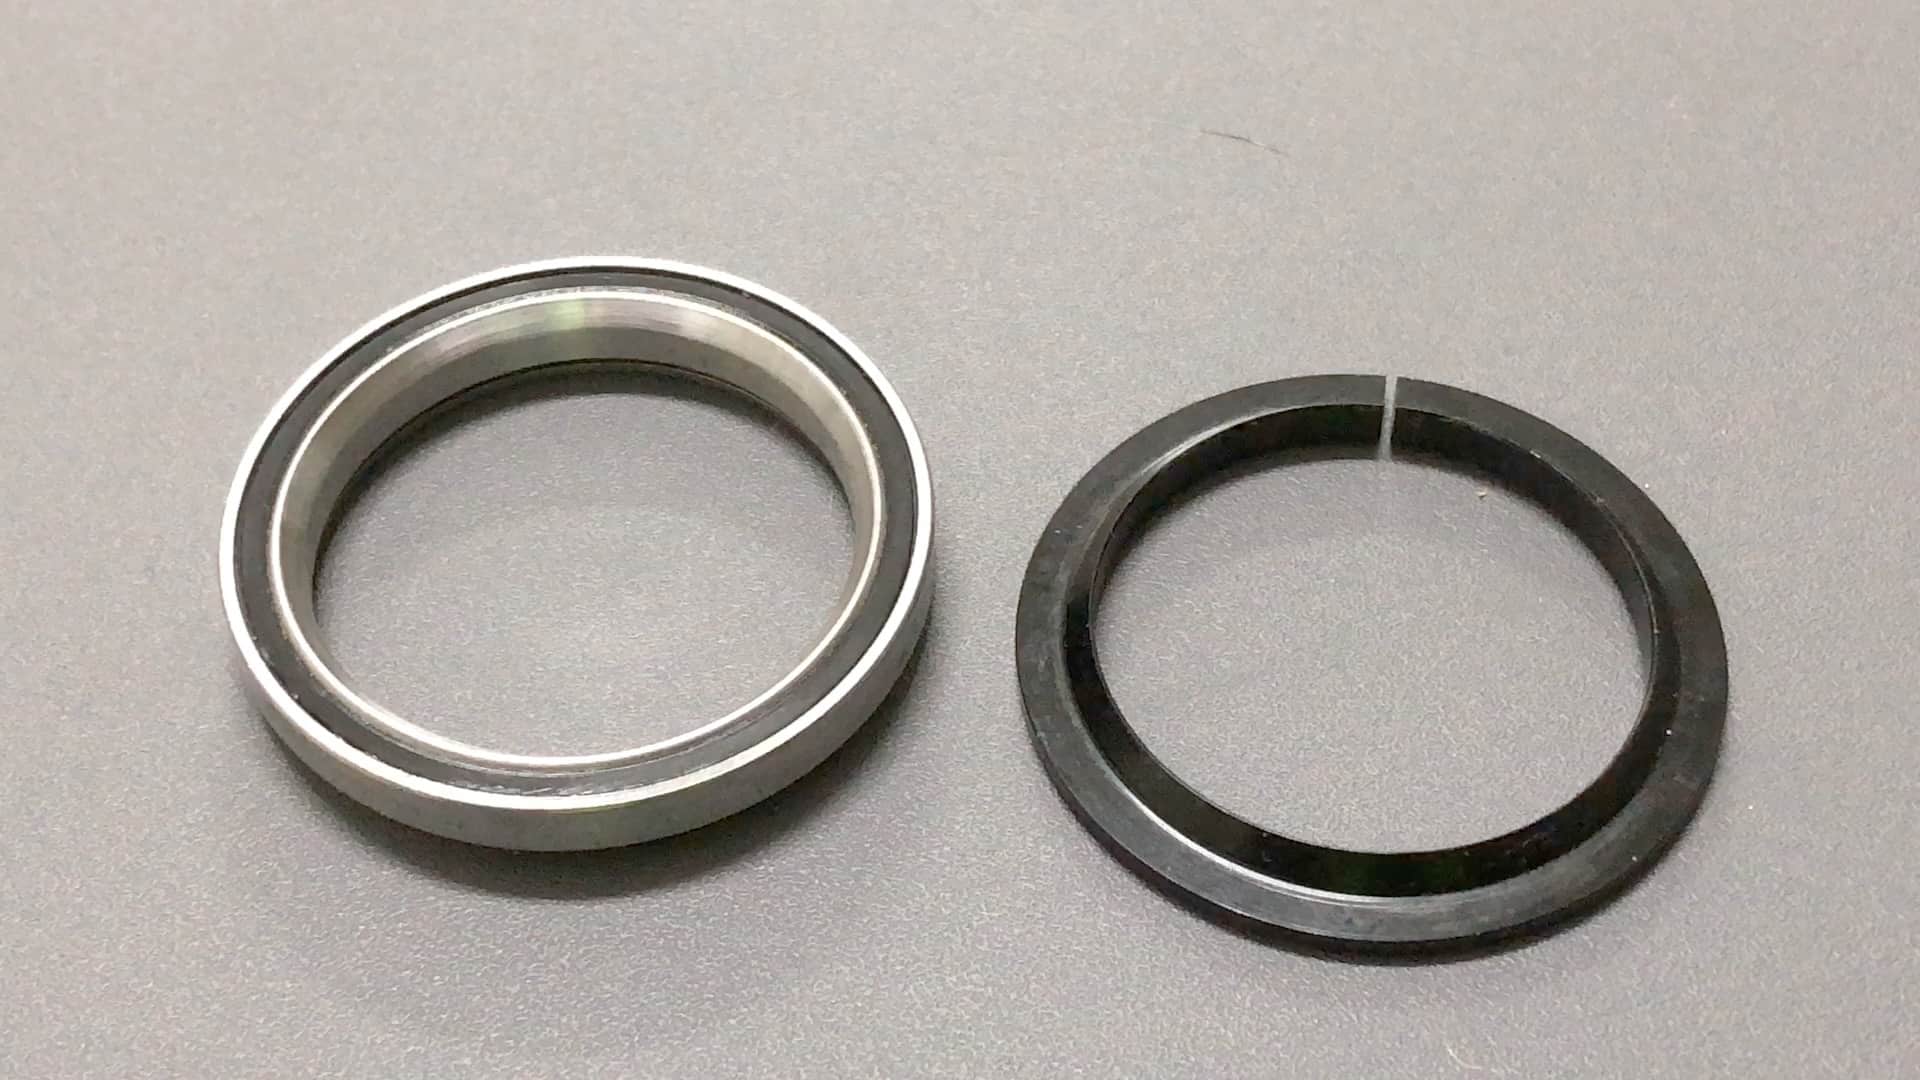
In the image, the sealed bearing on the left displays the bearings in their cage with minimal grease.
The sealed bearing on the right has the correct level of grease, which, in conjunction with the seal, prevents dirt and grit from too easily fouling the ball bearings.
You can remove the seal, then soak the unit—as a whole—in degreaser (again, kero is great for this), rinse it out thoroughly, wait for the solvent to evaporate, re-grease, and then replace the seal.
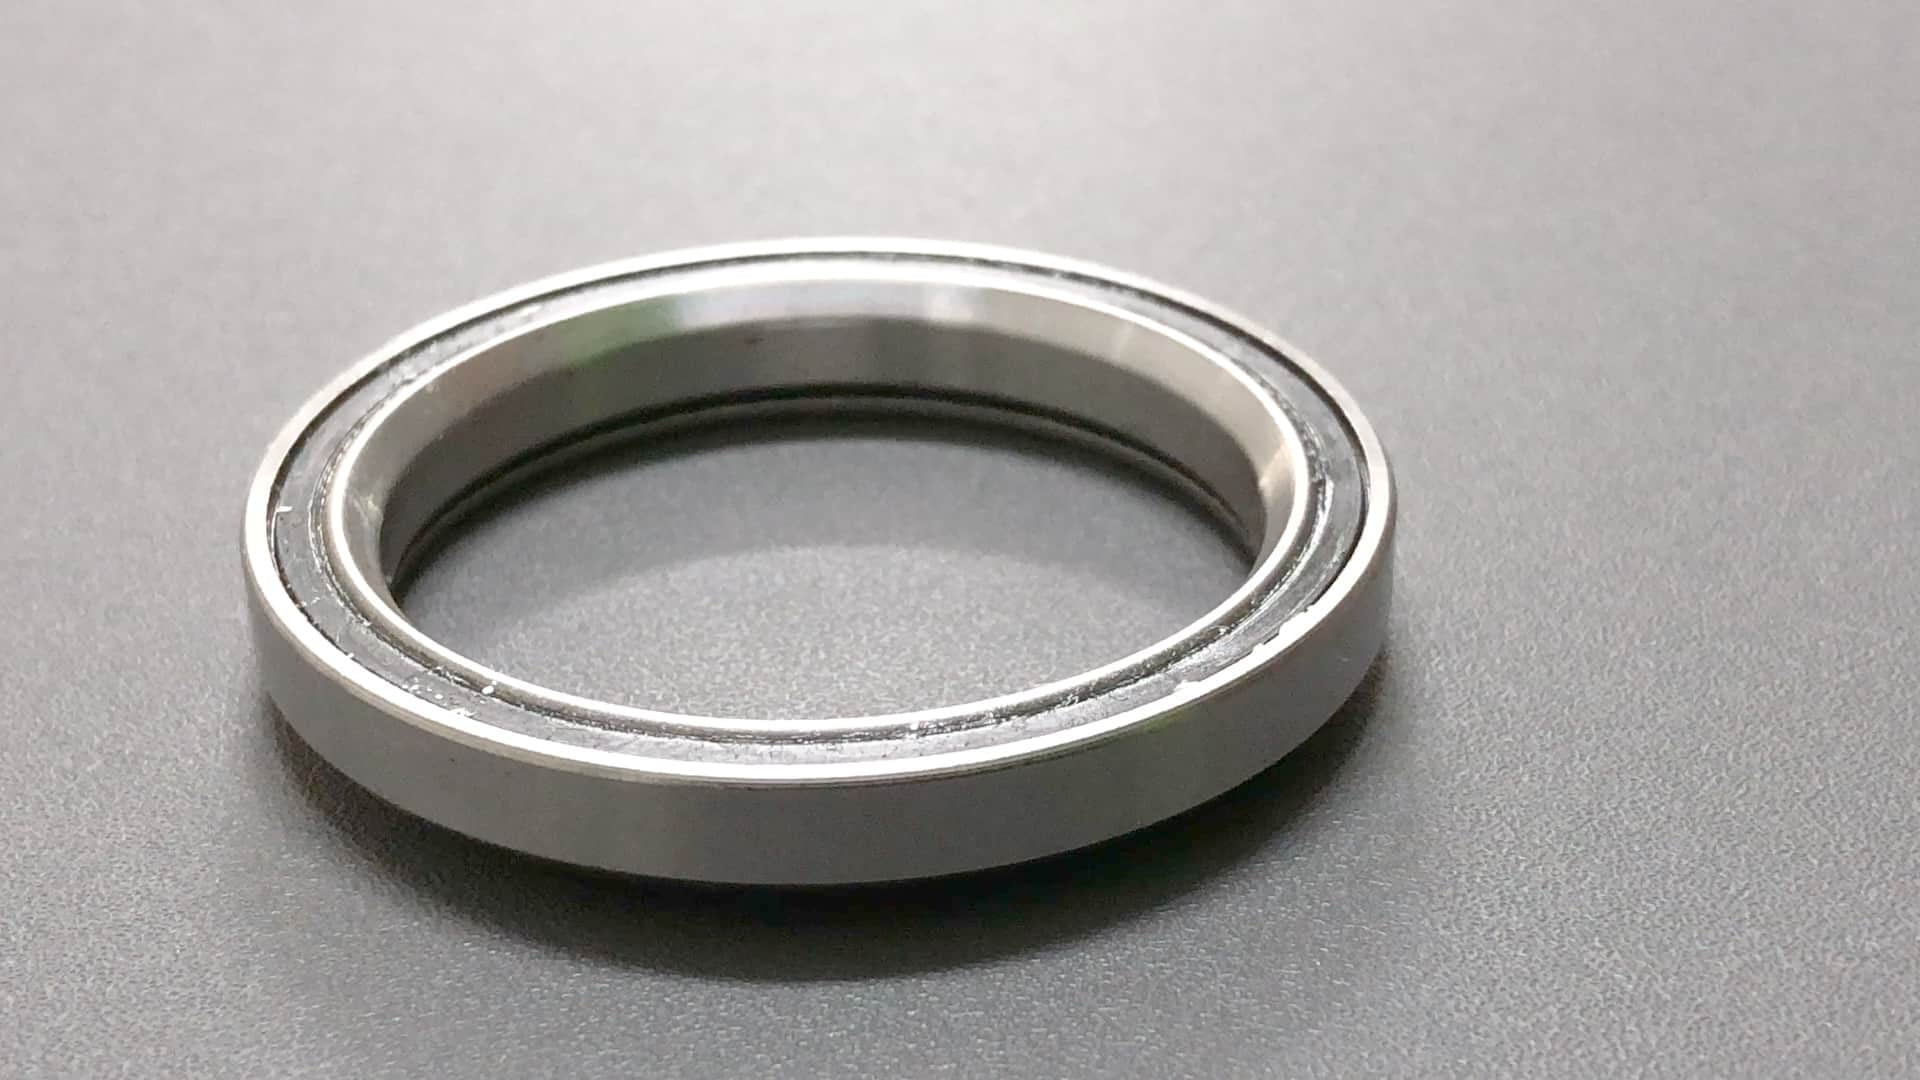
Sealed bearings are precisely machined and assembled, removing the cage is difficult and not advised anyway.
When sealed bearings each the end of their useful life, they’re easy to replace as a unit.
Replacing a bearing cage and bearings as you might the loose bearings of a cup-and-cone headset design is impractical.
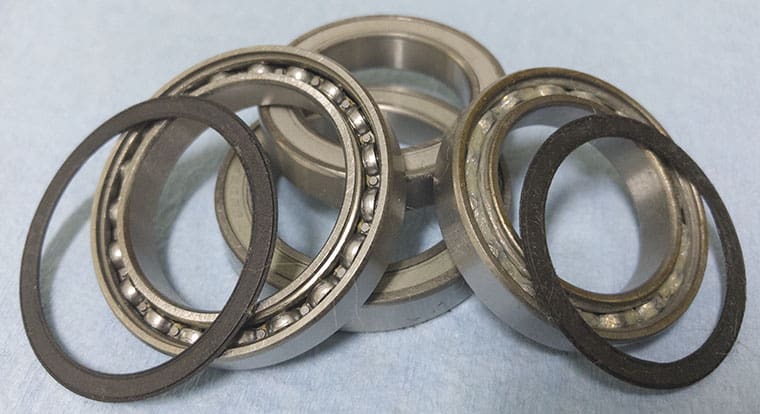
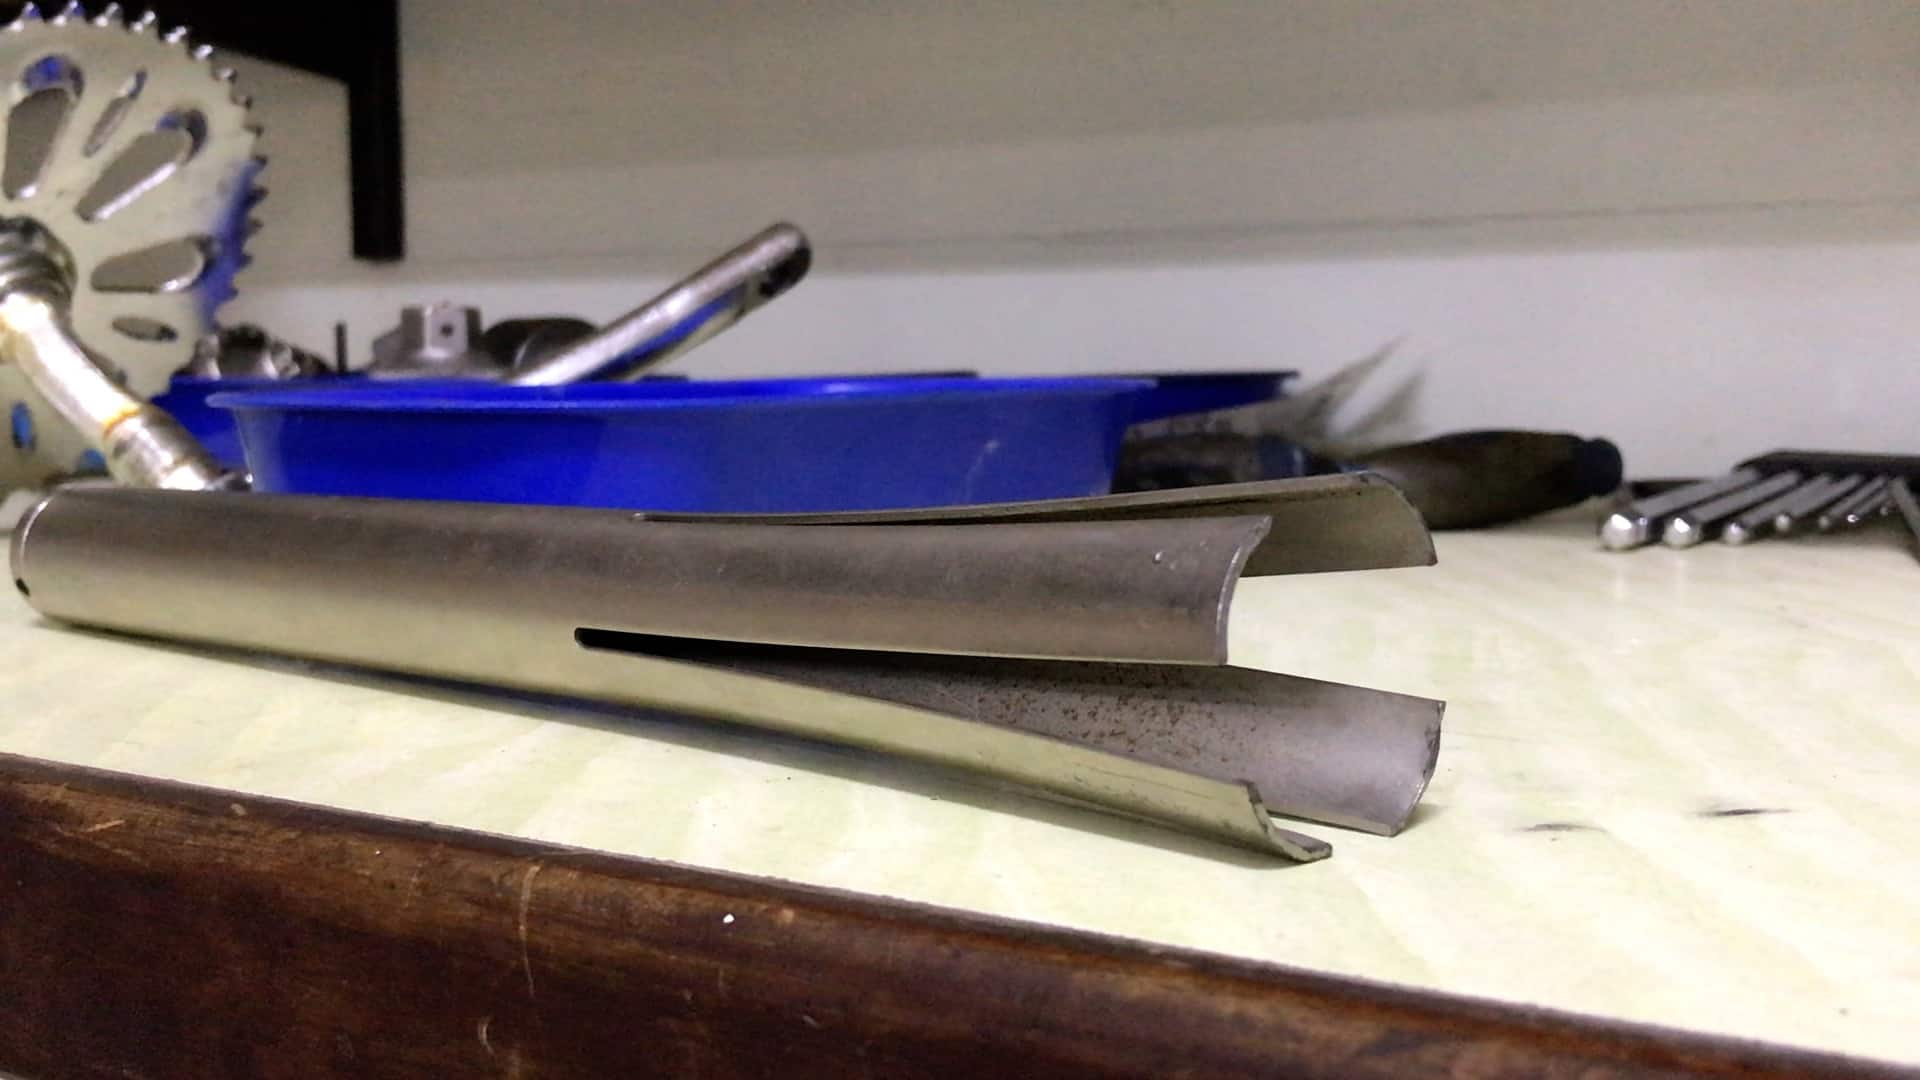
Sealed Bearing Headset Structural Elements
The beveled edges are key to the design of a sealed bearing headset.
We’ll go into this in more detail below, but for now these elements demonstrate the principles.
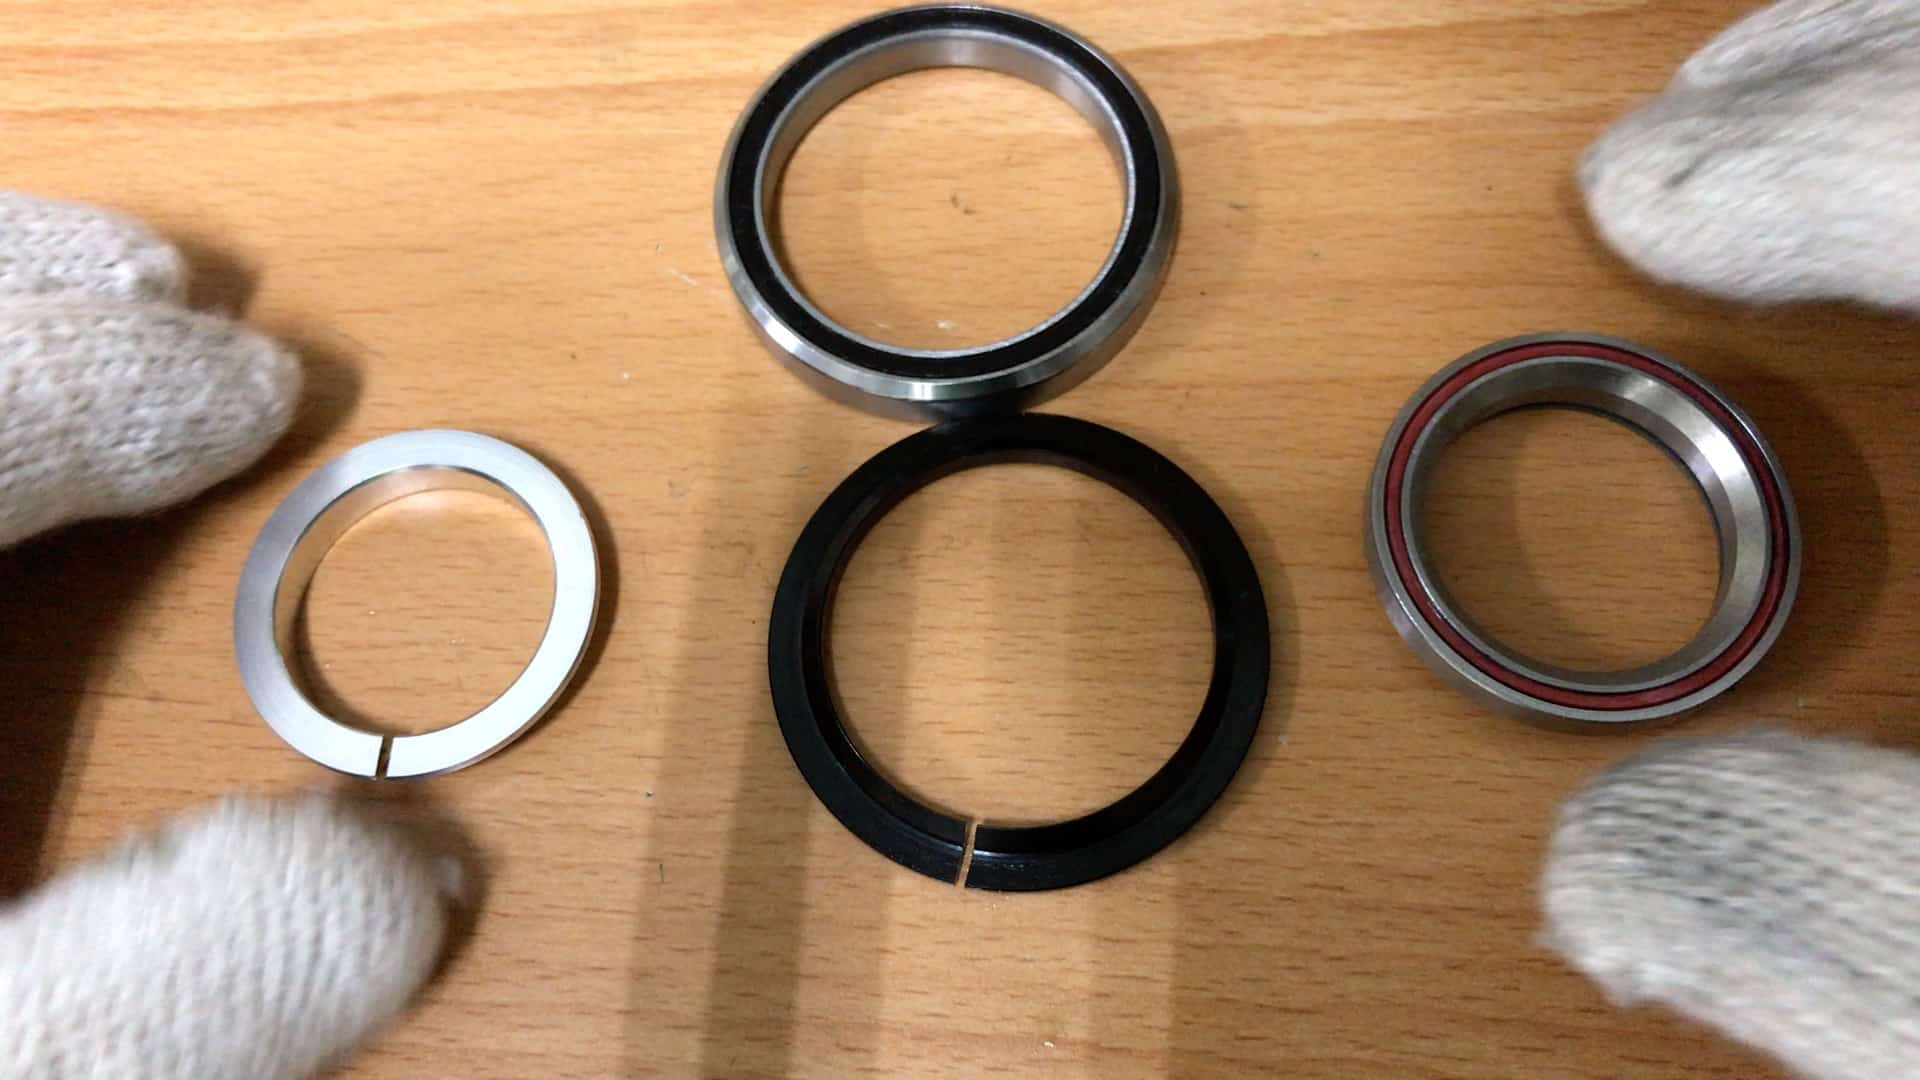
In the image you see the lower (black) and upper (red) bearings of a sealed bearing headset.
Below the black bearing is the (crown) race which pairs with that bearing.
The crown race’s flange projects at 45 degrees; the angle of the beveled edge of the inside race is also machined to 45 degrees, thus fitting on top of the crown race—both edges fit into each other.
The underside of the bearing is also beveled at 45 degrees and fits up into the bottom of the head tube (demonstrated below in the integrated headset section).
The upper bearing’s beveled inside race fits into the washers which hold the fork steerer steady, allowing the sealed bearing headset to be tightened thus eliminating play.
Other Sealed Bearings
Sealed bearings used in bottom brackets, pedals, and hubs differ from sealed bearing headsets.
The bearing cage is held in tension between the inner and outer races with a seal on either side—there is no beveled edged container.
These sealed bearings fit flush inside bearing cups or the bike frame (BB shell), whereas the sealed bearings for headsets.
THREADED SEALED BEARING HEADSET
Low to middle end bikes have either a threaded or a threadless headset.
Many of these headset designs use sealed bearings, thereby technically becoming sealed bearing headsets, although many—usually the cheaper bikes—do not.
Bike design has changed very little since the popularization of the safety bike in the 1890s.
Headset evolution began with threaded headsets, where ball bearings/bushings, cups and races are held in place with locknuts that thread onto the fork stem’s threads.
The introduction of threadless headsets was contingent on removing the threads from the fork steerer and installing cups into the head tube to hold the bearings.
Forks were originally manufactured with uniform length threaded steerers; these were replaced by forks manufactured at a set length.
The fork steerer was later cut to a cyclist’s desired length, and nut inserted into the steerer in conjunction with a tensioner bolt held the assemblage in place.
The biggest evolutionary change has been the introduction of the threadless integrated headset, which is the quintessential form of the headset—we’ll look at that in detail later on.
In the next section we’ll take a close look at upgrading a traditional threaded headset with cage bearings, converting into a sealed bearing headset.
Threaded Sealed Bearing Headset Conversion – Bearing Removal
Threaded headsets are not complicated but they do consist of many parts.

Several lock rings and a lock nut combine forces to hold the threaded steerer in position.
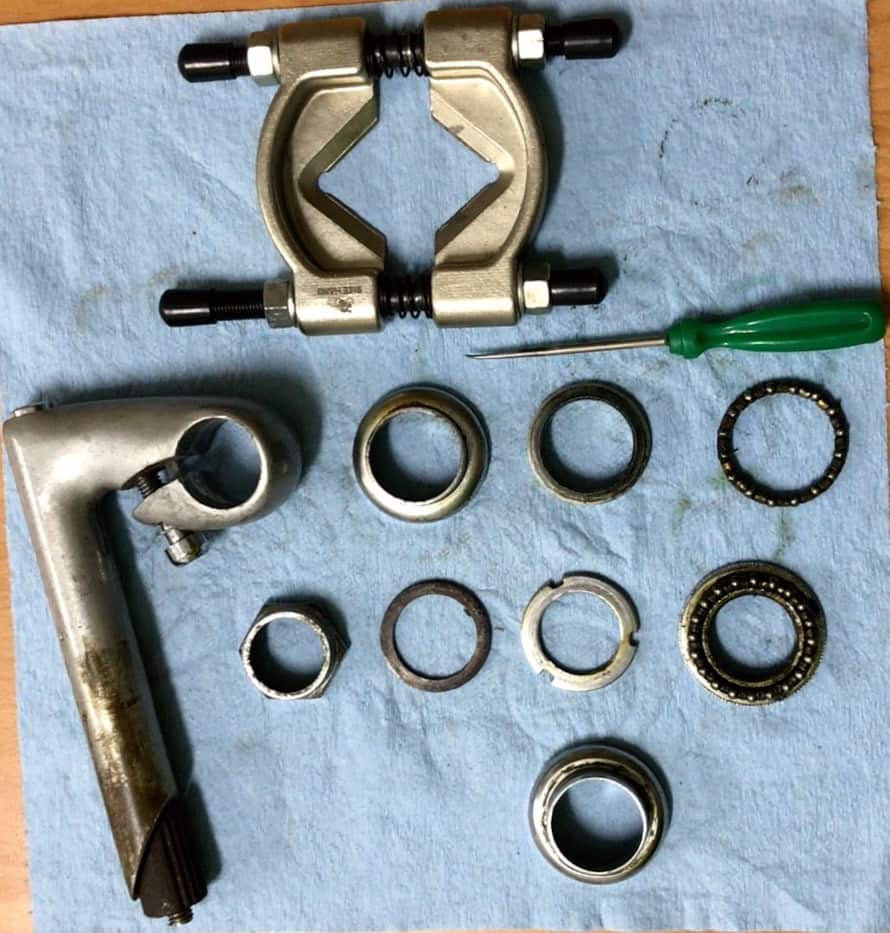
The threaded end of the fork extends almost to the top of the uppermost lock nut; the stem inserts into it, then tightens against it. (The crown race remover up top is necessary only where an old crown race is anchored firmly in position. A screwdriver or awl is normally enough to lift it clear of the crown race).

You need to remove that lock nut, then the lock rings further down.
That exposes the caged bearings resting in their cups—the bottom caged bearing comes out as you remove the fork from the head tube.
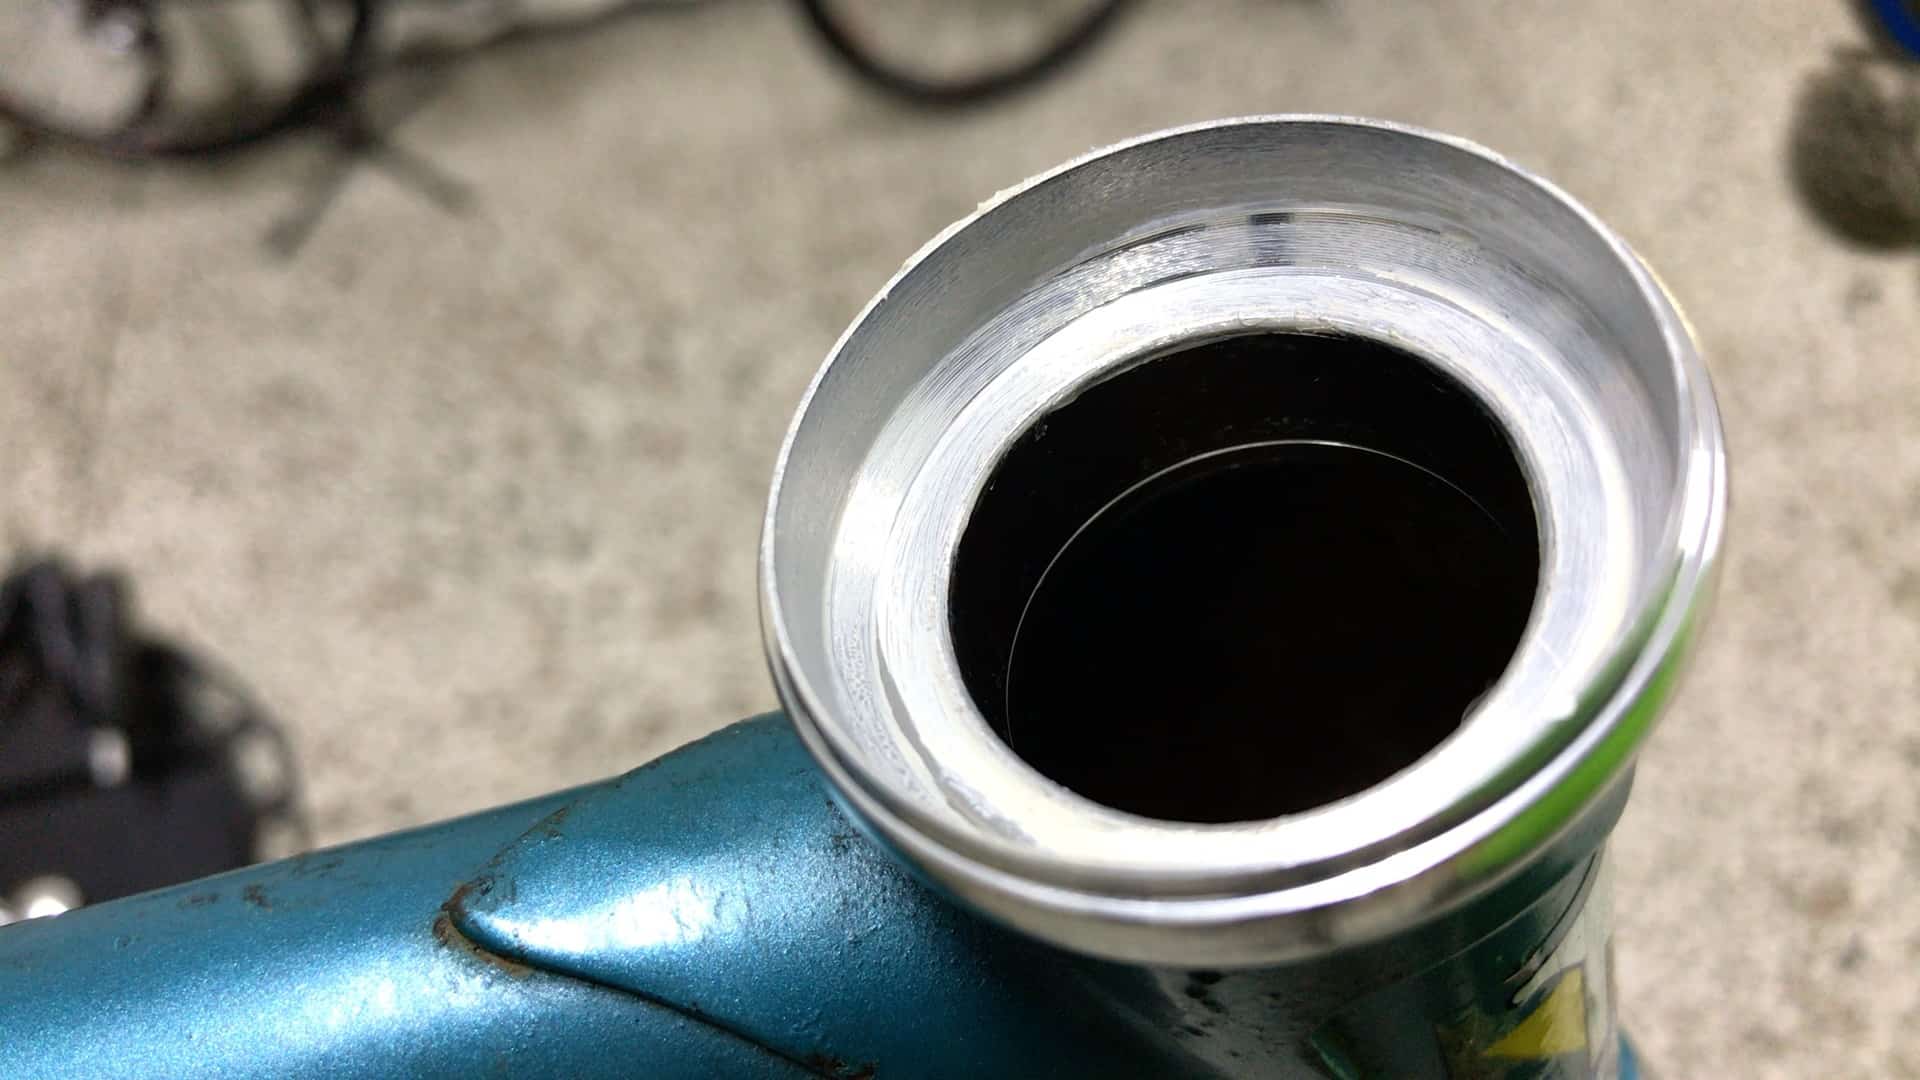
The cups must now be removed and new ones fitted, since the sealed bearing will not fit the original caged bearings cups.
This procedure requires firstly removing the old cups, then installing the new ones.

You need a tool to remove the cups and then a special installation tool to seat the new cups properly in the head tube.
(We cover this in the video at the end of this section).
Cleaned and re-greased—just drop the sealed bearing into position.
Threaded Sealed Bearing Headset Conversion – Bearing Installation
The beveled edge of the bearing case slots into the new cup, hand in glove.
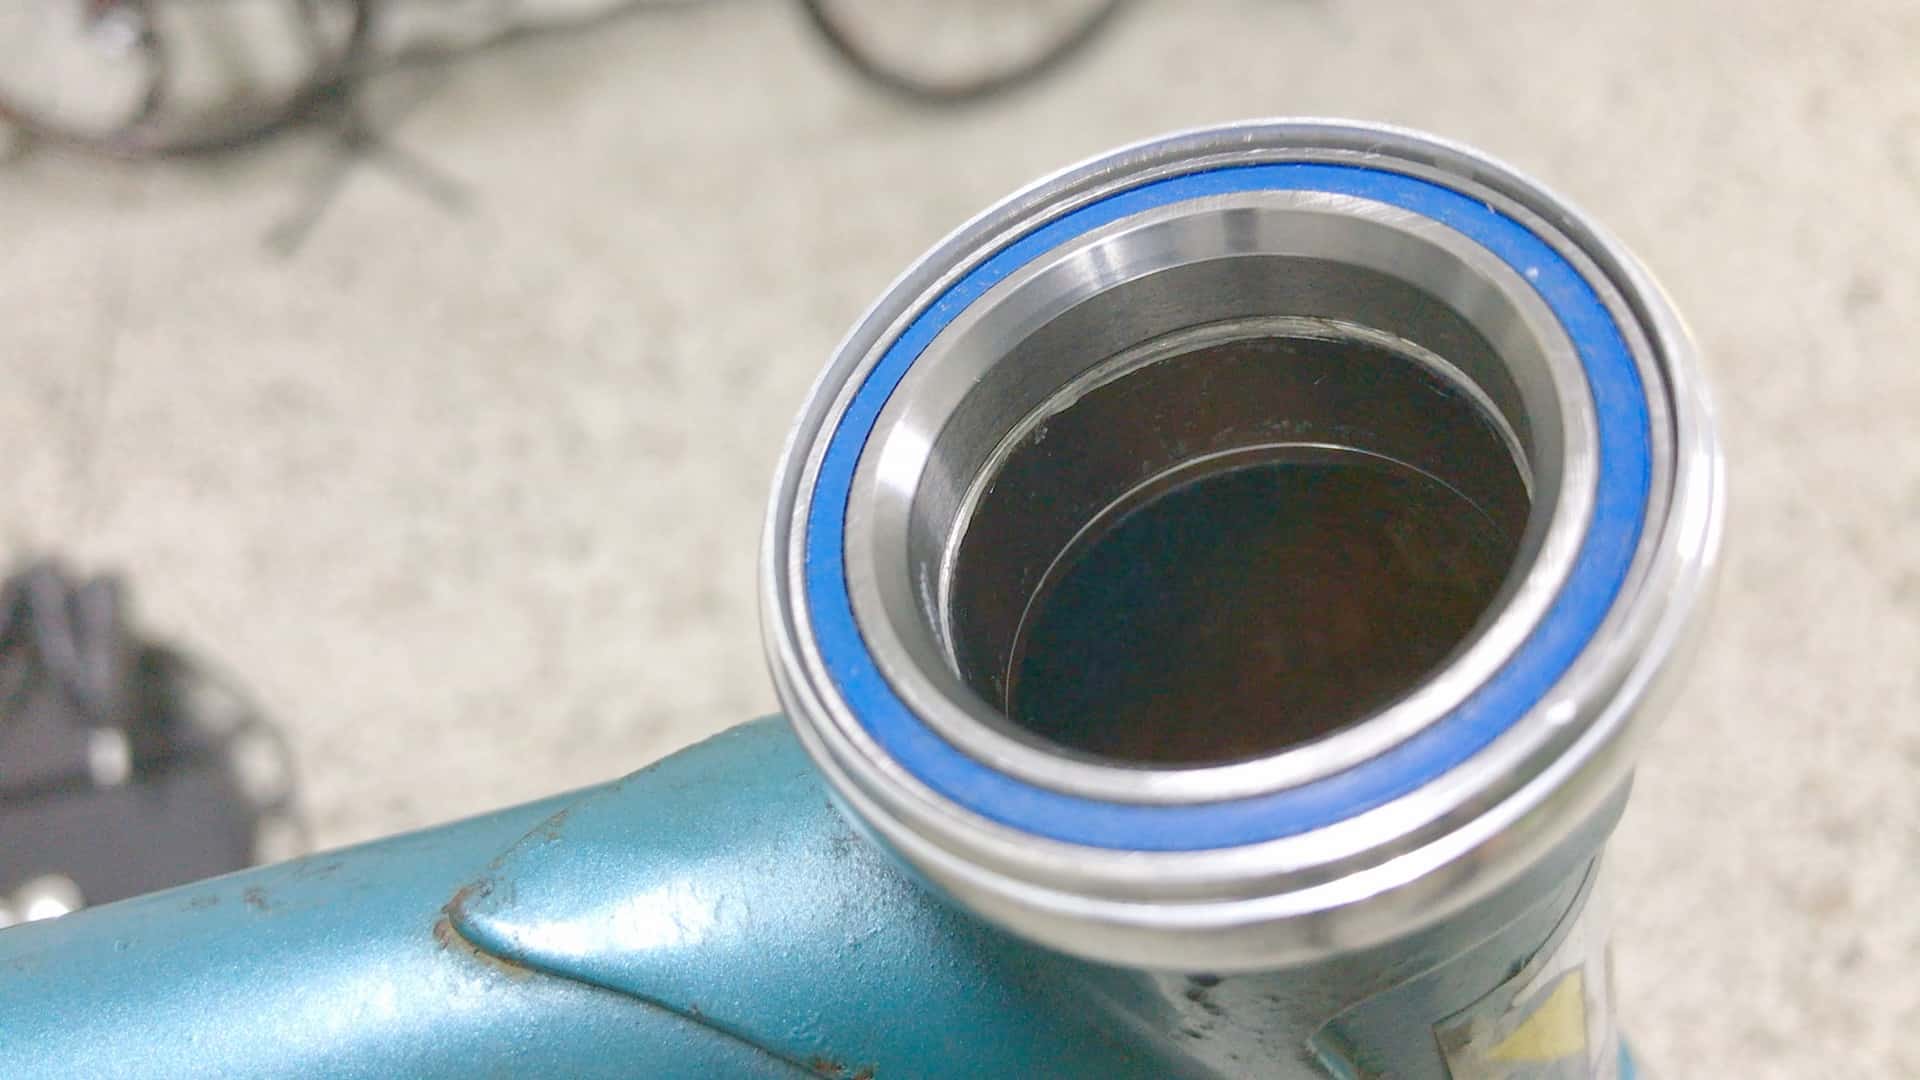
It’s a good idea to also grease the casing as a way of reducing the possibility of creaking or squeaking should there be any movement of later on.
Note that the caged bearing above was dirty and worn from years of neglect.
It had possibly never been serviced in its lifetime which demonstrates the immediate advantage of conversion to a sealed bearing headset setup—the caged bearings are now protected inside the sealed bearing’s casing.
The seal on top is not 100% impervious to water which can still penetrate into the bearing bringing dirt and grit with it.
It is, however, a marked improvement, and if the bike is in for more years of neglect, then this conversion to a sealed bearing headset will ensure the bearing is much better protected.
Threaded Sealed Bearing Headset Conversion – Finishing Off
The conversion charts a journey from complexity to simplicity.
A non-sealed bearing headset involves too many parts.

Before 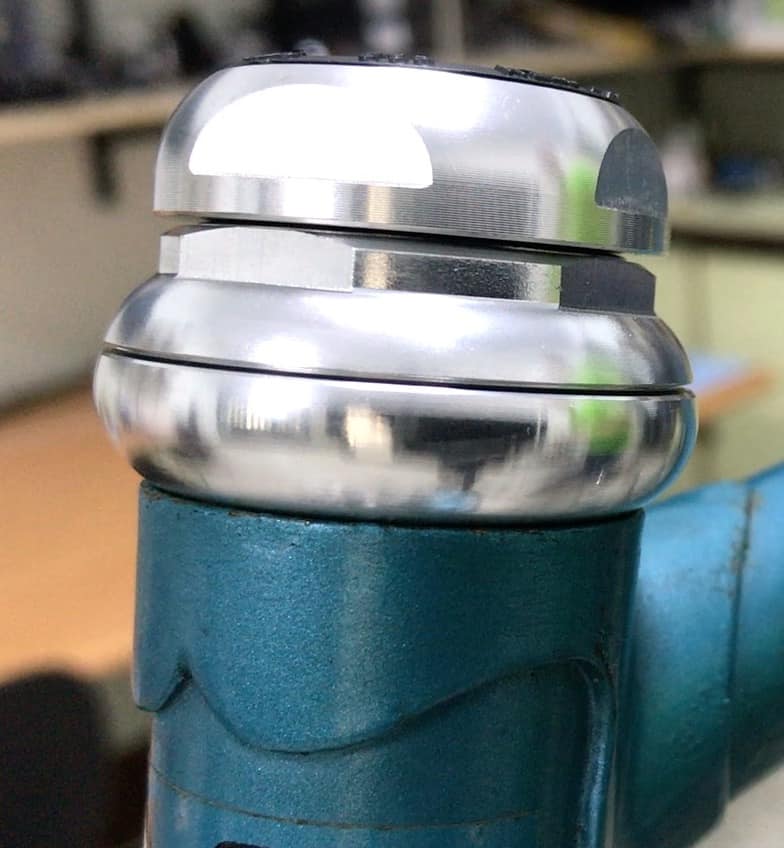
After
Replacing the caged bearing headset with the sealed bearing headset is not only a better technical solution, it looks a lot better as well.
INTEGRATED SEALED BEARING HEADSETS
The essential form of the sealed bearing headset is exemplified in the modern integrated headset.
It was created by eliminating threaded/threadless headset cups—a recessed lip is integrated in the top and bottom of the head tube into which a sealed bearing is then installed.
The integrated headset was the logical step to take once headsets had progressed from threaded to threadless.
We’ll illustrate the finer points of the integrated headset by demonstrating the installation procedure as we did with the threaded headset above.
Essential Tools
Even if you’re not a budding bike mechanic and not in the process of building up a specialized toolset, a set of Allen wrenches is a must for working on bikes nevertheless.

A set like this is best since each wrench has an extra hexagonal head at right angles to the main shaft, which gives greater leverage when needed.
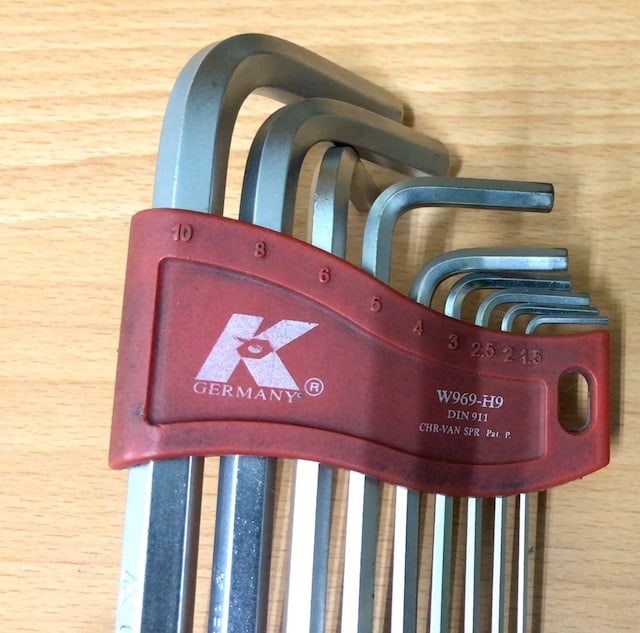
A basic Allen wrench set is the minimum requirement.
A bearing cup removal tool is what you don’t need.
The beauty of a sealed bearing integrated headset is the ease of maintaining/installing/removing the sealed bearings in the absence of bearing cups.
The Modern Sealed Bearing Headset
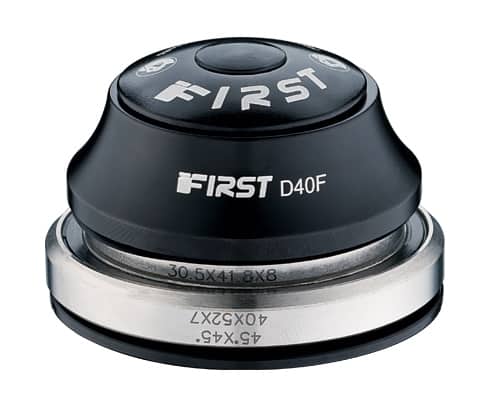
At first glance the integrated sealed bearing headset looks as complicated as the preceding threaded, caged bearing headset.
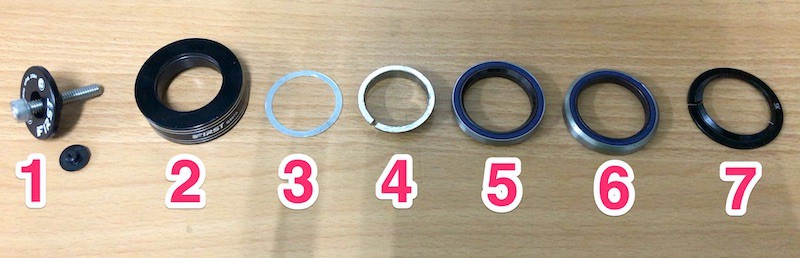
The difference, however, is the absence of cups and threads.
#5 & #6 are the upper and lower sealed bearings.
The built-in lip replaces the sealed bearing cups you would otherwise have to press in to the head tube.
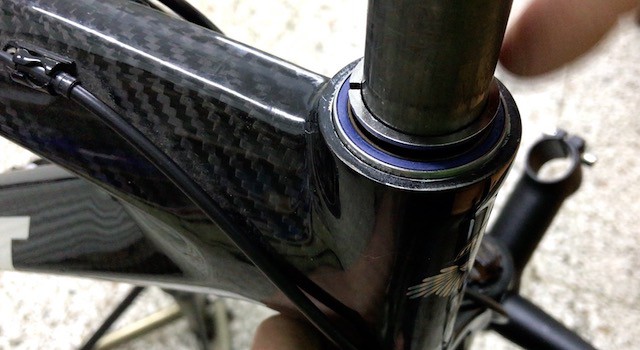
The upper sealed bearing sits firmly in its integrated cup, since the tolerances are generally spot on.
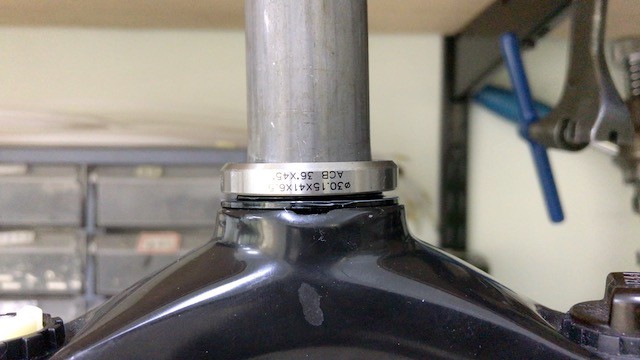
The lower sealed bearing sits squarely on the crown race (#7).
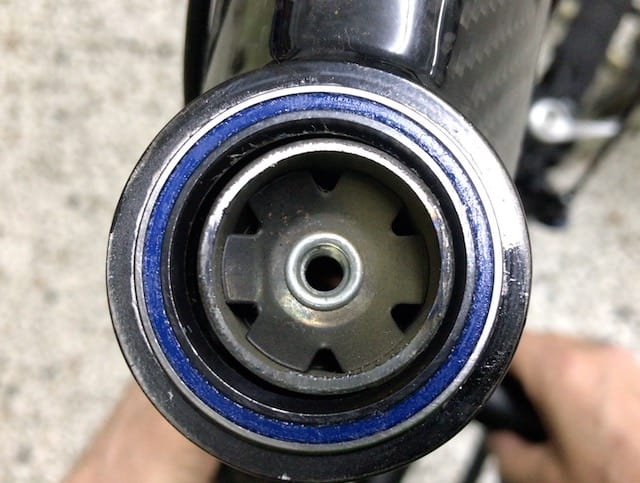
Running the steerer up through the head tube, the bearing slots up into the lip recessed inside the bottom of the head tube.
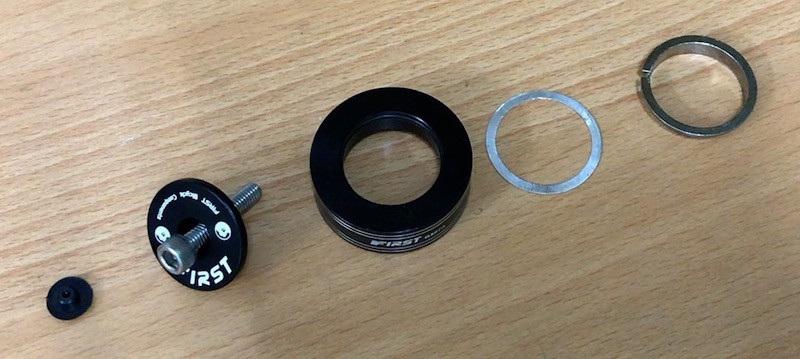
Then it’s simply a matter of sliding parts #4, #3, and #2 in succession down the length of steerer above the head tube.
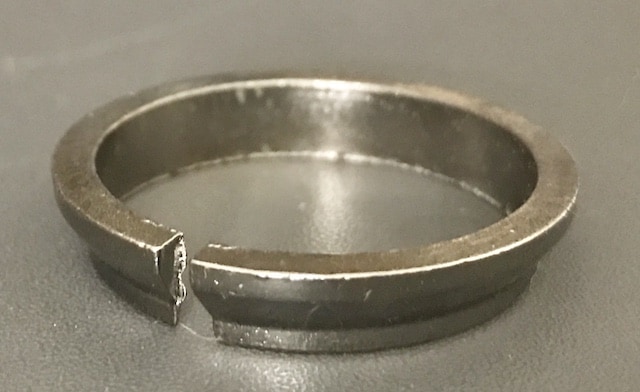
The compression ring replaces the role the threads play in a threaded sealed bearing headset.
The ring compresses slightly into the sealed bearing which holds the steerer firm in the head tube and, importantly, square to the head tube angle (anywhere from 63-75 degrees depending on the frame design).
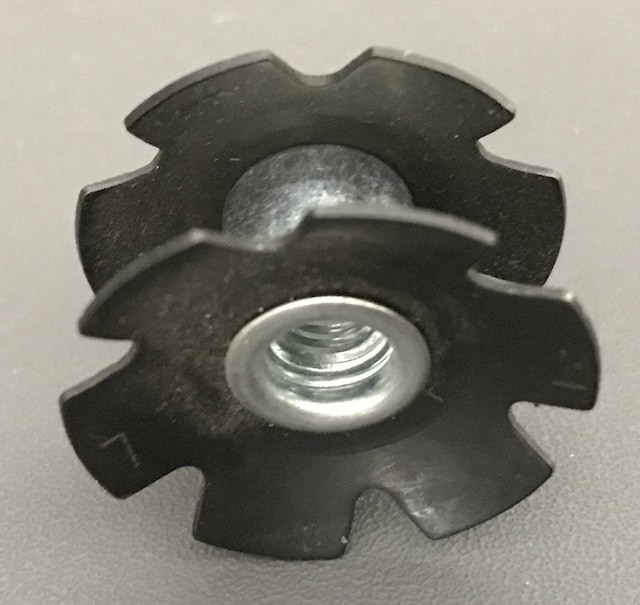
The star (fangled) nut (or expander where you have a carbon fork) is a vital component, of course, and should already be installed into the fork steerer.
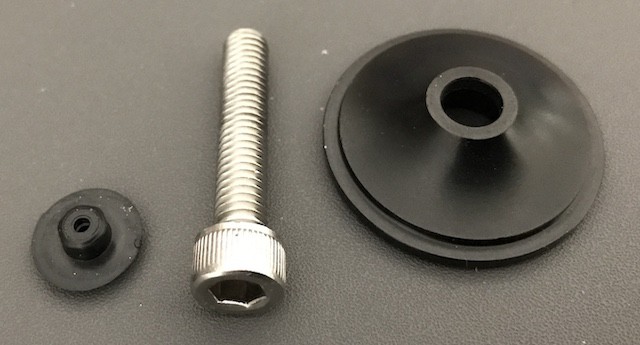
The compression bolt engages the nut which pulls all elements of a sealed bearing headset firmly together.
The video documents the whole process.
OTHER SEALED BEARING HEADSETS
Other sealed bearing headsets to be aware of are tapered headsets (for tapered head tubes) and semi-integrated headsets.
Tapered Headsets
Recent advances in frame design include an “overdrive” head tube, as Giant named it.
Standard (you could probably call them classic now) head tubes were originally 1” top and bottom after which 1 1/8” became standard.

An oversized or overdrive head tube is normally 1 1/8″ on top and 1 1/2” at the bottom.
The technical rationale behind the design is greater riding stability, stemming from the greater width of the head tube lower down.
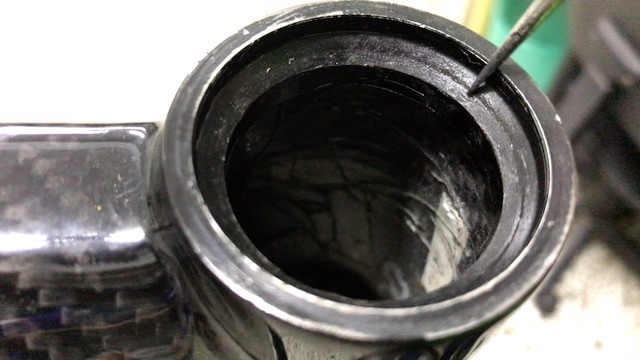
Semi Integrated Headset
The simple difference between integrated and semi-integrated is that the head tube lacks the built-in cups of the former.
Note the thin edge of the lower cup.
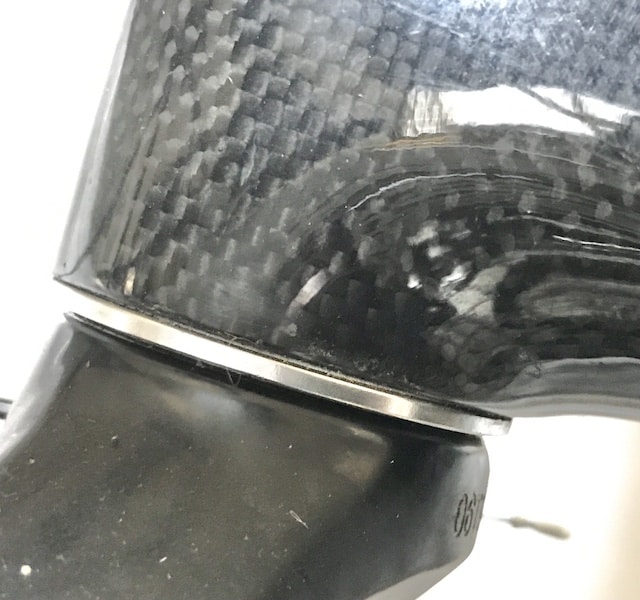
The bearing cups are minimally visible when inserted into the head tube.
FINAL COMMENTS
The
- precise machining
- greater protection the enclosing case and seal provides the ball bearings
- ease of installation, removal, or maintenance of sealed bearings
make sealed bearing headsets technologically superior substitutes for the caged bearing headsets that preceded them.
That’s the reason, of course, why sealed bearings are found in all of a bike’s major components.
The upgrade to a sealed bearing headset whether that be in the form of a threaded or semi-integrated headset is not hard, and it need not be expensive, unless you insist on installing a top brand.
Sealed bearings can be replaced so your headset will likely last as long as you keep the bike it’s installed on.