The shift from threaded BBs to press fit made the simple process of installing and maintaining bottom brackets more complex.
Installing, removing, and maintaining potentially tricky press fit BBs becomes quick and efficient using a press fit tool set—especially if you own a bike shop.
Here’s what to consider when choosing (and using) a press fit tool.
CONTENTS
- What Do We Mean by ‘Press Fit’?
Direct Install
Interference Fit - Press Fit Tool Solutions
- The Ultimate Press Fit Tool Kit
- A Press Fit Tool for Every Situation
WHAT DO WE MEAN BY ‘PRESS FIT’?
Used to be you threaded your BSA or Italian (or French) bottom bracket into the bottom bracket shell.
Easy and Simple.
The only complication resulted from cross-threading your bottom bracket cartridge or cups into the shell.
And even then you can rescue a severely damaged shell.
A good quality tapping tool can take mangled alloy and recut the threads good enough to accept a cartridge or cup. (Assumes you replace a BB unit that has damaged threads since repairing BB threads is more difficult compared to the shell).
The logical move was to upgrade the threaded design by removing the threads and directly installing bearings into the BB shell (secured vis a C-clip).
Or by installing bearings in cups, an “interference” fit solution, which has become the most widely adopted form of press fit.
The problem then became pressing bearings in, and then pressing them out again without
- damaging the BB shell
- damaging the bearing or bearing cup
And that is the problem that various press fit tool designs address—with varying degrees of success.
The C-Clip Retains the Directly Installed Bearings
The press fit revolution began with BB30 where sealed bearings are installed directly into the BB shell.
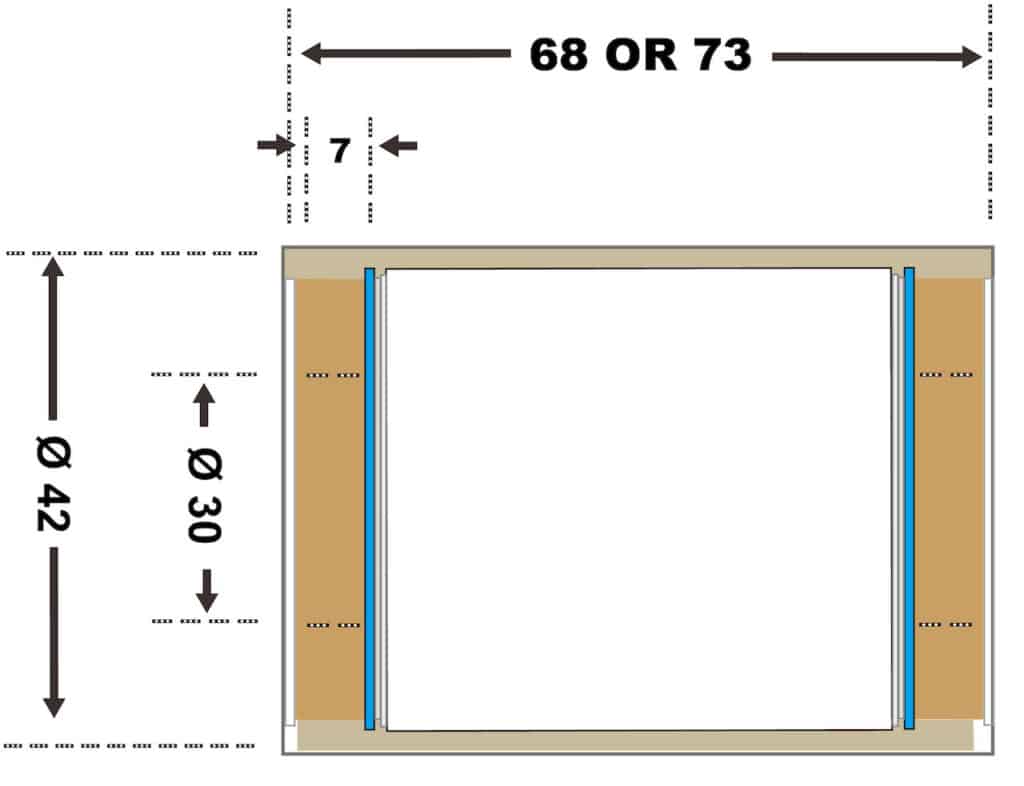
Sliding them into position perfectly square against the shell’s inner lip was — and remains — the thing to get right with every bearing/cup installation and removal.
Attempting to install a slightly skewed bearing on the drive or non-drive side can damage both bearing and shell.
Pushing the crank spindle into position will probably become impossible, even given a slight angle, since spindles and sealed bearing inner diameters are machined to extremely fine tolerances.
The right press fit tools are essential to seat bearings accurately—provided they’re used correctly.
CIRCLIP PLIERS

A pair with interchangeable jaws is handy.
Compress the clip for both insertion and removal.
PRESS-IN & PRESS-OUT UNIT
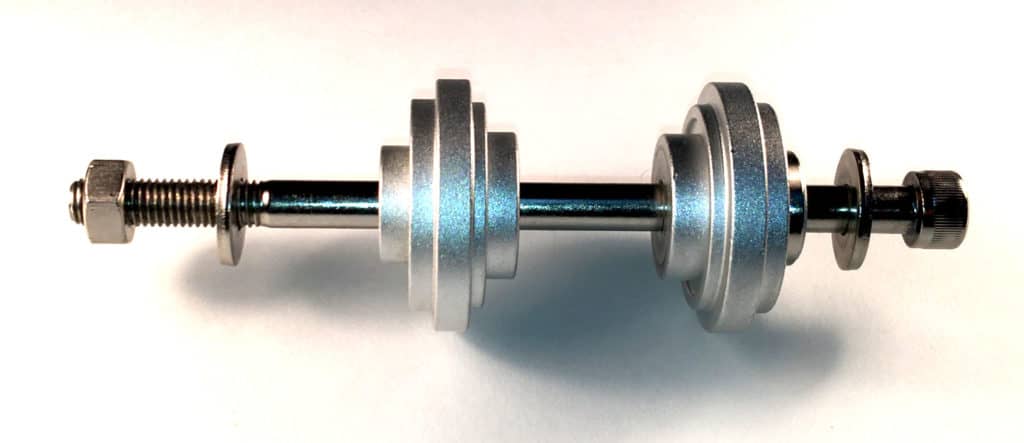
For pressing in: two disks and a bolt with the disks designed to fit the 30mm sealed bearing’s inner diameter.

For pressing out: a press-out extraction mechanism consisting of a wedge and a cup.
Or use an impact removal tool (extended commentary on the wisdom of using one of these below).
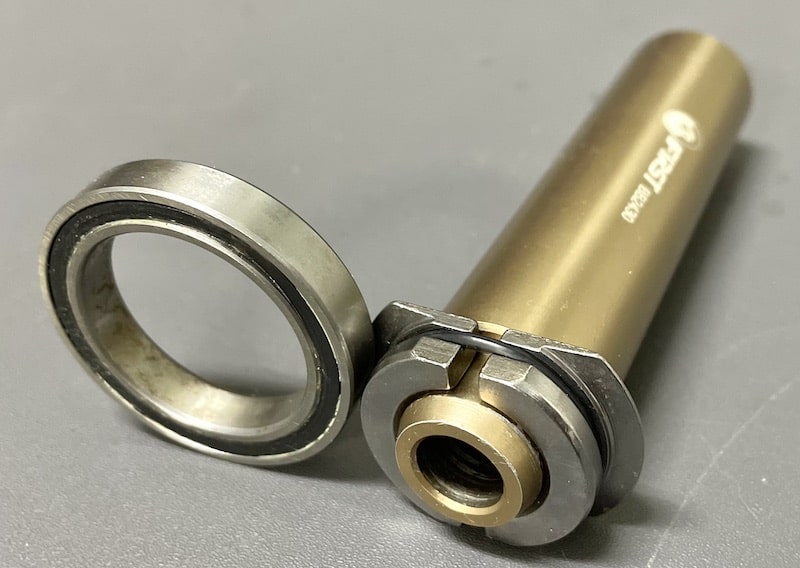
This is part of FIRST’s BB30 bearing removal mechanism which pushes the sealed bearing out of a 42mm BB shell rather than pulling it out.
SCHRAUBENSCHLÜSSEL
Most home — and all professional — workshops have the following wrenches:
- set of open end ring wrenches
- an adjustable wrench or two
- a set of Allen/Hex wrenches
Having them all increases your choice in how you tackle a particular press fit installation or removal.
RETAINING COMPOUND
Apply to the bearing a smear of activator for an alloy frame, and retaining compound plus activator for a carbon frame.
Insert the c-clip.
Then insert the bearing and press into position with your press fit tool of choice.
Bearing Cup Interference Fit
Pressing sealed bearings into cups, then pressing the cups into the shell is the most common type of press fit BB.
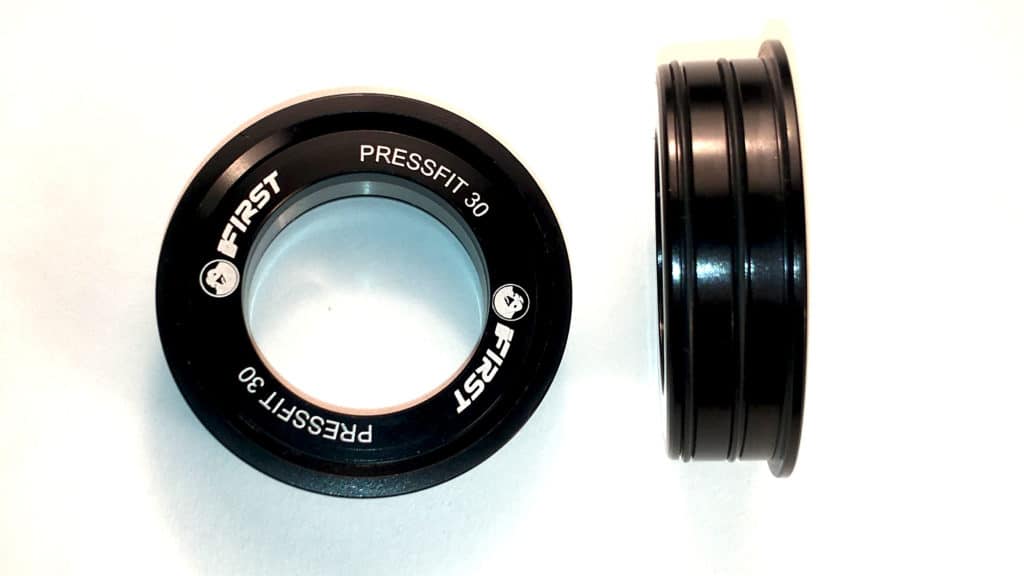
The outer diameter of the BB cup holding the sealed bearings exceeds the shell’s inner diameter by around 0.01 of a millimeter.
Pushing the cup into the shell, or removing it, should not be possible without a press fit tool.
If you could press a cup in by hand, it would not be anchored in the shell and move around making a hell of a noise, which is already the main complaint against press fit setups that are a textbook fit, let alone those that are not a good fit to begin with.
PRESS FIT TOOL SOLUTIONS
There is no such thing as a press fit tool per se.
You install and remove press fit sealed bearings and cups with various individual tools depending on whether you are installing or removing a bearing or cup.
That means creating your own kit out of tools you already own (as we saw above).
Or, better still, get hold of a kit specially manufactured to cover all press fit installation and removal situations.
Installation
You can make your own tool or easily find one online.
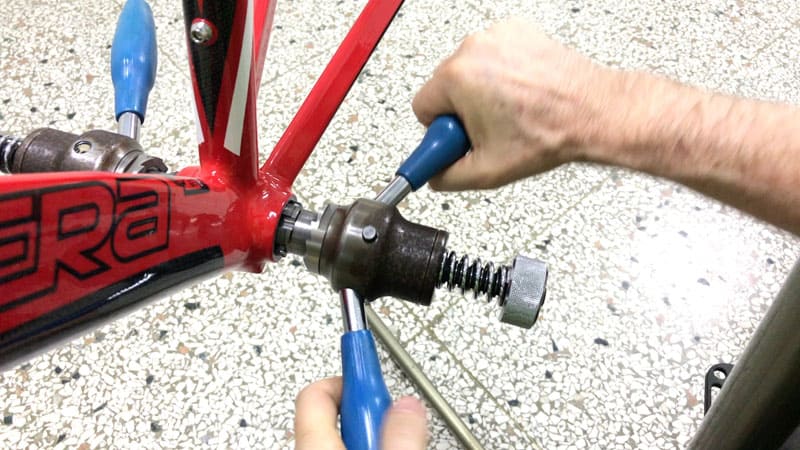
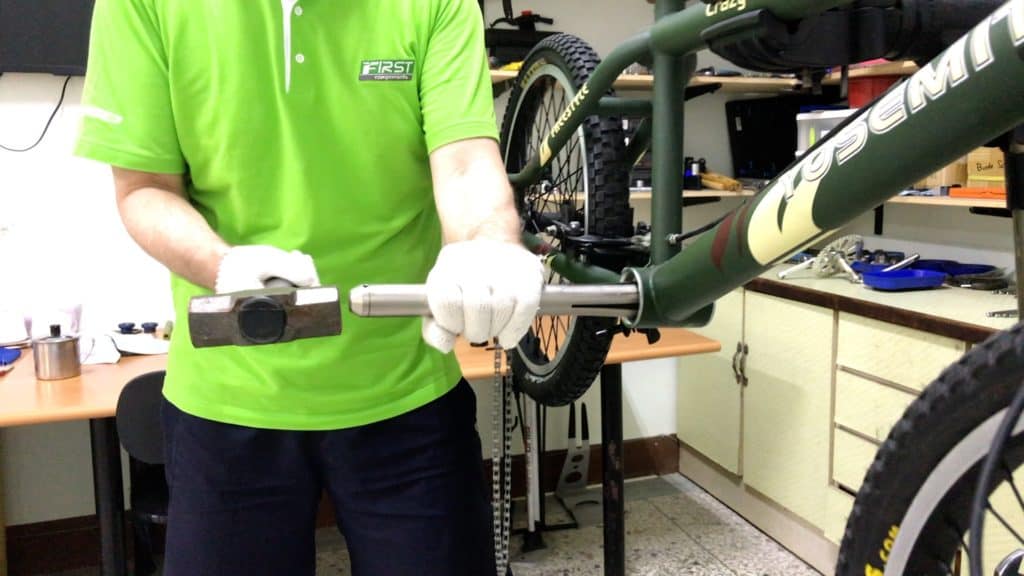
The crudest home made press fit tool “solution” is a block of wood and a hammer—claw or ball peen/machinist type.
Lodge a (greased) cup in the shell; place the wood block across it; then hammer evenly across the face of the wood, tapping the cup into the shell in tiny increments as evenly as you can.
You achieve an effective install by keeping the bearing cup perfectly parallel to the shell.
There is room for some skewness—but not much.
Once a cup skews too far from parallel, the only fix is to remove it, and start again.
That means you’ll need a removal tool which means a kit is the best way to go—you get exactly the tools you need to easily install AND remove bearings, or bearings in cups. More on that in a moment.
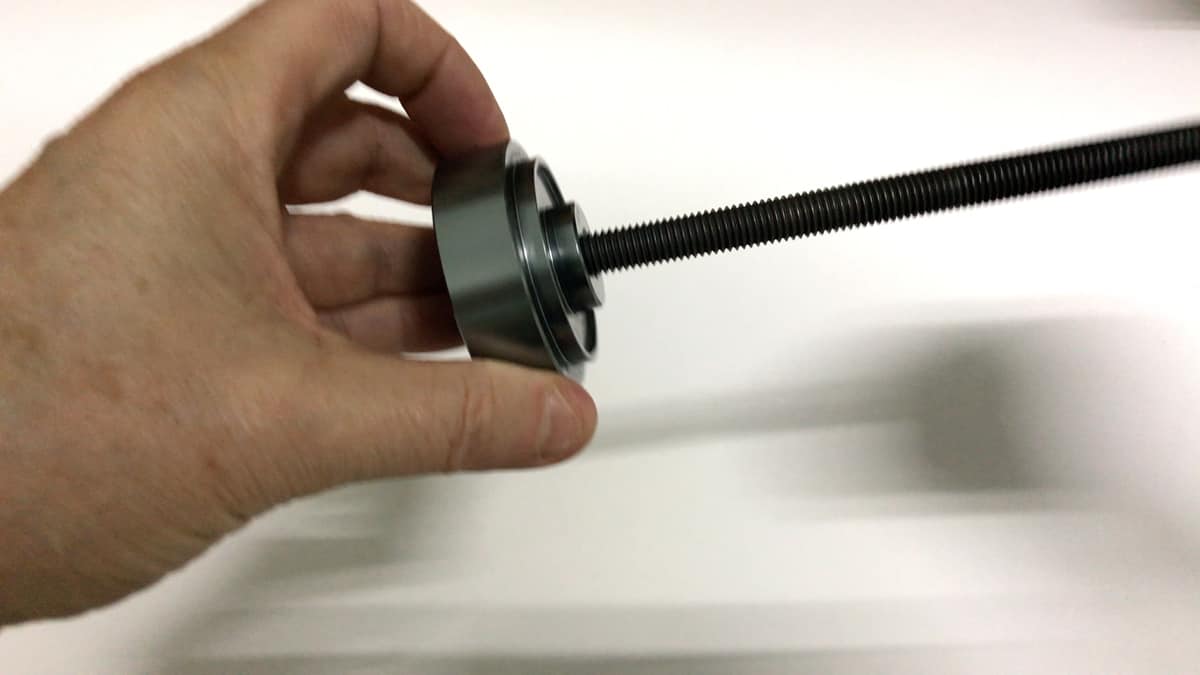
A press fit tool minimally consists of a bolt 3-4 times the width of the bottom bracket shell fitted with disks.
Each disk is machined to fit the internal diameter of the sealed bearing to be installed.
Turn the bolt to gently press the bearing or cup into the shell.
MAKE YOUR OWN TOOL . . . ?
If you are determined to go DIY, there are various options.
Plenty of Youtubers have uploaded videos detailing different approaches.
The most practical solution is to buy the essential components to add to existing tools to create your own kit.
For 100% convenience, buy a ready made kit since these cover a wide variety of installation and removal scenarios.
Impact Removal
Removing bearings or bearing cups is achieved by
- banging them out of the shell
- pressing them (gently) out of the shell
The second method is the way to go which I detail below.
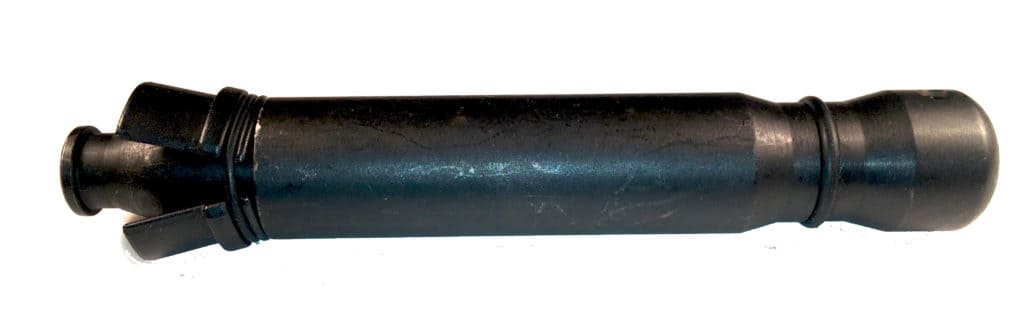
An expanding impact tool such as this is commonly recommended as the press fit tool for removing bearing cups.
It’s a direct adaption of the head tube headset bearing cup removal tool; it’s cheap and easily obtained.
Thread it through into the end containing the bearing or cup you wish to remove.
This causes each side to contract.
Each snaps out into position — expanding into the head tube — as the end slips out of the cup inside the head tube, or in this case, the bottom bracket shell.
Here the mechanic threaded the tool from the non-drive side, the target being the cup on the non-drive side.
Pulling it through, each side compresses towards the tube’s centerline, then springs into position as the end passes behind the cup.
A couple of hammer blows pops the cup out of the shell . . .
. . . and onto the floor, unless you’ve made arrangements to prevent it.
The tool’s leading edge is not gentle on a bearing or cup; still, there’s no need to compound any damage by bouncing it off a hard surface.
One of the most harsh impact removal tools is this one.
It’s deployed in the same way as the headset bearing removal type but is more difficult to position.
The bits that sit against the bearing or cup are anchored on the tool by the rubber grommet.
A weak point of this press fit tool is that the bits often slip away from the grommet.
Because the tool only works with each bit in place, the user must remove the tool, re-position any bit that slips free, then grab the hammer hoping none of the other bits dislodge in the meantime.
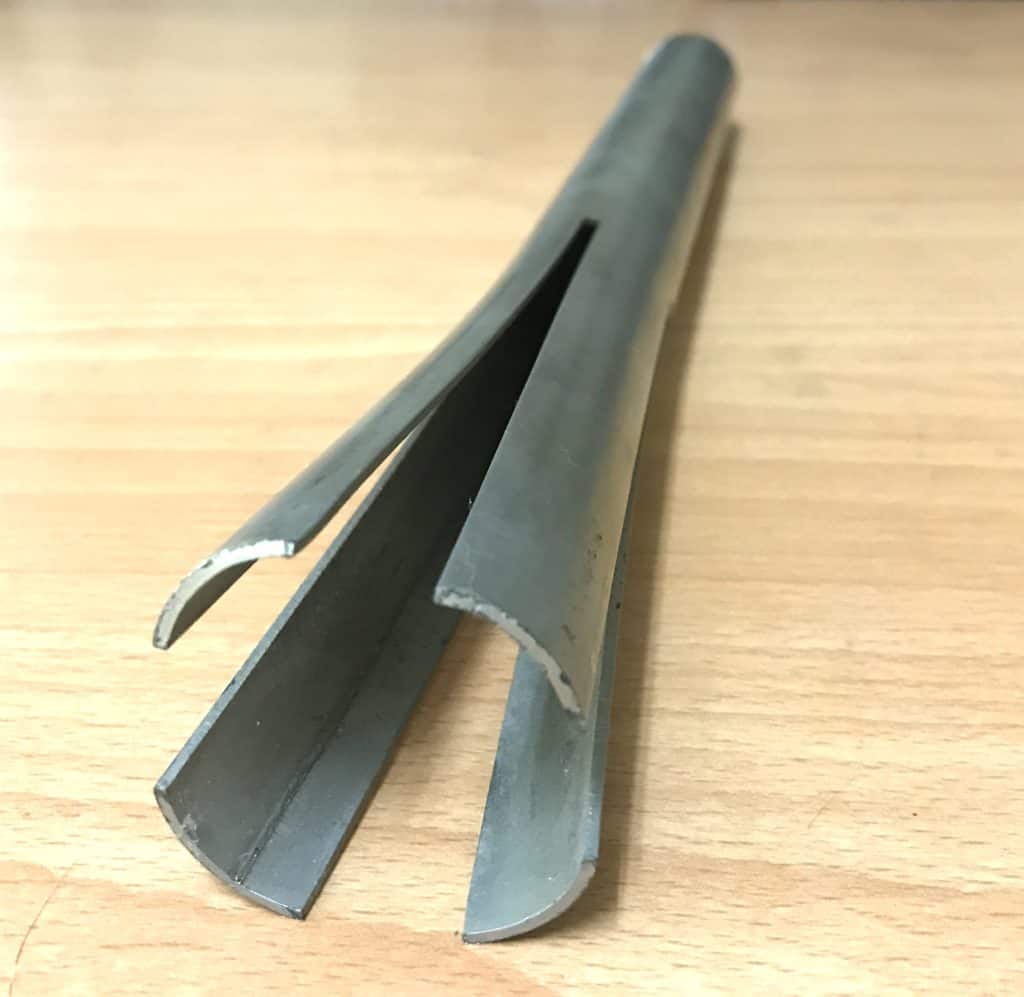
Non-Impact Removal
The minimal press fit tool to remove a bearing or cup without using a hammer requires a
- wedge
- shaft (to mount the wedge) and nut
- a cup (to catch the cup or bearing)
You insert the wedge behind the bearing or cup, turn the shaft—the bearing/cup is pulled into the retaining cup.
Slide the wedge in at an angle behind the bearing/cup inside the BB.
Making sure it’s square against the bearing or cup, turn the nut—the bearing/cup extracts into the retaining cup.
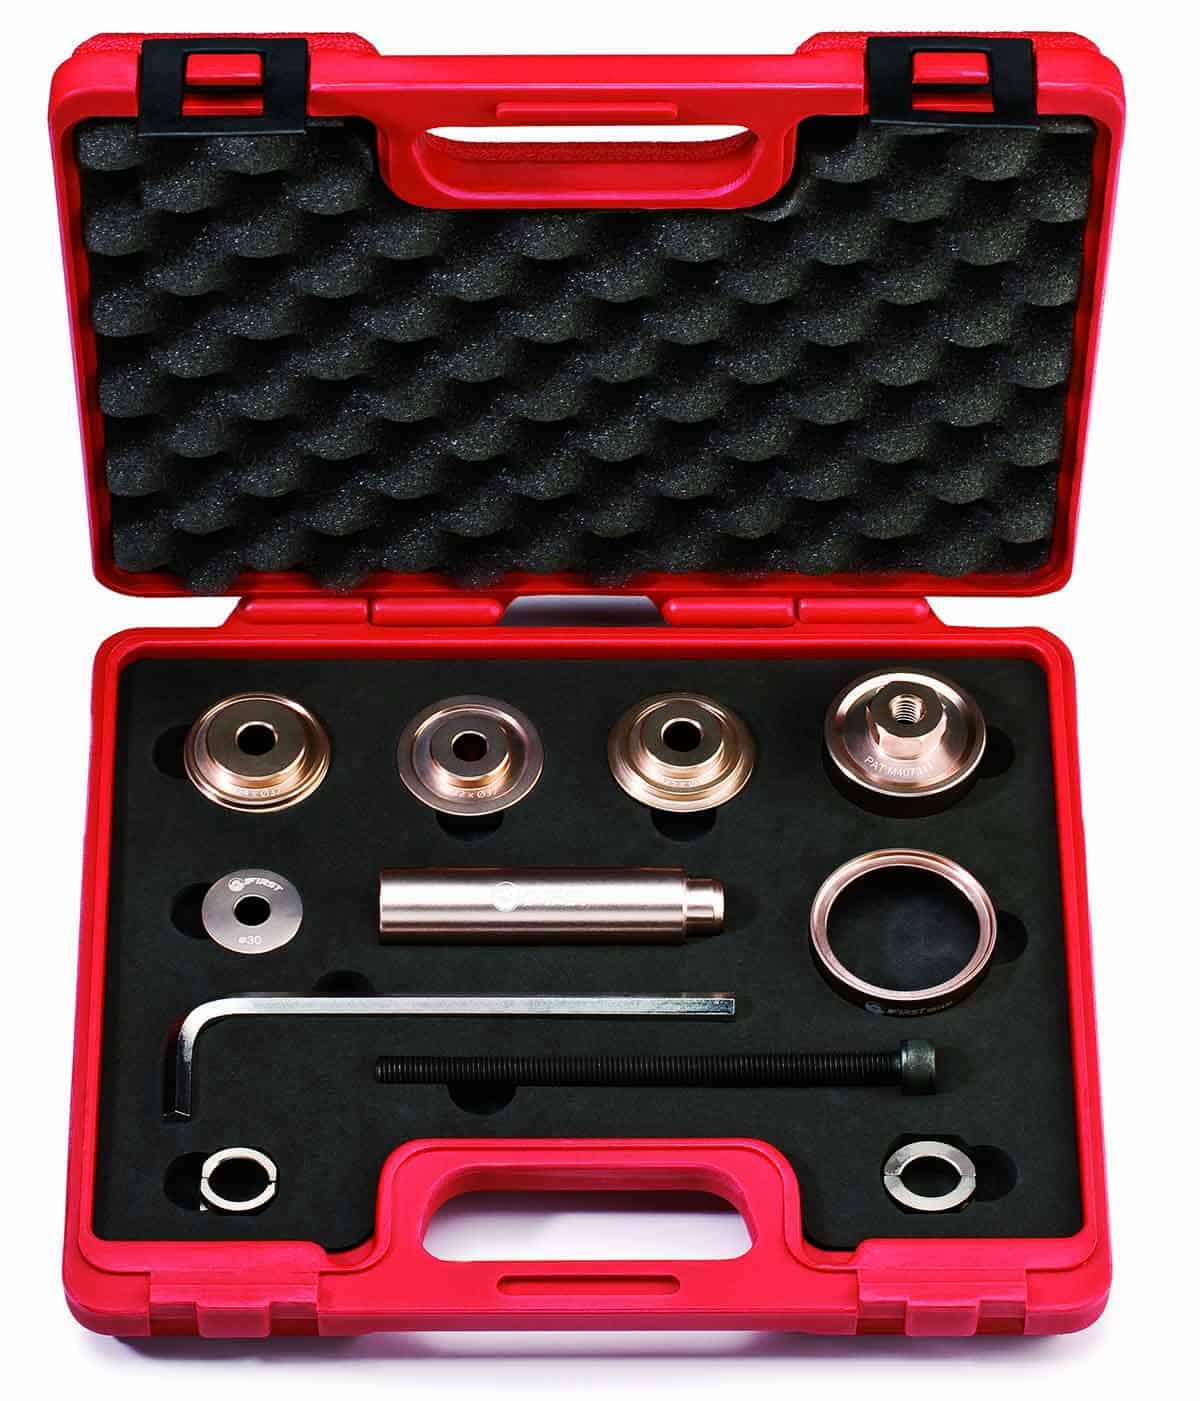
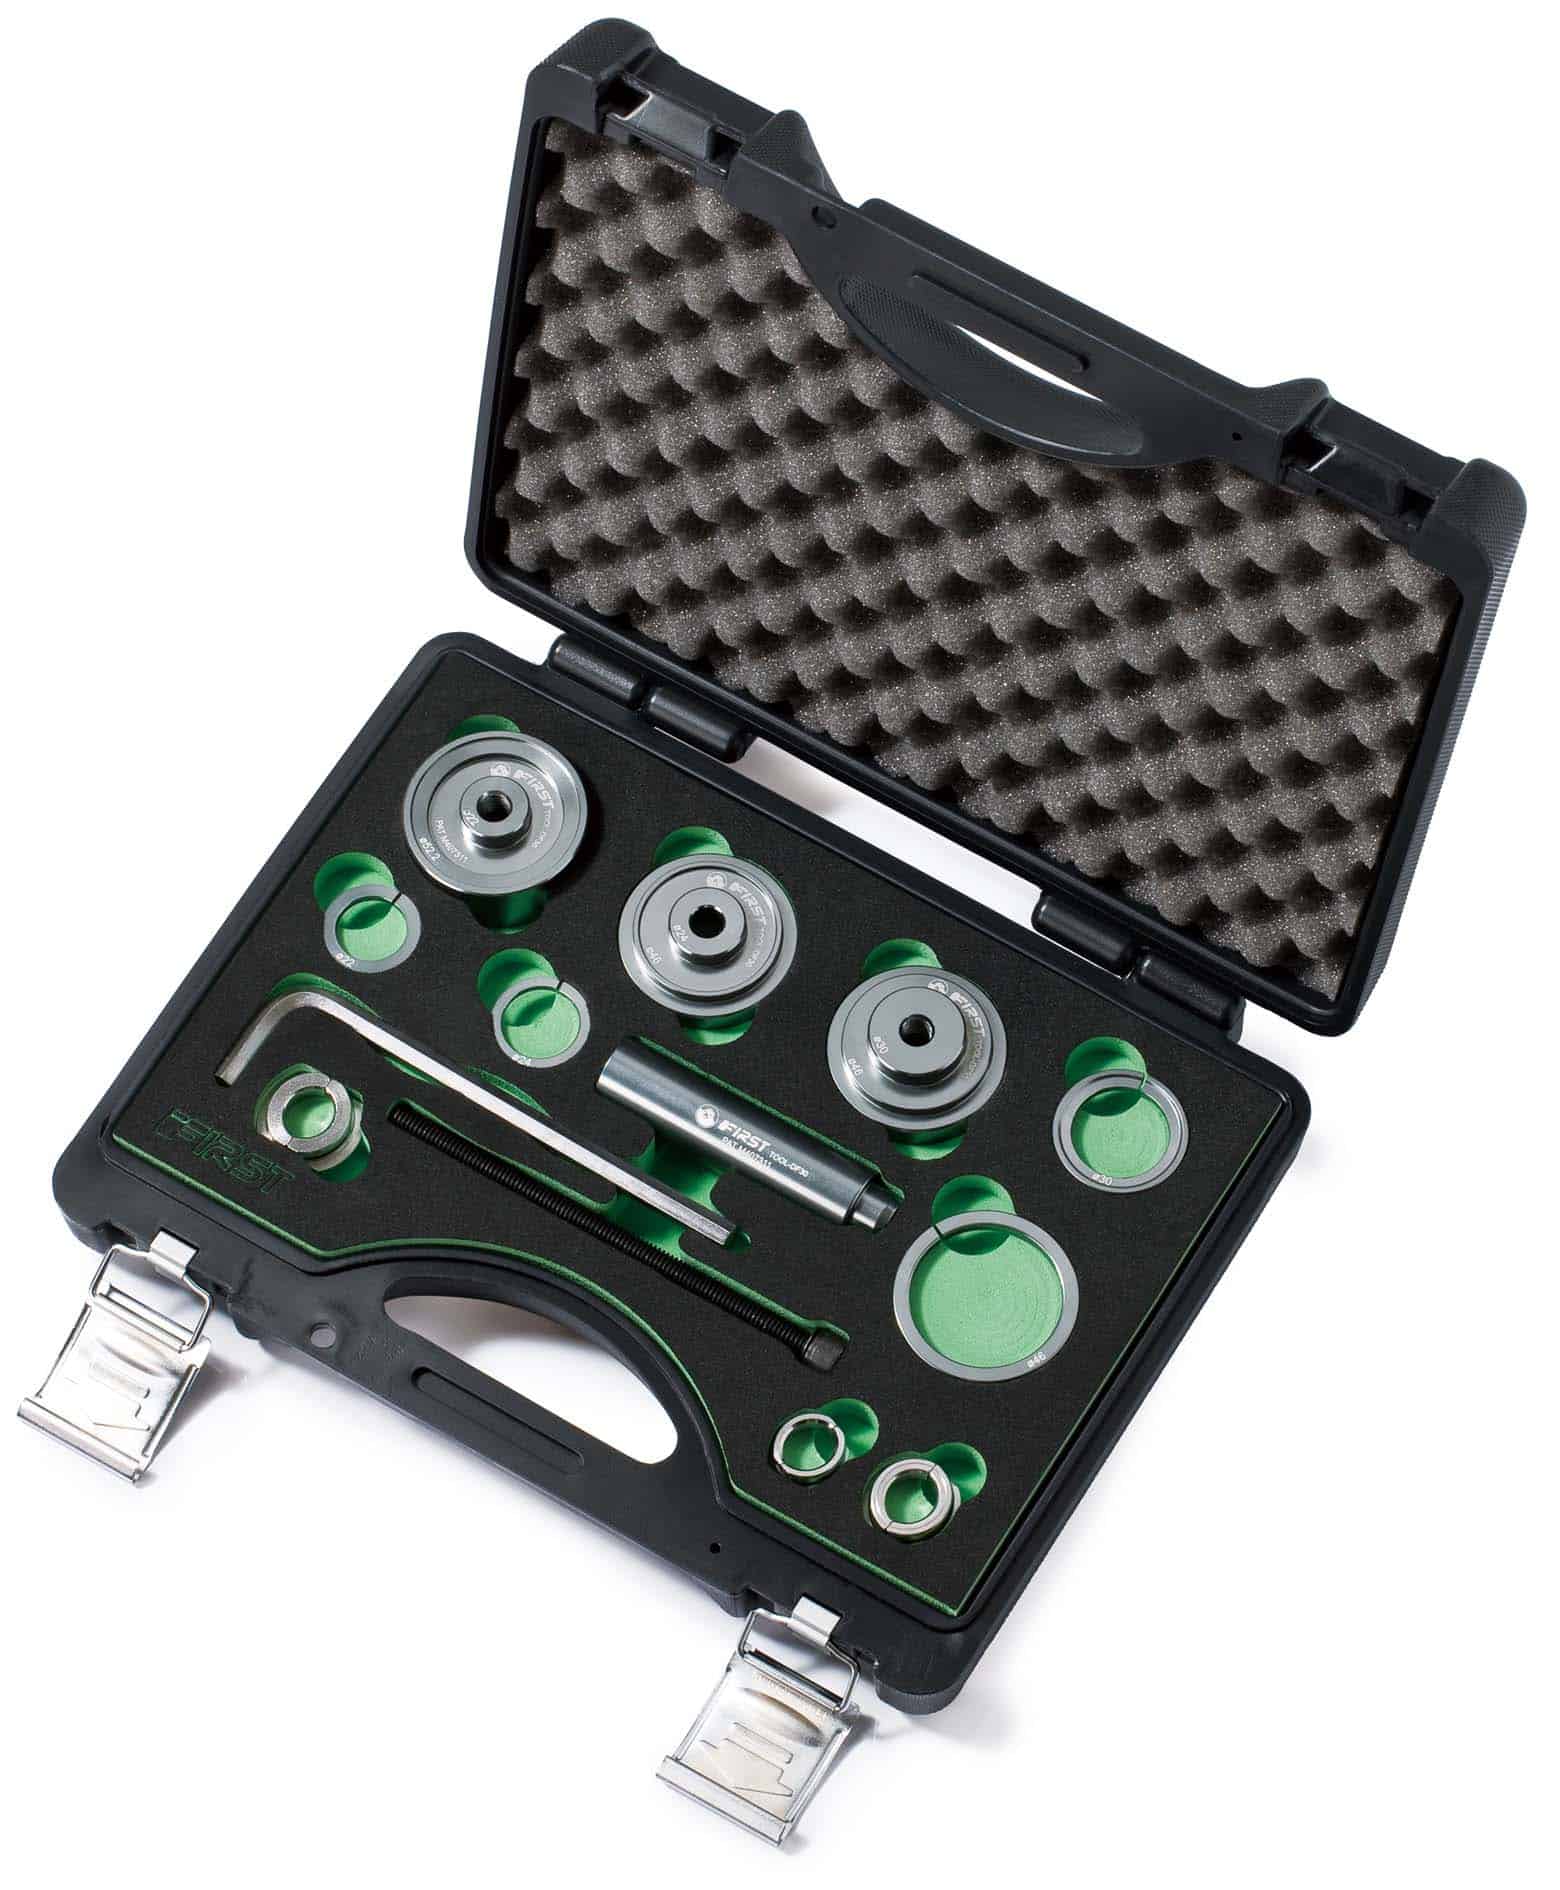
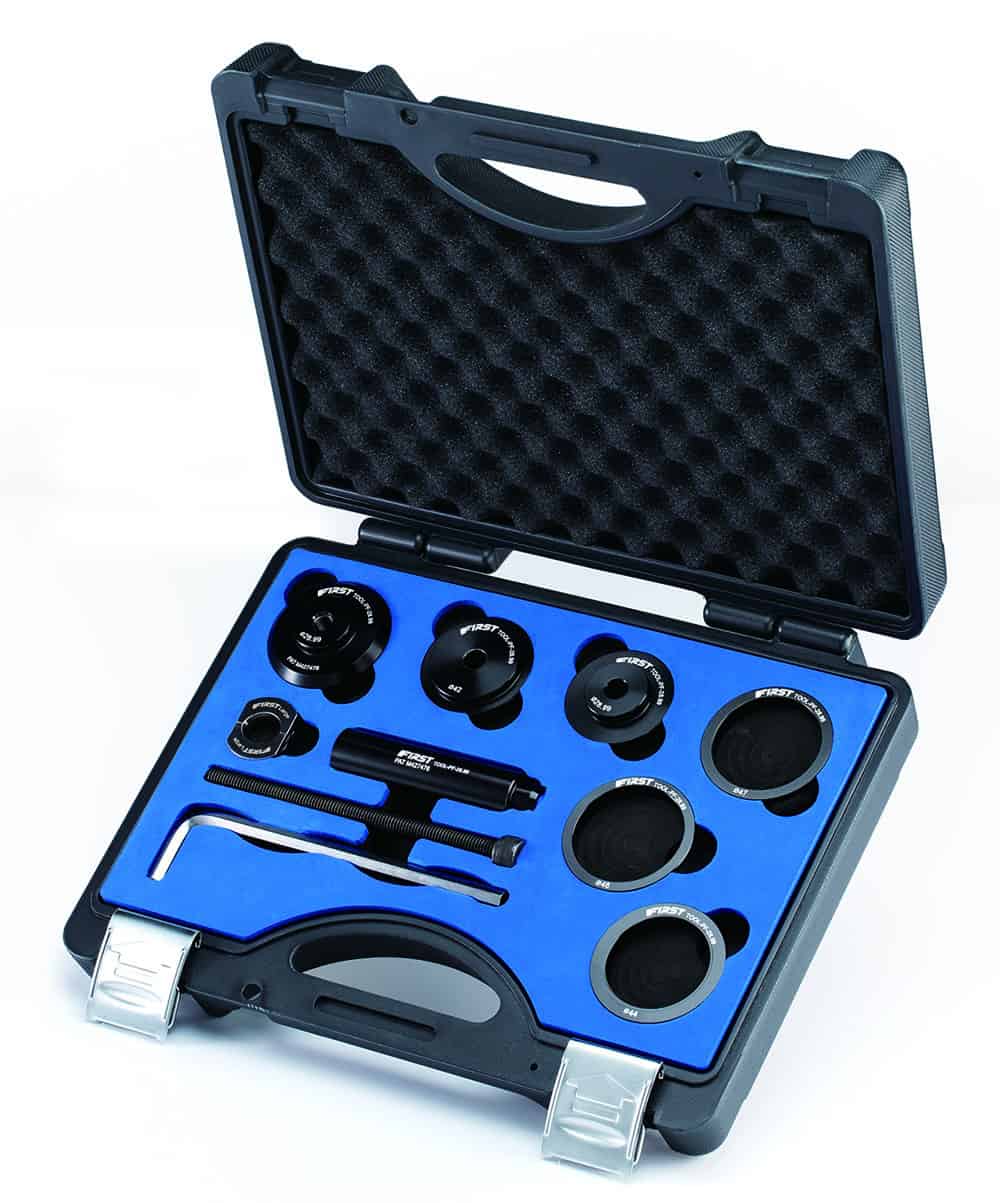
THE ULTIMATE PRESS FIT TOOL KIT
FIRST has three press fit tool kits.
- For 41mm and 42mm press fit setups
- For PF30
- For 28.99mm (SRAM ‘DUB’ kit)
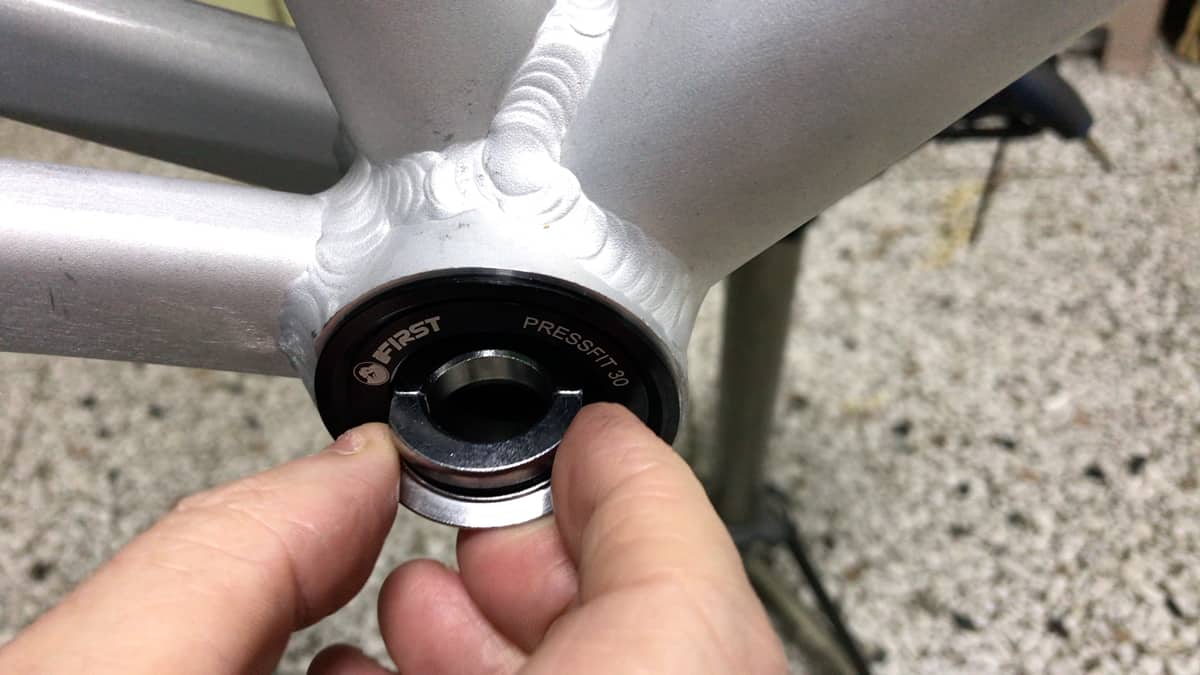
The following points on how the tools work are presented in relation to the PF30 tool.
Note that the installation and removal techniques are the same for each.
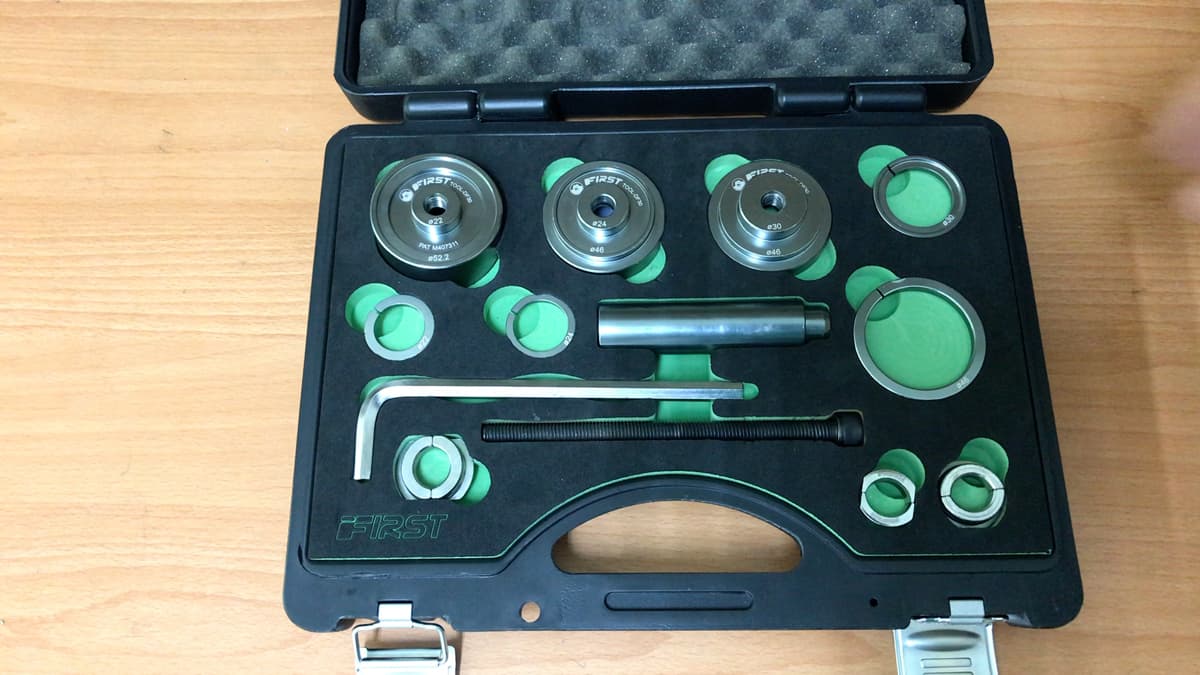
The 3 pieces at the top either provide stability during installation/removal, or actually press in a cup or, reversed, catch a cup as it is removed.
Two are used at a time. Which one depends on whether you are doing an installation or removal along with the size of the bearing or cup.
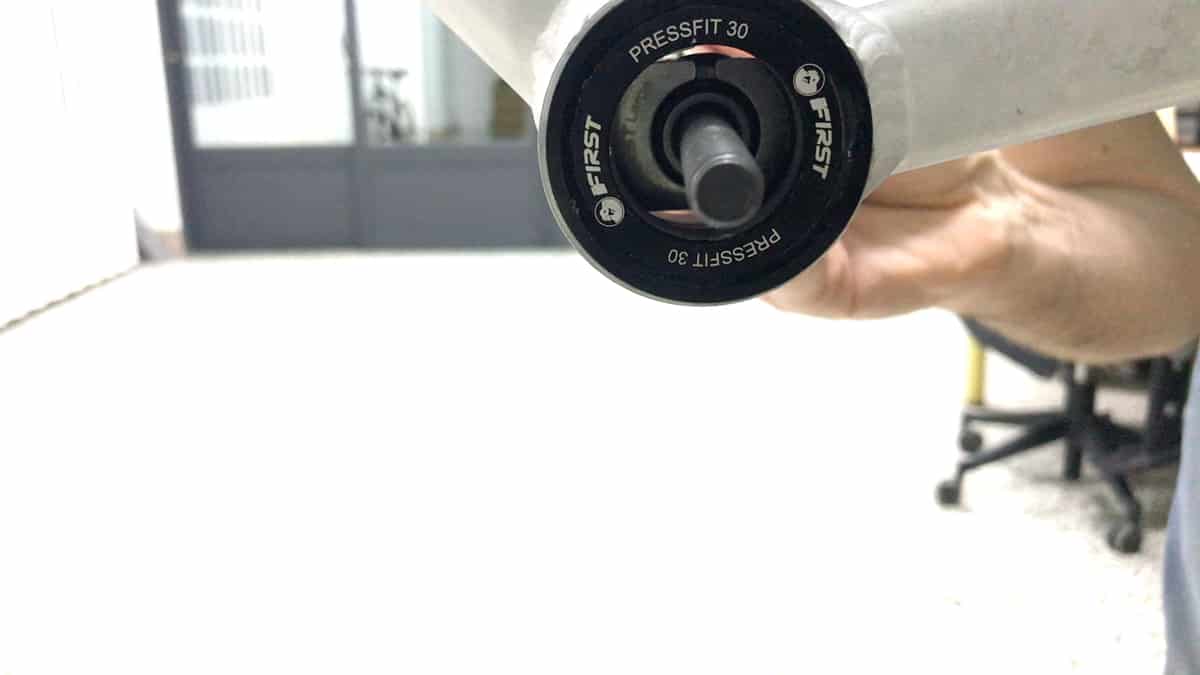
One of the 3 steel hitches along the bottom fits behind a bearing cup inside the BB shell, then onto the tube shaft (center of image) through which the bolt is threaded.
Turning the bolt applies the pressure that pushes the cup into the receptacle.
Unscrew the bolt to release the tool’s components and the cup.
You do one side at a time so reverse the procedure for the other side.
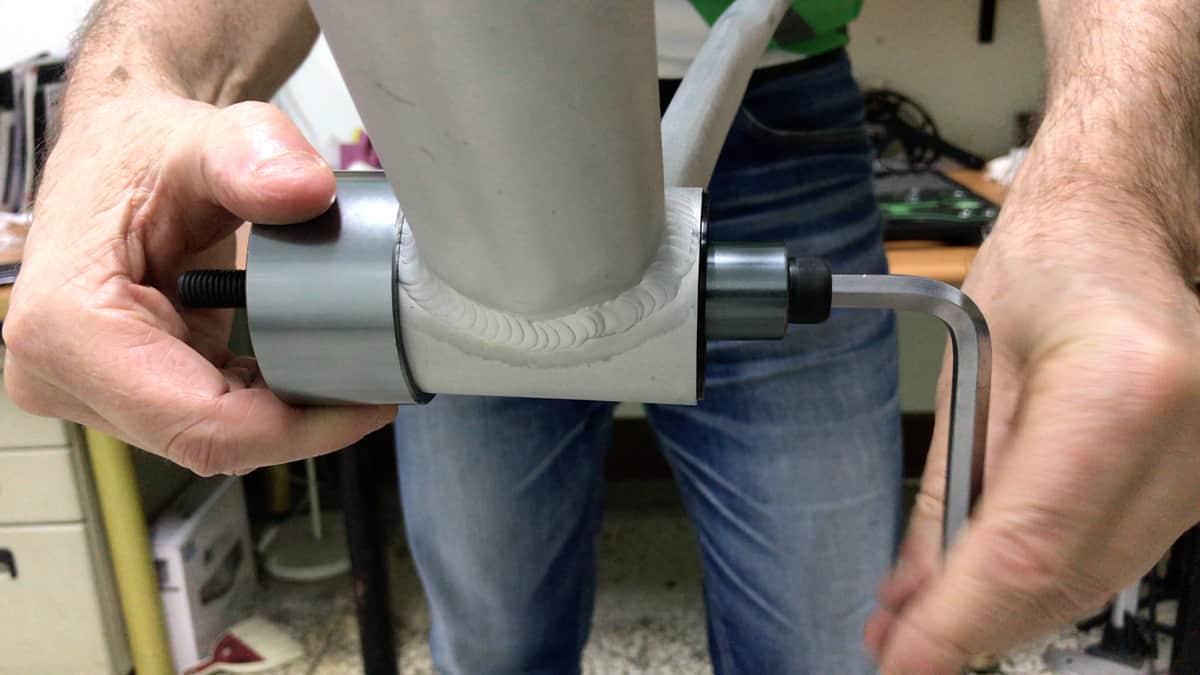
Installation Components
The bolt threads through the piece anchoring the tool on the opposite side to the installation.
This piece fits directly into the shell to install the first cup on the opposite side.
Where one side has already been installed, you reverse the piece to brace against the edge of the BB shell.
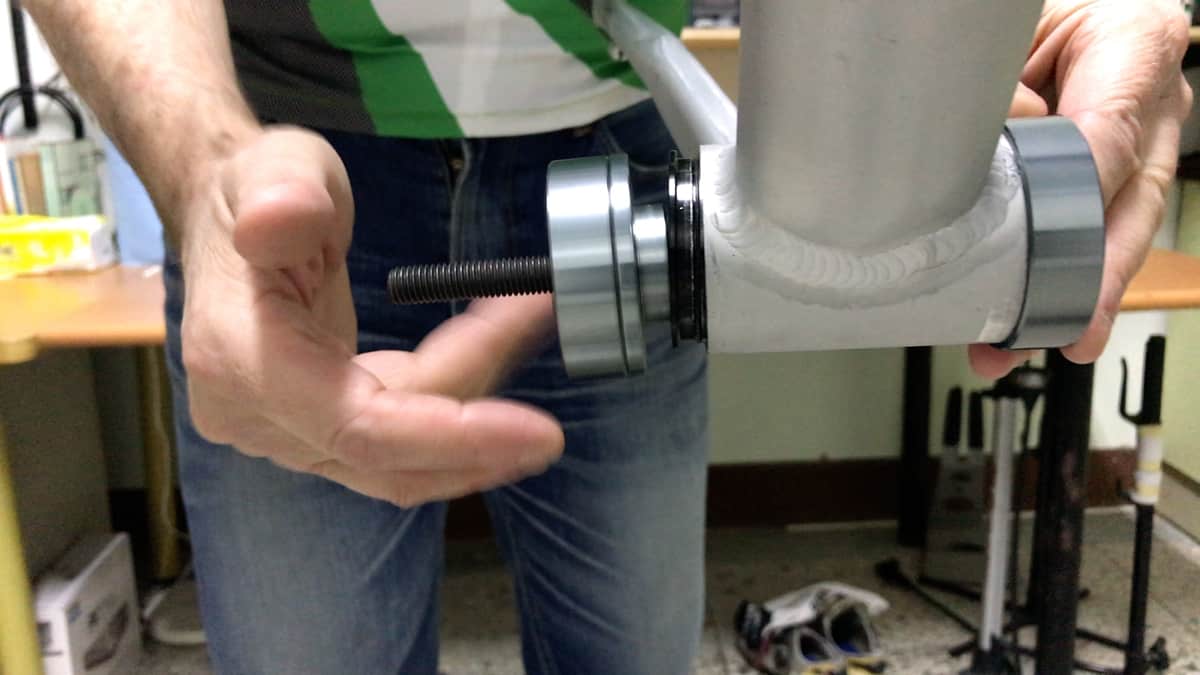
The matching cup threads along the center bolt and loosely fits into the cup.
Cranking the bolt presses the the cup into the BB shell.
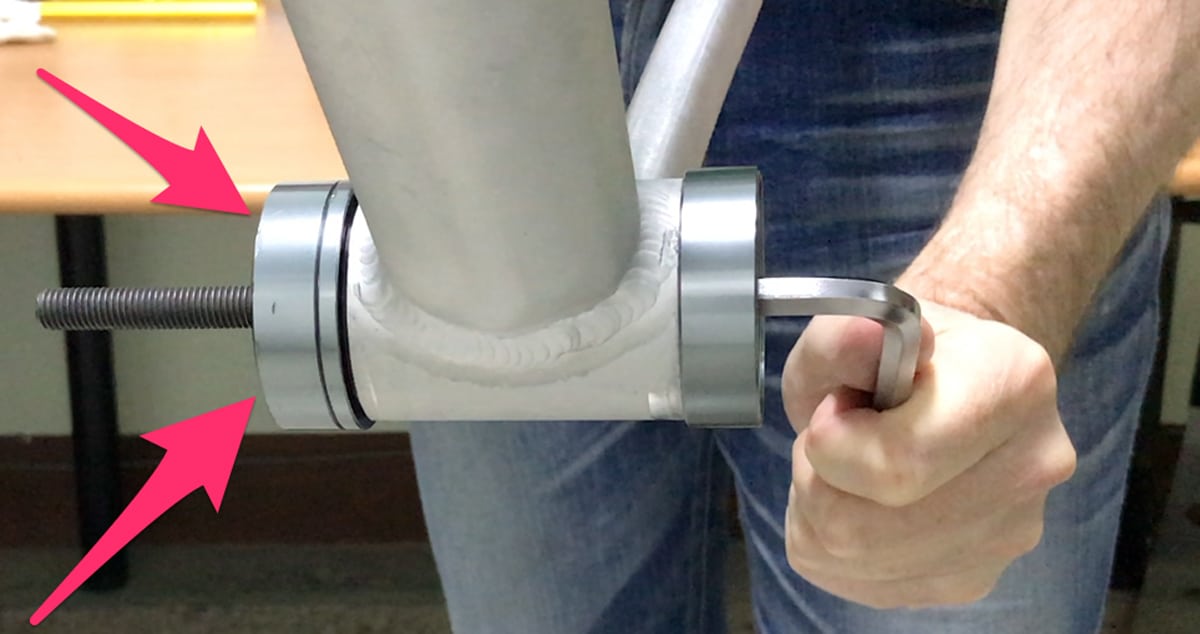
Removal Components
Any good press fit removal tool uses a steel wedge that you insert into a bottom bracket’s inner diameter.
The impact method of removal is crude and is simply not necessary given the number of wedge type tools on the market.
The wedge squares against the bearing or bearing cup and applying tension gently pushes (or pulls in some press fit tool designs) it out.
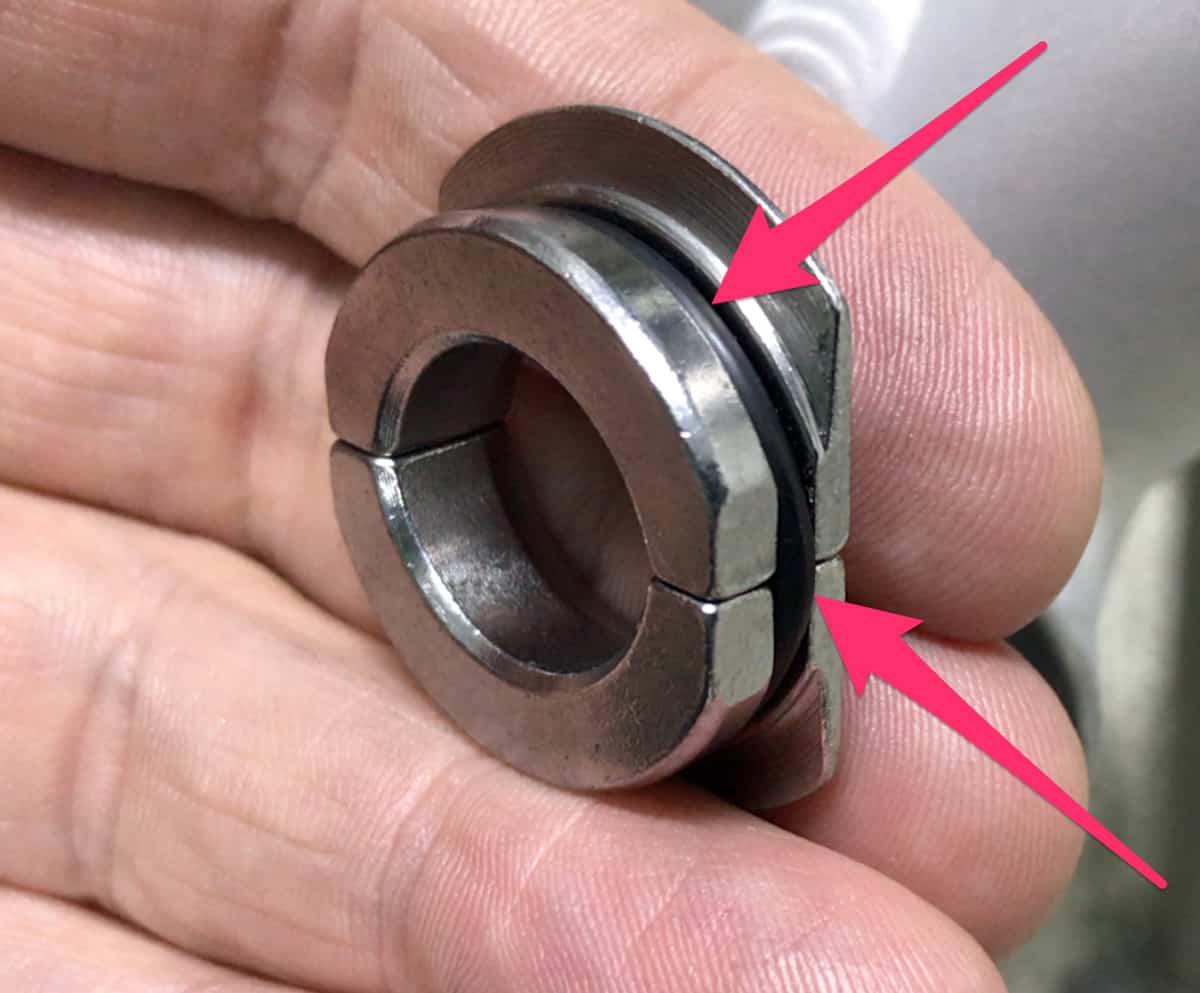
Each tool in FIRST’s press fit tool range uses a “split steel-hitch”.
Each half is bound to the other by a rubber grommet which allows the pieces to expand onto the shaft which holds them in tension against the bearing cup inside a bottom bracket cup.
You insert the shaft in to the side opposite the cup you will remove.
Slip the steel-hitch in sideways, then push it onto the end of the shaft.
The end of the shaft is visible around the bolt with the hitch snugged around it in turn.
Threading the receiving cup anchors the bolt; a few turns presses the cup into the receiving cup.
Remove the receiving cup to retrieve the perfectly undamaged bearing cup you have just removed.
A PRESS FIT TOOL FOR EVERY SITUATION
Anyone can easily obtain all the components to create a custom set of press fit tools.
Just get a kit.
You can order directly from this page . . . and get KOSTENLOS Shipping!