This article examines (1) the technical issue of fixie chain tension and (2) the aesthetic issue of fixie frame craftsmanship (considerations which apply to all frame manufacturing actually).
Firstly lets note that a fixed gear bicycle is a type of single speed bicycle and not the other way around: fixies are single speed, but a single speed is not necessarily a fixie.
Yes a lot of cyclists conflate single speeds and fixies—but they’re not the same.
In this examination of the most simple (and most elegant) bike design of them all, we’ll look at fixed gear bikes for the road (and not track bikes by the way) from the point of view of these two issues, technical and aesthetic, one of which gets a lot of press (we’ve got a unique contribution to that), and one which doesn’t get any press at all.
Contents
Single Speeds and Fixies
The modern bicycle began its run as a single speed machine we know as the High Wheeler, Penny Farthing, or the Ordinary (when it was actually quite extra-ordinary, so named to distinguish it from the non-ordinary safety bikes that replaced these dodgy machines according to this source).
Now, technically speaking, the high wheeler is the original fixed gear bicycle. Although patents for variable gears appeared from 1868 onwards with James Starley releasing his Geared Ariel in 1871, the non-geared drive dominated.
The following decades, of course, were owned by the single speed safety bike with its rear wheel chain drive, free hub (William van Auden came up with the idea of placing a ratchet in the hub thus inventing the freewheel in 1869), and twin triangles as the basis for the frame.
And the rise of the derailleur when it came did not have a great impact on the mass market—single speed (with coaster brakes) remained standard well into the 1980s.
For our purposes, there are two problems shared by single speeds and fixed gear bicycles as 1. dropped chain and 2. chewed trouser leg.
Trouser leg trauma can be avoided either by tucking the flapping thing into a sock or securing it with the (once ubiquitous and still available) trouser clip. Chains are another matter.
Hoffy’s article on chain problem fixes is a must-read, although you should note that chains don’t “stretch” or elongate, a wide misconception rarely debunked.
The rollers wear which increases the distance between each, and that’s what you measure with a chain wear gauge, not the “stretch” of the chain.
Dropped chains can be quite the bugbear of fixed gear bicycle life (and single speed of course), but assuming you’ve got the right sized chain ring and chain, it is all a question of chain tension.
Let’s take a look at one solution to this.
Eccentric Bottom Bracket for Chain Tensioning
A key reason for installing an eccentric bottom bracket is for quickly and easily tensioning the chain.
You can tighten a chain, of course, by loosening the axle nuts, pulling the axle away from the crank, then tightening the nuts to hold the axle at that point of tension.
If a chain is too tight in a drive train where the chain ring is not perfectly straight, crank rotation will not be smooth.
There’ll be resistance at the point of deviation from the chain line and it might even seize up completely.
Since the force exerted on the rear wheel axle is always in the direction of the crank, the battle is always to minimize chain looseness.
Adjustment involves a tricky technique in which you move the axle towards the rear bit by bit . . . that is loosen one nut, pull the wheel to that side so that it’s closer to the chain stay and no longer centered behind the BB shell . . . then tighten the nut and then repeat on the other side until the right tension is reached.
Using a chain tensioner is also a possibility but hardly an elegant solution on a fixed gear bicycle where elegance and the ‘cool’ factor is the whole point!
This is why using an eccentric bottom bracket (EBB) is a viable alternative.
How Does It Work?
All non-EBB bottom brackets are concentric . . . ie. they rotate in a perfect circle around a BB’s geometric center which is the center of the crank spindle (once installed).
An EBB, in contrast, rotates in an arc offset from the center of the spindle.
There are two reasons cyclists want this offset effect:
1. To easily adjust the height of the spindle (relevant for mountain bikers)
2. To tension the chain
For a fixed gear bicycle the chain tensioning function is the one you want.
You adjust chain tension by rotating the EBB to any point on one half of a complete half; the chain loosens then tightens as you rotate the unit.
But quickly and conveniently carrying out that rotation is not achieved when the common adapter type of EBB on the market at the moment.
This is the common adapter type which held in the shell by tightening the bolts; a standard bottom bracket threads into it.
To rotate the unit you have to firstly loosen it and then slide it around to the point that gets the chain to the right degree of tension. The re-tighten the bolts.
This type of EBB adapter works through a pair of expanders that press into the BB shell when the bolt is tightened.
The FIRST Components EBB in Action
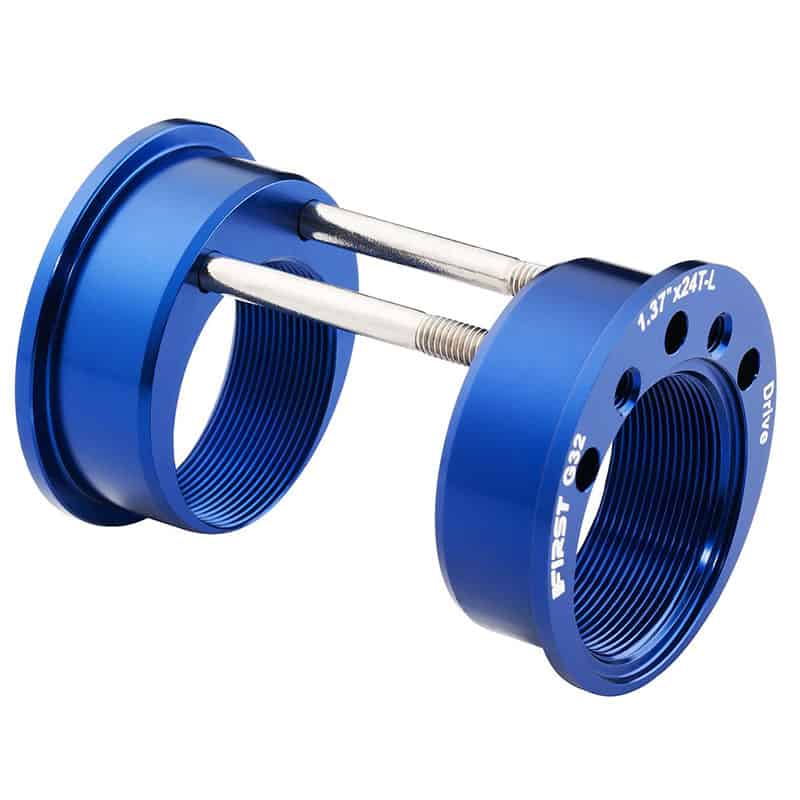
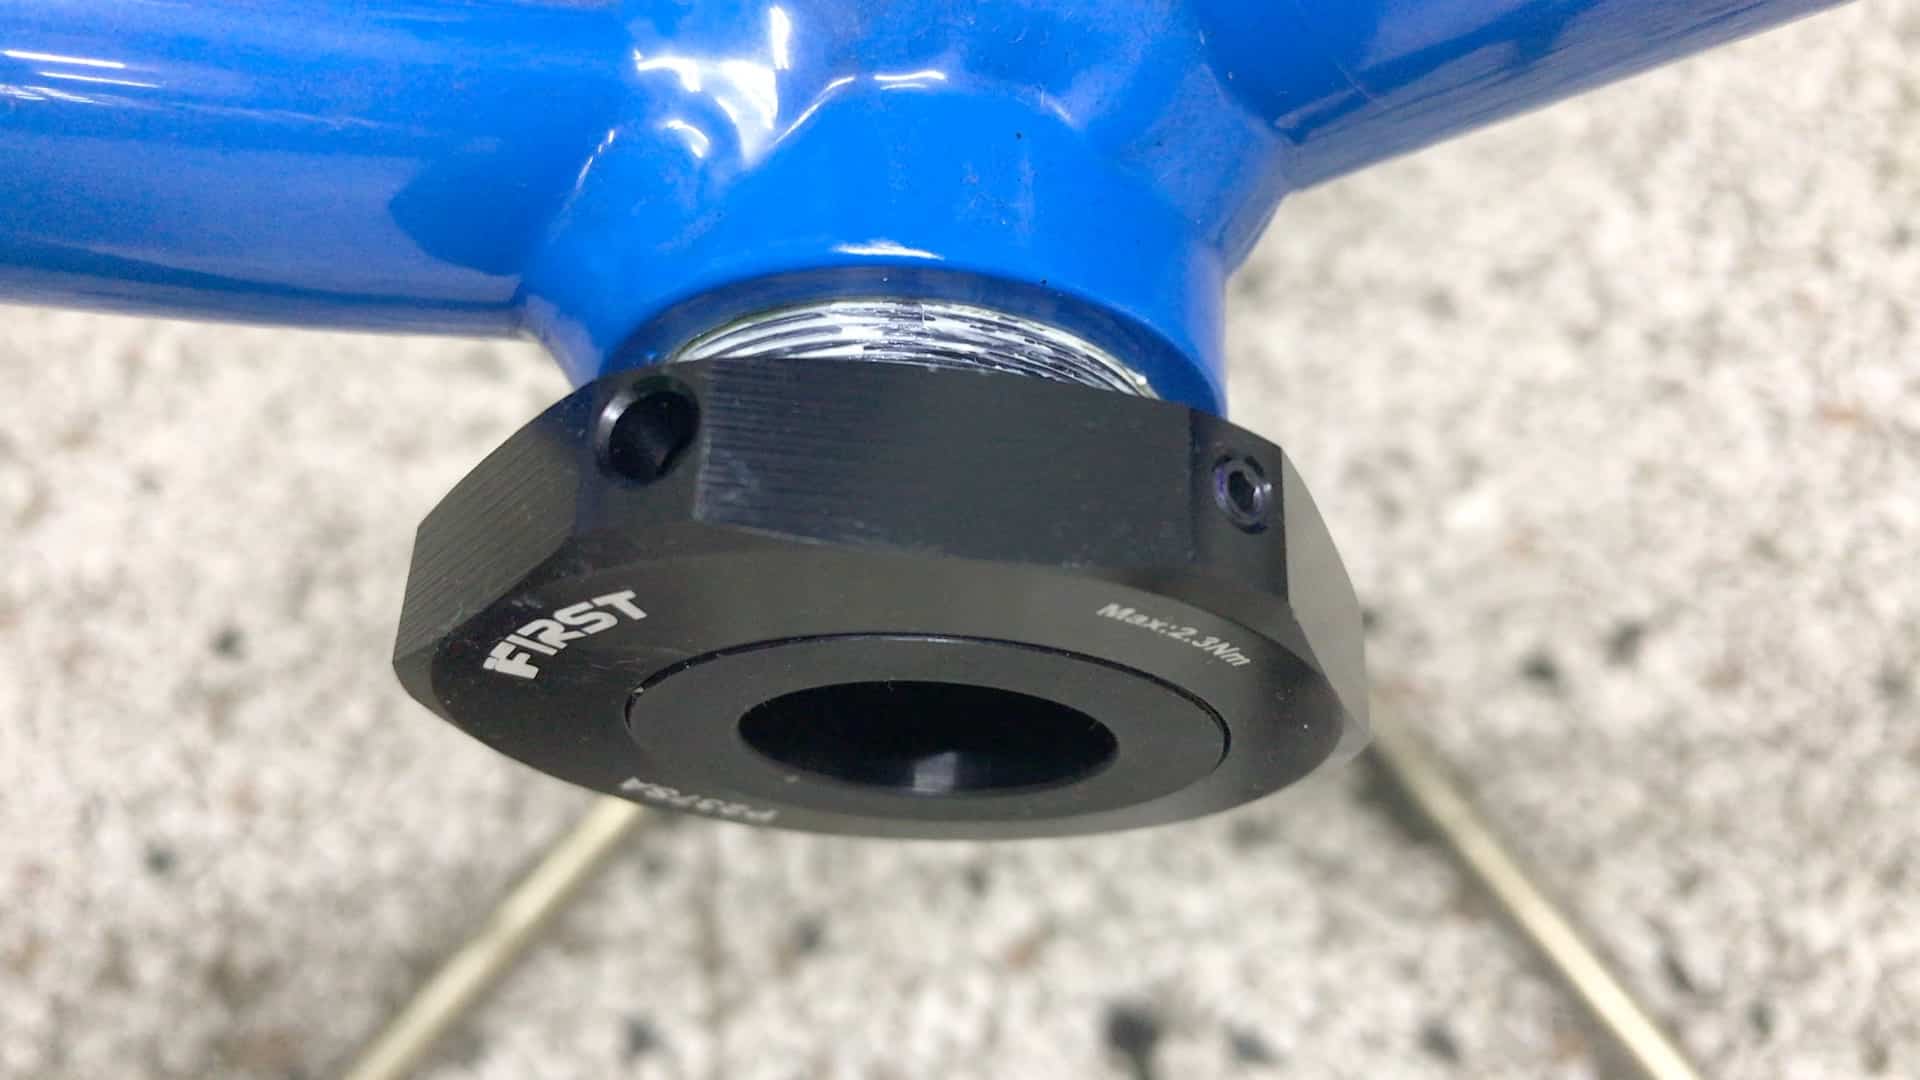
An important point is that this is a threaded bottom bracket, not a press-in adapter that accepts a bottom bracket.
The P237SA kit is designed to fit a standard BSA 34.8mm threaded bottom bracket shell.
As a complete bottom bracket, and not merely an adapter, the P237SA contains sealed bearings mounted inside a moveable shell.
The shell can be rotated in an offset circle just as an EBB adapter can be rotated as in a standard EBB setup, which moves an installed crank spindle either towards the rear sprocket or away from it.
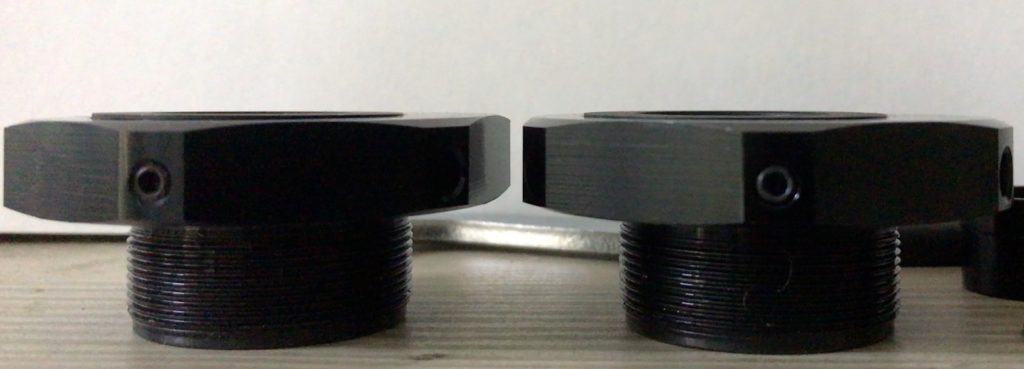
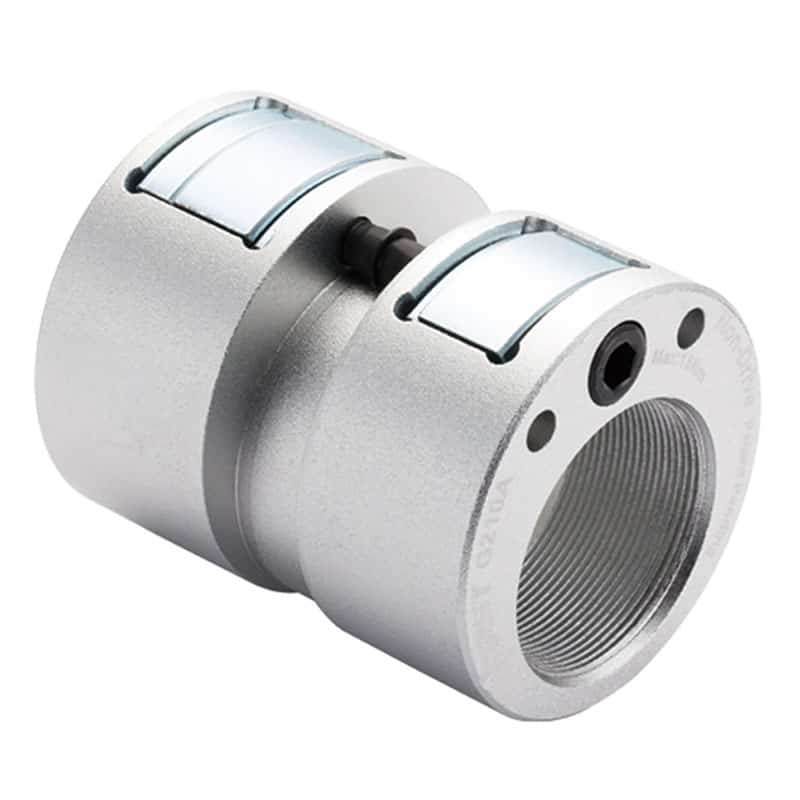
This lateral view shows one of three corners out of the six, each of which has a 2mm Allen bolt that prevent the shell from rotating during BB installation.
This view of a partially installed unit also shows one of the three holes on the remaining three corners.
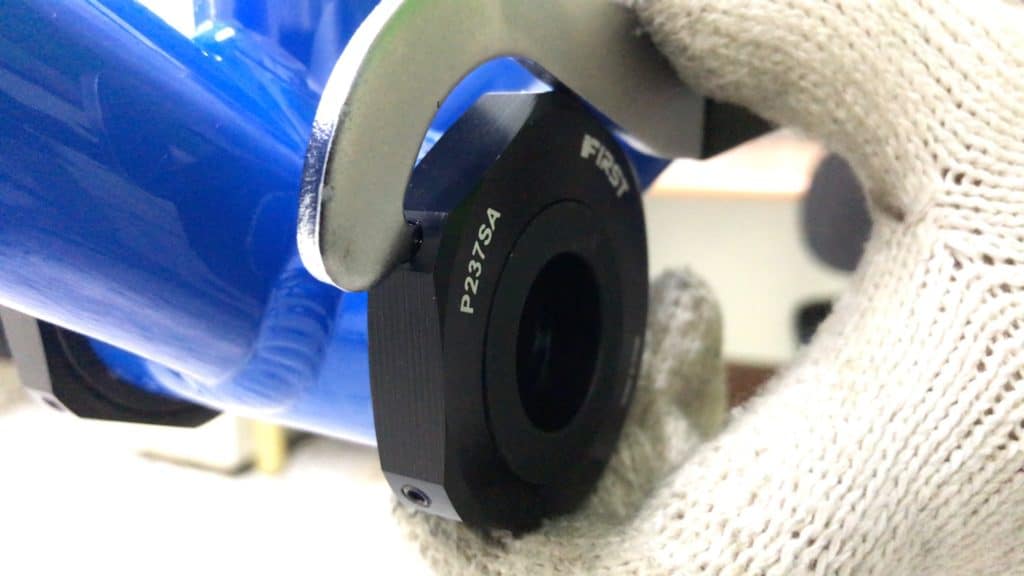
The hole is for the wrench—you insert the tip then lay the body of the tool along the flat side of the EBB for grip when tightening during installation.
The 2mm hex bolts must all be tight to prevent the EBB shell from rotating during the tightening process.
Rotating the Moveable Shell into Position
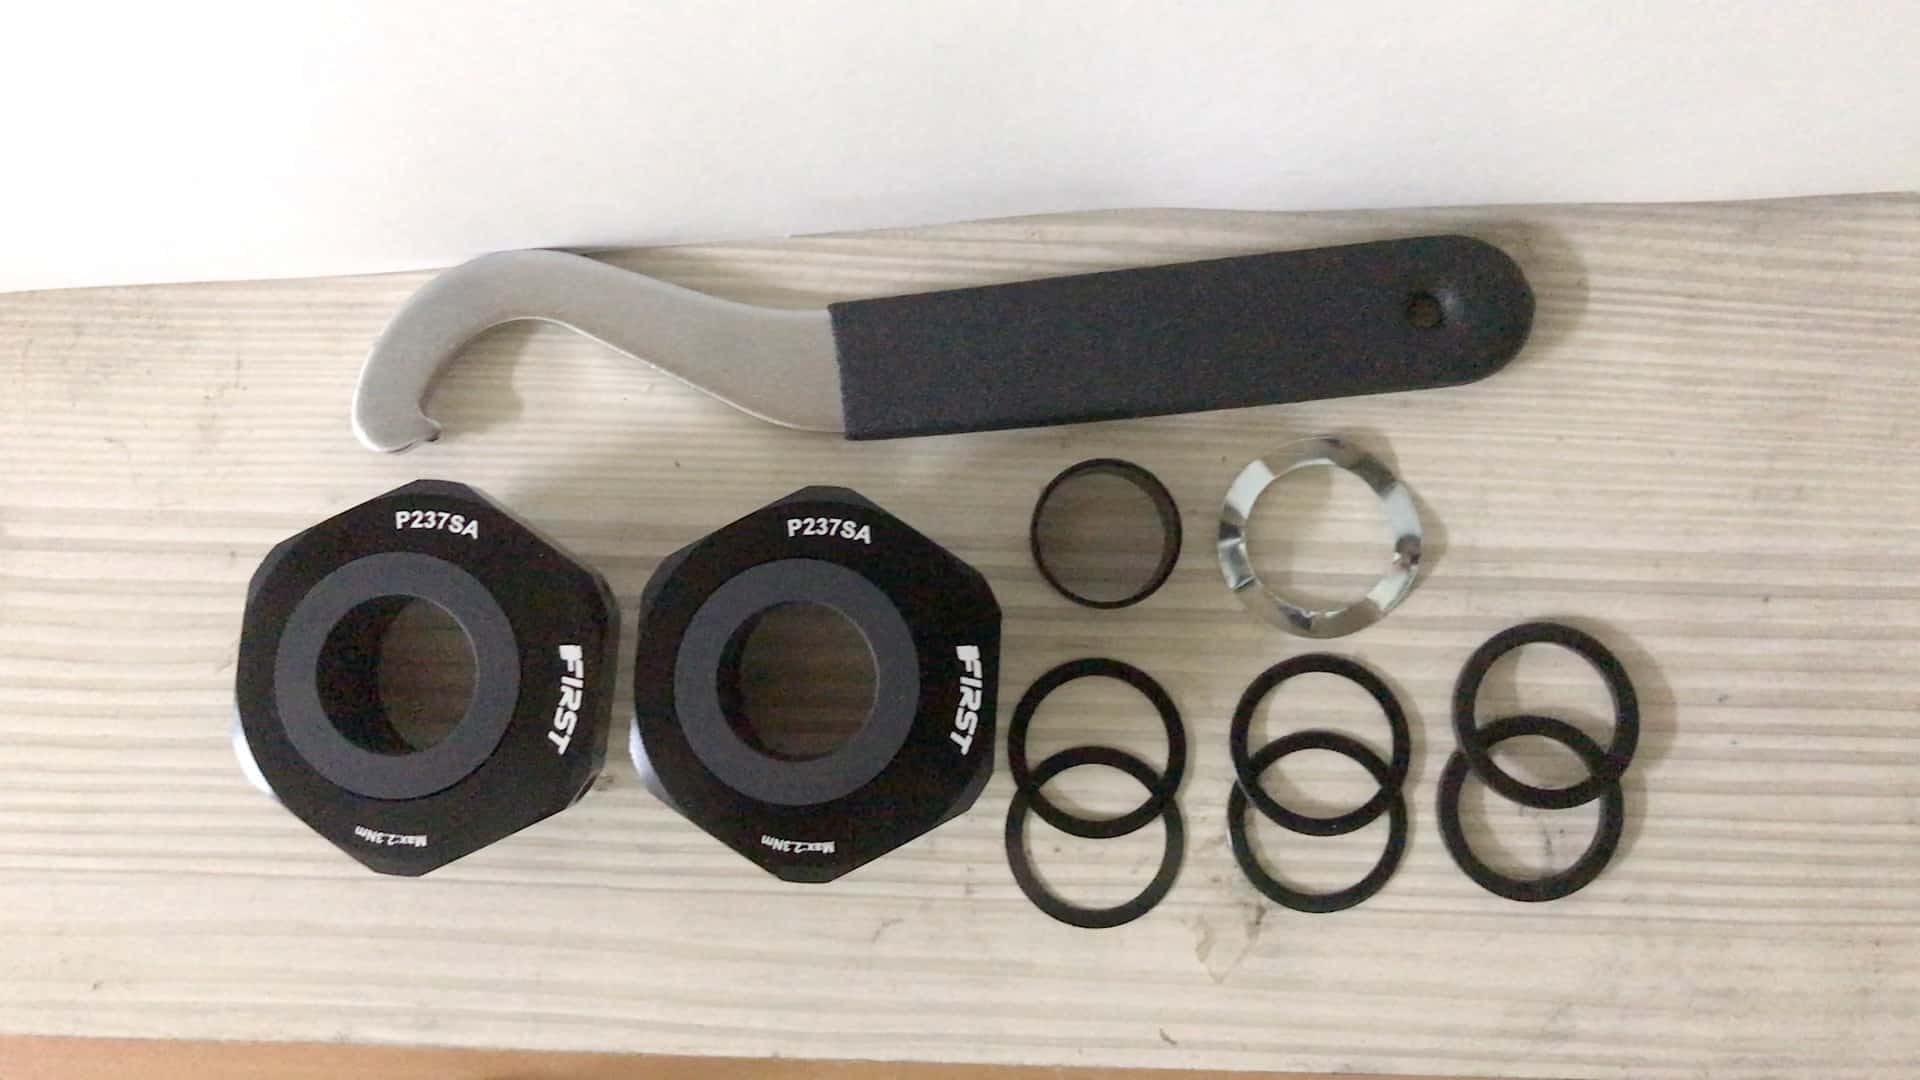
The convenience of this design stems from the three hex bolts placed on three of the six vertices. Each is loosed or tightened with a 2mm Allen wrench.
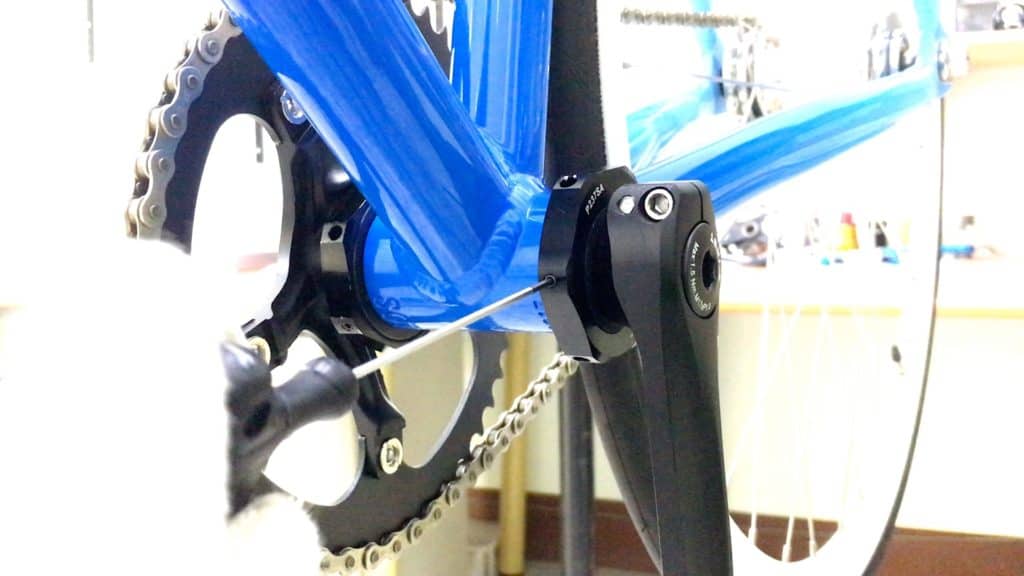
To adjust chain tension, you loosen all six bolts (three on each side).

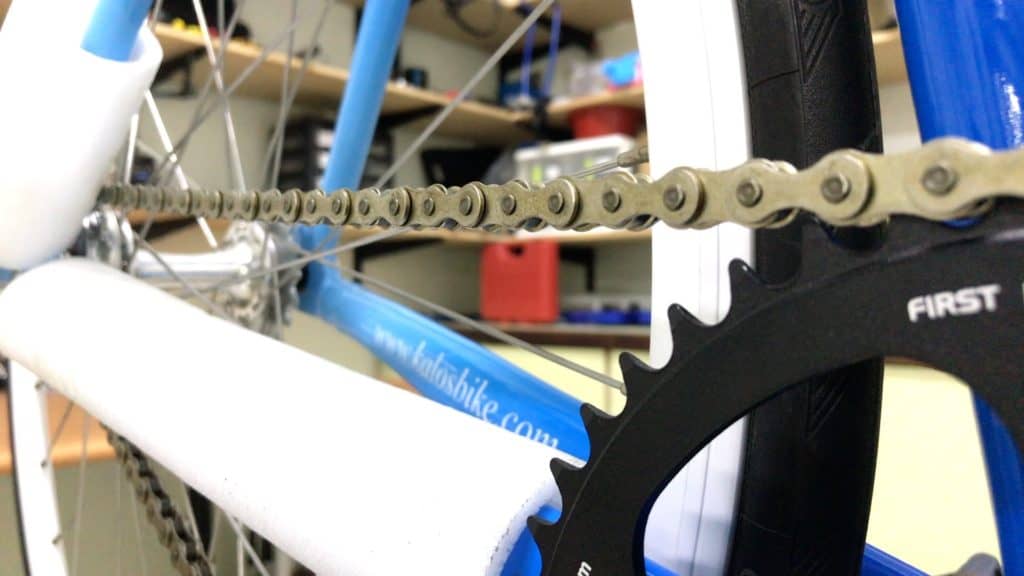
Let’s suppose your fixie’s chain is maximally loose.
You couldn’t ride a fixed gear bicycle with the chain this loose—it would fall off as soon as you increased cadence beyond a certain (and very low) threshold.
The technique to apply here is to rotate both the left and right side casings together.
If either the left or right side moves out of alignment with the other the spindle jams preventing any further adjustment of the casings.
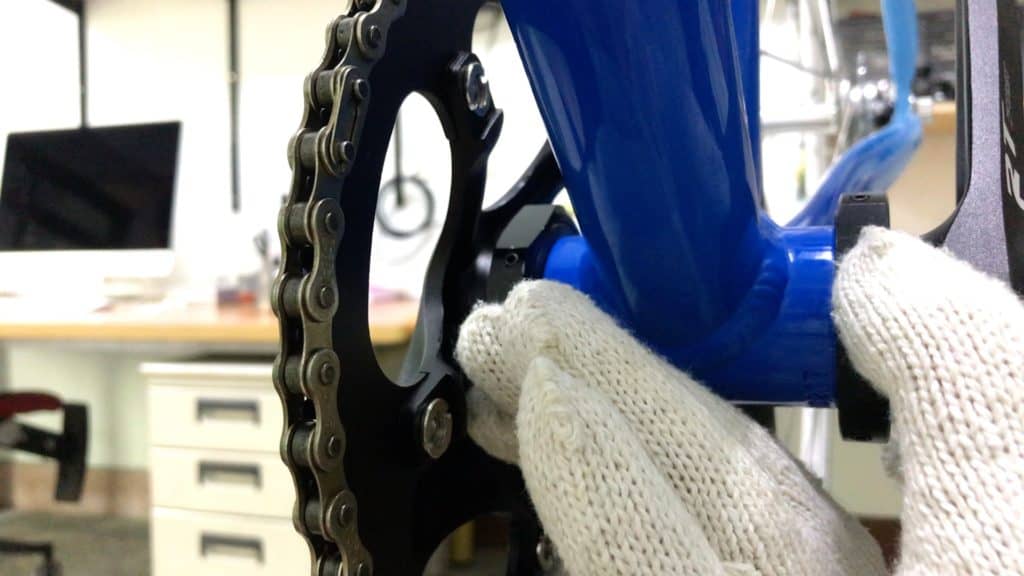
With a hand on each, you rotate both together and as you do, the chain slack begins to disappear.
When the chain tension is just right, you tighten one Allen bolt on each side to hold the casings in place, then tighten each bolt to 2-3 Nm.
When you’re out and about, you could put your bike on a stand anywhere at all and adjust your fixed gear bicycle’s chain tension.
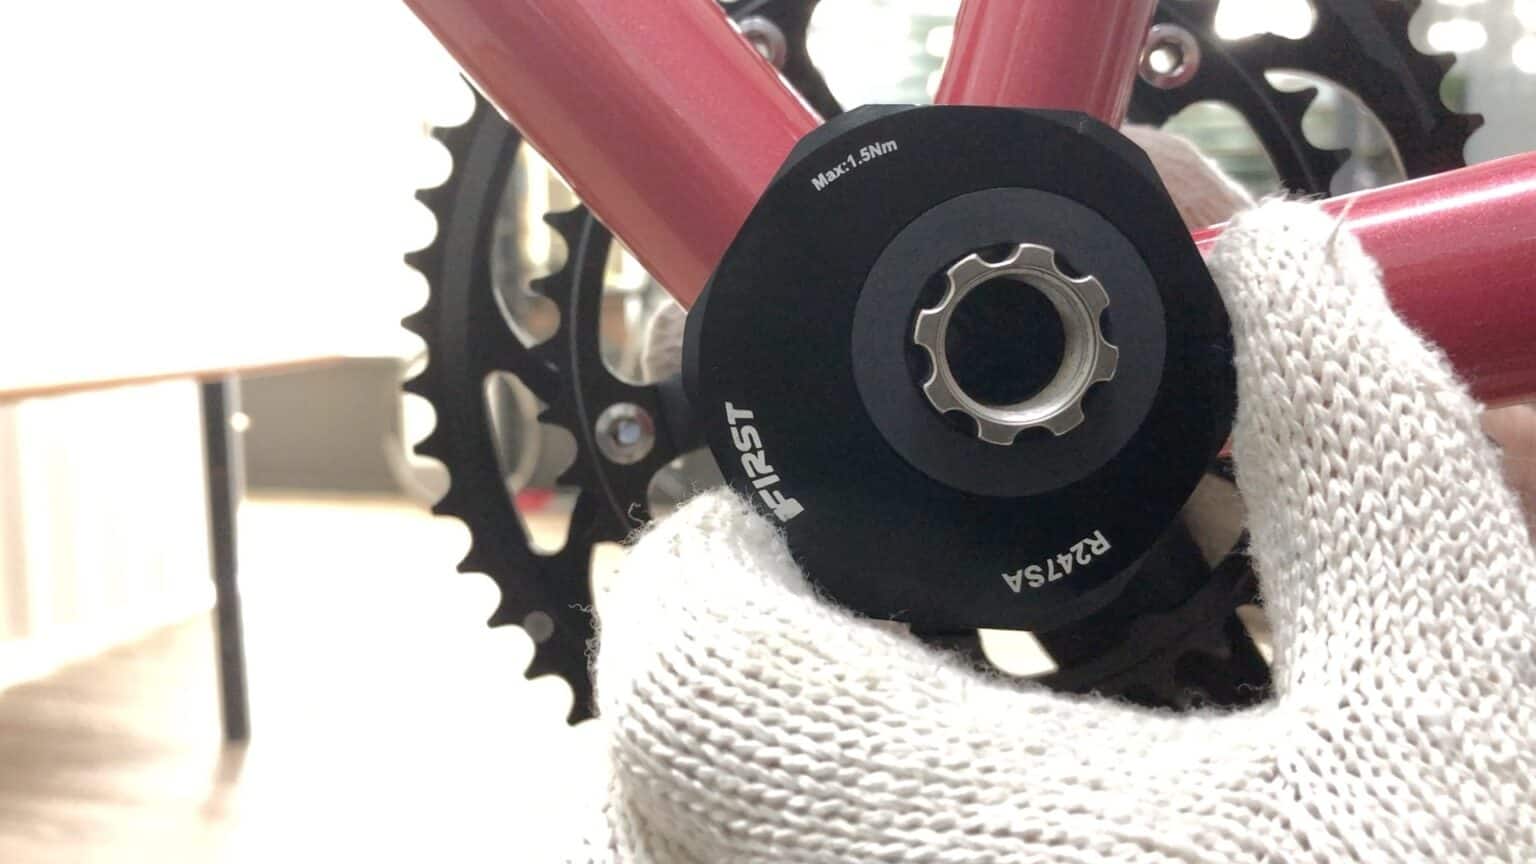
On a final note, with T47 gaining in popularity, we released a T47 EBB (R247SA) in exactly the same design to fit a T47 threaded BB shell.
Fixed Speed Bicycle Framesets
Fixies are all about simplicity—so simple they lack even the complication of a free wheel hub!
And as bike design becomes increasingly complicated and high-tech in relation to e-bikes and their electrical integrations, internal cable routing, and the widespread adoption of disk brakes on road bikes, no bike frame is simpler than the fixed gear bicycle frame.
If you want minimal, elegant design, fixies deliver.
Period.
“Hand Made” Fixie Frames vs The Rest
Since fixed gear bicycles are all about style, elegance, and avoiding an ‘average’ riding experience let’s say, what could be more elegant and exclusive than a ‘hand made’ frame.
Visiting a specialist bike show, say the NAHBS, where’d be sure to find single/fixed frame craftsman with beautifully made candidates is a surety to find some excellent candidates.
And you’ll be paying for that craftsmanship of course.
But, wait up. Let’s first consider the nature of that craftsmanship with some facts about factory-manufactured frames.
Main point: factory frame making is a labor intensive activity involving many pairs of hands and differing little from what takes place in an artisan’s workshop. The main point of difference is probably that in an artisan’s workshop, the artisan does everything. In the factory several people are involved.
Frame Welding
A frame maker buys the tubes—top, down, seat, head, chain and seat stays—some of which may have been extruded through custom jigs at the tube suppliers to provide custom tube shapes.

The frame maker then welds the tubes to each other with a few temporary to make a complete frame. This process gets the tubes positioned correctly and that’s about it.
Then they send the frames out to a specialist welder (generally TIG), although a few weld it themselves.

It is only in the with the signature 2020s move to Industry 4.0 fully automated factories in which frames are manufactured by machines: tubes are cut, welding robots put the frame together that you have completely factory-made frames.
Frame Straightening
Welding a frame subjects it to extreme heat at a number of points.
Then there is the T4 and T6 heat processing: T4 baking strengthens the welds; T6 heat treatment hardens the frame.
You’re left with an extremely strong frame, but one that’s deviates too much from the required geometry.
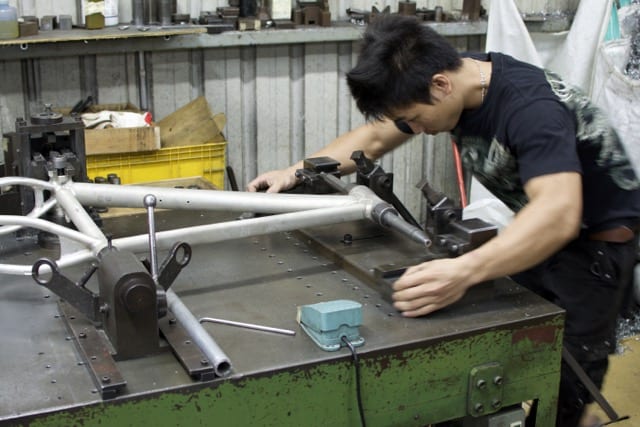
The frame technician places the frame in a jig elevated on a table that measures how much the frame deviates from the specified geometric tolerances.

Some jigs are fitted with a hydraulic press that squares the frame in the jig. The main tool is a good old hammer—the technician taps and knocks the frame into shape (literally) to tolerance.
Finishing Processes—Decals and Clear Coat
Painting, decals, and polishing are extremely labor intensive even as they require a degree of assembly line processing, in this case a spray painting line.
A batch of frames receive their undercoat, main color coats, and clear coat during successive runs through the line.
Decals are applied just before the clear coat which protects everything from dirt and scratches.
Decal transfers are painstakingly positioned by hand right where they should go on each frame which takes a lot of skill.
What takes even more skill is the pressing out of air bubbles from underneath each transfer.
Final processing involves the post-inspection removal of spots of dust that show up as dark specs or lumps in the clear coat.
The technician gently scrubs the offending spot with a light grade of wet and dry. When the spot is removed, they buff and polish the spot so it’s back to a clear coat quality finish.
The Upshot?
The upshot is that there is no clear boundary between factory produced frames and ‘hand made’ frames.
As much hand craftsmanship goes into factory frames as goes into nominally ‘hand made’ fixed gear bicycle frames (and by extension for most other so-called mass market frames of course).
So when you’re shopping for a fixed gear bicycle,