Substituting a 1x direct mount chainring crank for a direct mount double chainring crank is a simple procedure.
Let’s firstly have a look at how a direct mount double chainring is put together.
Then we’ll see how easy it is to swap out one unit for another, using the 1x to direct mount double as an example.
Contents
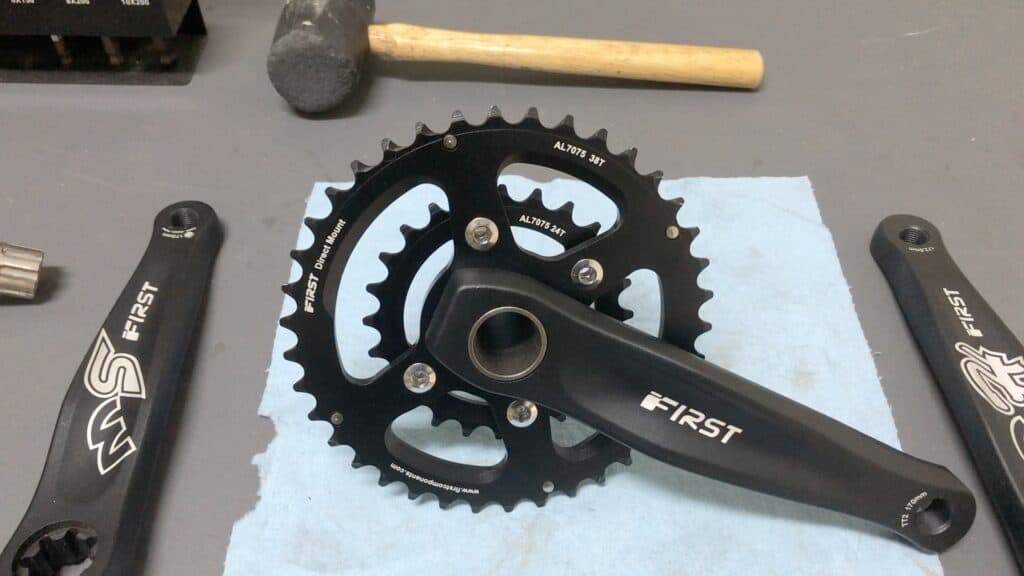
WHAT IS A DIRECT MOUNT DOUBLE CHAINRING CRANK?
Non-direct mount cranks — with single, double, or triple chainrings — consist of a crank arm fused to a spider.
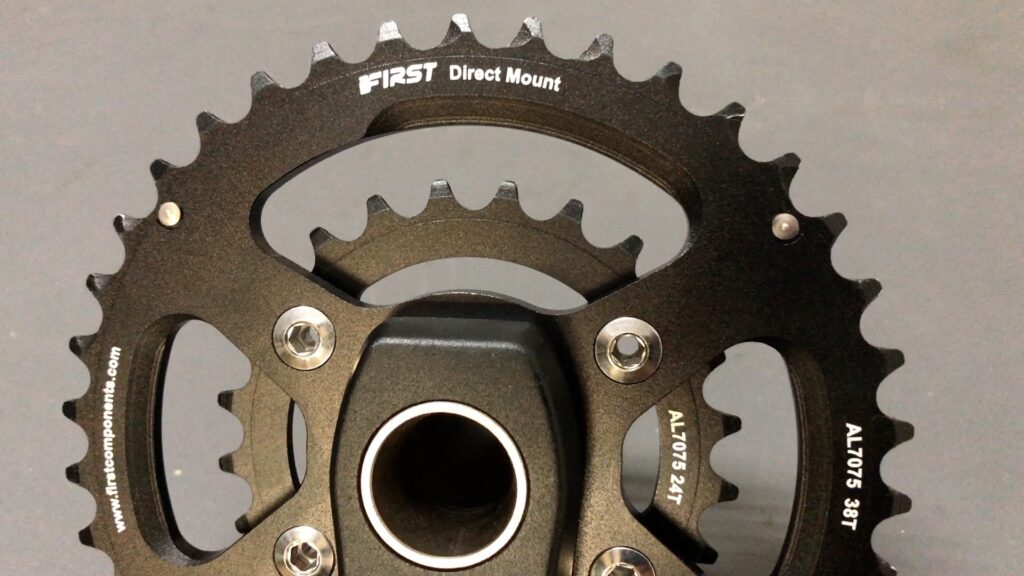
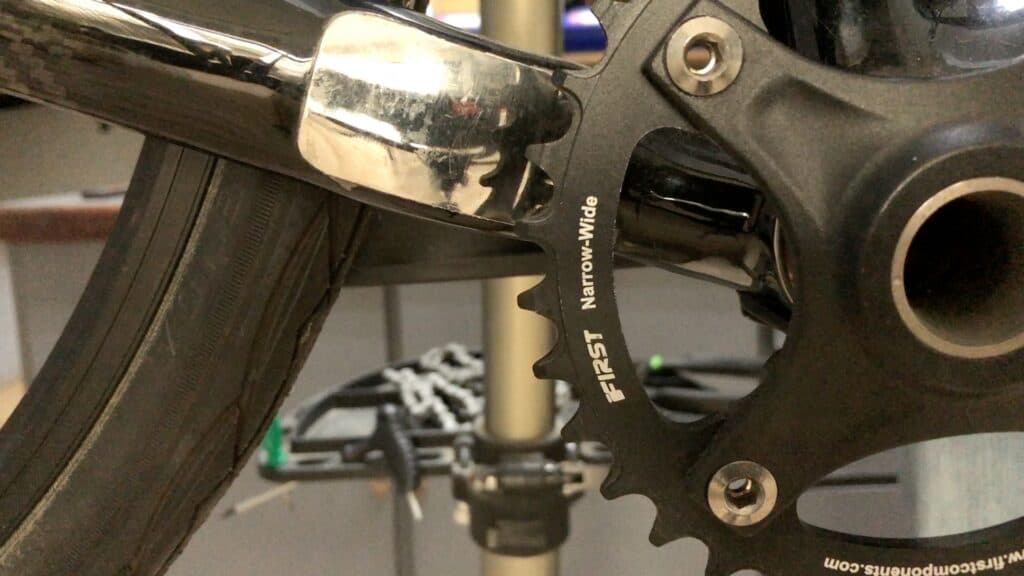
Direct mount cranks do away with the spider and consist of just the arm fused to the spindle. The chainring slots into splines surrounding the spindle.
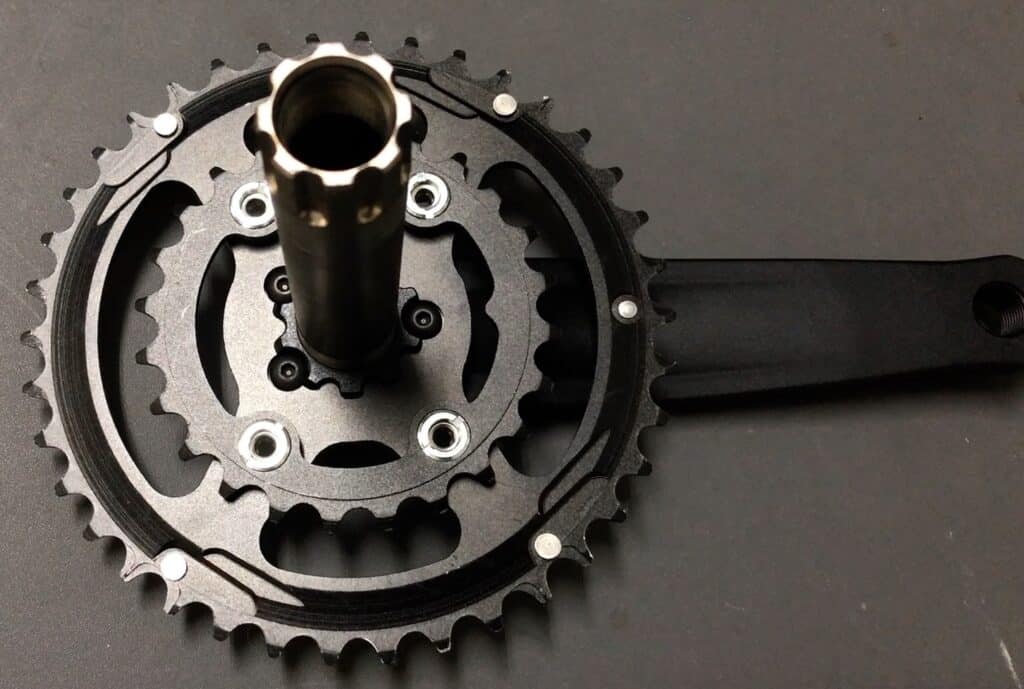
In the case of a direct mount double chainring, the additional chainring bolts to the arms of what would otherwise be a single direct mount chainring.
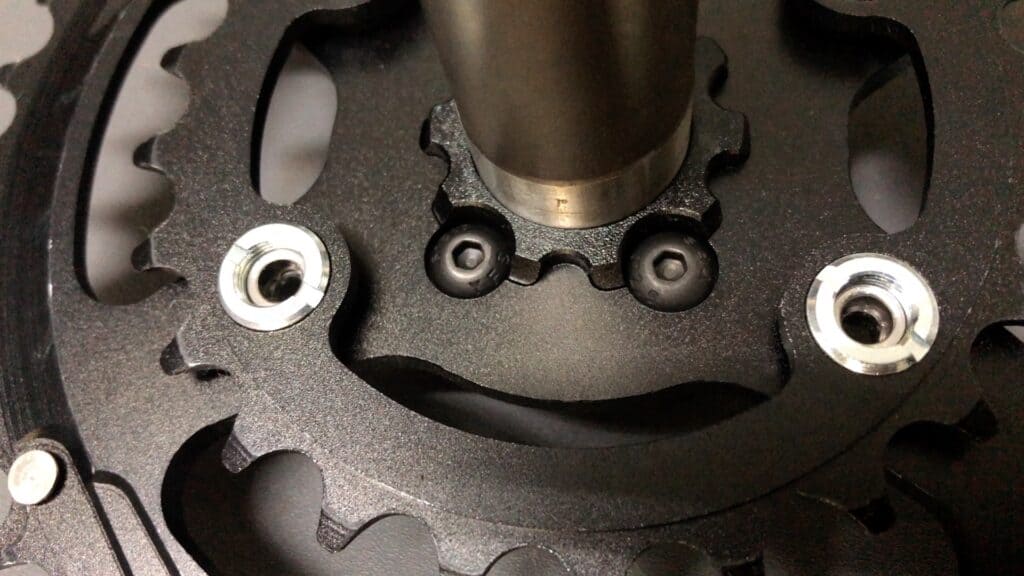
First Components’ design anchors the main chainring to the crank using three M3 Allen bolts.
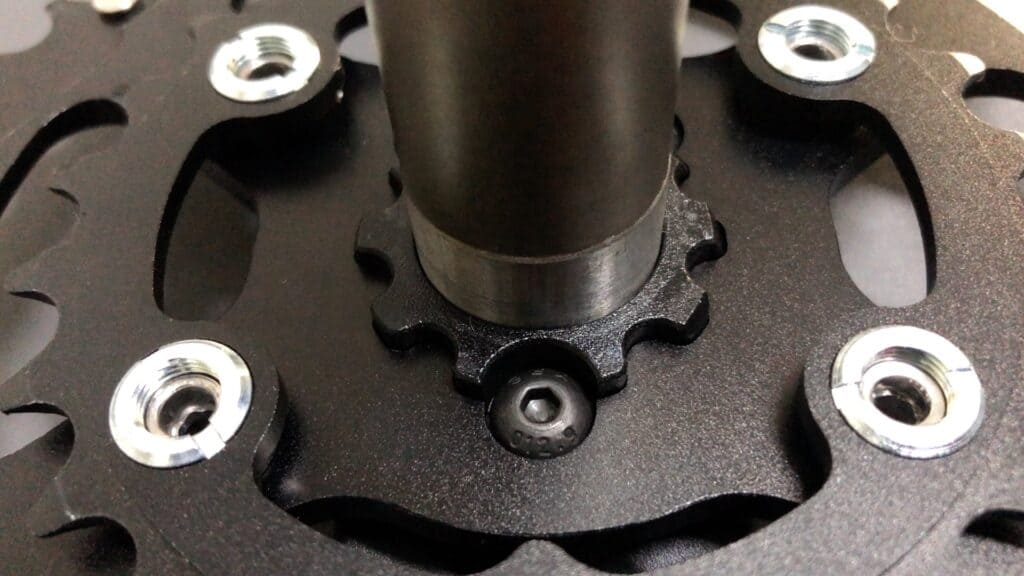
Two bolts on one side; one on the opposite side. Four bolts anchor the smaller chainring to the big ring.
CHANGING FROM A 1X STANDARD TO A DIRECT MOUNT DOUBLE
Why might you do this? It all depends on the type of riding you have in mind.
Adding the small chainring gives you the option for a wider range of gears for one.
You can also downsize from the sort of supersized cassette that combines well with the modern (narrow wide) 1x setup and which suits performance mountain biking over rough terrain and steep climbs.
Installing a cassette with higher gears will get you moving faster over extended flat sections if that is required.
The procedure is so simple that you could do it on site, on a race day for instance. Thus, in the following example be aware that you could do this removal/installation anywhere.
The bike in this demo removal and installation is suspended in one of the larger portable stands available in the market.
The main idea here is that the higher you elevate the bike, the easier it is to work on.
The key aspect is anchoring the bike so that it stays vertical—so you could even turn it upside down to rest on the seat and handlebars as most of us did when we worked on our bikes as kids.
Removing the 1x Crank
The steps are:
- remove the crank bolt
- loosen the pinch bolts
- slide the crank off the spindle
- tap out the crank
Remove the Crank Bolt
The crank bolt should be easy to loosen . . . on any bike.
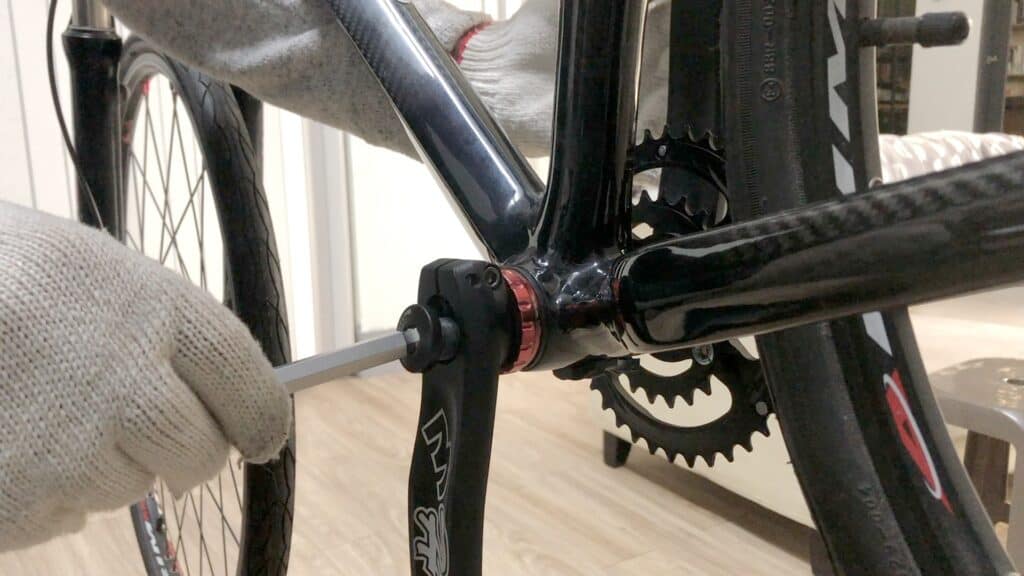
The crank bolt does not function to hold the non-drive side crank on the spindle. It’s only used to firm the crank onto the spindle during installation.
The recommended tightening torque for most manufacturers is 1-2 Nm, basically finger tight.
If the person originally installing the crank followed manufacturer recommendations, you’ll only need to apply light pressure on the wrench to break the bolt’s grip to the spindle.
To make sure you don’t misplace the bolt, screw it into the spindle a turn or two after you remove the spindle.
Loosen the Pinch Bolts
During the crank install, the pinch bolts should — ideally — have been tightened each in turn, incrementally.
The correct method to use here is to loosen each bolt a little, each in turn.
Loosen one half a turn. Then rotate the crank a half turn, flipping it to the opposite crank.
As you loosen one, the other compensates by tightening a little which is why you best avoid loosening one side all the way and only then loosening the other.
You’ll cause the opposite side to tighten a lot . . . which is not a big deal in itself. But the tighter the bolt the greater the chance you might damage the hex bolt head making it harder for the wrench to find purchase on the bolt during re-installation.
Tap Out the Crank
The tightness of the fit between the spindle and the bottom bracket can vary a lot depending on which brand’s crank you’re using.
Test just how tight it is by gently tapping with the palm of your hand, and then tapping a bit harder if there’s no movement.
You need to have a rubber mallet or wood block plus claw, or ball pein, hammer ready to use where the fit is extremely tight, and a light tap with the palm of a hand won’t dislodge the spindle.
You never want to hammer the spindle directly as you will damage it.
If using a block of wood, place it against the end of the spindle and strike the wood where it contacts the spindle.
A rubber mallet is easiest—with one hand on the drive side, tap the non-drive side of the spindle. A sharp tap is all that’s usually needed to break the spindle free of the bottom bracket.
Then it’s a matter of pulling the crank all the way out of the bottom bracket from the drive side.
Wiggling it back and forth from side to side while gently applying pressure will have it out quickly.
Installing the Direct Mount Double
- Grease spindle and install
- Install crank
- Crank bolt
- Tighten pinch bolts to tolerance
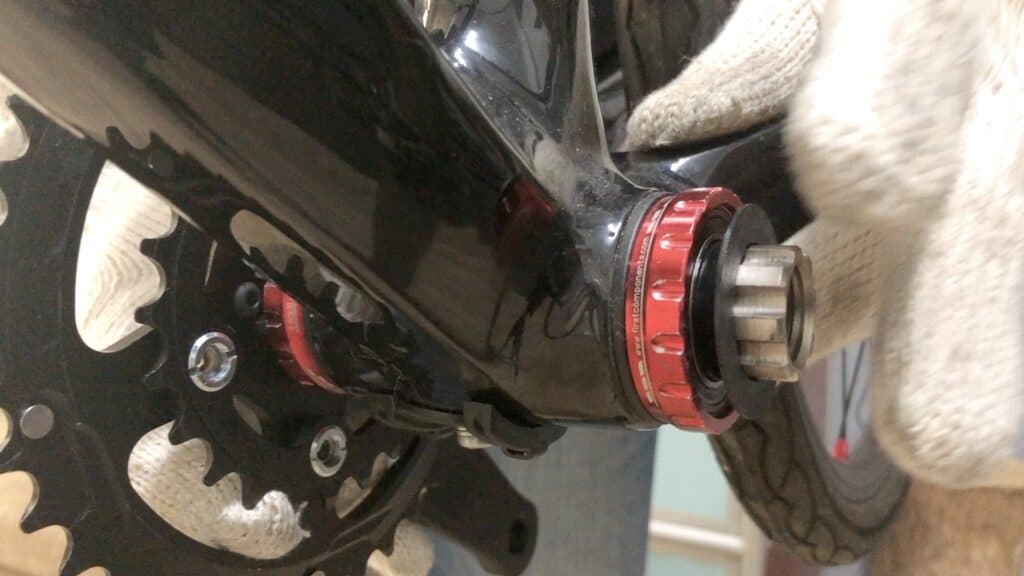
Grease Spindle – Install
Begin by smearing a little grease on the spindle where it will contact the bottom bracket.
Insert it into the bottom bracket and tap gently with the palm of your hand if there’s resistance . . . and there should be a little resistance.
If there’s a lot of resistance, tapping on the face of the crank on the drive side with a mallet might be necessary.
Don’t strike the crank directly. Place a soft cloth between the crank and the mallet to cushion the blow.
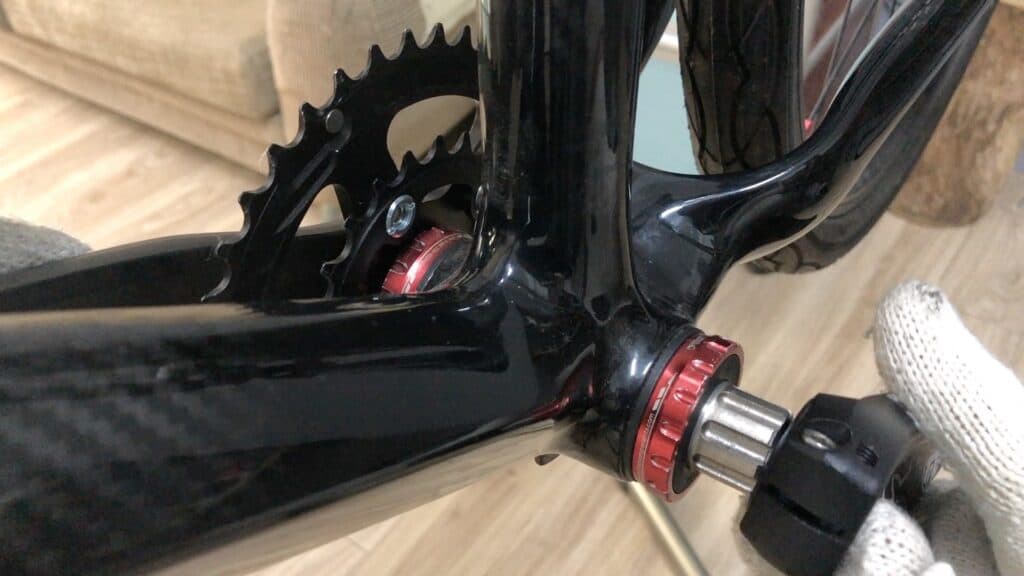
A tap or two will get the end of the spindle moving into the bottom bracket. Then you just work it through the BB until the spindle emerges on the non-drive side.
As the spindle emerges from the BB cup, be aware that it’s easy to dislodge the dust cap that nests inside the cup, covering the sealed bearing.
Make a peace sign with your fingers, placing one finger on each side of the BB where the spindle will emerge from the cup.
Press against the dust cover to hold it firm, in case the edge of the spindle snags the dustcover.
If you did happen to push the dust cover out of position, it’s not a problem. It may be a little tricky to push it back into the BB cup, since it has a tightly-fitting sleeve that slides past the bearing.
Install non-drive side crank
That leaves sliding the crank onto the spindle. Slightly grease the spindle beforehand . . . it’s not shown in the image since this is a demo install only.
You also need to make sure you get the crank orientation exactly right by making sure the install is at 180 degrees to the drive-side—otherwise you’ll have an asymmetrically mounted crank that’s impossible to pedal!
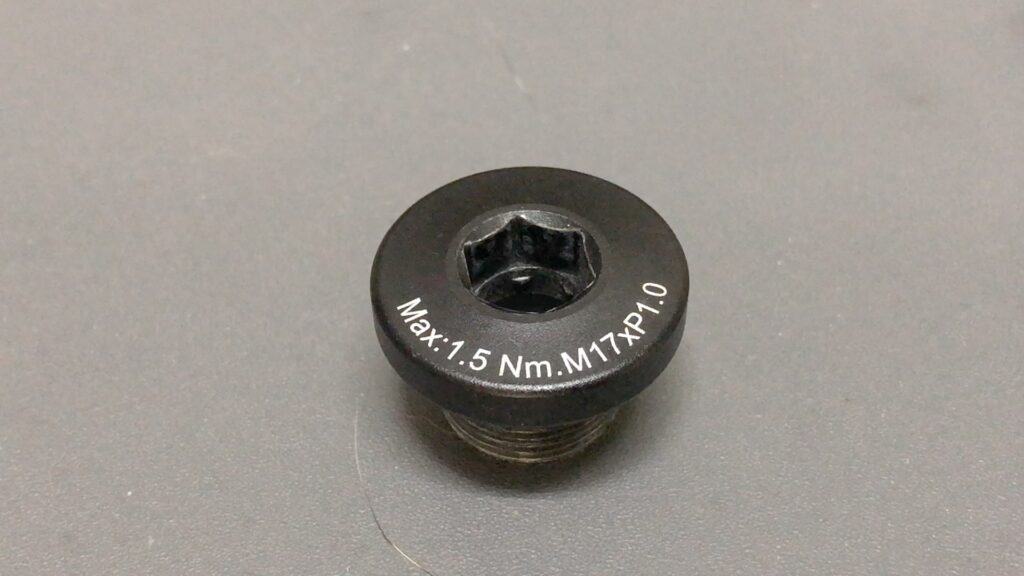
Installing the crank bolt seats the crank in position on the spindle.
A torque wrench is not required to tighten the bolt to tolerance, which is 1.5 Nm in this case.
Screw the bolt in as far as it will go. When it resists, a half turn with a wrench is all you need.
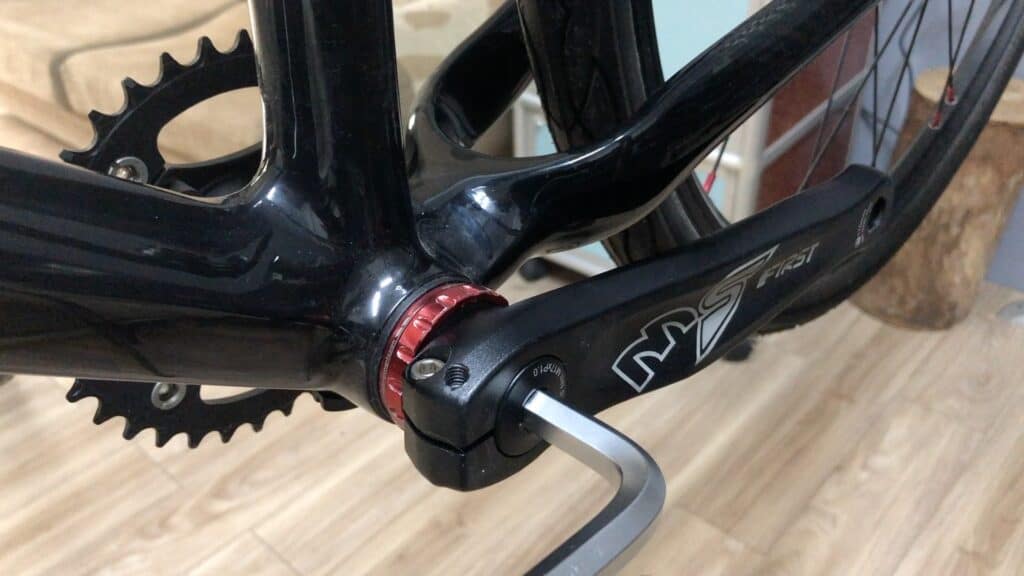
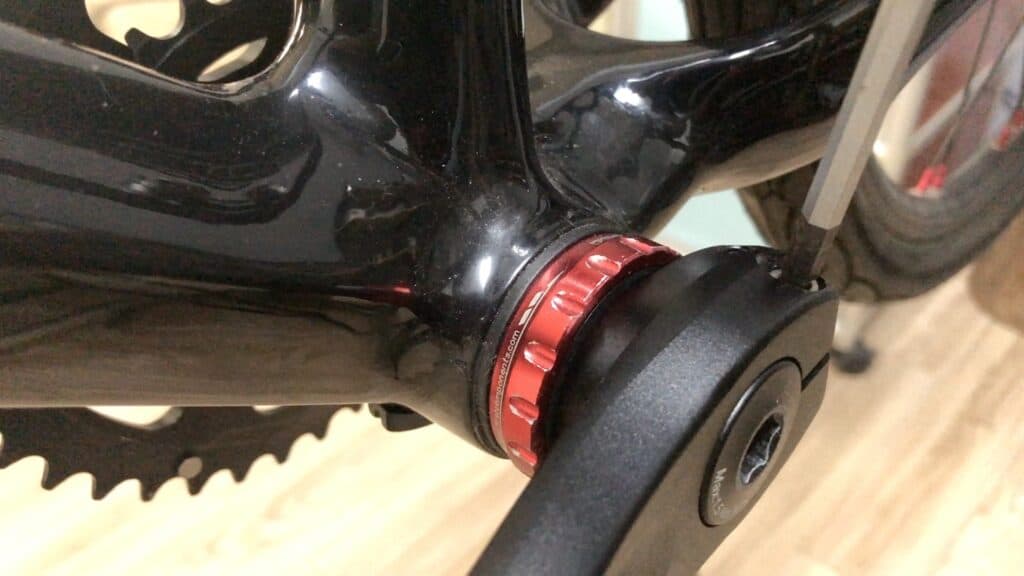
Tightening the Pinch Bolts to Tolerance
The bolt fixes the crank perfectly in place. Now the pinch bolts should be tightened each a little in turn.
A turn or two on one side . . . flip to the other side for another turn or two.
Tightening one side loosens the other and after four or five times flipping to the opposite side, the bolts firm up.
This is where you’d use your torque wrench to tighten to tolerance (12-14 Nm is standard). It’s not part of the demo here since this is, well, just a demo.
If you plan on carrying out this procedure on the go, out at the race venue for example, getting the bolt to within tolerance using a torque wrench is a step you can’t miss.
Guesstimating 12-14 Nm of torque is a matter of luck since the “feel” is different depending on the length of the lever, the handle of your wrench in other words.
Derailleur Re-installation
This particular bike—the First Components’ demo bike—began life fitted with a triple chainring crank.
Then we removed the derailleur and installed a single narrow wide chainring crank, having just released a new narrow wide model a few years back.
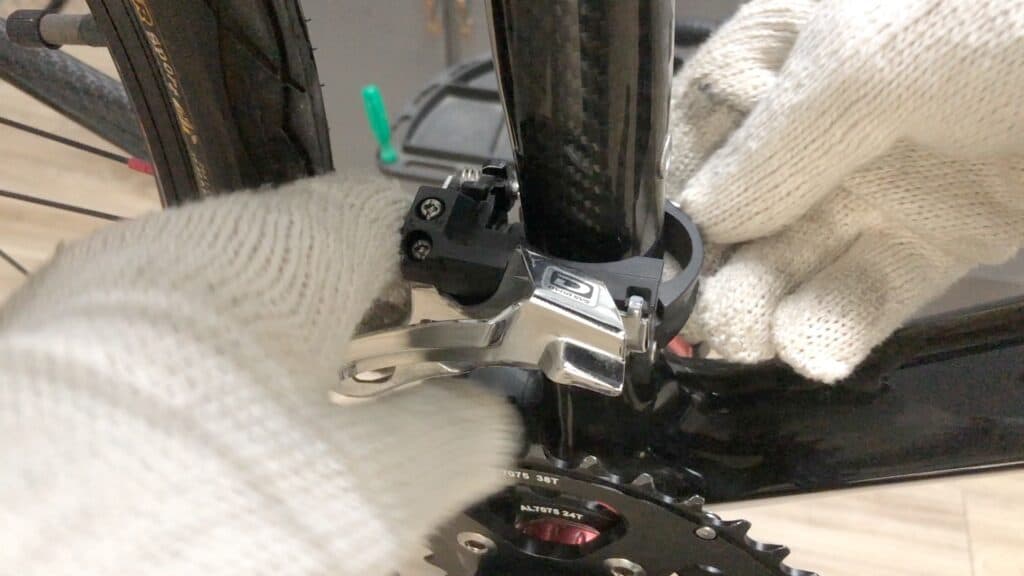
Since we’re now replacing that with a double, we need to re-install the derailleur. And although this derailleur is a triple chainring model, it works fine with a double chainring . . . the cage just needs adjusting a few degrees more to the outside in relation to the chainring (normally the cage is parallel to the big ring).
Re-threading the cable through the guide and then up through the frame.

This is an old-school derailleur in which the cable loops over and down to the clamp.
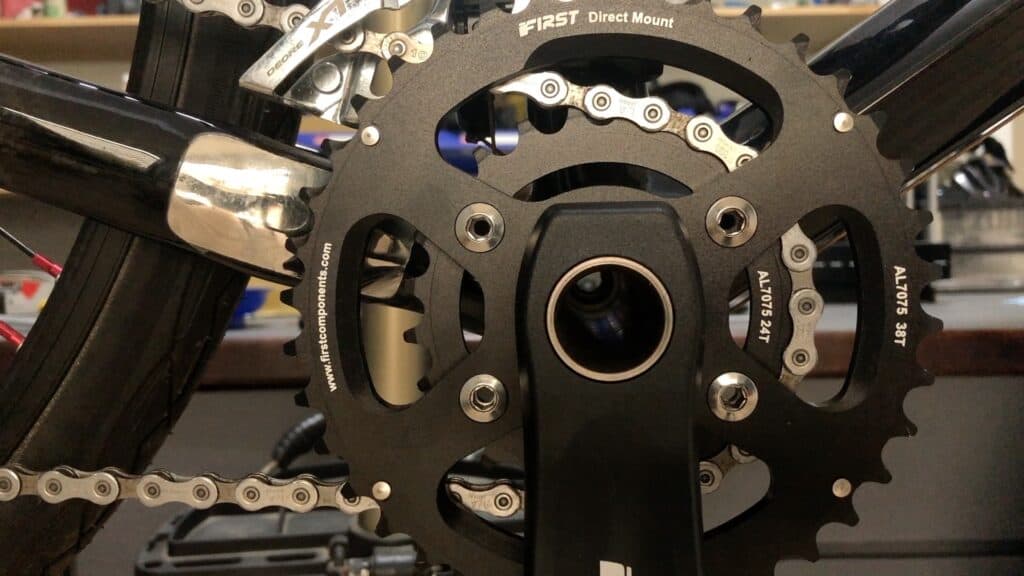
The end result is a double chainring ready to work exactly as you would expect of any double chainring crank.
CONCLUSION
There are two benefits to the setup described above.
One is that it’s easy to make quick crank component changes with the right tools and a little experience.
The second is the flexibility you gain from the direct mount setup.
All you need to do is remove the crank (and we’ve detailed how easy that is) to be able to quickly swap the chainring for any other.
Although the demo here concerns a direct mount double chainring, you could quickly install any custom ring you wanted.