The modern bike with its non-threaded stem system and requirement to cut the fork to size, relies on spacers to achieve a comfortable handlebar height.
In this post we take a detailed look at the logic behind bike headset spacers—what do they really do?
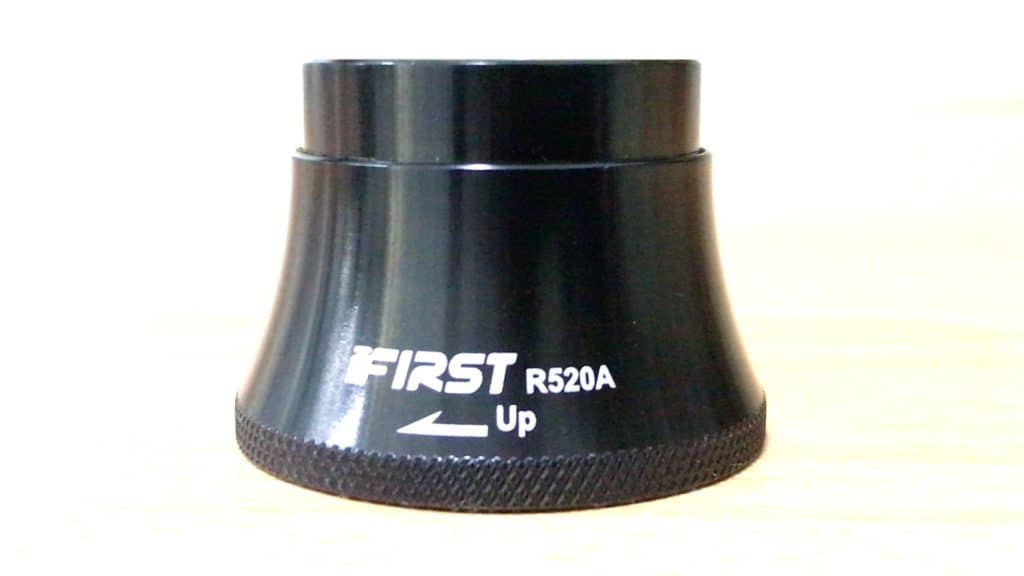
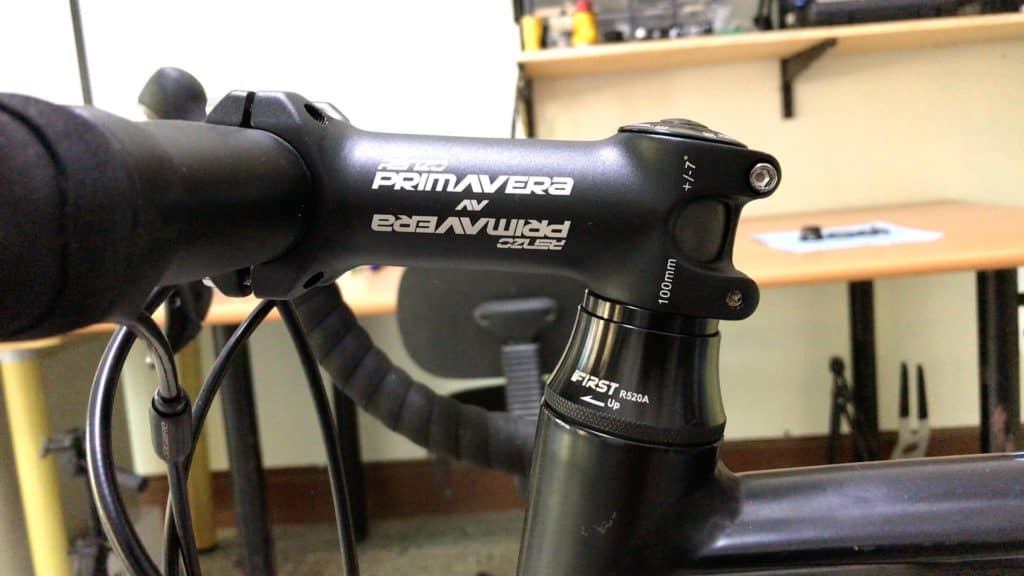
We also show, in fine detail, how to fine tune the stack height with an original headset design (R520A) from First Components lab—no spacer required, or optional at the very least!
Quick Links to Sections
Handlebar Height Matters
History of Bike Stems and Bike Headset Spacers
Adjustable Bike Stems
Adjustable Bike Headset
First of all let’s get a clearer understanding of the intimate relationship amongst a bike’s handlebars, stem and spacers.
HANDLEBAR HEIGHT MATTERS
If you are a recreational or commuting cyclist, comfort and safety are paramount. Your handlebars need to be at the height that allows you
- stable control
- sustainable posture
You want to be comfortably upright and what that means for each cyclist is a little different, sometime a lot.
If you are a sports cyclist, and especially if you are into competition cycling or a professional, then you’ll be a lot more sensitive to variations in handlebar height.
We could say that dialing in perfect handlebar height is essential even. Even a minor adjustment up or down makes a difference.
The bike we use for the headset demo below, for example, increased stack height by 5mm, causing the handling to be slightly (ever-so-slightly) less responsive and “top heavy” since the cyclist Center of Mass had been raised.
Handlebar height, of course, depends on stem height. Stem length is a crucial comfort factor, but we won’t get into that here.
HISTORY OF BIKE STEMS AND BIKE HEADSET SPACERS
It’s a history of forks as much as the other components.
The move to threadless produced forks with steerers of equal length where you decide your handlebar height, then cut the steerer to fit.
MIT GEWINDE
In the (increasingly distant) past bikes sported a quill, or threaded, stem, that worked with a threaded headset. This setup is still around on cheaper “classic” bikes, or even the odd super-expensive edition.
The fork steerer fits up into the head tube without projecting past the headset. Ball bearings sit inside pressed-in cups at the top and bottom of the head tube.
A nut screws onto the fork and after the appropriate amount of pre-load to prevent any movement in the head tube, the lock nut is tightened to hold the assemblage in place.
The quill stem slots down into the steerer. The expander bolt locks it into position.
Handlebar height is adjusted through positioning the quill stem a little higher or lower. Some threaded stems also have a pivot point allowing further heightening or lowering of the handlebar.
Like a seatpost, there is a limit to how high you can go. Sheldon Brown puts it best:
If you raise the stem too high, so that there’s not sufficient length remaining inside the steerer, you might find the whole handlebar assembly disconnecting from the bike—your life will pass before your eyes and down you’ll go!
OHNE GEWINDE
A threadless stem setup allows a cyclist to have any handlebar height they want due to the ability to cut the fork to size.
The—now independent—stem clamps close to the top of the steerer.
Top tier professional racers are likely to have a zero stack height, meaning the stem sits right on top of the headset seal. Just check out the top riders’ bikes in Le Tour every year.
They’re committed to that setup, so the fork will be cut flush with the top of the stem, allowing for the 3 millimeter recess at the top for the top cap.
The steerer, however, can project beyond the top of the stem, which can be positioned anywhere along it, from zero stack height through to the very top.
The steerer’s exposed surface above and/or below the stem is covered with spacers, of course. The top cap and compression bolt tighten down on top of it all.
This allows much latitude for stem adjustment in search of the sweet spot.
You truly can have your cake and eat it. If you later decide you prefer the stem down towards the headset, you can remove the fork and lop off the excess.
Or leave like that because you never know . . .
Having said that, though, long spacer-covered extensions above the stem are not exactly elegant…or cool. Cut them back when, over time, you have experimented and found the height that works for you.
You can also raise and lower handlebar height on a threadless stem with an adjustable bike stem.

These work on a pivot a little forward of the steerer allowing a rider to raise the handlebars quite a lot.
Not for the sports rider, this sort of kit. A city bike around town, or trekking longer distances perhaps.
Moreover, combining this type of stem with a riser bar gives the casual rider an extremely upright posture on a bike frame that would not otherwise allow it.
ADJUSTABLE BIKE HEADSET TO FINE-TUNE SPACERS & STACK HEIGHT
Small changes in stack height make a noticeable difference for cyclists who spend a lot of time in the saddle.
Raising handlebar height 5mm, for example, gives a feeling of reduced responsiveness the payoff being, perhaps, increased comfort.
I say perhaps since this whole issue is very personal. Each cyclist has their particular comfort zone (often more subjective and imagined than demonstrably objective). The trick is to find it.
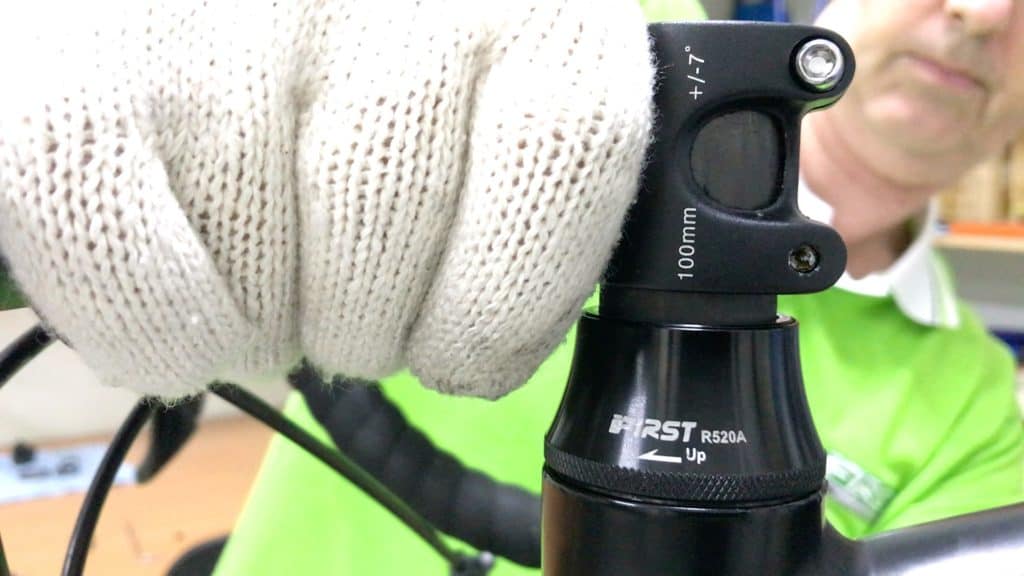
Whether you have a zero stack height or prefer several centimeters of spacers for a relaxed and easy riding position, you can fine tune the height, up or down, to a maximum of 7mm with First Component’s Adjustable Headset (R520A).
We demonstrate on a road bike that accepts an integrated headset. The R520A also fits an MTB with an integrated headset setup of course.
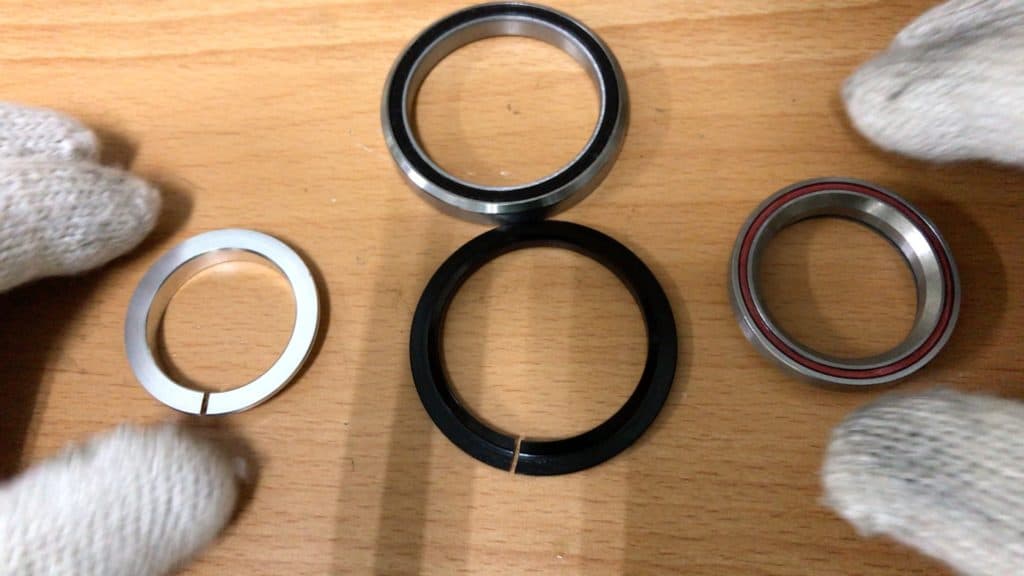
The main components are as with any integrated headset.
There is the top and bottom (OS) sealed bearings, the lower bearing race and the compression ring.
The one difference is the lack of a spacer that normally sits on top of the compression ring beneath the seal.
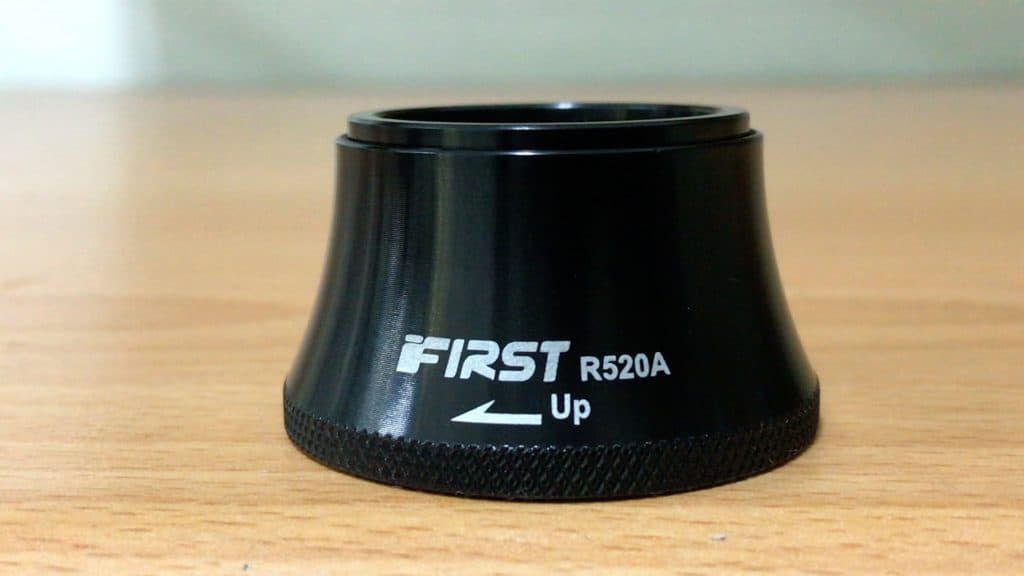
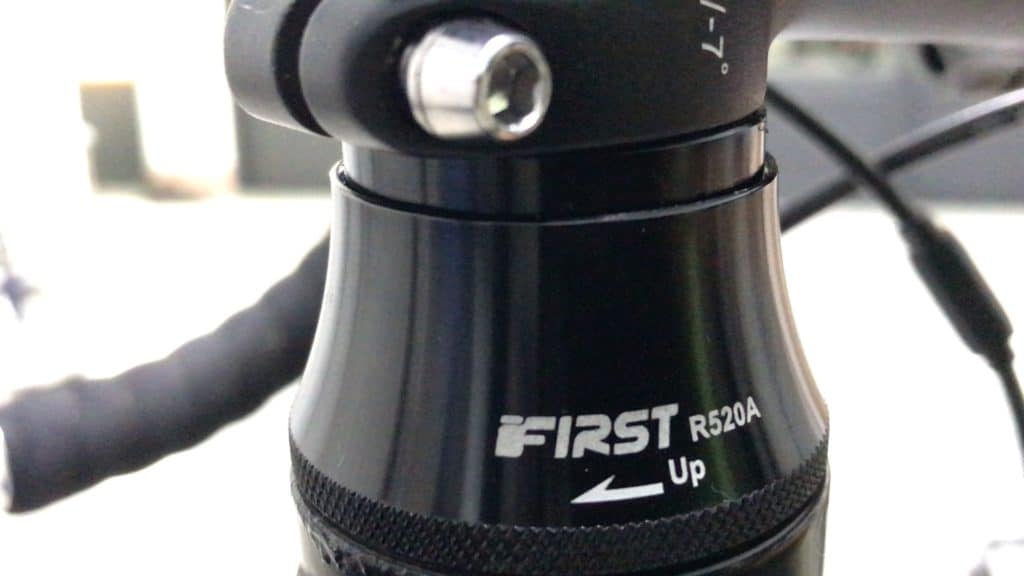
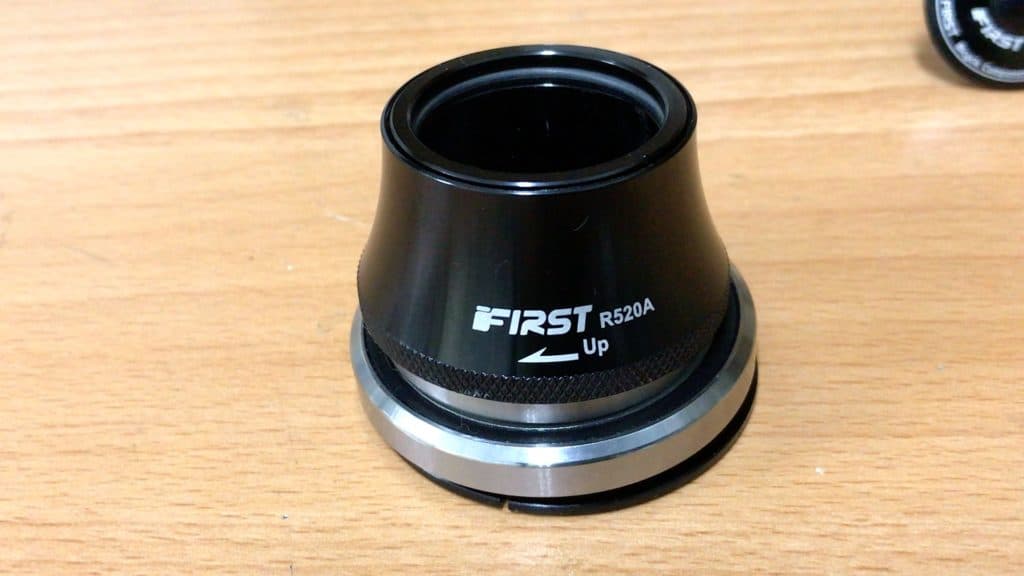
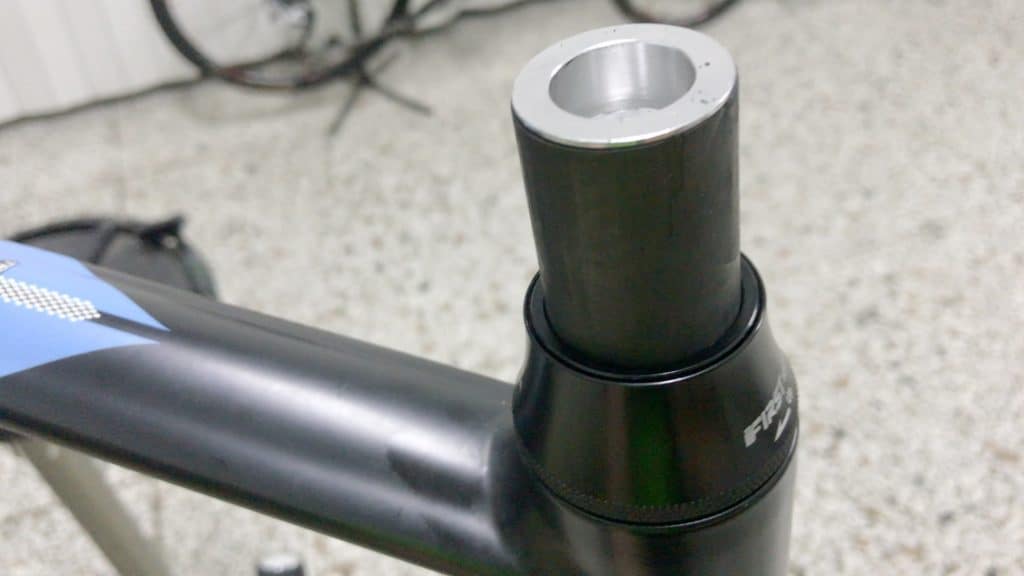
The most important part of this component set is the seal. The design provides an internally mounted threaded sleeve which winds up or down as you rotate the outer casing.
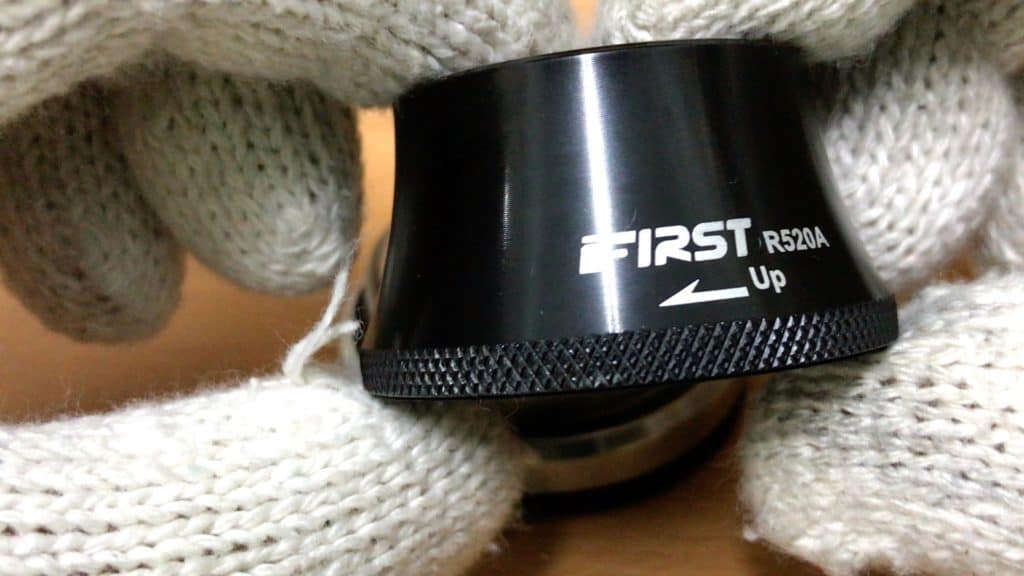
Turning the outer casing to the limit achieves the full 7mm extension. The edge at the base of the cone is burred; getting a grip with greasy or sweaty hands is not a problem. Sweaty? Yes, you could adjust your spacer and stack height out on the road.
You have to know the correct technique to make use of this feature though. It’s not simply a matter of turning the casing to fill the space (ie. create a spacer).
We show how it all works in the remainder of this article.
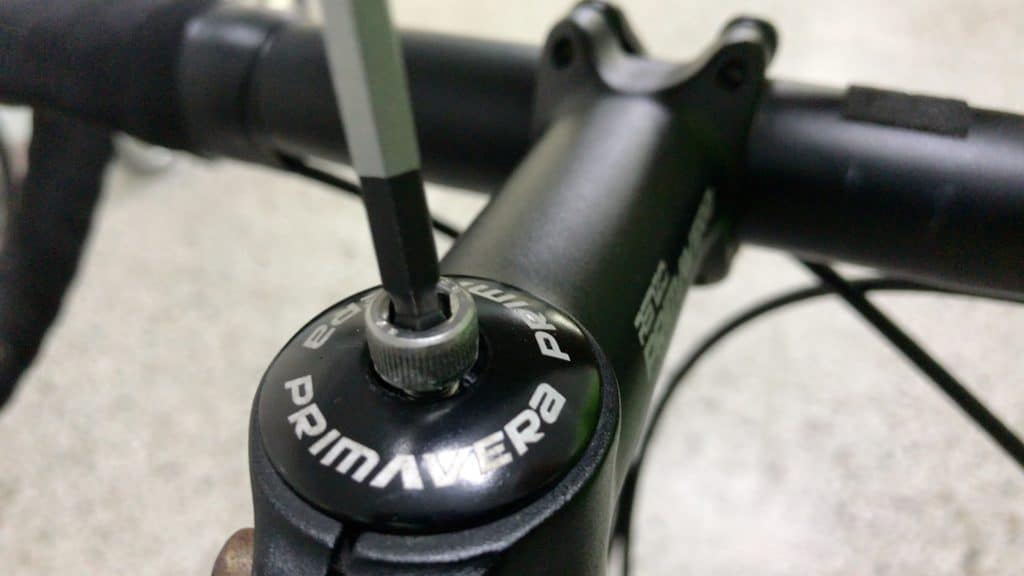
As with standard threadless headsets, you begin by removing the top cap and compression bolt, loosening the stem bolts, then removing the stem/handlebars.
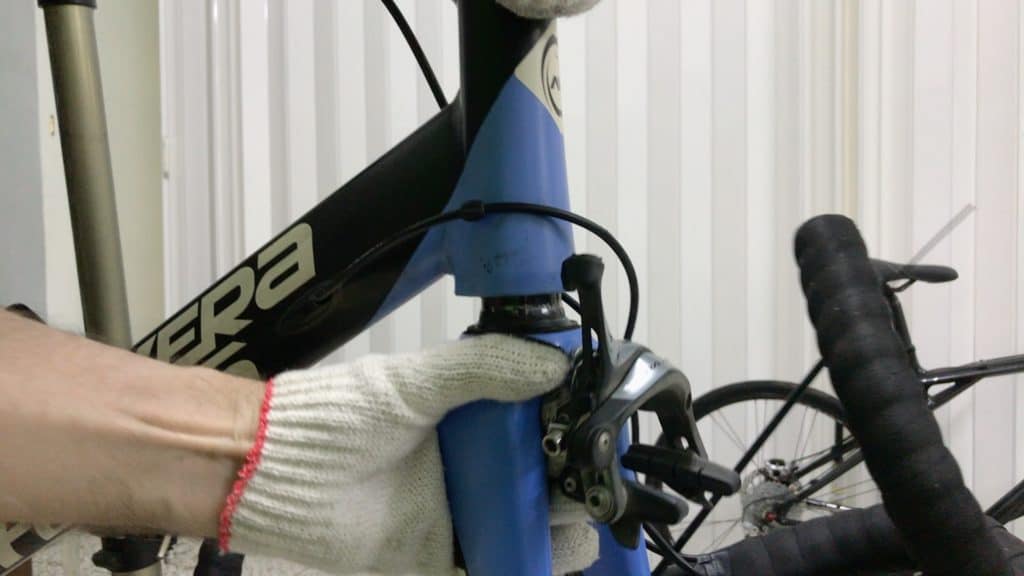
The headset on this bike is a OEM version of a First integrated headset. This type of headset has a rubber gasket just below the top of the seal which forms a firm seal to the steerer.
The seal’s firmness against the steerer causes the seal to resist sliding up and off the steerer.
Pulling the fork down presses the seal against the head tube, easily sliding it a few centimeters up the steerer.
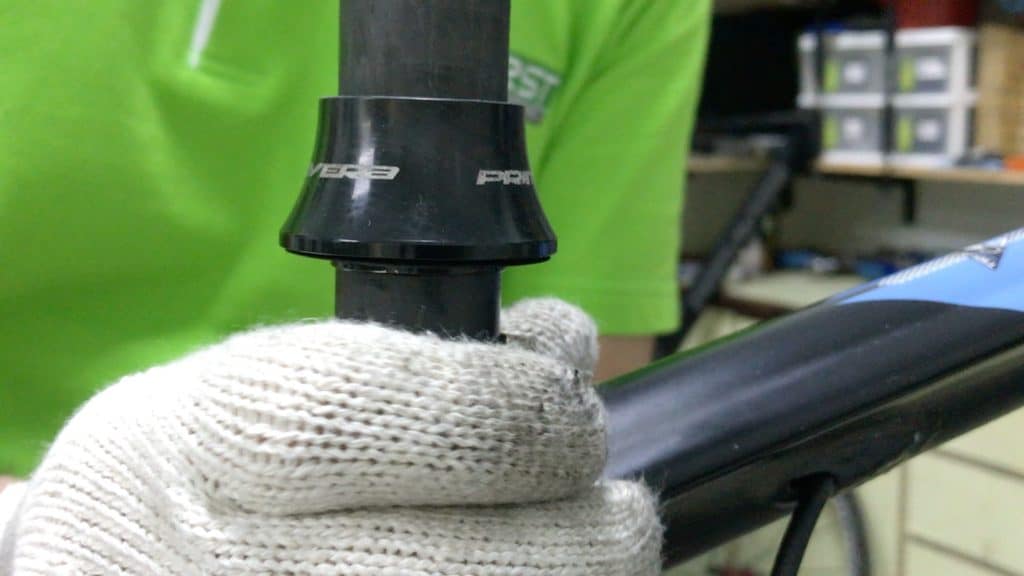
You then slip the fork back up into position. It’s now easier to take hold of the seal then slide it all the way off the steerer.
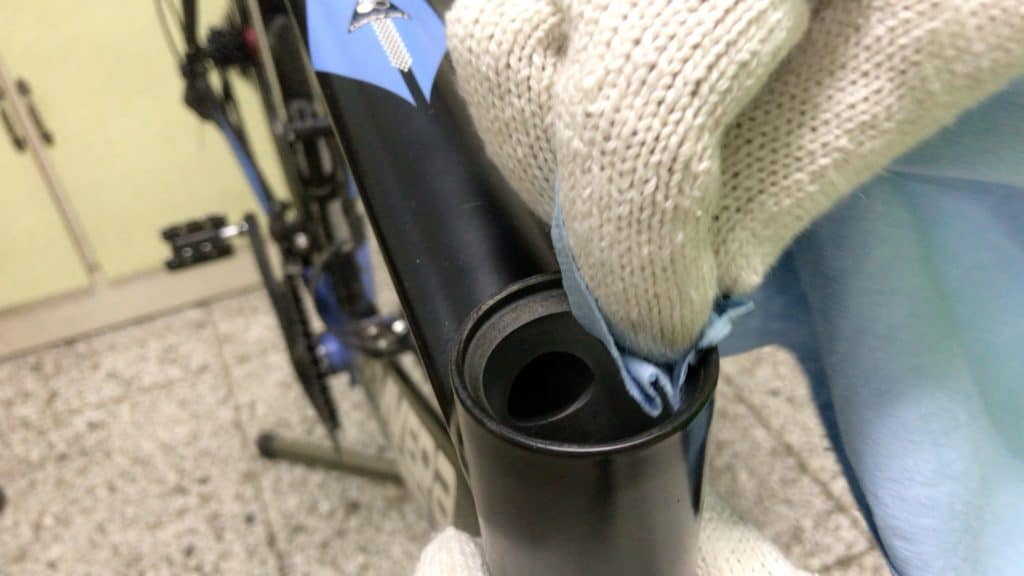
Wiping away old grease and dirt from the bearing seats, top and bottom.
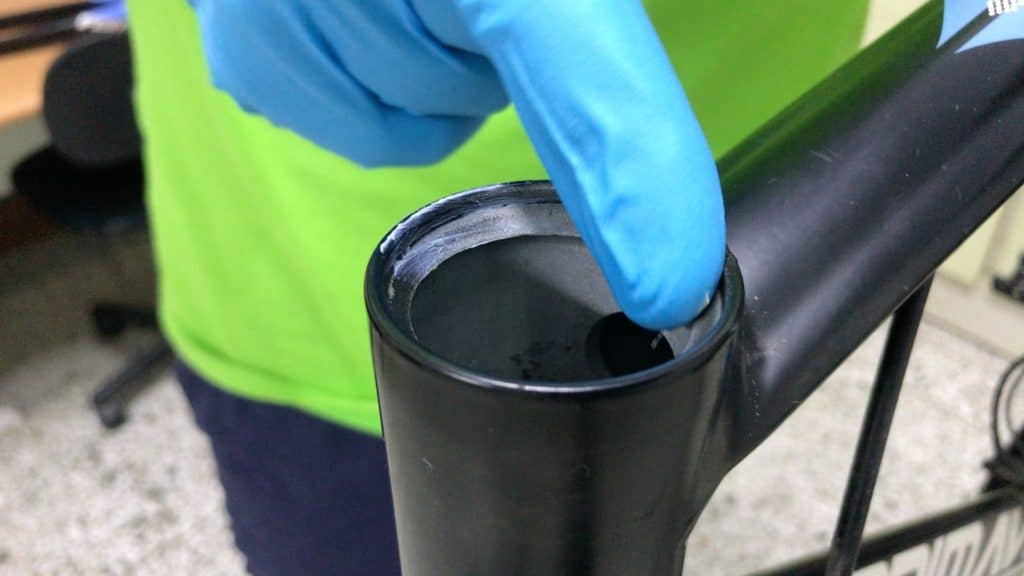
Then coating those same surfaces with a light smear of grease.
Some mechanics apply a generous helping of grease to both the seat and the sealed bearing on installation—certainly makes the whole lot almost 100% water tight.
Once you move the bearing seal flush over the bearing and compression ring, you can decide how you are going to make use of the adjust mechanism.
Ideally, of course, you have planned this in advance: it all depends on steerer height.
If you are a racer with a zero, or near-zero, stack height, then follow the procedure here to the letter—your steerer will be cut near flush to the top of the stem.
You need to calculate a ball-park stack height to work with. Remember, you have 7mm or 7 “degrees of freedom” available for fine-tuning the stack height.
Does the cyclist require a default 5mm spacer, 10mm, or even 20 or 30mm stem height above the top of the seal?
The calculation can be made with the 7mm in mind: you could extend the sleeve all the way out for the initial installation, which allows for adjustment of 7mm down to 0mm.
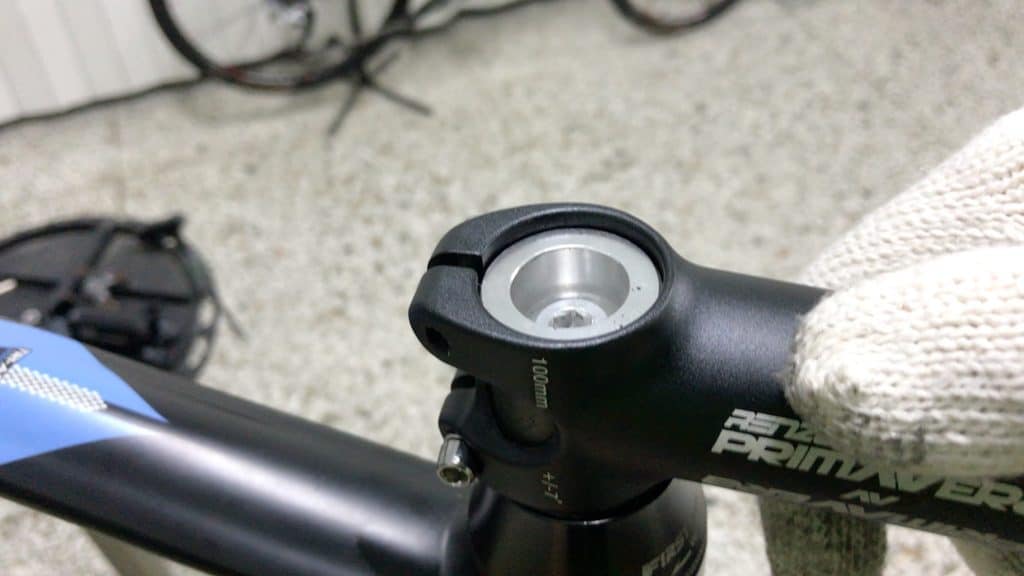
Whatever the case you need to make sure there is enough clearance between the steerer’s top edge, and the stem for the top cap to sit snugly inside, the usual situation for an integrated assembly.
The illustration shows a 2.5mm gap which allows the top cap to snug down perfectly.
Making use of the full 7mm ie. adjusting the internal sleeve to maximum extension would blow out the gap to 9.5mm. Too far. So we’ll keep it at 5mm. A 7.5mm gap is certainly as far as you want to go.
So having decided on a 5mm gap we just need to raise the stem 5mm. That exposes a 5mm section of steerer, normally filled by a spacer. Here we just need to fill that space with the headset’s internal sleeve.
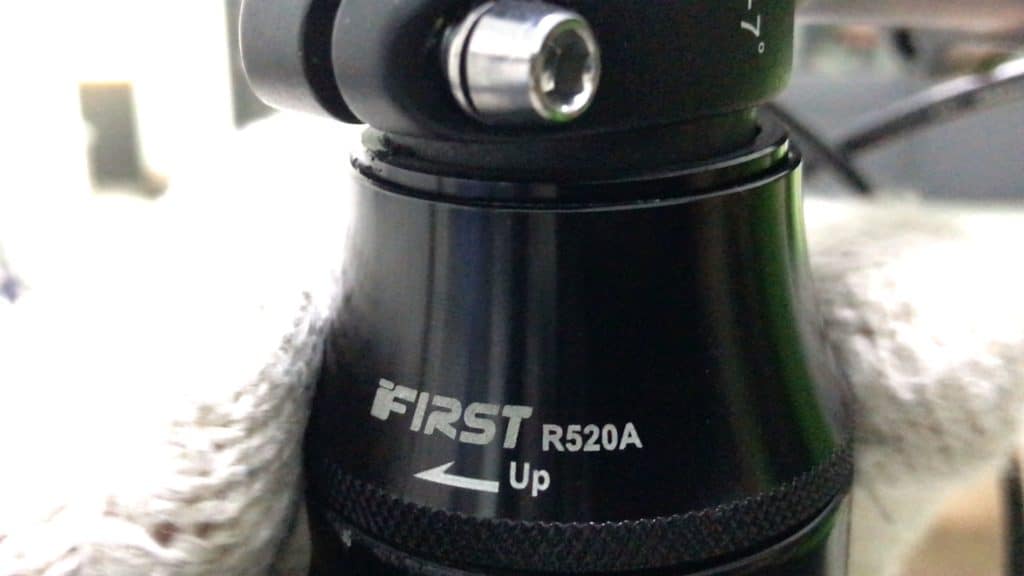
Rotating the outer casing clockwise moves the sleeve up several micro millimeters each turn.
In theory you can position the stem anywhere along this 0-5mm range, whatever suits the rider. Adjustments could also be made out on the trail or the road of course, although the cyclist carrying this out needs a good sense of what is “firmly tight” when re-doing the stem bolts. Having a portable torque wrench handy makes all the difference in these cases.
The inner sleeve is at full extension now, firmly snugged against the stem, effectively acting as a 5mm spacer.
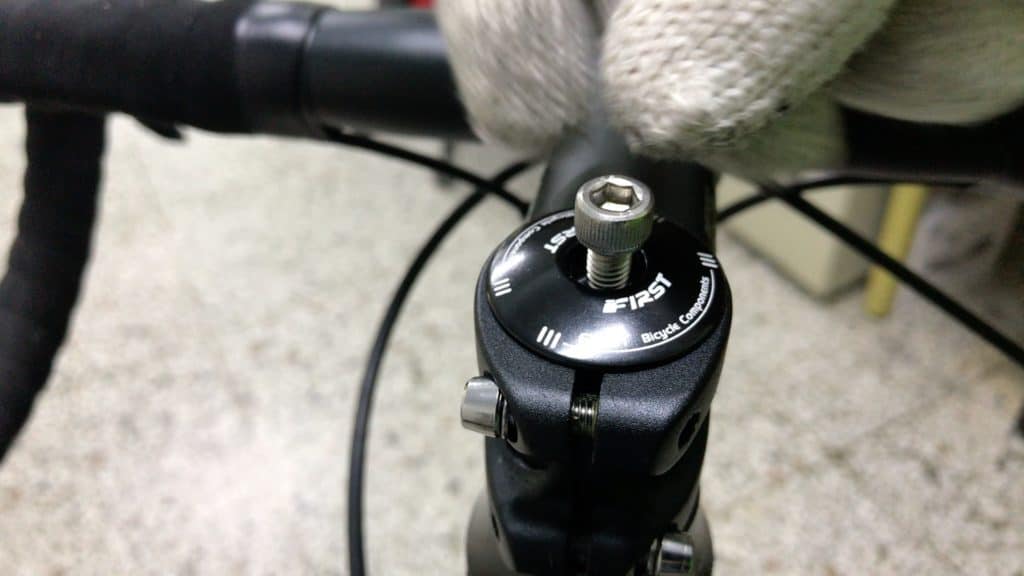
With the top cap replaced, tightening the tensioning bolt holds the whole assemblage together. There is no possibility the outer casing or the inner sleeve can move.
Straighten the stem, tighten the stem bolts to tolerance and that’s all there is to it. You have effectively installed a 5mm bike headset spacer without actually needing the spacer.
You can also reduce that space any time by loosening the stem bolts and top cap, retracting the inner sleeve, moving the stem to the new position, then retightening the bolts.
And again, before the steerer is cut, you can add spacers to achieve your preferred stack height. In that scenario, the sleeve snugs against a spacer rather than the stem’s lower edge.
The effect is the same, though. You can still adjust that particular stack height within 7mm.
In Sum
Bike headset spacers are an essential part of the handlebar/fork/stem assemblage that defines modern bikes.
What do you think of this particular solution to micro-adjusting stack height and adding spacers by means of this type of headset?
We would highly value and appreciate your feedback.
1 Kommentar zu „Bike Headset Spacers—Fine Tune Your Stack Height with the R520A“
Assuming the headset is initially fitted at maximum extension, if you decide to reduce the space as described then once the stem is moved down to the new height there will be residual fork steerer protruding above the top of the stem. This means you will be unable to secure the headset properly with the top cap since it needs something to pull against and compress the bearings, otherwise the only thing you’re tightening is the top cap on to the fork steerer. As such a spacer will still be required to take up the remaining height of the steerer (plus a couple of mm) after you’ve lowered the stem position in order for the top cap to securely fasten the headset together. Since simple alloy rings (traditional headset spacers) are extremely cheap to make and buy (or even carbon ones these days) all you have succeeded in doing is coming up with an engineeringly more complex and financially more costly solution to a ‘simple problem’.
Well done!